【Spring Boot学习】一、Spring Boot快速入门
1.使用Spring Initializer快速创建Spring Boot项目
(1)New Project,选择Spring Initializer,如图所示:
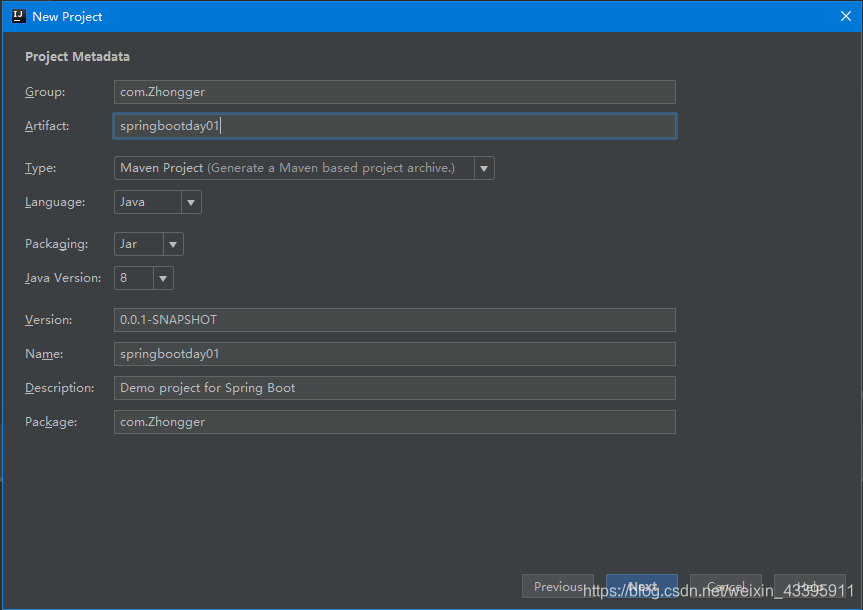
 (2)根据向导输入名,一定要注意Artifact的项目一定要全部为小写,否则无法创建
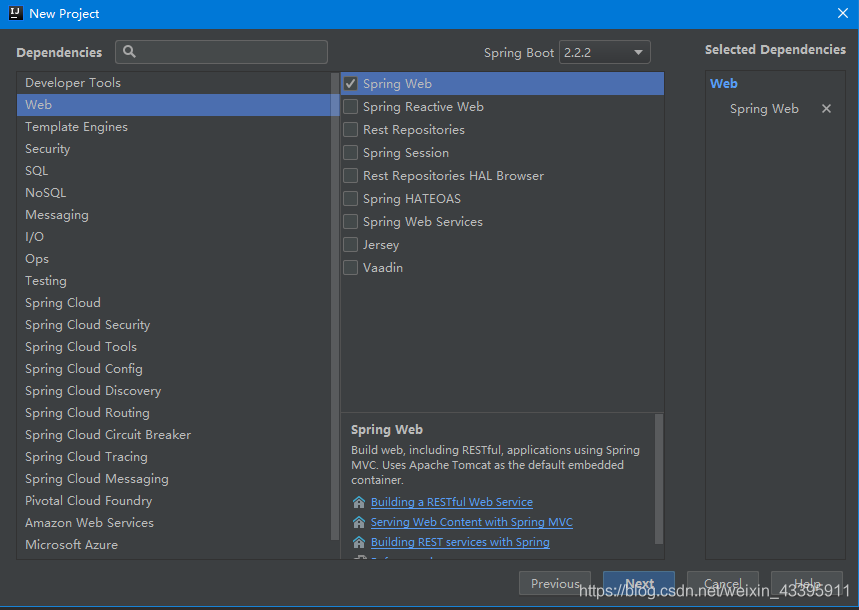
 (3)如果要创建Web项目,则选择勾选以下选项:
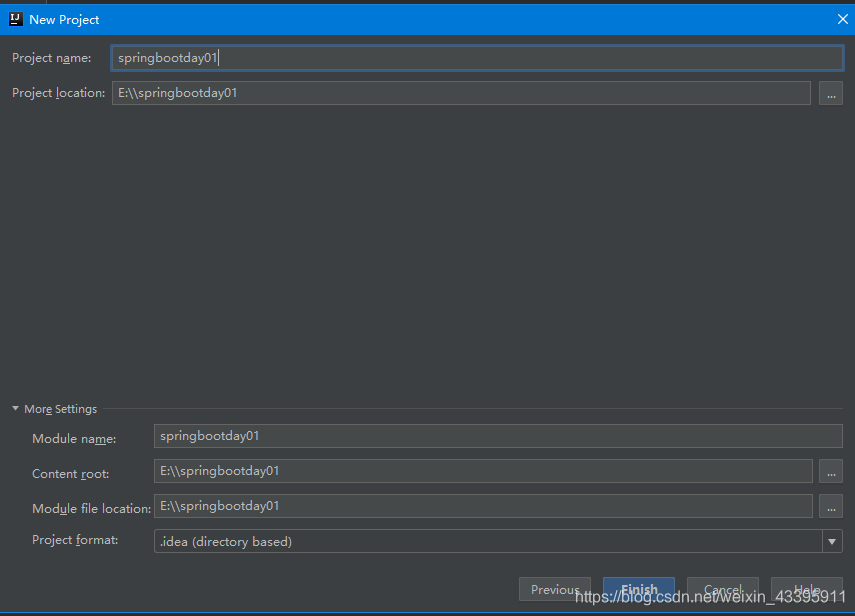
 (4)选择要保存的路径,点击finish即创建完成
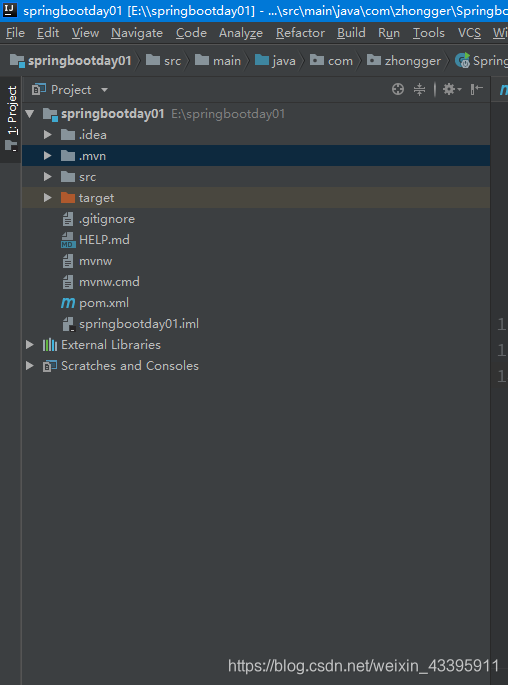
 (5)创建成功后,目录文件如下:
 pom.xml也给我们自动创建好了,并导入了相关的依赖:
<?xml version="1.0" encoding="UTF-8"?>
<project xmlns="http://maven.apache.org/POM/4.0.0" xmlns:xsi="http://www.w3.org/2001/XMLSchema-instance"
         xsi:schemaLocation="http://maven.apache.org/POM/4.0.0 https://maven.apache.org/xsd/maven-4.0.0.xsd">
    <modelVersion>4.0.0</modelVersion>
    <parent>
        <groupId>org.springframework.boot</groupId>
        <artifactId>spring-boot-starter-parent</artifactId>
        <version>2.2.2.RELEASE</version>
        <relativePath/> <!-- lookup parent from repository -->
    </parent>
    <groupId>com.zhongger</groupId>
    <artifactId>springbootday01</artifactId>
    <version>0.0.1-SNAPSHOT</version>
    <name>springbootday01</name>
    <description>Demo project for Spring Boot</description>

    <properties>
        <java.version>1.8</java.version>
    </properties>

    <dependencies>
        <dependency>
            <groupId>org.springframework.boot</groupId>
            <artifactId>spring-boot-starter-web</artifactId>
        </dependency>

        <dependency>
            <groupId>org.springframework.boot</groupId>
            <artifactId>spring-boot-starter-test</artifactId>
            <scope>test</scope>
            <exclusions>
                <exclusion>
                    <groupId>org.junit.vintage</groupId>
                    <artifactId>junit-vintage-engine</artifactId>
                </exclusion>
            </exclusions>
        </dependency>
    </dependencies>

    <build>
        <plugins>
            <plugin>
                <groupId>org.springframework.boot</groupId>
                <artifactId>spring-boot-maven-plugin</artifactId>
            </plugin>
        </plugins>
    </build>

</project>
同时,在src/main/java/com/zhongger下也给我们创建好了SpringBoot应用的驱动类
Springbootday01Application.java
package com.zhongger;

import org.springframework.boot.SpringApplication;
import org.springframework.boot.autoconfigure.SpringBootApplication;

@SpringBootApplication
public class Springbootday01Application {

    public static void main(String[] args) {
        SpringApplication.run(Springbootday01Application.class, args);
    }

}
(6)我们在com.zhongger包下创建一个controller的包,然后在包里新建一个类:HelloController.java
package com.zhongger.controller;

import org.springframework.web.bind.annotation.RequestMapping;
import org.springframework.web.bind.annotation.RestController;

@RestController
public class HelloController {
    @RequestMapping("/hello")
    public String hello(){
        return "Hello! SpringBoot World!";
    }
}
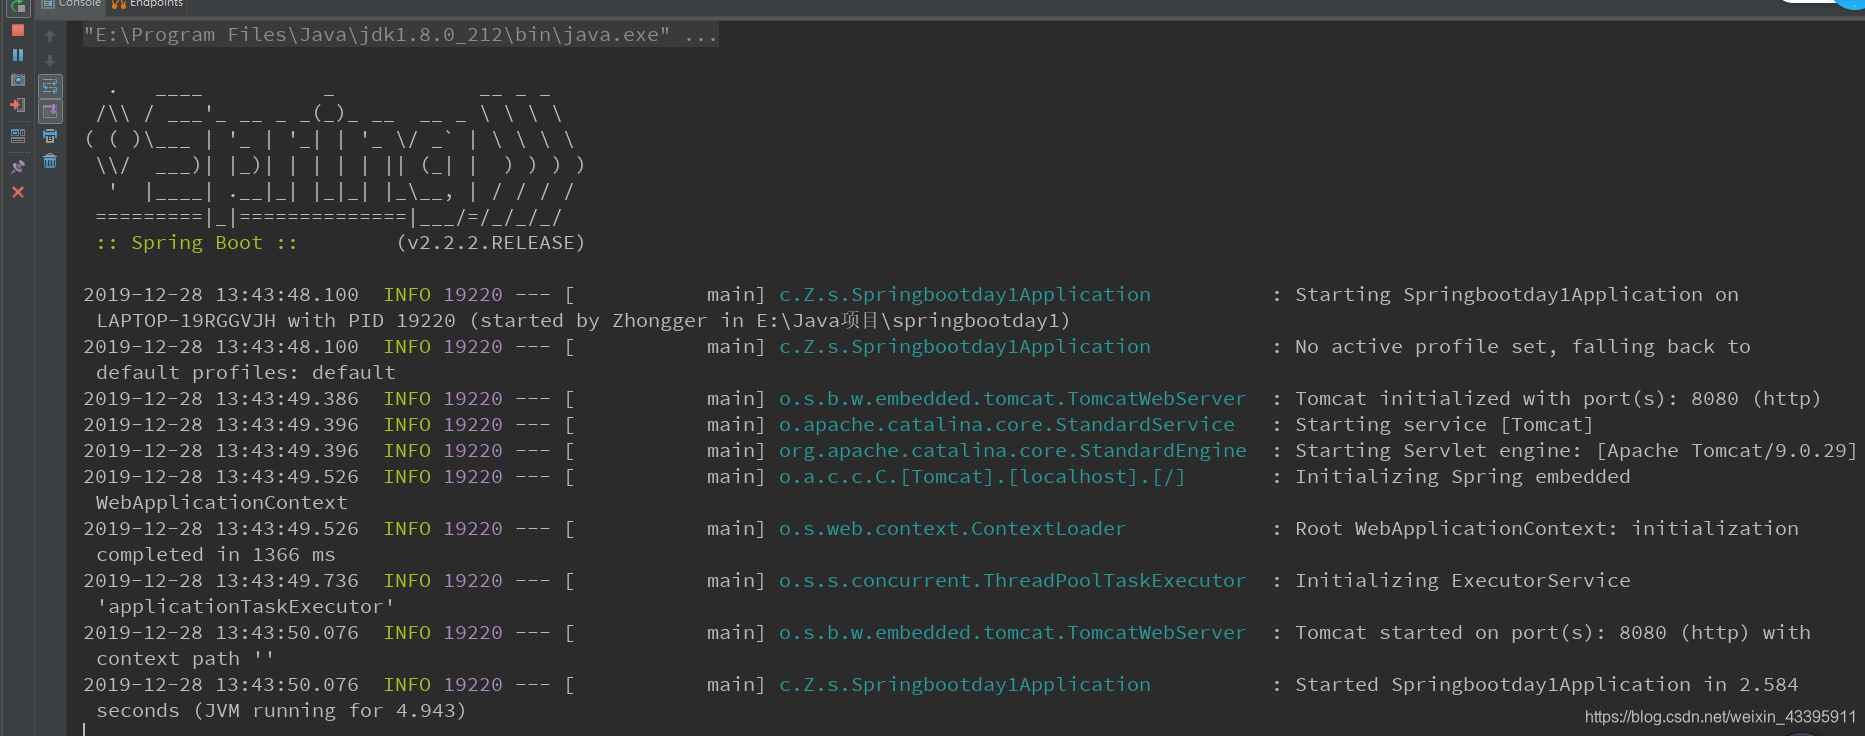
(7)运行Springbootday01Application.java,控制台打印以下日志信息:
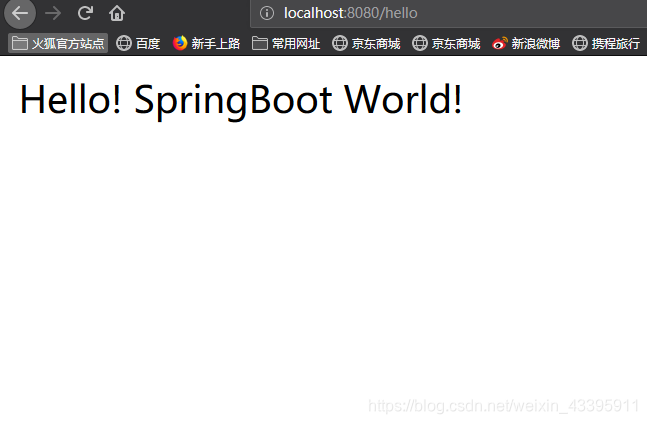
(8)打开浏览器,在地址栏输入localhost:8080/hello ,一敲回车出现:
就这么快捷,就是这么方便地把一个SpringBoot应用创建出来了!相比Spring SpringMVC MyBatis三大框架的整合而言,SpringBoot真的给我们开发者带来了很多便捷,省去了很多配置,让我们更加专注于业务逻辑的开发。
2.一些讲解
默认生成的Spring Boot项目:
1.主程序已经生成好了
2.resources文件夹中的目录结构:
static:保存所有静态资源:js、css、images等
templates:保存所有的模板页面,(Spring Boot默认jar包使用嵌入式的Tomcat,默认不支持JSP页面);但是可以使用模板引擎,如freemaker、thymeleaf等
application.properties:Spring Boot应用的配置文件
接下来我会继续编写Spring Boot入门学习的一些博客,希望和大家多多交流,加油!
