一、环境:
1.Linux环境
2. 安装Ubuntu 16.04.
Ubuntu 16: Run “Software & Update”, for “downloaded from” choose sohu.com etc. as the source.
Passwd for ethtest is test.
- install golang
- in a terminal window, run “sudo apt-get update”
- run “sudo apt-get install golang”
-
下载geth源文件(https://github.com/ethereum/go-ethereum)
unzip go-ethereum-master.zip
(or git clone https://github.com/ethereum/go-ethereum)
进入go-ethereum-master目录,编译go-ethereum:
cd go-ethereum-master
make
将build/bin/geth拷贝到/usr/bin目录下:
sudo cp build/bin/geth /usr/bin -
安装智能合约编译器solc
sudo add-apt-repository ppa:ethereum/ethereum
sudo apt-get update
sudo apt-get install solc
which solc
二:
运行简单的智能合约(实现阶乘运算)
1.合约的内容:
contract Factorial{
function Compute(uint amount) public returns (uint){
uint output=1;
while(amount!=0){
output=outputamount;
amount–;
}
return (output);}}
2.打开命令终端输入:
~$ geth --rpc --rpccorsdomain "" --nodiscover console --dev.period 1
进入geth命令界面
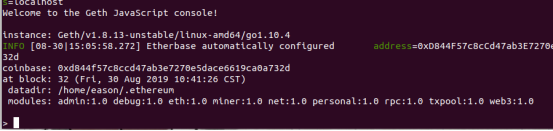
3.第一次进入输入
eth.accounts
命令显示为[],
即没有账户(有默认账户则不需要创建)。
首先创建一个账户:
personal.newAccount(“gyh”)
其中gyh为用户的密码
eth.getBalance(eth.accounts[0])
查看第一个账户的余额
如果为0输入
miner.start()
开始挖矿
miner.stop()
停止,再次查询余额会发现增多说明挖矿成功!

4.部署合约输入
abi==[{“constant”:false,“inputs”:[{“name”:“amount”,“type”:“uint256”}],“name”:“Compute”,“outputs”:[{“name”:"",“type”:“uint256”}],“payable”:false,“stateMutability”:“nonpayable”,“type”:“function”}]
其中标记部分的获得首先进入https://remix.ethereum.org
将第一步合约内容的代码输入之后Compile->Details


代码在第一行的中括号中
MyContract=eth.contract(abi)
>mycontract=MyContract.new(
{
from: web3.eth.accounts[0],
data: ‘0x608060405234801561001057600080fd5b5060e18061001f6000396000f3fe6080604052600436106039576000357c010000000000000000000000000000000000000000000000000000000090048063f4965e6614603e575b600080fd5b348015604957600080fd5b50607360048036036020811015605e57600080fd5b81019080803590602001909291905050506089565b6040518082815260200191505060405180910390f35b600080600190505b60008314151560ac5782810290508280600190039350506091565b8091505091905056fea165627a7a7230582044f67175f04e61e84fce97396a658e9b26a4e8691412d49ad1019ca73a25278a0029’,
gas: ‘4700000’
}, function (e, contract){
console.log(e, contract);
if (typeof contract.address !== ‘undefined’) {
console.log('Contract mined! address: ’ + contract.address + ’ transactionHash: ’ + contract.transactionHash);
}
})


标记部分用相同的方法获得
在此处提示了一个error 解决办法是将账户解锁:
personal.unlockAccount([eth.accounts[0])

密码是gyh
再次创建一次合约
mycontract=MyContract.new(
{
from: web3.eth.accounts[0],
data: ‘0x608060405234801561001057600080fd5b5060e18061001f6000396000f3fe6080604052600436106039576000357c010000000000000000000000000000000000000000000000000000000090048063f4965e6614603e575b600080fd5b348015604957600080fd5b50607360048036036020811015605e57600080fd5b81019080803590602001909291905050506089565b6040518082815260200191505060405180910390f35b600080600190505b60008314151560ac5782810290508280600190039350506091565b8091505091905056fea165627a7a7230582044f67175f04e61e84fce97396a658e9b26a4e8691412d49ad1019ca73a25278a0029’,
gas: ‘4700000’
}, function (e, contract){
console.log(e, contract);
if (typeof contract.address !== ‘undefined’) {
console.log('Contract mined! address: ’ + contract.address + ’ transactionHash: ’ + contract.transactionHash);
}
})
测试合约是否部署正确
txpool.status
若pending是0则部署失败;
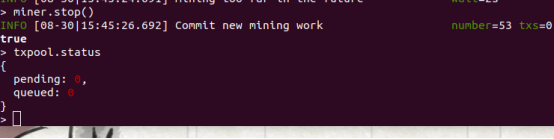
miner.start()
开始挖矿
miner.stop()
txpool.status
这时显示pending 为0则成功
5、调用合约:
Factorial=MyContract.at(mycontract.address)

address一定是一个地址值,不存在或为null则错误
Factorial.Compute.call(3) 显示3阶乘的结果为6
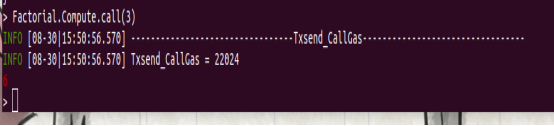
试验完成!
