GET方法前置步骤做完
stu.models.py
再其中创建需要用到的字段及对应数据库的表


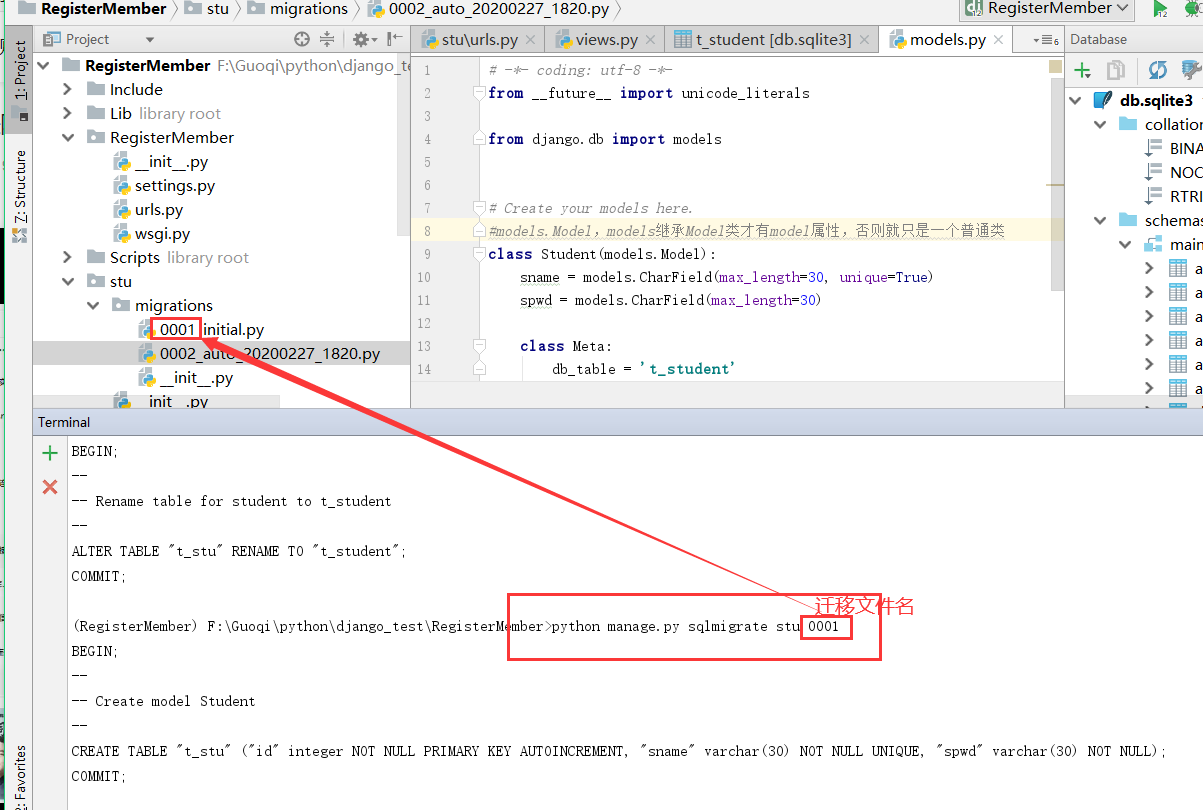
 1 # -*- coding: utf-8 -*-
 2 from __future__ import unicode_literals
 3
 4 from django.db import models
 5
 6
 7 # Create your models here.
 8 class Student(models.Model):
 9     sname = models.CharField(max_length=30, unique=True)
10     spwd = models.CharField(max_length=30)
11
12     class Meta:
13         db_table = 't_student'
db.sqlite3--用pycharm自带的数据库
右键链接数据库
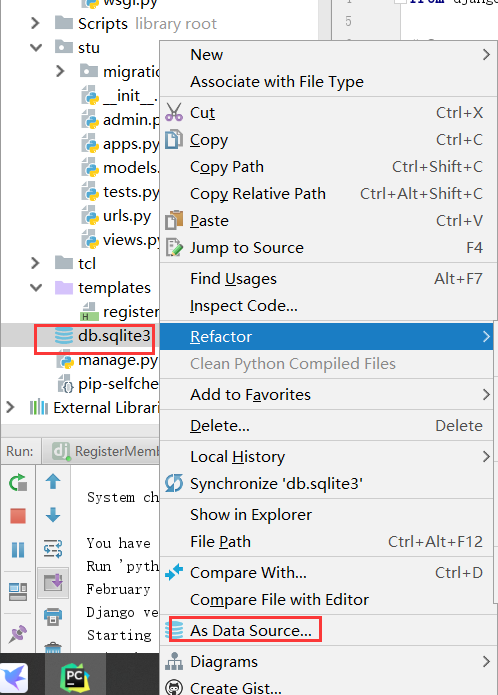
进入默认ok--connection测试链接(successfully)--apply-ok
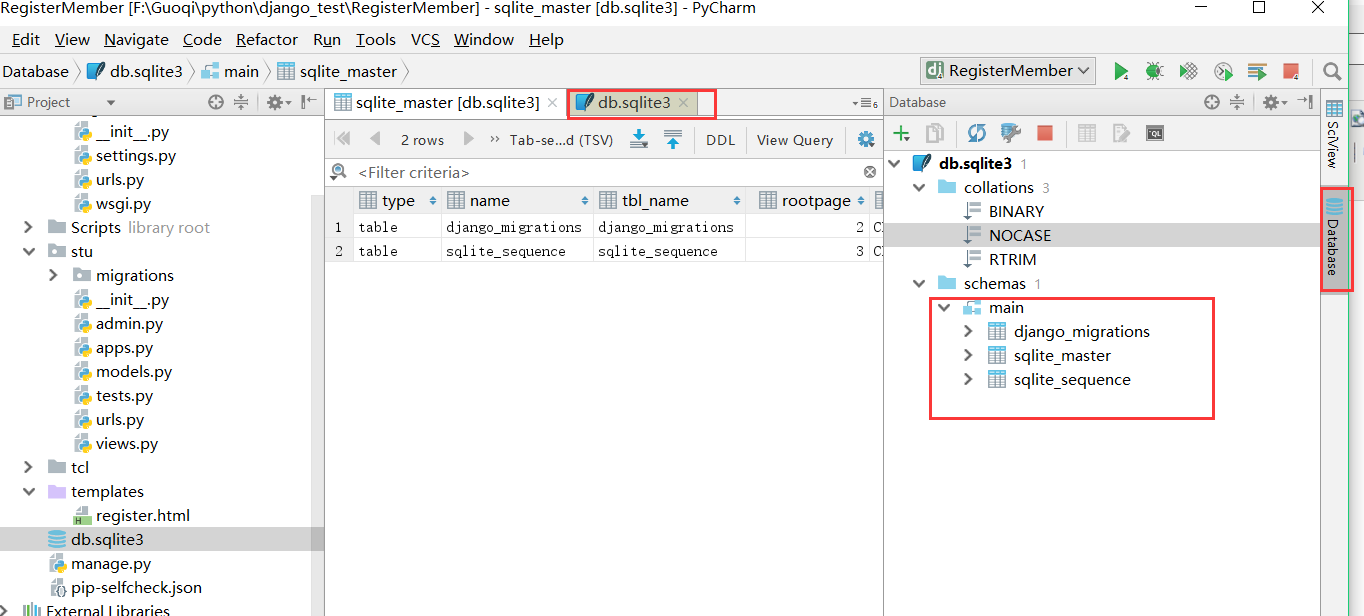
点击右侧Database进入数据库
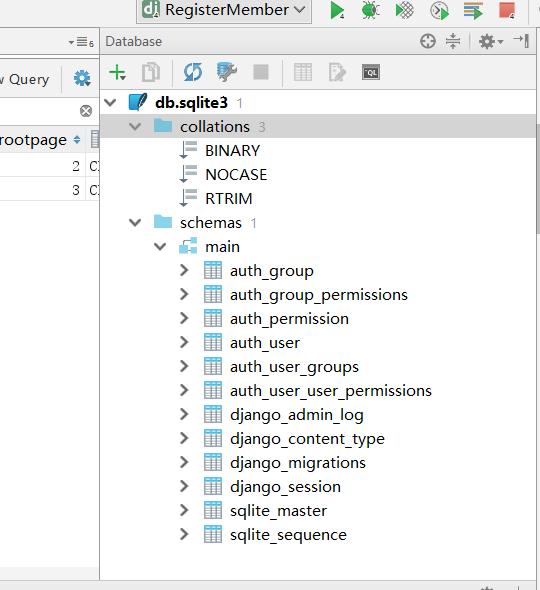
既然我们系统有很多默认的系统应用app,那么就一定有很多对应的数据库表,下面我们先把系统默认app映射到我们右侧的数据库中

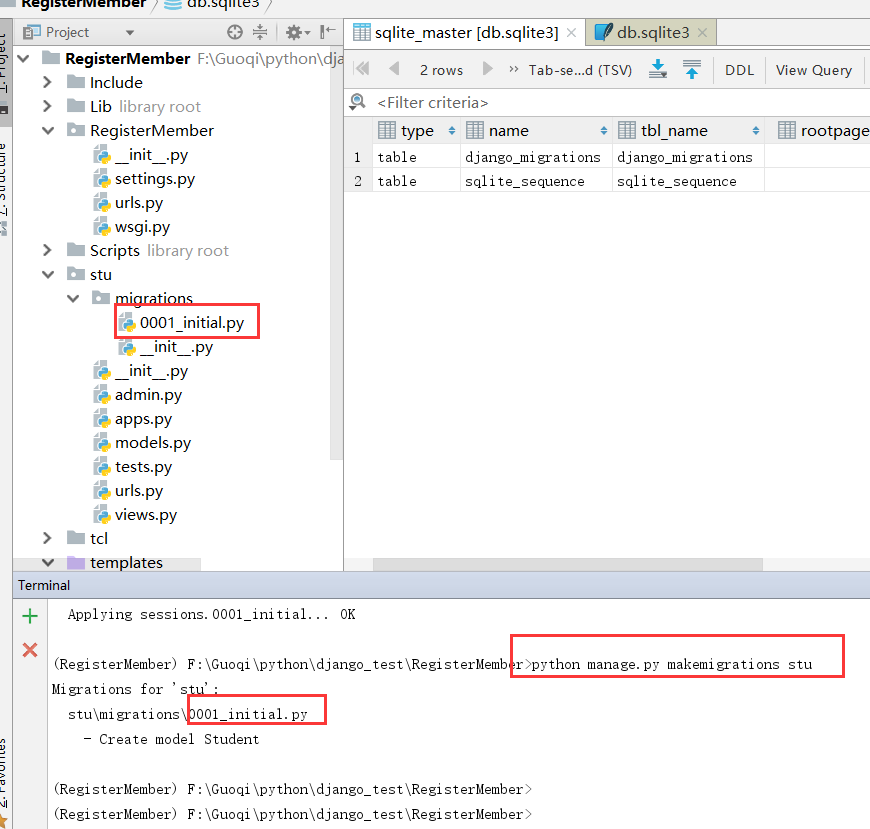
进入Terminal,敲入命令>python manage.py后会弹出很多Terminal可以用到的命令,如果忘记了,可以输入此命令去查询
以下为python manage.py中所有可以用到的命令
 1 Type 'manage.py help <subcommand>' for help on a specific subcommand.
 2
 3 Available subcommands:
 4
 5 [auth]
 6     changepassword
 7     createsuperuser
 8
 9 [contenttypes]
10     remove_stale_contenttypes
11
12 [django]
13     check
14     compilemessages
15     createcachetable
16     dbshell
17     diffsettings
18     dumpdata
19     flush
20     inspectdb
21     loaddata
22     makemessages
23     makemigrations #创建左侧文件夹migrations迁移到我们的应用app中
24     migrate #将现有的表映射到数据库
25     sendtestemail
26     shell
27     showmigrations
28     sqlflush
29     sqlmigrate
30     sqlsequencereset
31     squashmigrations
32     startapp #创建应用
33     startproject #创建项目
34     test
35     testserver
36
37 [sessions]
38     clearsessions
39
40 [staticfiles]
41     collectstatic
42     findstatic
43     runserver #启动服务器
在Terminal输入如下命令,将现有的应用对应的表映射到数据库
>python manage.py migrate
刷新数据库,多了系统表
下一步,我们将我们自己的model映射数据库表

看上方会自动生成出自己model的迁移文件
将我们自己项目,根据迁移文件映射到数据库表中
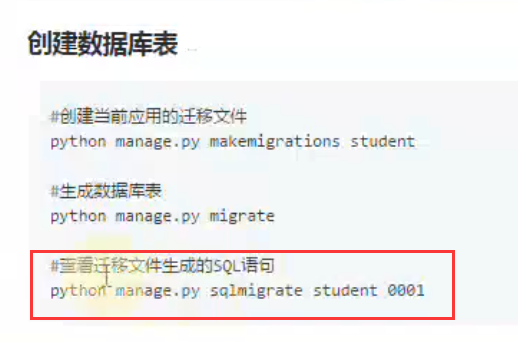
我们也可以通过一个语句去查看对应迁移文件生成的SQL语句是什么:

右侧数据库多出了t_stu表
可以通过语句>python manage.py sqlmigrate stu 0001去查看对应迁移文件中的SQL语句,其中stu为创建的应用i名,0001为迁移文件的名字

完善views.py内容(全程只是操作对象,并没有对数据库进行操作,这叫对象映射,在其他语言数据库中也有这种类似映射,当代码中执行save()方法的时候,底层会自动执行数据库语句,对是数据库的操作由底层自动完成我们只需要操作对象即可。)
 1 # -*- coding: utf-8 -*-
 2 from __future__ import unicode_literals
 3
 4 from django.http import HttpResponse
 5 from django.shortcuts import render
 6 from .models import *
 7
 8
 9 # Create your views here.
10 def index_view(request):
11     # 获取当前请求方式(GET/POST)
12     m = request.method  # request的请求方式,m值为GET
13
14     if m == 'GET':
15         return render(request, 'register.html')
16     else:
17         # 获取请求参数uname接收前台传过来的uname,虽然名字,一样但是是不同的变量;pwd同理
18         uname = request.POST.get('uname', '')
19         pwd = request.POST.get('pwd', '')
20         # 非空判断O
21         if uname and pwd:
22             # 插入数据库
23             # 创建模型对象,引入左POST侧models文件中的所有内容from .models import *,sname为数据库中的字段值,接收上方传过来的uname;spwd同理
24             stu = Student(sname=uname, spwd=pwd)
25             # 插入数据库
26             stu.save()
27             return HttpResponse('注册成功')
28         return HttpResponse('注册失败')
运行项目,浏览器中输入http://127.0.0.1:8000/student,输入用户名密码,点击注册,注册内容会自动出现在数据库中
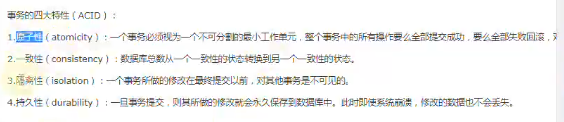
Mysql事务的四大特性: