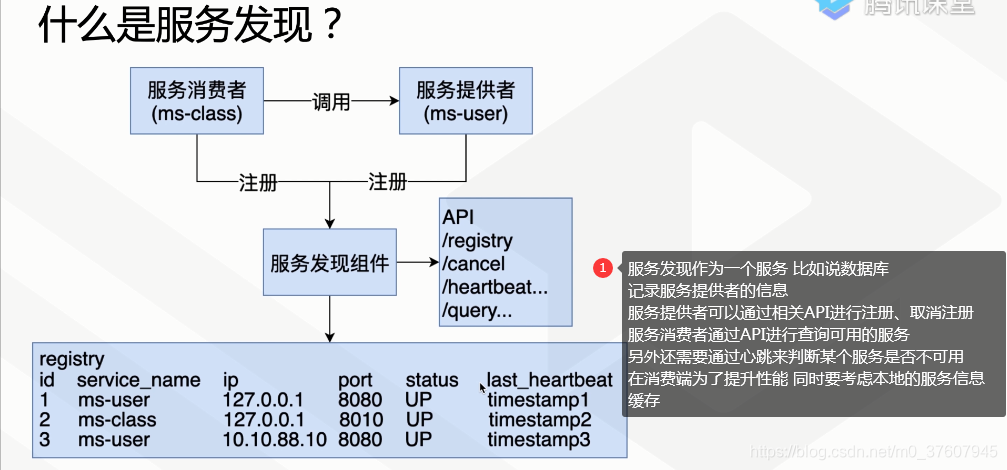
什么是服务发现?
UserDTO userDTO = restTemplate.getForObject("http://localhost:8081/users/{userId}", UserDTO.class, userId);
上面的地址被写死 如果地址发生变化 此处地址也需要被修改 而线上环境中地址会频繁发生变化 比方说 微服务部署在docker中,服务器重启,地址一定会发生变化,如果服务地址发生改变,如何能自动感知呢?
服务提供者->服务的被调用方(即:为其他微服务提供接口的微服务),如用户微服务
服务消费者->服务的调用方(即:调用其他微服务接口的微服务),如课程微服务
服务发现是一种让服务消费者总能找到服务提供者的机制
服务发现的原理
https://www.hashicorp.com/
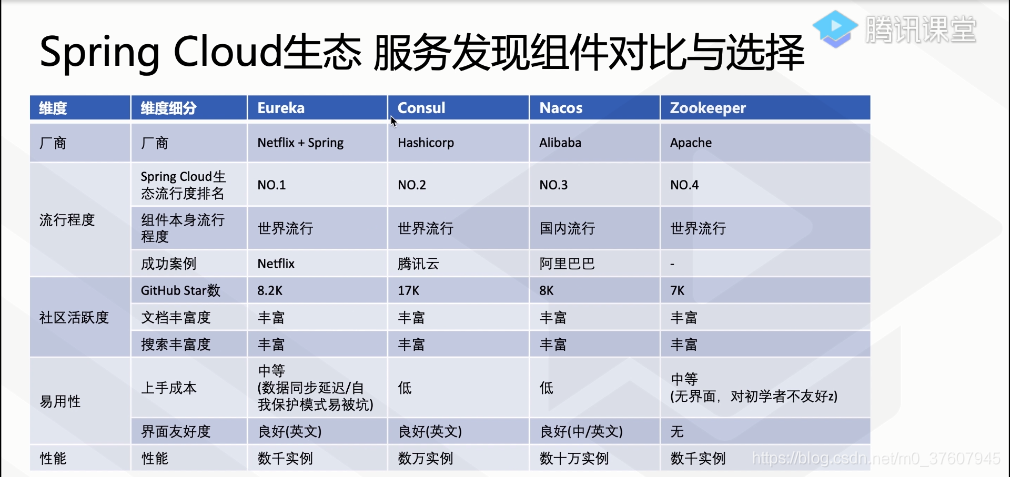
SpringCloud生态服务发现组件对比与选择
搭建consul
HashiCorp 开源的服务发现组件 & 配置服务器
官方网站:https://www.consul.io/
https://www.consul.io/downloads.html 下载consul
下载最新稳定版:https://www.consul.io/downloads.html
下载指定版本:https://releases.hashicorp.com/consul/
需要的端口
| Use | Default Ports |
|---|---|
| DNS: The DNS server (TCP and UDP) | 8600 |
| HTTP: The HTTP API (TCP Only) | 8500 |
| HTTPS: The HTTPs API | disabled (8501)* |
| gRPC: The gRPC API | disabled (8502)* |
| LAN Serf: The Serf LAN port (TCP and UDP) | 8301 |
| Wan Serf: The Serf WAN port TCP and UDP) | 8302 |
| server: Server RPC address (TCP Only) | 8300 |
| Sidecar Proxy Min: Inclusive min port number to use for automatically assigned sidecar service registrations. | 21000 |
| Sidecar Proxy Max: Inclusive max port number to use for automatically assigned sidecar service registrations. | 21255 |
检查端口是否被占用的方法:
Windows:
# 如果没有结果说明没有被占用
netstat -ano| findstr "8500"

Linux:
# 如果没有结果说明没有被占用
netstat -antp |grep 8500

macOS:
# 如果没有结果说明没有被占用
netstat -ant | grep 8500
或
lsof -i:8500
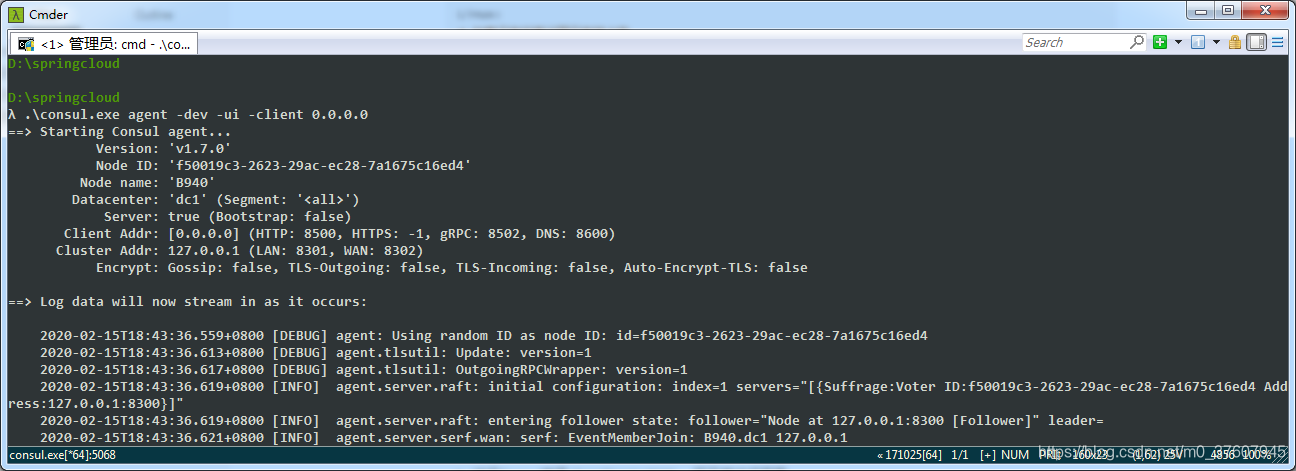
安装 & 启动
-
解压下载下来的压缩包,将目录切换到
consul所在目录 -
执行如下命令即可:
./consul agent -dev -ui -client 0.0.0.0 -
验证是否成功
./consul -v -
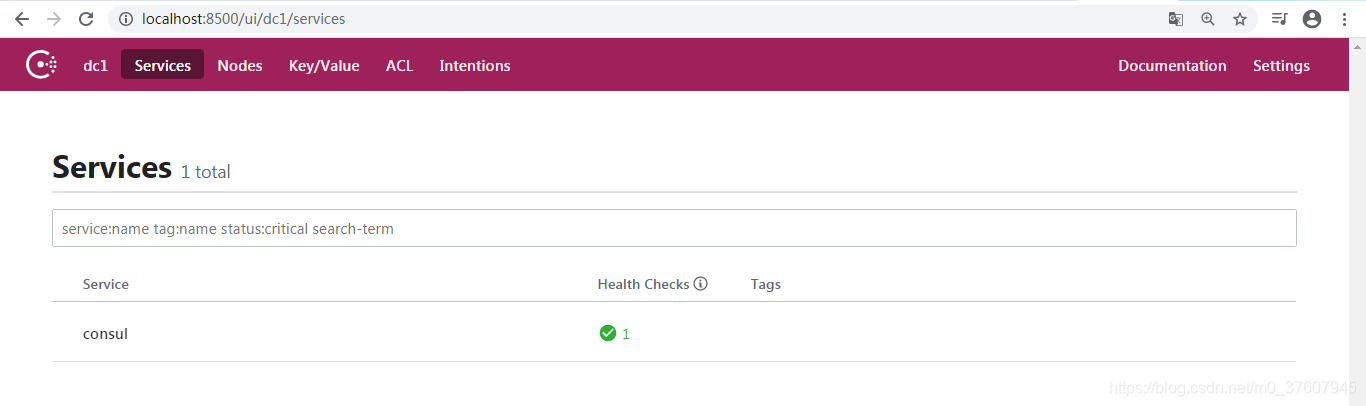
访问Consul首页
localhost:8500,可正常访问页面。
在线Consul
- Consul官方提供:
https://demo.consul.io - itmuch提供:
http://consul.itmuch.com:8500
整合consul实现服务注册
添加依赖
		<!-- spring-cloud-starter-[springcloud子项目名称]-[子项目的模块名称] -->
		<dependency>
			<groupId>org.springframework.cloud</groupId>
			<artifactId>spring-cloud-starter-consul-discovery</artifactId>
		</dependency>
		<dependency>
			<groupId>org.springframework.boot</groupId>
			<artifactId>spring-boot-starter-actuator</artifactId>
		</dependency>
		<dependency>
			<groupId>org.springframework.cloud</groupId>
			<artifactId>spring-cloud-starter-consul-config</artifactId>
		</dependency>
增加配置文件内容
spring:
application:
# 指定注册到Consul上的服务名称 分割符必须使用中划线 而不能使用下划线
# 如果你的服务发现组件使用的是consul,如果使用了_,那么会强制转换为-
# 如果服务发现组件不是consul,那么会造成微服务之间无法正常通信
# ribbon[默认把ms-user作为虚拟主机名 而主机名不包含下划线]
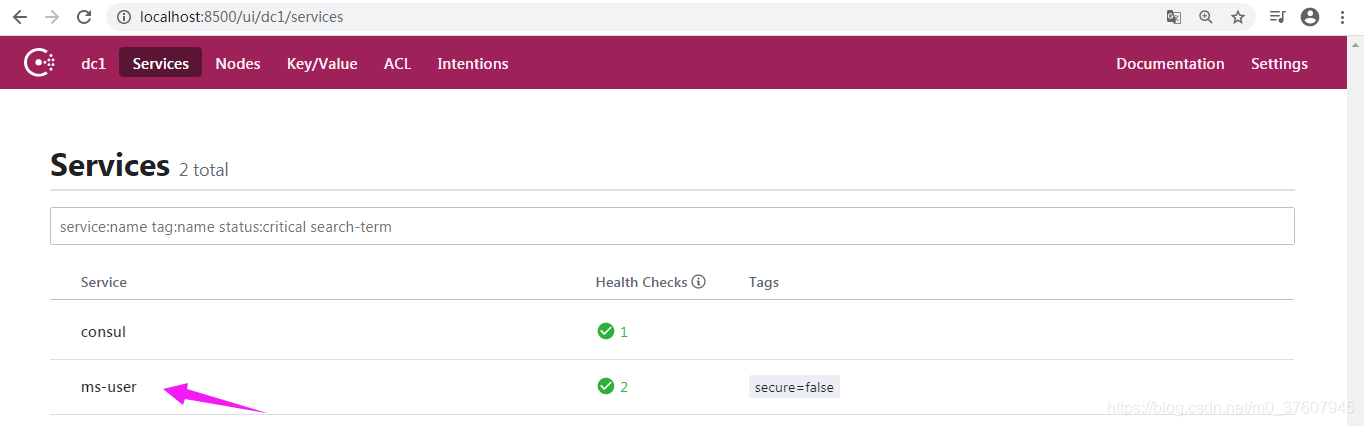
name: ms-user
cloud:
consul:
host: localhost
port: 8500
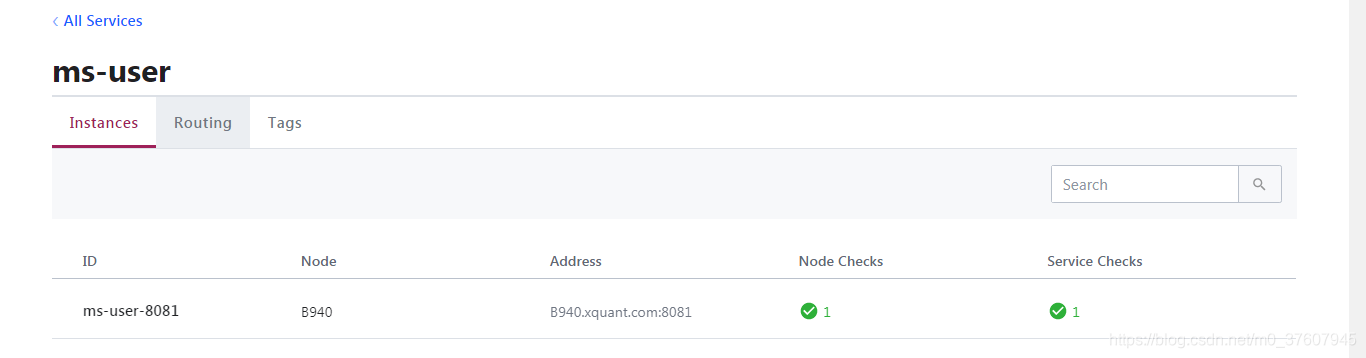
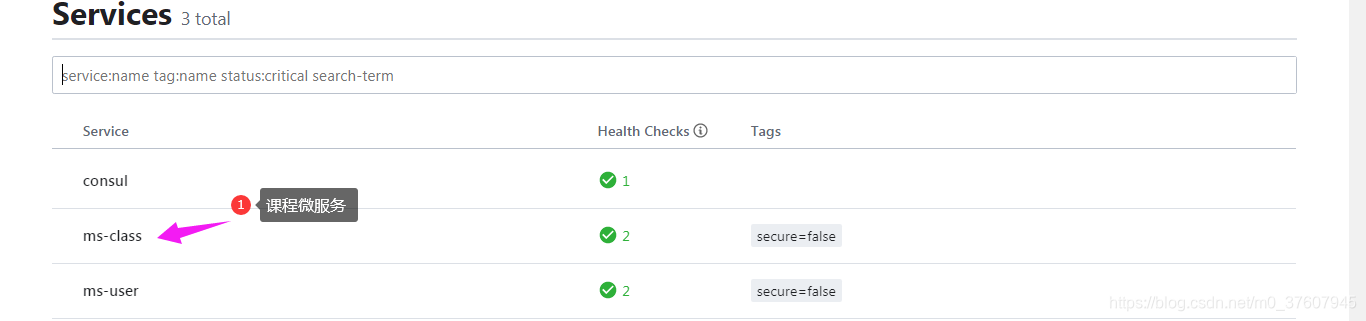
启动用户微服务并查看注册信息
consul健康检查
consul —>如果间隔5秒请求/test 如果能正常返回 认为检查通过 --》微服务A 开启健康检查 路径:/test 间隔:5秒
在生产上是不可以的 只能证明服务器之间是可以通信的 但不能证明服务是可用的
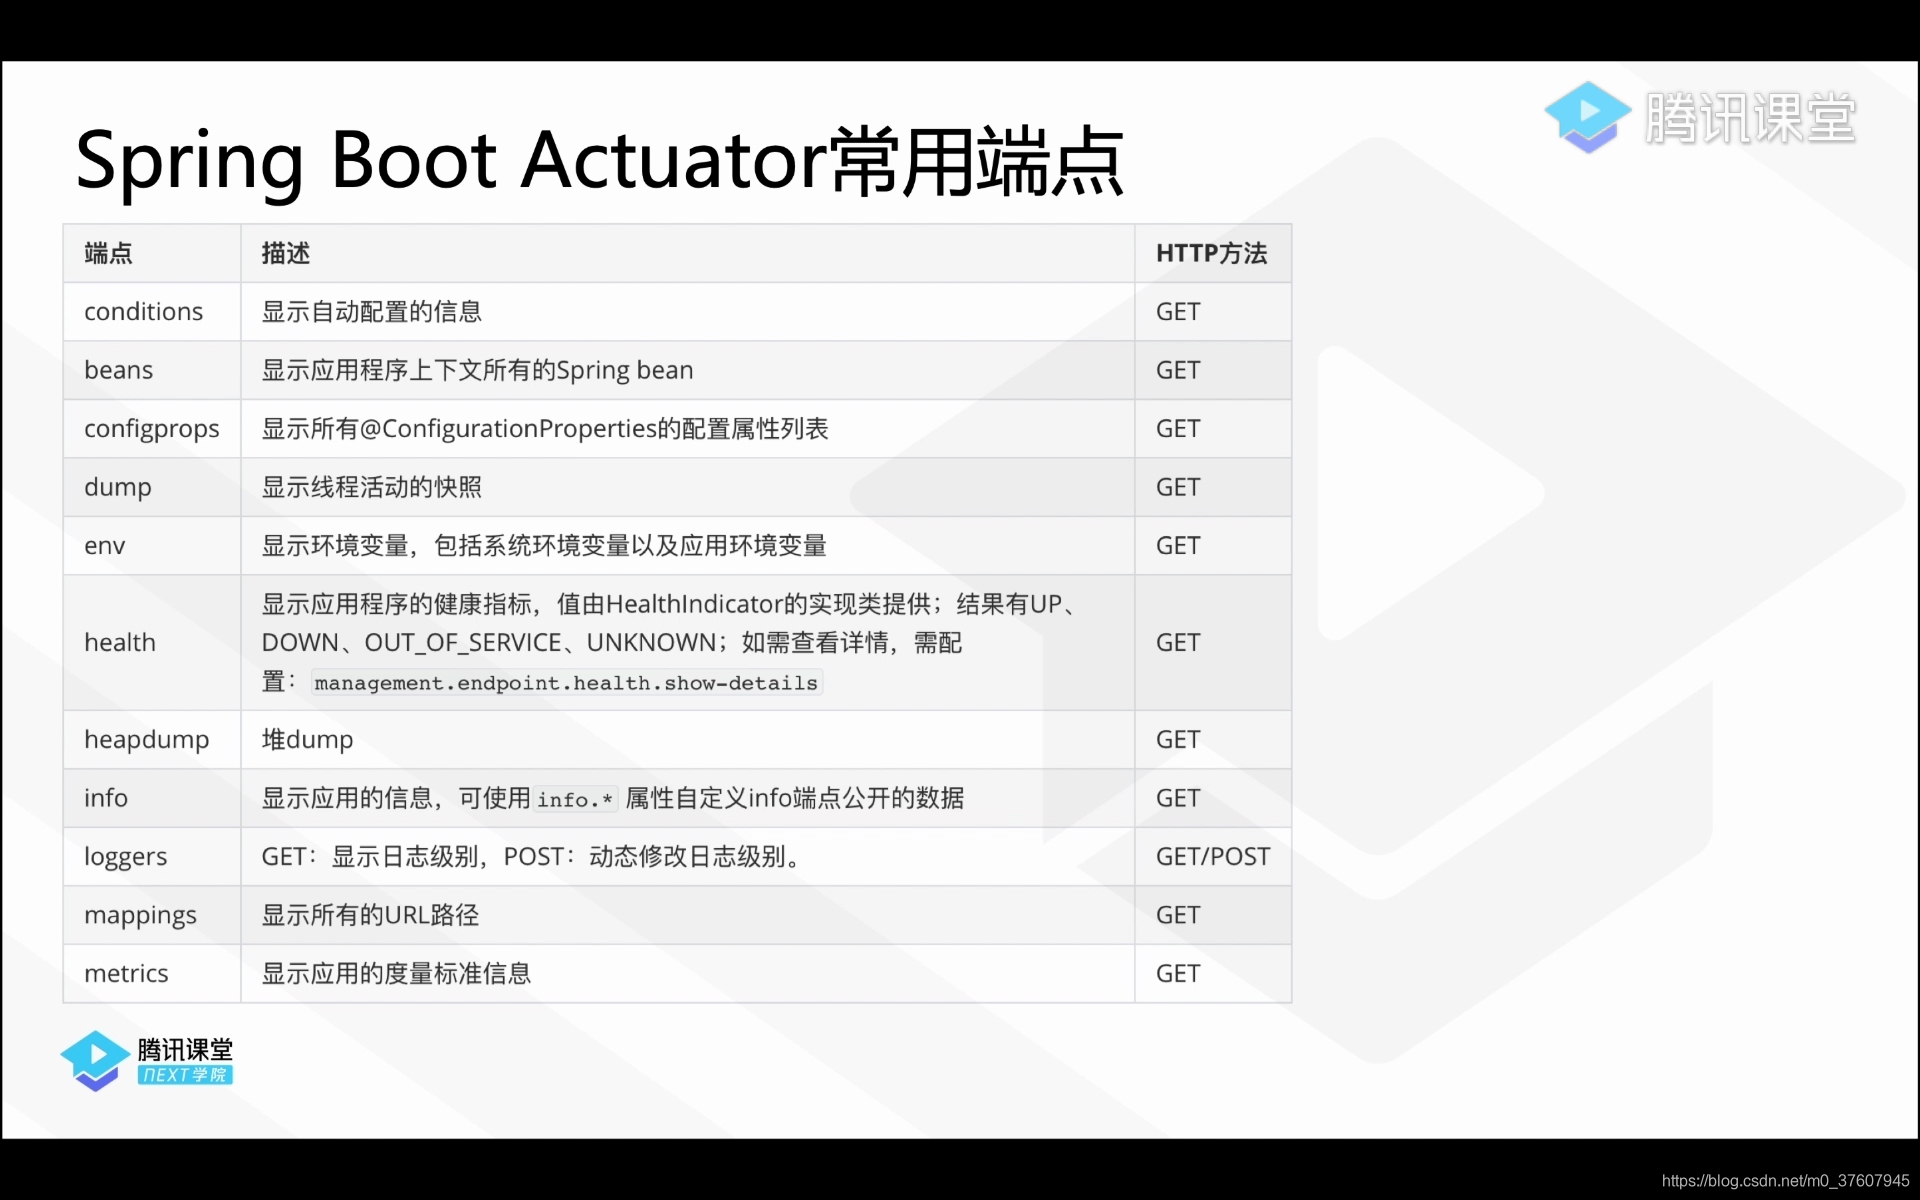
Spring Boot Actuator:
Spring Boot官方出品的一种监控组件
添加依赖
		<dependency>
			<groupId>org.springframework.boot</groupId>
			<artifactId>spring-boot-starter-actuator</artifactId>
		</dependency>
访问网站
http://localhost:8081/actuator
{"_links":{"self":{"href":"http://localhost:8081/actuator","templated":false},"health":{"href":"http://localhost:8081/actuator/health","templated":false},"health-path":{"href":"http://localhost:8081/actuator/health/{*path}","templated":true},"info":{"href":"http://localhost:8081/actuator/info","templated":false}}}
默认情况下 只开放info和health
配置开放其他端点
management:
  endpoints:
    web:
      exposure:
        include: '*'
  endpoint:
    health:
      show-details: always
{"_links":{"self":{"href":"http://localhost:8081/actuator","templated":false},"archaius":{"href":"http://localhost:8081/actuator/archaius","templated":false},"beans":{"href":"http://localhost:8081/actuator/beans","templated":false},"caches-cache":{"href":"http://localhost:8081/actuator/caches/{cache}","templated":true},"caches":{"href":"http://localhost:8081/actuator/caches","templated":false},"health":{"href":"http://localhost:8081/actuator/health","templated":false},"health-path":{"href":"http://localhost:8081/actuator/health/{*path}","templated":true},"info":{"href":"http://localhost:8081/actuator/info","templated":false},"conditions":{"href":"http://localhost:8081/actuator/conditions","templated":false},"configprops":{"href":"http://localhost:8081/actuator/configprops","templated":false},"env":{"href":"http://localhost:8081/actuator/env","templated":false},"env-toMatch":{"href":"http://localhost:8081/actuator/env/{toMatch}","templated":true},"loggers":{"href":"http://localhost:8081/actuator/loggers","templated":false},"loggers-name":{"href":"http://localhost:8081/actuator/loggers/{name}","templated":true},"heapdump":{"href":"http://localhost:8081/actuator/heapdump","templated":false},"threaddump":{"href":"http://localhost:8081/actuator/threaddump","templated":false},"metrics":{"href":"http://localhost:8081/actuator/metrics","templated":false},"metrics-requiredMetricName":{"href":"http://localhost:8081/actuator/metrics/{requiredMetricName}","templated":true},"scheduledtasks":{"href":"http://localhost:8081/actuator/scheduledtasks","templated":false},"mappings":{"href":"http://localhost:8081/actuator/mappings","templated":false},"refresh":{"href":"http://localhost:8081/actuator/refresh","templated":false},"features":{"href":"http://localhost:8081/actuator/features","templated":false},"service-registry":{"href":"http://localhost:8081/actuator/service-registry","templated":false},"consul":{"href":"http://localhost:8081/actuator/consul","templated":false}}}
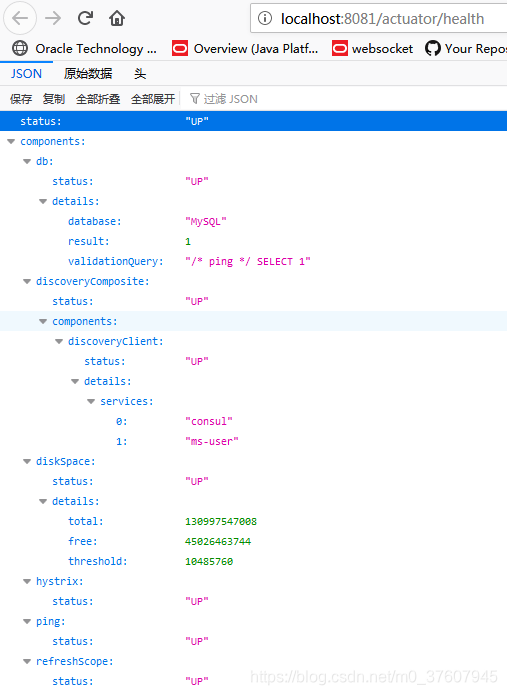
http://localhost:8081/actuator/health
{"status":"UP","components":{"db":{"status":"UP","details":{"database":"MySQL","result":1,"validationQuery":"/* ping */ SELECT 1"}},"discoveryComposite":{"status":"UP","components":{"discoveryClient":{"status":"UP","details":{"services":["consul","ms-user"]}}}},"diskSpace":{"status":"UP","details":{"total":130997547008,"free":45026463744,"threshold":10485760}},"hystrix":{"status":"UP"},"ping":{"status":"UP"},"refreshScope":{"status":"UP"}}}
整合consul与actuator
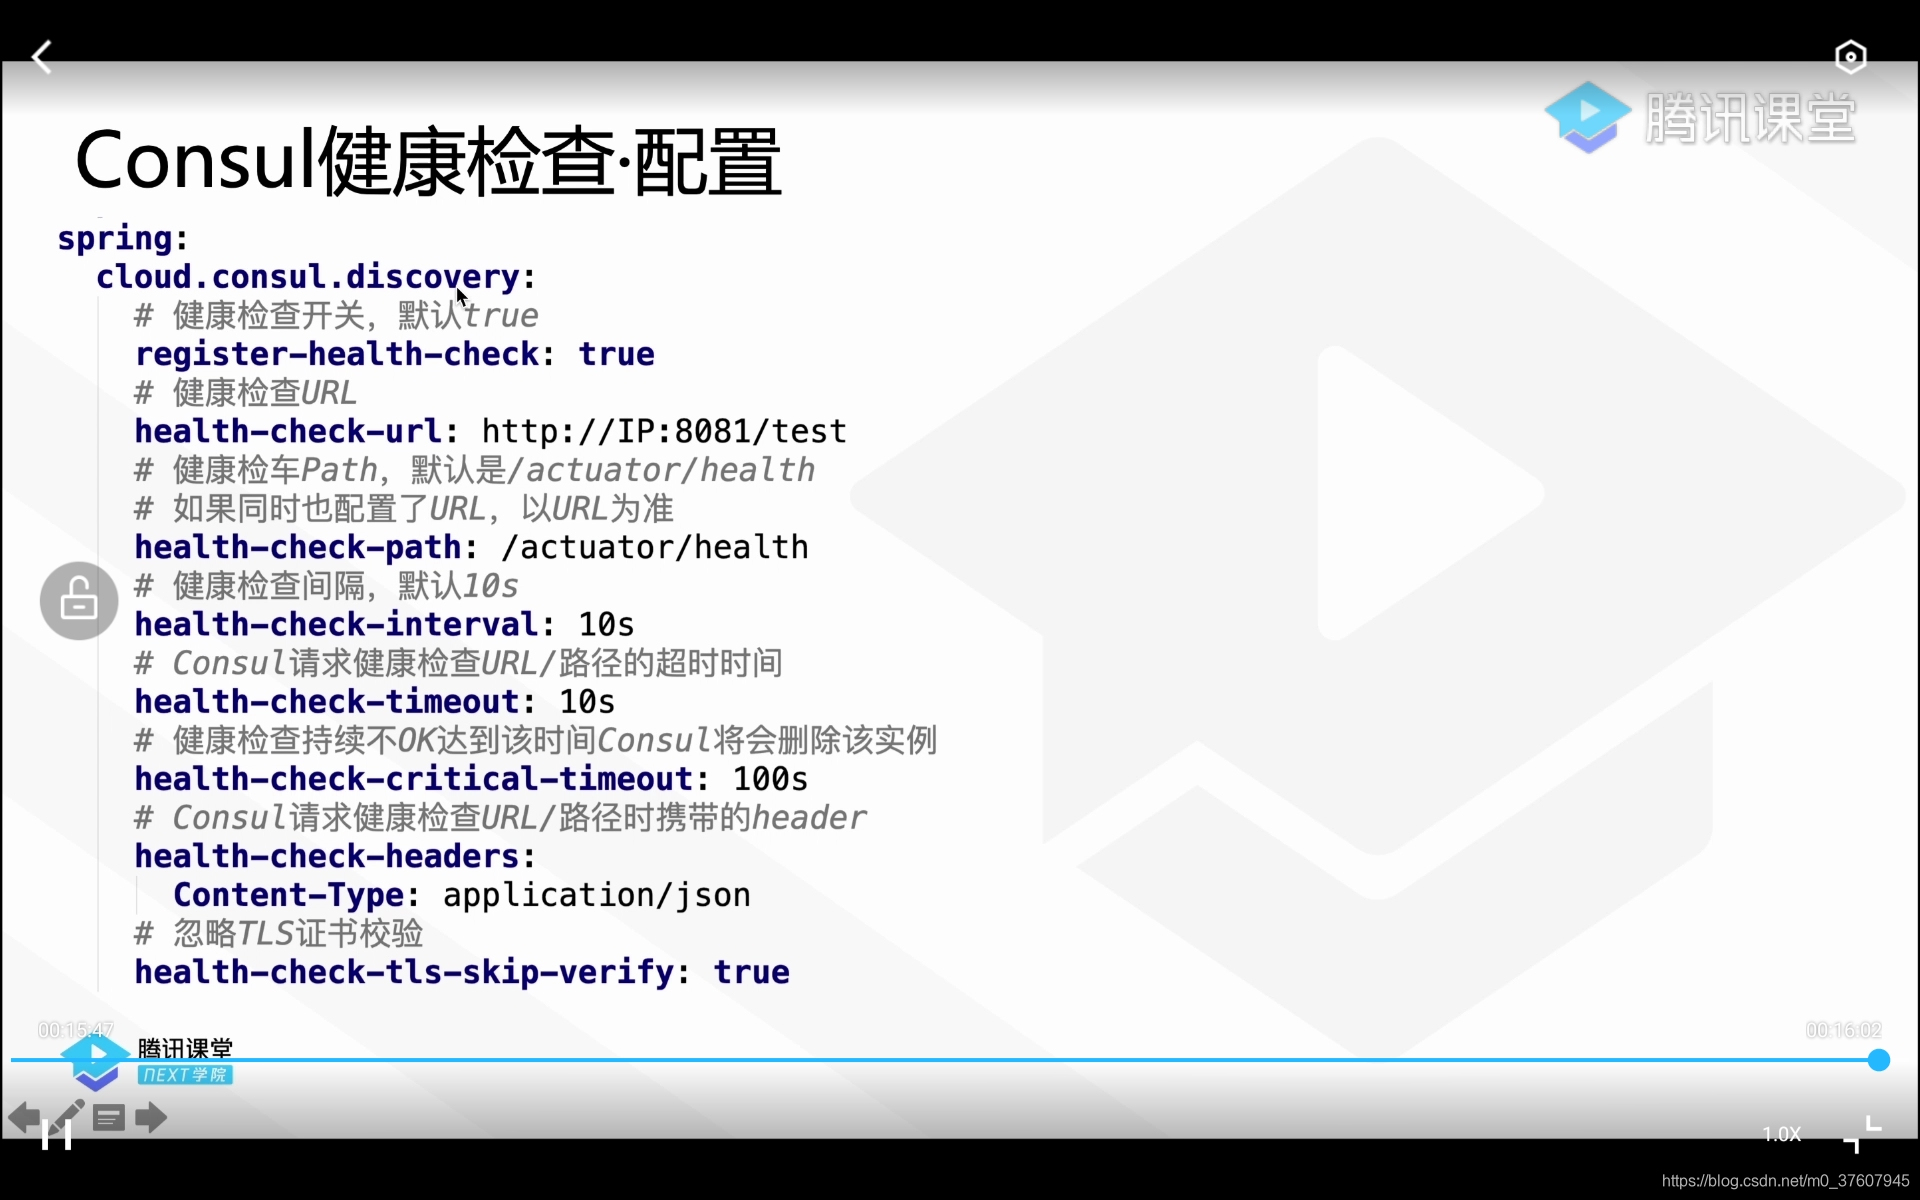
spring.cloud.consul.discovery.health-check-path=/actuator/health
服务发现API
将课程微服务注册到consul上
- 拷贝依赖
	<!-- spring-cloud-starter-[springcloud子项目名称]-[子项目的模块名称] -->
	<dependency>
		<groupId>org.springframework.cloud</groupId>
		<artifactId>spring-cloud-starter-consul-discovery</artifactId>
	</dependency>

	<dependency>
		<groupId>org.springframework.cloud</groupId>
		<artifactId>spring-cloud-starter-consul-config</artifactId>
	</dependency>

	<dependency>
		<groupId>org.springframework.boot</groupId>
		<artifactId>spring-boot-starter-actuator</artifactId>
	</dependency>
- 拷贝配置
  application:
    name: ms-class
  cloud:
    consul:
      host: localhost
      port: 8500
      discovery:
        health-check-path: /actuator/health
management:
  endpoints:
    web:
      exposure:
        include: '*'
  endpoint:
    health:
      show-details: always
- 启动课程微服务
服务发现测试
在课程微服务添加如下的代码:
package com.cloud.msclass.controller;

import java.util.List;

import org.springframework.beans.factory.annotation.Autowired;
import org.springframework.cloud.client.ServiceInstance;
import org.springframework.cloud.client.discovery.DiscoveryClient;
import org.springframework.web.bind.annotation.GetMapping;
import org.springframework.web.bind.annotation.RestController;

@RestController
public class TestController {

	@Autowired
	private DiscoveryClient discoveryClient;

	@GetMapping("/test-discovery")
	public List<ServiceInstance> testDiscovery() {
		//到Consul上查询指定微服务的所有势力
		return discoveryClient.getInstances("ms-user");
	}

}
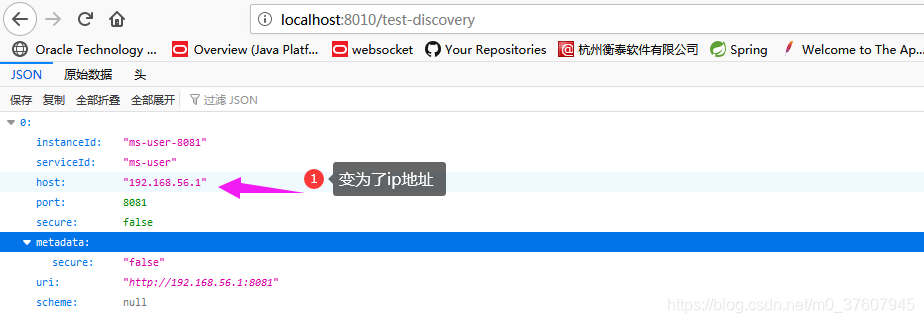
访问地址:http://localhost:8010/test-discovery
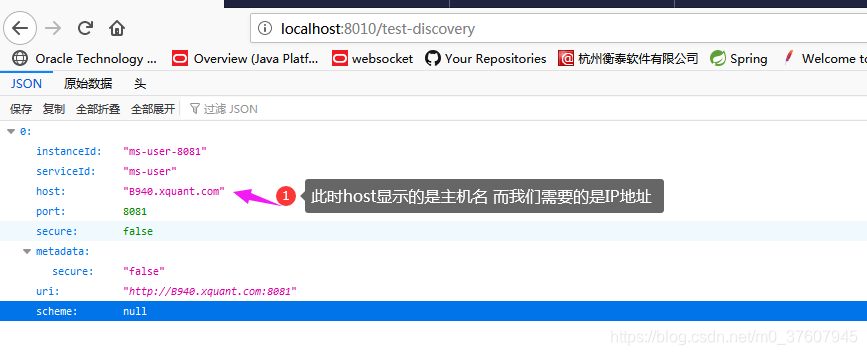
修改配置
spring.cloud.consul.discovery.prefer-ip-address=true
课程微服务重构
通过服务发现查找服务进行调用
package com.cloud.msclass.service;

import java.math.BigDecimal;
import java.net.URI;
import java.util.List;

import org.springframework.beans.factory.annotation.Autowired;
import org.springframework.cloud.client.ServiceInstance;
import org.springframework.cloud.client.discovery.DiscoveryClient;
import org.springframework.stereotype.Service;
import org.springframework.web.client.RestTemplate;

import com.cloud.msclass.domain.dto.UserDTO;
import com.cloud.msclass.domain.entity.Lesson;
import com.cloud.msclass.domain.entity.LessonUser;
import com.cloud.msclass.repository.LessonRepository;
import com.cloud.msclass.repository.LessonUserRepository;

@Service
public class LessonService {

	@Autowired
	private LessonRepository lessonRepository;
	@Autowired
	private LessonUserRepository lessonUserRepository;

	@Autowired
	private RestTemplate restTemplate;

	@Autowired
	private DiscoveryClient discoveryClient;

	public Lesson buyById(Integer id) {
		// 1. 根据id查询lesson
		Lesson lesson = this.lessonRepository.findById(id).orElseThrow(() -> new IllegalArgumentException("该课程不存在"));
		// 2. 根据lesson.id查询user_lesson,那么直接返回lesson
		LessonUser lessonUser = this.lessonUserRepository.findByLessonId(id);
		if (lessonUser != null) {
			return lesson;
		}
		// TODO  登录实现后需重构
		Integer userId = 1;
		// 3. 如果user_lesson==null && 用户的余额 > lesson.price 则购买成功

		List<ServiceInstance> instances = this.discoveryClient.getInstances("ms-user");
		// TODO 需要改进
		URI uri = instances.get(0).getUri();

		UserDTO userDTO = restTemplate.getForObject(uri + "users/{userId}", UserDTO.class, userId);
		BigDecimal money = userDTO.getMoney().subtract(lesson.getPrice());
		if (money.doubleValue() < 0) {
			throw new IllegalArgumentException("余额不足");
		}
		// TODO 购买逻辑 ... 1. 调用用户微服务的扣减金额接口  2.向lesson_user表插入数据
		return lesson;
	}
}
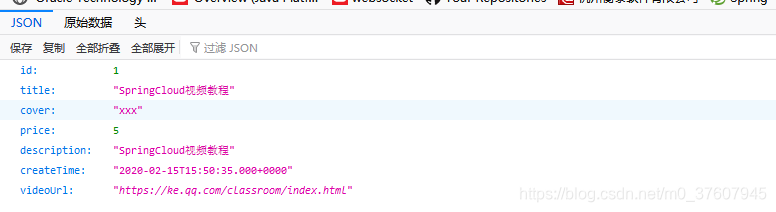
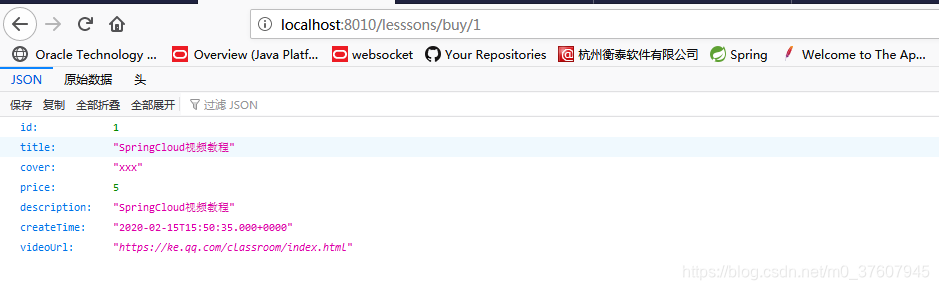
访问地址:http://localhost:8010/lesssons/buy/1
元数据
什么是元数据?
元数据是Spring Cloud中一个扩展点
如何设置?
添加系统属性:
spring.cloud.consul.discovery.tags:a=b,c=d
访问consul控制台:
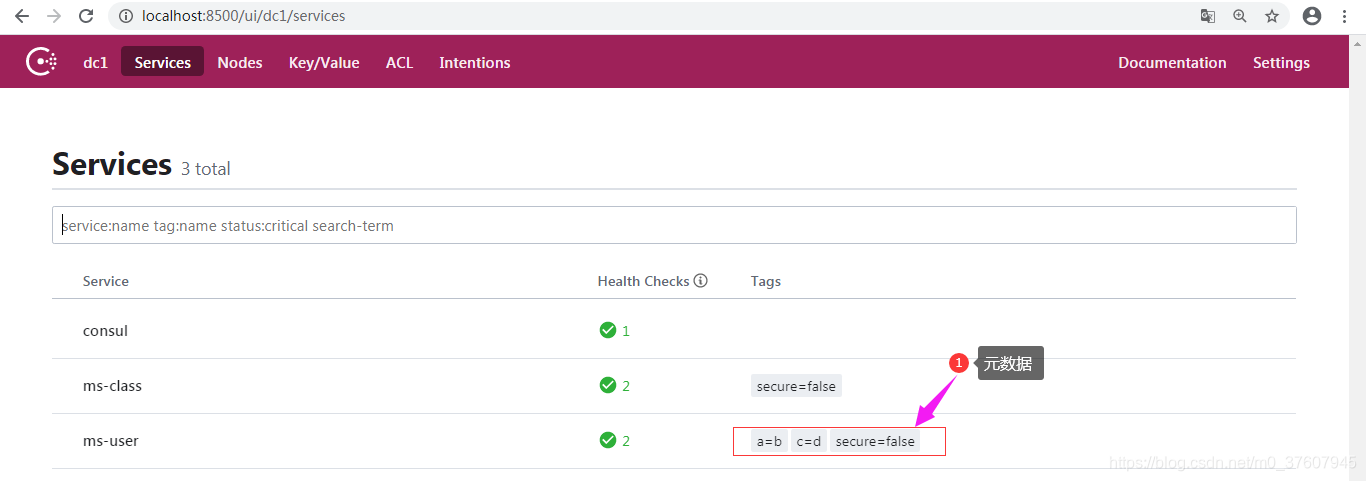
元数据的作用?
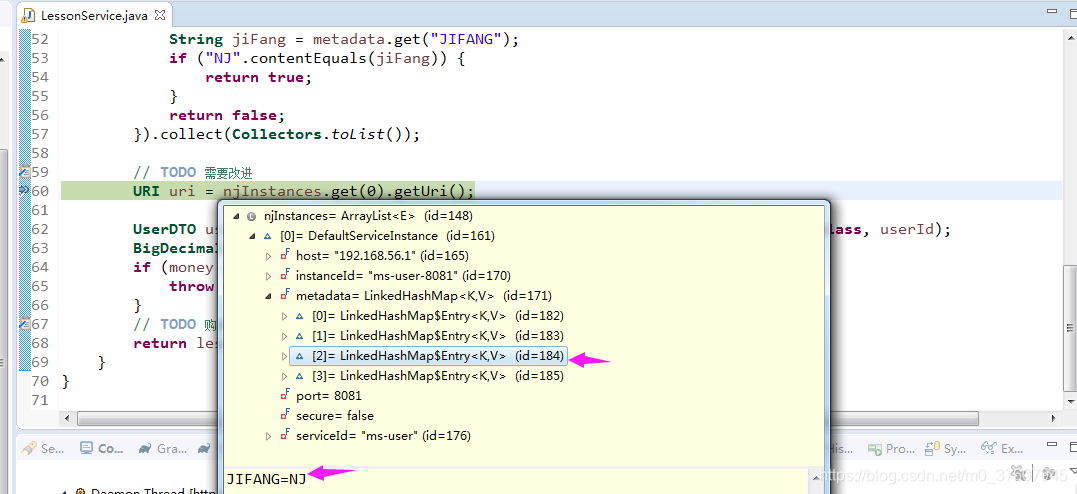
比如:容灾
服务部署在NJ 则设置tags : JIFANG=NJ 实现同机房调用
List<ServiceInstance> instances = this.discoveryClient.getInstances("ms-user");

List<ServiceInstance> njInstances = instances.stream().filter(instance->{
	Map<String, String> metadata = instance.getMetadata();
	String jiFang = metadata.get("JIFANG");
	if("NJ".contentEquals(jiFang)) {
		return true;
	}
	return false;
}).collect(Collectors.toList());

// TODO 需要改进
URI uri = njInstances.get(0).getUri();
多网卡的IP选择
如何注册IP到Consul上
如果能查找到IP则使用IP,否则使用主机名
consul查找主机IP的代码入口:org.springframework.cloud.commons.util.InetUtils#findFirstNonLoopbackHostInfo
	public HostInfo findFirstNonLoopbackHostInfo() {
		InetAddress address = findFirstNonLoopbackAddress();
		if (address != null) {
			return convertAddress(address);
		}
		HostInfo hostInfo = new HostInfo();
		hostInfo.setHostname(this.properties.getDefaultHostname());
		hostInfo.setIpAddress(this.properties.getDefaultIpAddress());
		return hostInfo;
	}
	public HostInfo convertAddress(final InetAddress address) {
		HostInfo hostInfo = new HostInfo();
		Future<String> result = this.executorService.submit(address::getHostName);

		String hostname;
		try {
			hostname = result.get(this.properties.getTimeoutSeconds(), TimeUnit.SECONDS);
		}
		catch (Exception e) {
			this.log.info("Cannot determine local hostname");
			hostname = "localhost";
		}
		hostInfo.setHostname(hostname);
		hostInfo.setIpAddress(address.getHostAddress());
		return hostInfo;
	}
如果不想注册主机名,则需要增加配置:
spring.cloud.consul.discovery.prefer-ip-address=true
如何指定注册到Consul上的IP地址
TIPS
- 本文基于Spring Cloud Hoxton,理论支持Spring Cloud所有版本。
- 标注【通用】的,指的是不管你使用哪款服务发现组件(Eureka、Consul、Zookeeper…)配置都可生效。
【推荐】方式一、忽略指定名称的网卡【通用】
spring:
  cloud:
    inetutils:
      ignored-interfaces:
        - docker0
        - veth.*
    consul:
      discovery:
        prefer-ip-address: true
【推荐】方式二、指定想要的网段【通用】
spring:
  cloud:
    inetutils:
      preferred-networks:
        - 192.168
        - 10.0
    consul:
      discovery:
        prefer-ip-address: true
【不推荐】方式三、只使用站点本地地址【通用】
spring:
  cloud:
    inetutils:
      use-only-site-local-interfaces: true
    consul:
      discovery:
        prefer-ip-address: true
TIPS
站点本地地址:
【不推荐】方式四、手动指定IP【Consul专用】
spring:
  cloud:
    consul:
      host: localhost
      port: 8500
      discovery:
        prefer-ip-address: true
        ip-address: 127.0.0.1
本章总结
- 服务发现的原理
- 搭建Consul
- 如何使用Consul实现服务发现
- 健康检查
- 元数据
- InstanceId自定义
