由于前后端分离近几年已成为主流,故尝试了下Vue+SpringBoot的前后端整合。
- Vue的学习可以参考:https://cn.vuejs.org/v2/guide/,
由于vue的作者尤雨溪是一个华人,所以其官网的教程什么的中文文档都很简洁明了。按照官网的所有代码基本走一遍,就能对vue有大概的了解(前提你要有js、jquery的基础);
前端源代码
- 新建一个vue项目(百度很多,自行搜索下),项目目录结构如下:
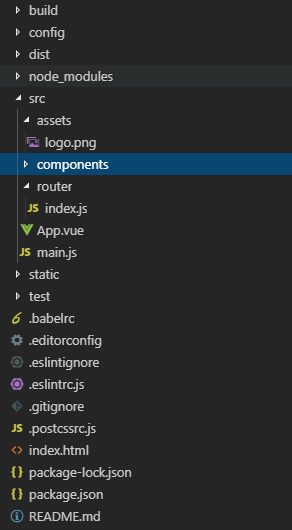
- 其中,默认生成的index.html和main.js不做改变,即如下:
index.html
<!DOCTYPE html>
<html>
  <head>
    <meta charset="utf-8">
    <meta name="viewport" content="width=device-width,initial-scale=1.0">
    <title>myvue</title>
  </head>
  <body>
    <div id="app">
    </div>
    <!-- built files will be auto injected -->
    <!-- <script type="/dist/" -->
  </body>
</html>
main.js
import Vue from 'vue'
import App from './App'
import router from './router'

Vue.config.productionTip=false

new Vue({
  el:"#app",
  router,
  components:{ App },
  template:'<App/>'
})
App.vue
<template>
  <div id="app">
    <img src="./assets/logo.png">
    <router-view/>
  </div>
</template>

<script>
import HelloWorld from './components/HelloWorld'

export default {
  name: 'App'
}
</script>

<style>
#app {
  font-family: 'Avenir', Helvetica, Arial, sans-serif;
  -webkit-font-smoothing: antialiased;
  -moz-osx-font-smoothing: grayscale;
  text-align: center;
  color: #2c3e50;
  margin-top: 60px;
}
</style>
- 修改index.js,引入各路由组件;
import Vue from 'vue'
import Router from 'vue-router'
import HelloWorld from '@/components/HelloWorld'
import aaa from '@/components/aaa'
import loginUI from '@/components/loginUI'
import success from '@/components/success'
import axios from 'axios'

Vue.prototype.$http = axios
Vue.use(Router)

export default new Router({
  routes: [
    {
      path: '/',
      name: 'HelloWorld',
      component: HelloWorld
    },
    {
    	path: '/abc',
      name: 'aaa',
      component: aaa
    },
    {
    	path: '/loginUI',
      name: 'loginUI',
      component: loginUI
    },
    {
    	path: '/success',
      name: 'success',
      component: success
    }
  ]
})
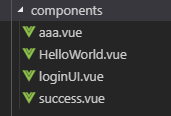
- 在components添加四个vue文件,如下
HelloWorld.vue,主要是主页面,其中“点我跳转”是自己用来尝试,vue路由组件的跳转过程的,“点我登录”跳转至登录页面;
<template>
 <div class="hello">
    <h1>{{ msg }}</h1>
    <button @click="go">点我跳转</button>
    <button @click="loginUI">点我登录</button>
</div>
</template>

<script>
export default {
  // name: 'HelloWorld',
  data () {
    return {
      msg: '哈哈'
    }
  },
  methods:{
  	go(){
      console.log(66)
      this.$router.push({
        path:'/abc'
      })
    },
    loginUI(){
      this.$router.push({
        path:'/loginUI'
      })
    }
  }
}
</script>

<style>
</style>
aaa.vue
<template>
	<div>我是aaa
	<button @click="back">点我返回</button>
	</div>

</template>

<script>
export default {
  methods:{
  	back(){
  		this.$router.push('/')
  	}
  }
}
</script>
login.vue(登录页面,点击登录通过axios请求后台接口)
<template>
    <table id="loginUI">
    <tr>
      <td>用户名</td>
      <td><input type="text" v-model="username"></td>
    </tr>
    <tr>
      <td>密码</td>
      <td><input type="password" v-model="password"></td>
    </tr>
    <tr>
      <td colspan="2"><input type="submit" @click="login" value="提交"></td>
    </tr>
  </table>
</template>

<script>
import qs from 'qs'
export default {
  data(){
    return {
      username:"",
      password:""
    }
  },
  methods:{
    login(){
      var that=this;
      console.log(that.username+":"+that.password)
      var user={
        username:that.username,
        password:that.password
      }
      this.$http.post('http://localhost:8080/user/login',qs.stringify(user))
      .then(function (params) {
        console.log(params)
        if(params.data.status===200){
          that.$router.push({
          path:'/success'
        })
        }
      })
      .catch(function (reason) {
        console.log(reason)
      })
    }
  }

}
</script>

<style>
#loginUI {
  margin:0 auto;
}
</style>
success.vue,登录成功页面
<template>
	<div>
    成功!
    <router-link to="/">返回</router-link>
	</div>

</template>
okay,前端源代码部分完成;
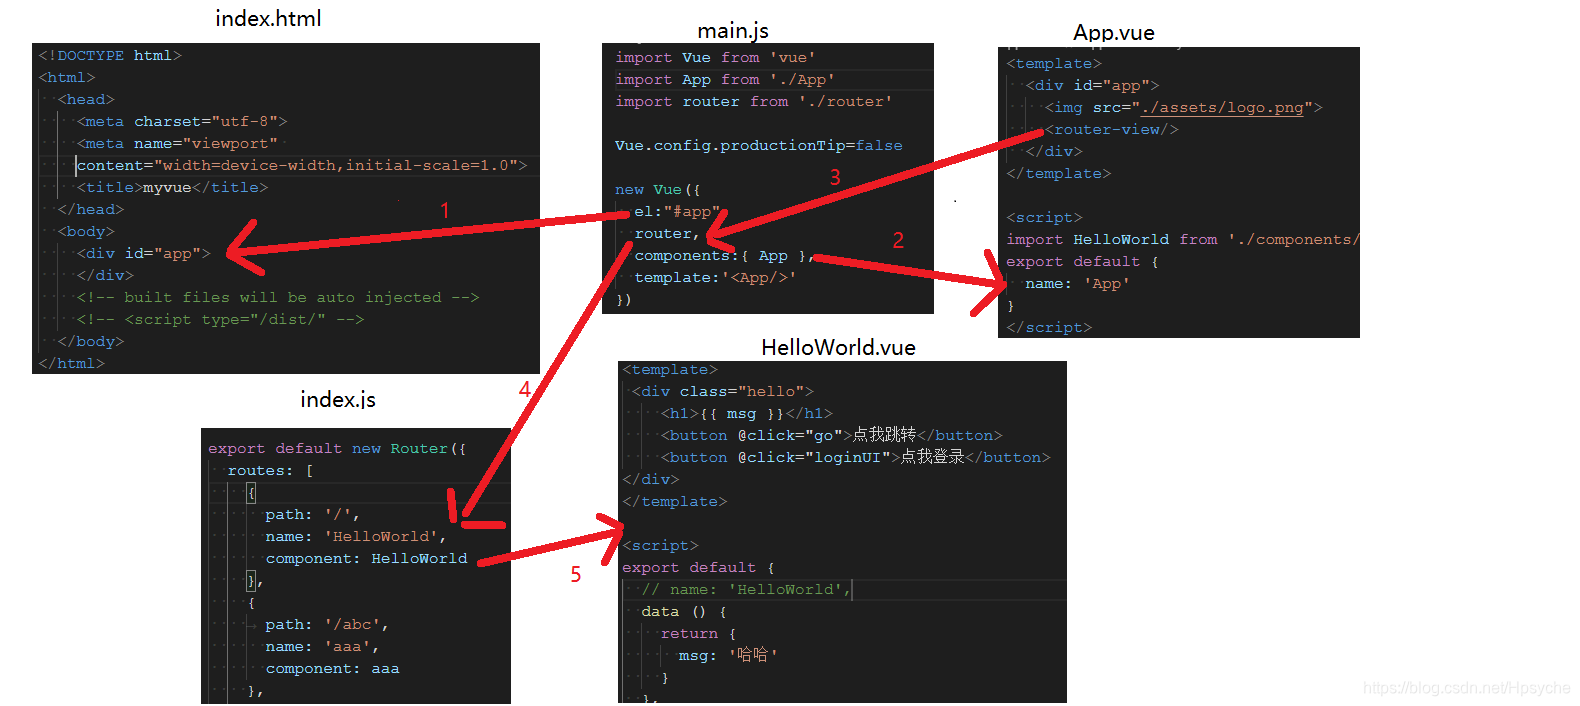
前端代码调用过程如下
后台源代码
后台用SpringBoot完成,
UserController
package com.hpsyche.springboot_to_vue.controller;

import com.hpsyche.springboot_to_vue.entity.User;
import com.hpsyche.springboot_to_vue.entity.vo.ReturnMsgVo;
import org.springframework.web.bind.annotation.GetMapping;
import org.springframework.web.bind.annotation.PostMapping;
import org.springframework.web.bind.annotation.RequestMapping;
import org.springframework.web.bind.annotation.RestController;

/**
 * @author Hpsyche
 */
@RestController
@RequestMapping(value = "/user")
public class UserController {
    @PostMapping("/login")
    public ReturnMsgVo login(User user){
        System.out.println(user);
        return ReturnMsgVo.success(null);
    }

    @GetMapping("/hello")
    public String hello(){
        return "hello";
    }
}
其中User和ReturnMsgVo就是普通的实体类和返回信息实体,在这里不做赘述。
调试过程
先启动后台(端口8080),再启动前端:npm run dev(其发现8080被占用后,自动启用8081端口)。
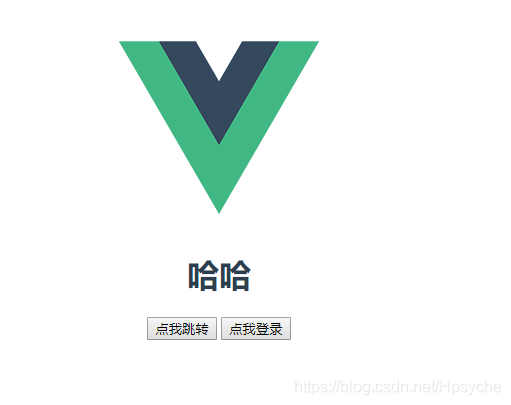
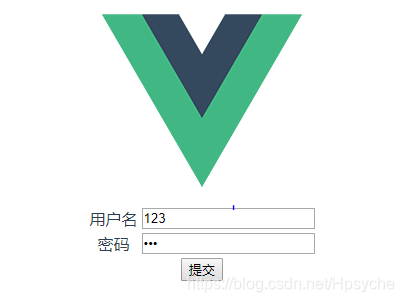
首页如下,点击登录
提交后报错403,
Response to preflight request doesn't pass access control check: No 'Access-Control-Allow-Origin' header is present on the requested resource. Origin 'http://localhost:8080' is therefore not allowed access. The response had HTTP status code 403
搜索了以下,从这篇博客找到答案https://blog.csdn.net/Brave_Coder/article/details/77103899#
常规的GET,POST,PUT,DELETE请求是简单请求(相对于OPTIONS请求),但是OPTIONS有点儿特别,它要先发送请求问问服务器,你要不要我请求呀,要我就要发送数据过来咯(这完全是根据自己的理解写的,如果有误,敬请谅解,请参考阮一峰大神原文。)
在Vue的项目里,Http服务采用Axios,而它正是采用OPTIONS请求。
如果仅仅在header里面加入: ‘Access-Control-Allow-Origin’:*,是并不能解决问题的,错误就是如文章开头所示。
就需要我们在后台对OPTIONS请求额外处理
解决方案
故我添加了一个拦截器
package com.hpsyche.springboot_to_vue.interceptor;

import org.springframework.stereotype.Component;
import org.springframework.web.servlet.HandlerInterceptor;
import org.springframework.web.servlet.ModelAndView;

import javax.servlet.http.HttpServletRequest;
import javax.servlet.http.HttpServletResponse;

/**
 * @author Hpsyche
 */
@Component
public class ProcessInterceptor implements HandlerInterceptor {
    @Override
    public boolean preHandle(HttpServletRequest httpServletRequest, HttpServletResponse httpServletResponse, Object o) throws Exception {
        httpServletResponse.setHeader("Access-Control-Allow-Origin", "*");
        httpServletResponse.setHeader("Access-Control-Allow-Headers", "Content-Type,Content-Length, Authorization, Accept,X-Requested-With");
        httpServletResponse.setHeader("Access-Control-Allow-Methods","PUT,POST,GET,DELETE,OPTIONS");
        httpServletResponse.setHeader("X-Powered-By","Jetty");
        String method= httpServletRequest.getMethod();
        if (method.equals("OPTIONS")){
            httpServletResponse.setStatus(200);
            return false;
        }
        return true;
    }

    @Override
    public void postHandle(HttpServletRequest httpServletRequest, HttpServletResponse httpServletResponse, Object o, ModelAndView modelAndView) throws Exception {
    }

    @Override
    public void afterCompletion(HttpServletRequest httpServletRequest, HttpServletResponse httpServletResponse, Object o, Exception e) throws Exception {
    }
}
同时在Spring中声明
package com.hpsyche.springboot_to_vue.config;

import com.hpsyche.springboot_to_vue.interceptor.ProcessInterceptor;
import org.springframework.context.annotation.Configuration;
import org.springframework.web.servlet.config.annotation.InterceptorRegistry;
import org.springframework.web.servlet.config.annotation.WebMvcConfigurer;

/**
 * @author Hpsyche
 */
@Configuration
public class MyWebMvcConfig implements WebMvcConfigurer {
    @Override
    public void addInterceptors(InterceptorRegistry registry) {
        registry.addInterceptor(new ProcessInterceptor()).addPathPatterns("/**");
    }
}
再次访问,成功!

配置成功!
