基于Springboot搭建CSDN与本地博客同步系统
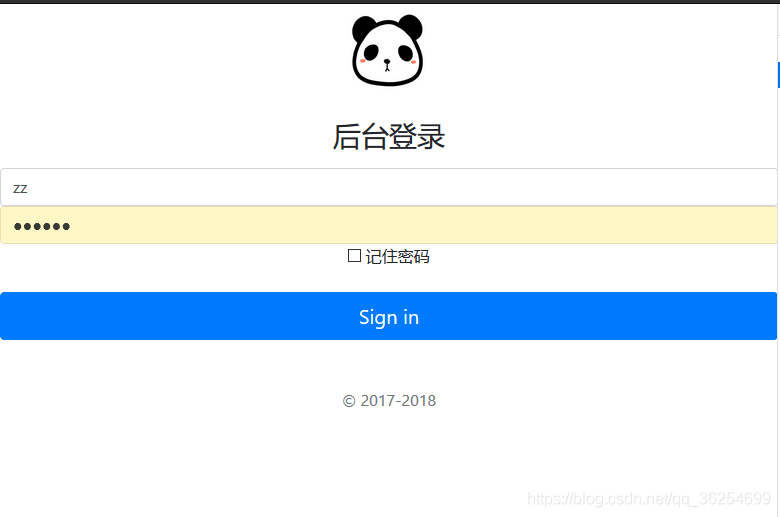
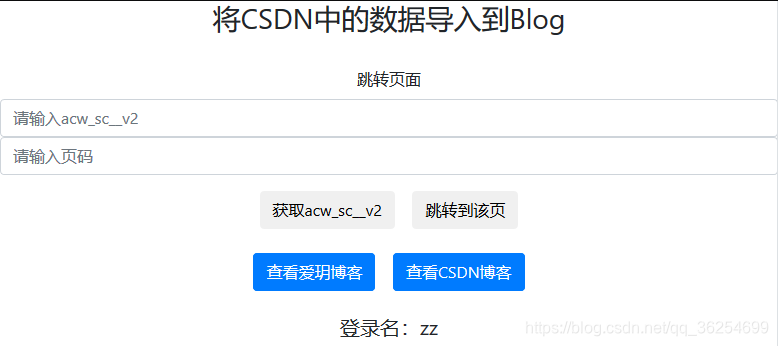
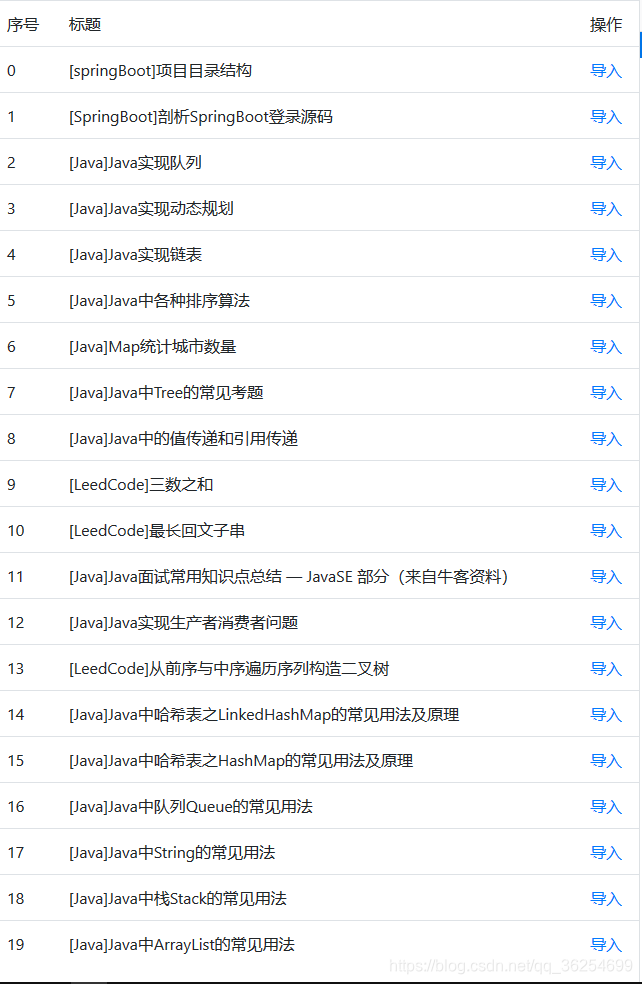
一、效果图
二、项目结构
├─src
│  └─main
│      ├─java
│      │  └─com
│      │      └─springboot
│      │          ├─config
│      │          ├─constant
│      │          ├─controller
│      │          ├─dao
│      │          │  └─impl
│      │          ├─domain
│      │          ├─repository
│      │          ├─service
│      │          │  └─impl
│      │          ├─utils
│      │          │  └─copyFromCsdn
│      │          └─vo
│      └─resources
│          ├─config
│          ├─i18n
│          ├─META-INF
│          ├─static
│          │  └─img
│          └─templates
参考原博客:[springBoot]项目目录结构
三、代码分析(以获取CSDN博客列表为例)
1. mian.html通过post传输数据
部分代码:
<form role="form" method="post" action="GoToPages">
	<input type="text" class="form-control" name = "acw_sc__v2" id="acw_sc__v2" placeholder="请输入acw_sc__v2">
	<input type="text" class="form-control" name = "pages" id="name" placeholder="请输入页码">
	<button type="submit" class="btn btn-default" href="javascript:login()">跳转到该页</button>
</form>
2.后台控制器获取post数据并返回页面
 @PostMapping("/admin/GoToPages")
    public String goToPages(@RequestParam("acw_sc__v2") String acw_sc__v2,@RequestParam("pages") String pages,Model model){
        copyFromCsdnServiceImpl.setAcw_sc__v2(acw_sc__v2);
        List<CSDN> csdnListResult = copyFromCsdnServiceImpl.FindAllArticle(pages);
        model.addAttribute("csdnListResult",csdnListResult);
        return "csdnList";
    }
3.返回到csdnList并展示
<table class="table">
    <tr>
        <td>序号</td>
        <td>标题</td>
        <td>操作</td>
    </tr>
    <tr th:each="csdn:${csdnListResult}">
        <td th:text="${csdn.article_id}"></td>
        <td th:text="${csdn.article_title}"></td>
        <td>
            <a th:href ="@{'insert/' + ${csdn['article_id']} }">导入</a>
            <!--<a onclick=th:text="'https://www.study2016.cn/article/' + ${blog['article_id']}">浏览</a>-->
        </td>
    </tr>
</table>
四、技术知识点总结
因为是第一次使用springboot写项目,需要总结的基础很多,从以下几个方面对知识进行总结:
1.登陆拦截
//注册拦截器
@Override
public void addInterceptors(InterceptorRegistry registry) {
	//拦截所有的请求
	//addPathPattern后跟拦截地址,excludePathPatterns后跟排除拦截地址
	registry.addInterceptor(new LoginHandlerInterceptor()).addPathPatterns("/**")
		.excludePathPatterns("/","/index.html","/admin","/admin/**").excludePathPatterns("/static/**");
}
2.将所有/static/** 访问都映射到classpath:/static/ 目录下
@Configuration
public class WebMvcConfig extends WebMvcConfigurerAdapter{
    public void addResourceHandlers(ResourceHandlerRegistry registry) {
        //将所有/static/** 访问都映射到classpath:/static/ 目录下
        registry.addResourceHandler("/static/**").addResourceLocations("classpath:/static/");
    }
}
3.session的使用
 @PostMapping(value = "/admin/index")
    public String login(@RequestParam("username") String username,
                        @RequestParam("password") String password,
                        Map<String,Object> map, HttpSession session){
        if(!StringUtils.isEmpty(username) && "123456".equals(password)){
            //登陆成功,防止表单重复提交,可以重定向到主页
            session.setAttribute("loginUser",username);
            return "main";
            //return "redirect:/main";
        }else{
            //登陆失败
            map.put("msg","用户名密码错误");
            return "index";
        }

    }
4.thymeleaf的使用(参考链接)
(1)标准表达式语法
大多数Thymeleaf属性允许将它们的值设置为或包含表达式,由于它们使用的方言,我们将其称为标准表达式。这些表达式可以有五种类型:
${...} : 变量表达式。
*{...} : 选择表达式。
#{...} : 消息 (i18n) 表达式。
@{...} : 链接 (URL) 表达式。
~{...} : 片段表达式。
(2) 标准语法中的变量表达式
变量表达式是OGNL表达式 - 如果将Thymeleaf 与Spring - 集成在上下文变量上(也称为Spring术语中的模型属性),则为Spring EL。 它们看起来像这样:
${session.user.name}
它们作为属性值或作为它们的一部分,取决于属性:
<span th:text="${book.author.name}">
上面的表达式与下面是相同的(在OGNL和SpringEL中):
((Book)context.getVariable("book")).getAuthor().getName()
但是不仅在涉及输出的场景中找到变量表达式,而且还可以使用更复杂的处理方式,如:条件,迭代…等等。
<li th:each="book : ${books}">
这里${books}从上下文中选择名为books的变量,并在th:each中使用循环将其评估为迭代器。
(3)前台展示
- 展示
String数据
后台:
前台:model.addAttribute("success","后台String类型的数据传过来了");<span th:text="${success}"></span> - 展示
List<T>数据
后台:
前台:List<CSDN> csdnListResult model.addAttribute("csdnListResult",csdnListResult);
article_id、article_title为T类的成员变量<tr th:each="csdn:${csdnListResult}"> <td th:text="${csdn.article_id}"></td> <td th:text="${csdn.article_title}"></td> </tr> - 展示
List<Map<String, Object>>数据
后台:
前台:List<Map<String, Object>> result; model.addAttribute("aiYueBlog", result);
article_id、article_title为T类的成员变量<tr th:each="blog:${aiYueBlog }"> <td th:text="${blog.article_id}"></td> <td th:text="${blog.article_title}"></td> </tr>
(4)springboot热部署
application.yml:
扫描二维码关注公众号,回复:
9353591 查看本文章

debug: true
spring:
    devtools:
        restart:
            enabled: true  #设置开启热部署
    freemarker:
        cache: false    #页面不加载缓存,修改即时生效
application.properties:
# 禁用缓存
spring.thymeleaf.cache=false
pom.xml:
<!-- 热部署-->
<dependency>
	<groupId>org.springframework.boot</groupId>
	<artifactId>spring-boot-devtools</artifactId>
	<optional>true</optional>
</dependency>
(5)mysql插入数据中文乱码
1.application.yml:
datasource:
    username: root
    password: 1234556
    url: jdbc:mysql://localhost:3306/SQLNAME?useUnicode=true&characterEncoding=utf-8
    driver-class-name: com.mysql.jdbc.Driver
    type: com.alibaba.druid.pool.DruidDataSource

    initialSize: 5
    minIdle: 5
    maxActive: 20
    maxWait: 60000
    timeBetweenEvictionRunsMillis: 60000
    minEvictableIdleTimeMillis: 300000
    validationQuery: SELECT 1 FROM DUAL
    testWhileIdle: true
    testOnBorrow: false
    testOnReturn: false
    poolPreparedStatements: true
    #   配置监控统计拦截的filters,去掉后监控界面sql无法统计,'wall'用于防火墙
    filters: stat,wall,log4j
    maxPoolPreparedStatementPerConnectionSize: 20
    useGlobalDataSourceStat: true
    connectionProperties: druid.stat.mergeSql=true;druid.stat.slowSqlMillis=500
#    schema:
#      - classpath:department.sql
2.修改mysql表配置
ALTER TABLE 表名 CONVERT TO CHARACTER SET utf8 COLLATE utf8_general_ci;
五、非技术知识点总结
推荐阅读:https://blog.csdn.net/sunnyzyq/article/details/86711708
