最近在学习Maven,把一个开源的项目改成maven管理,期间使用到了多项目,从网上查阅了一些资料,主要参考的是http://kyfxbl.iteye.com/blog/1680045,在此把自己的一些心得体会写出来,供大家学习交流。
关于maven的安装,在此就不进行阐述,请参考网上其他教程。
本实例由4个项目组成,其中,aggregator是父工程,同时承担聚合模块和父模块的作用,没有实际代码和资源文件;open-plagform-common是公共的java工程;open-platfor-web是公共的web文件,主要包括css、js等;open-bug-m是最终要发布的应用,形成war包。
一、建立一个Maven工程:aggregator
/aggregator
/src/main/java
/src/test/java
pom.xml
此工程主要是父模块,聚合其他工程,没有实际代码和资源文件,最主要的是pom.xml文件,其主要内容如下:
-
<modelVersion>4.0.0</modelVersion> -
<groupId>cn.jess.platform</groupId> -
<artifactId>aggregator</artifactId> -
<version>0.0.1-SNAPSHOT</version> -
<!-- 因为是父工程 ,因此此处的packaging必须为pom --> -
<packaging>pom</packaging> -
<name>aggregator</name> -
<modules> -
<module>../open-platform-common</module> -
<module>../open-platform-web</module> -
<module>../open-bug-m</module> -
</modules> -
<!-- 配置部署的远程仓库 --> -
<distributionManagement> -
<snapshotRepository> -
<id>nexus-snapshots</id> -
<name>nexus distribution snapshot repository</name> -
<url>http://127.0.0.1:8081/nexus/content/repositories/snapshots/</url> -
</snapshotRepository> -
</distributionManagement> -
<build> -
<pluginManagement> -
<plugins> -
<plugin> -
<groupId>org.apache.maven.plugins</groupId> -
<artifactId>maven-resources-plugin</artifactId> -
<version>2.6</version> -
<configuration> -
<encoding>UTF-8</encoding> -
</configuration> -
</plugin> -
<plugin> -
<groupId>org.apache.maven.plugins</groupId> -
<artifactId>maven-compiler-plugin</artifactId> -
<version>2.5.1</version> -
<configuration> -
<encoding>UTF-8</encoding> -
<source>1.6</source> -
<target>1.6</target> -
</configuration> -
</plugin> -
</plugins> -
</pluginManagement> -
</build> -
<dependencyManagement> -
<dependencies> -
<dependency> -
<groupId>com.sun</groupId> -
<artifactId>tools</artifactId> -
<version>1.6.0</version> -
<scope>system</scope> -
<systemPath>${env.JAVA_HOME}/lib/tools.jar</systemPath> -
</dependency> -
</dependencies> -
</dependencyManagement>
二、建立一个Maven工程:open-platform-common
此工程主要是项目中使用到的公共java类库,pom文件主要内容如下:
-
<!-- 由于存在parent工程,因此groupId和version可以省略,直接使用parent工程--> -
<modelVersion>4.0.0</modelVersion> -
<artifactId>open-platform-common</artifactId> -
<!-- 因为此工程要发布到webapp的lib目录下,因此为jar(不知道这样解释对否?) --> -
<packaging>jar</packaging> -
<properties> -
<project.build.sourceEncoding>UTF-8</project.build.sourceEncoding> -
</properties> -
<!-- 指定Maven仓库 --> -
<repositories> -
<!-- my的maven仓库 --> -
<repository> -
<id>myRepository</id> -
<name>local private nexus</name> -
<url>http://127.0.0.1:8081/nexus/content/groups/public/</url> -
<releases> -
<enabled>true</enabled> -
</releases> -
<snapshots> -
<enabled>true</enabled> -
</snapshots> -
</repository> -
</repositories> -
<!-- 指定maven plugin仓库 --> -
<pluginRepositories> -
<!-- oschina的maven plugin仓库 --> -
<pluginRepository> -
<id>myPluginRepository</id> -
<name>local private nexus</name> -
<url>http://127.0.0.1:8081/nexus/content/groups/public/</url> -
<releases> -
<enabled>true</enabled> -
</releases> -
<snapshots> -
<enabled>false</enabled> -
</snapshots> -
</pluginRepository> -
</pluginRepositories> -
<dependencies> -
<!-- 此处的类库根据自己的需要进行添加 --> -
</dependencies> -
<!-- 用来指定父工程--> -
<parent> -
<groupId>cn.jess.platform</groupId> -
<artifactId>aggregator</artifactId> -
<version>0.0.1-SNAPSHOT</version> -
<relativePath>../aggregator</relativePath> -
</parent>
三、建立一个Maven工程:open-platform-web
此工程主要是项目中使用到的公共web文件,pom文件主要内容如下:
-
<!-- 由于存在parent工程,因此groupId和version可以省略,直接使用parent工程--> -
<modelVersion>4.0.0</modelVersion> -
<artifactId>open-platform-web</artifactId> -
<!-- 因为此工程要发布到webapp应用的根目录下,因此为war(不知道这样解释对否?) --> -
<packaging>war<ng> -
<properties> -
<project.build.sourceEncoding>UTF-8</project.build.sourceEncoding> -
</properties> -
<!-- 指定Maven仓库 --> -
<repositories> -
<!-- my的maven仓库 --> -
<repository> -
<id>myRepository</id> -
<name>local private nexus</name> -
<url>http://127.0.0.1:8081/nexus/content/groups/public/</url> -
<releases> -
<enabled>true</enabled> -
</releases> -
<snapshots> -
<enabled>true</enabled> -
</snapshots> -
</repository> -
</repositories> -
<!-- 指定maven plugin仓库 --> -
<pluginRepositories> -
<!-- oschina的maven plugin仓库 --> -
<pluginRepository> -
<id>myPluginRepository</id> -
<name>local private nexus</name> -
<url>http://127.0.0.1:8081/nexus/content/groups/public/</url> -
<releases> -
<enabled>true</enabled> -
</releases> -
<snapshots> -
<enabled>false</enabled> -
</snapshots> -
</pluginRepository> -
</pluginRepositories> -
<parent> -
<groupId>cn.jess.platform</groupId> -
<artifactId>aggregator</artifactId> -
<version>0.0.1-SNAPSHOT</version> -
<relativePath>../aggregator</relativePath> -
</parent> -
</project>
注意:此工程的WEB-INF目录下必须包含web.xml文件,否则在执行mvn时会报错
四、建立一个Maven工程:open-bug-m:
此工程是最终要发布的应用,其依赖于open-platform-common和open-platform-web,因此在pom文件中要加入这两个工程的依赖,pom文件内容如下所示:
-
<groupId>open-bug-m</groupId> -
<artifactId>open-bug-m</artifactId> -
<packaging>war</packaging> -
<name/> -
<description/> -
<properties> -
<project.build.sourceEncoding>UTF-8</project.build.sourceEncoding> -
</properties> -
<parent> -
<groupId>cn.jess.platform</groupId> -
<artifactId>aggregator</artifactId> -
<version>0.0.1-SNAPSHOT</version> -
<relativePath>../aggregator</relativePath> -
</parent> -
<!-- 指定Maven仓库 --> -
<repositories> -
<!-- my的maven仓库 --> -
<repository> -
<id>myRepository</id> -
<name>local private nexus</name> -
<url>http://127.0.0.1:8081/nexus/content/groups/public/</url> -
<releases> -
<enabled>true</enabled> -
</releases> -
<snapshots> -
<enabled>true</enabled> -
</snapshots> -
</repository> -
</repositories> -
<!-- 指定maven plugin仓库 --> -
<pluginRepositories> -
<!-- oschina的maven plugin仓库 --> -
<pluginRepository> -
<id>myPluginRepository</id> -
<name>local private nexus</name> -
<url>http://127.0.0.1:8081/nexus/content/groups/public/</url> -
<releases> -
<enabled>true</enabled> -
</releases> -
<snapshots> -
<enabled>false</enabled> -
</snapshots> -
</pluginRepository> -
</pluginRepositories> -
<dependencies> -
<dependency> -
<groupId>cn.jess.platform</groupId> -
<artifactId>open-platform-common</artifactId> -
<version>0.0.1-SNAPSHOT</version> -
<type>jar</type> -
</dependency> -
<dependency> -
<groupId>cn.jess.platform</groupId> -
<artifactId>open-platform-web</artifactId> -
<version>0.0.1-SNAPSHOT</version> -
<type>war</type> -
</dependency> -
<!-- 此处的类库根据自己的需要进行添加 --> -
</dependencies> -
<build> -
<finalName>open-bug</finalName> -
<plugins> -
<plugin> -
<groupId>org.apache.maven.plugins</groupId> -
<artifactId>maven-war-plugin</artifactId> -
<version>2.3</version> -
<configuration> -
<packagingExcludes>WEB-INF/web.xml</packagingExcludes> -
<overlays> -
<overlay> -
<groupId>cn.jess.platform</groupId> -
<artifactId>open-platform-web</artifactId> -
</overlay> -
</overlays> -
</configuration> -
</plugin> -
<plugin> -
<groupId>org.codehaus.cargo</groupId> -
<artifactId>cargo-maven2-plugin</artifactId> -
<version>1.2.3</version> -
<configuration> -
<container> -
<containerId>tomcat7x</containerId> -
<home>F:\apache-tomcat-7.0.42(x64)</home> -
</container> -
<configuration> -
<type>existing</type> -
<home>F:\apache-tomcat-7.0.42(x64)</home> -
<properties> -
<cargo.jvmargs> -
-Xdebug -Xrunjdwp:transport=dt_socket,server=y,suspend=n,address=8787 -
</cargo.jvmargs> -
</properties> -
</configuration> -
</configuration> -
<executions> -
<execution> -
<id>cargo-run</id> -
<phase>pre-integration-test</phase> -
<goals> -
<goal>run</goal> -
</goals> -
</execution> -
</executions> -
</plugin> -
</plugins> -
</build>
关于maven-war-plugin和cargo-maven2-plugin的使用方法请参考网上其他使用教程。
所有上述四个工程准备就绪后,执行mvn install就可对工程项目进行部署。
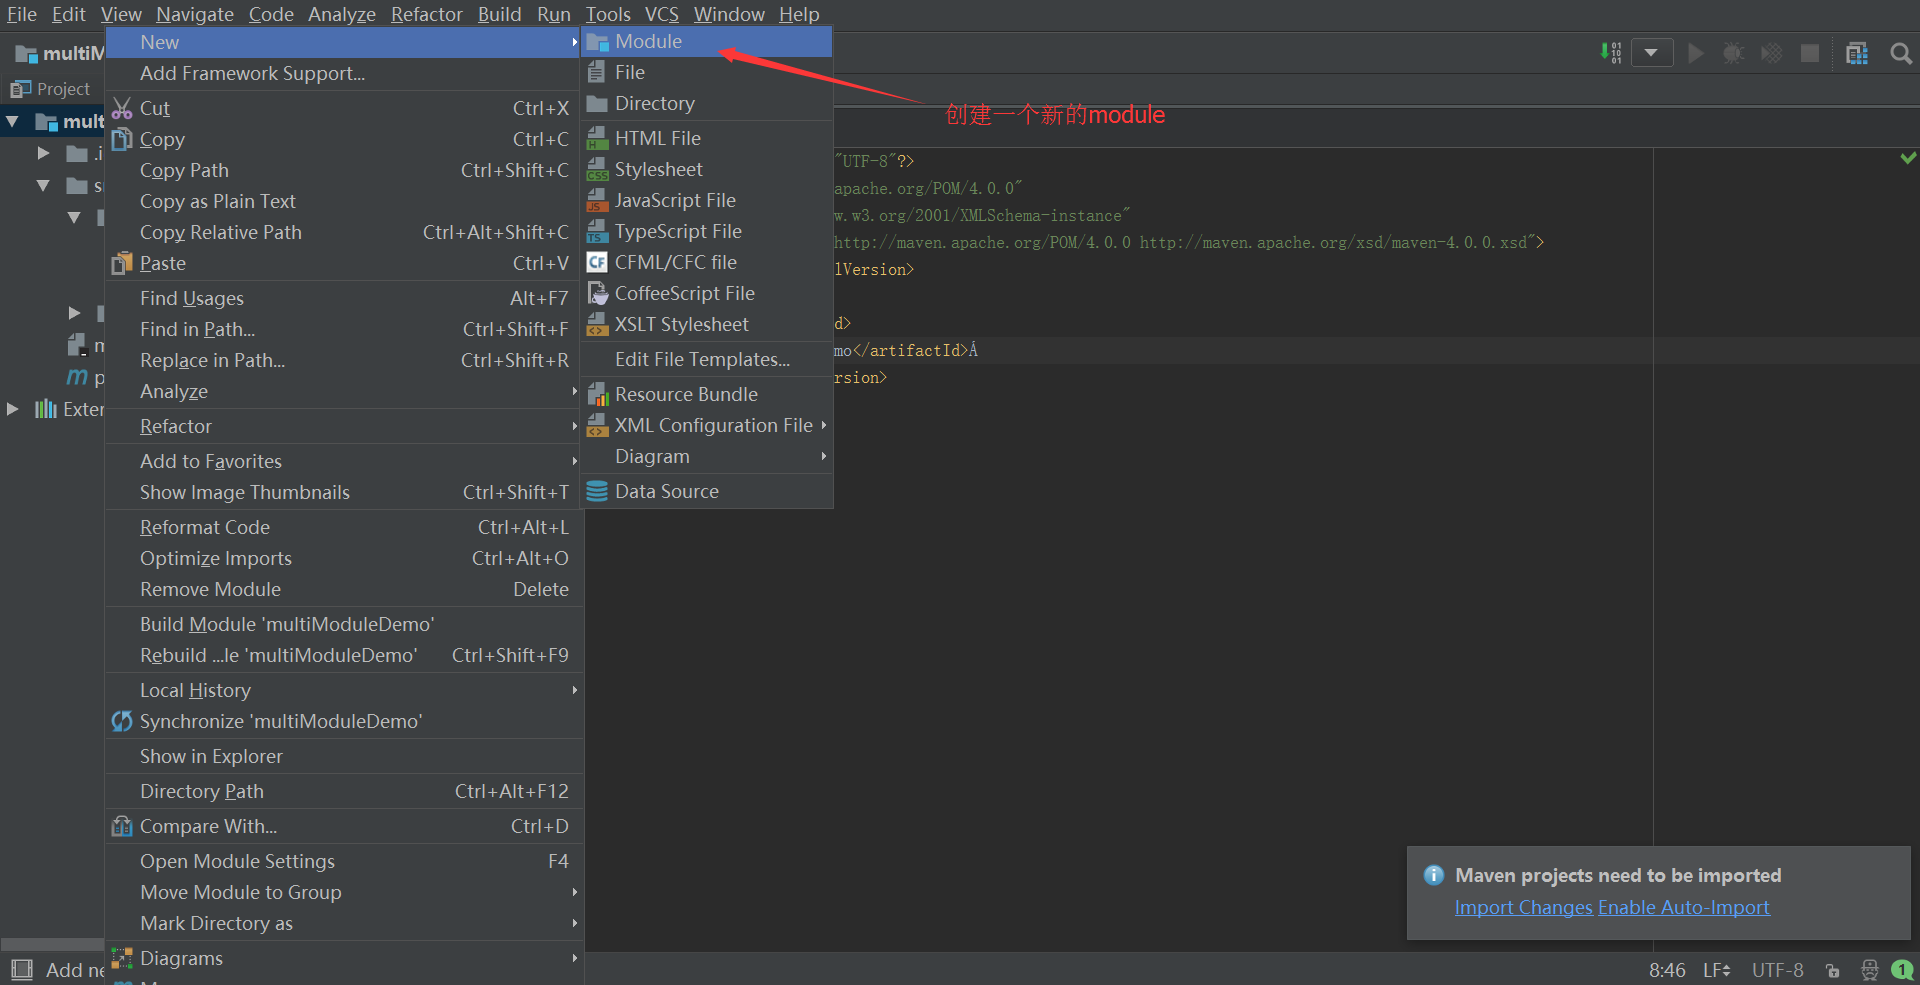
1. 创建一个新maven项目
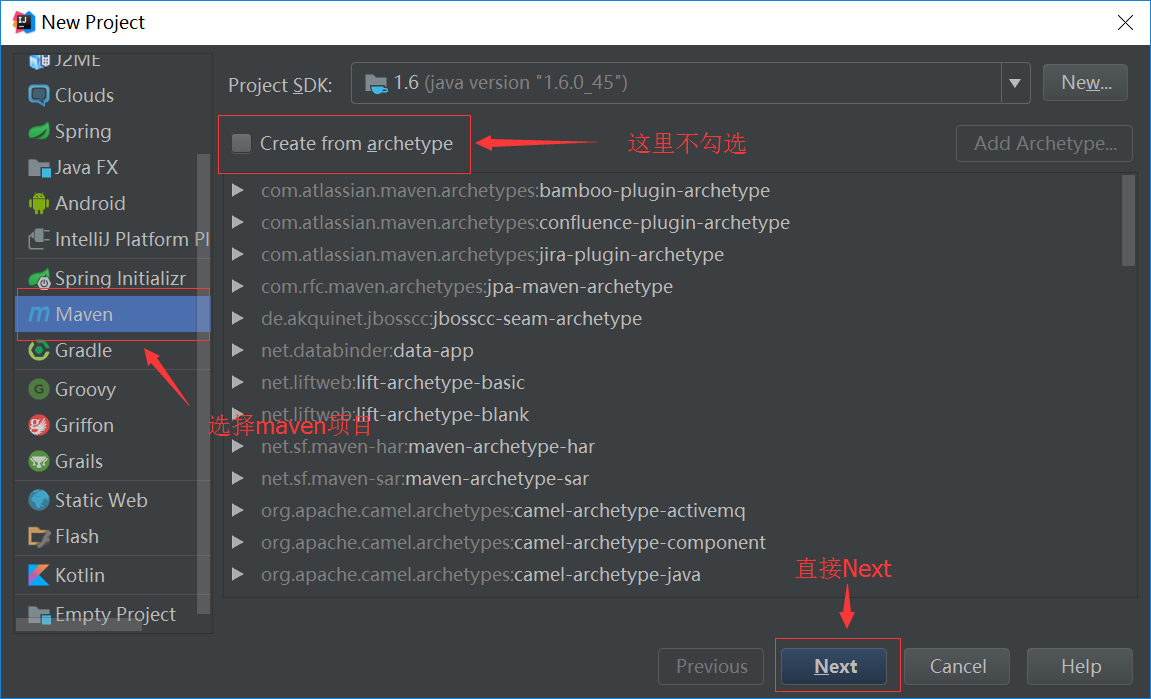
2.
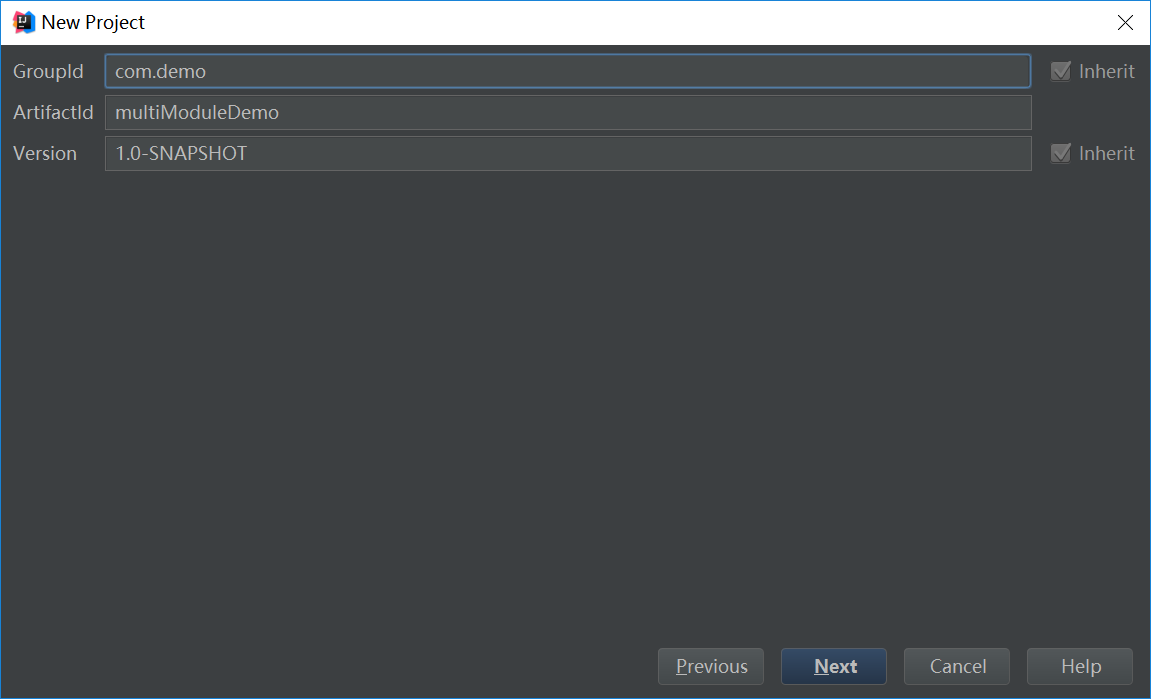
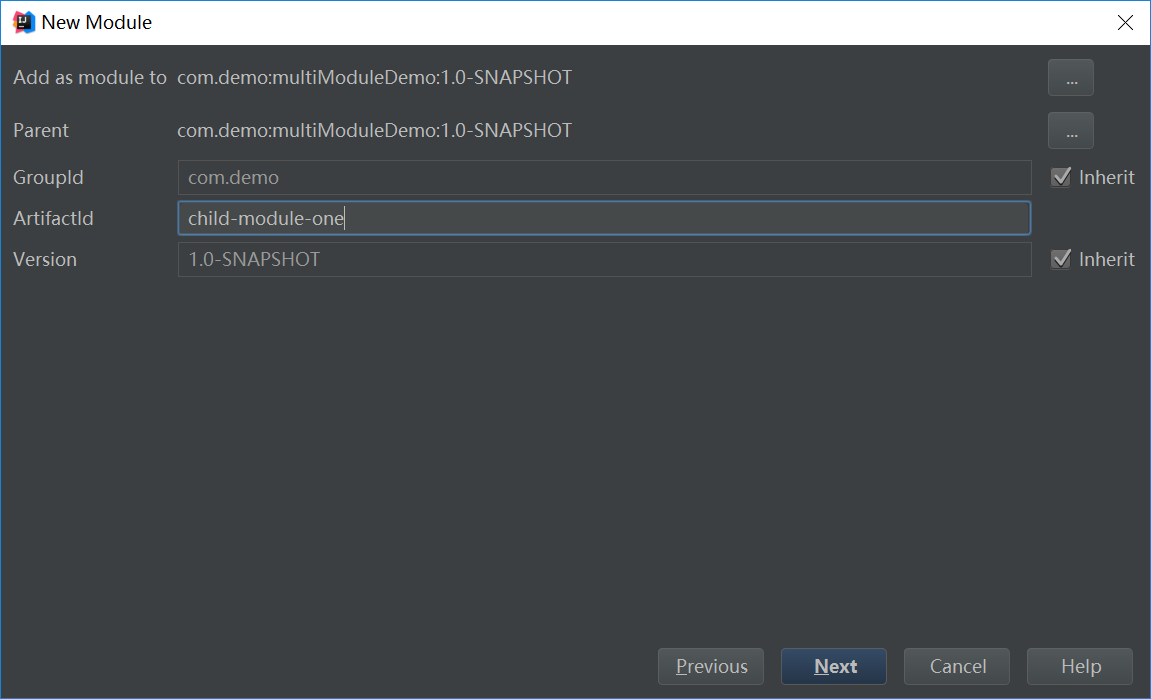
3. 输入groupid和artifactid,后面步骤直接next,最后finish
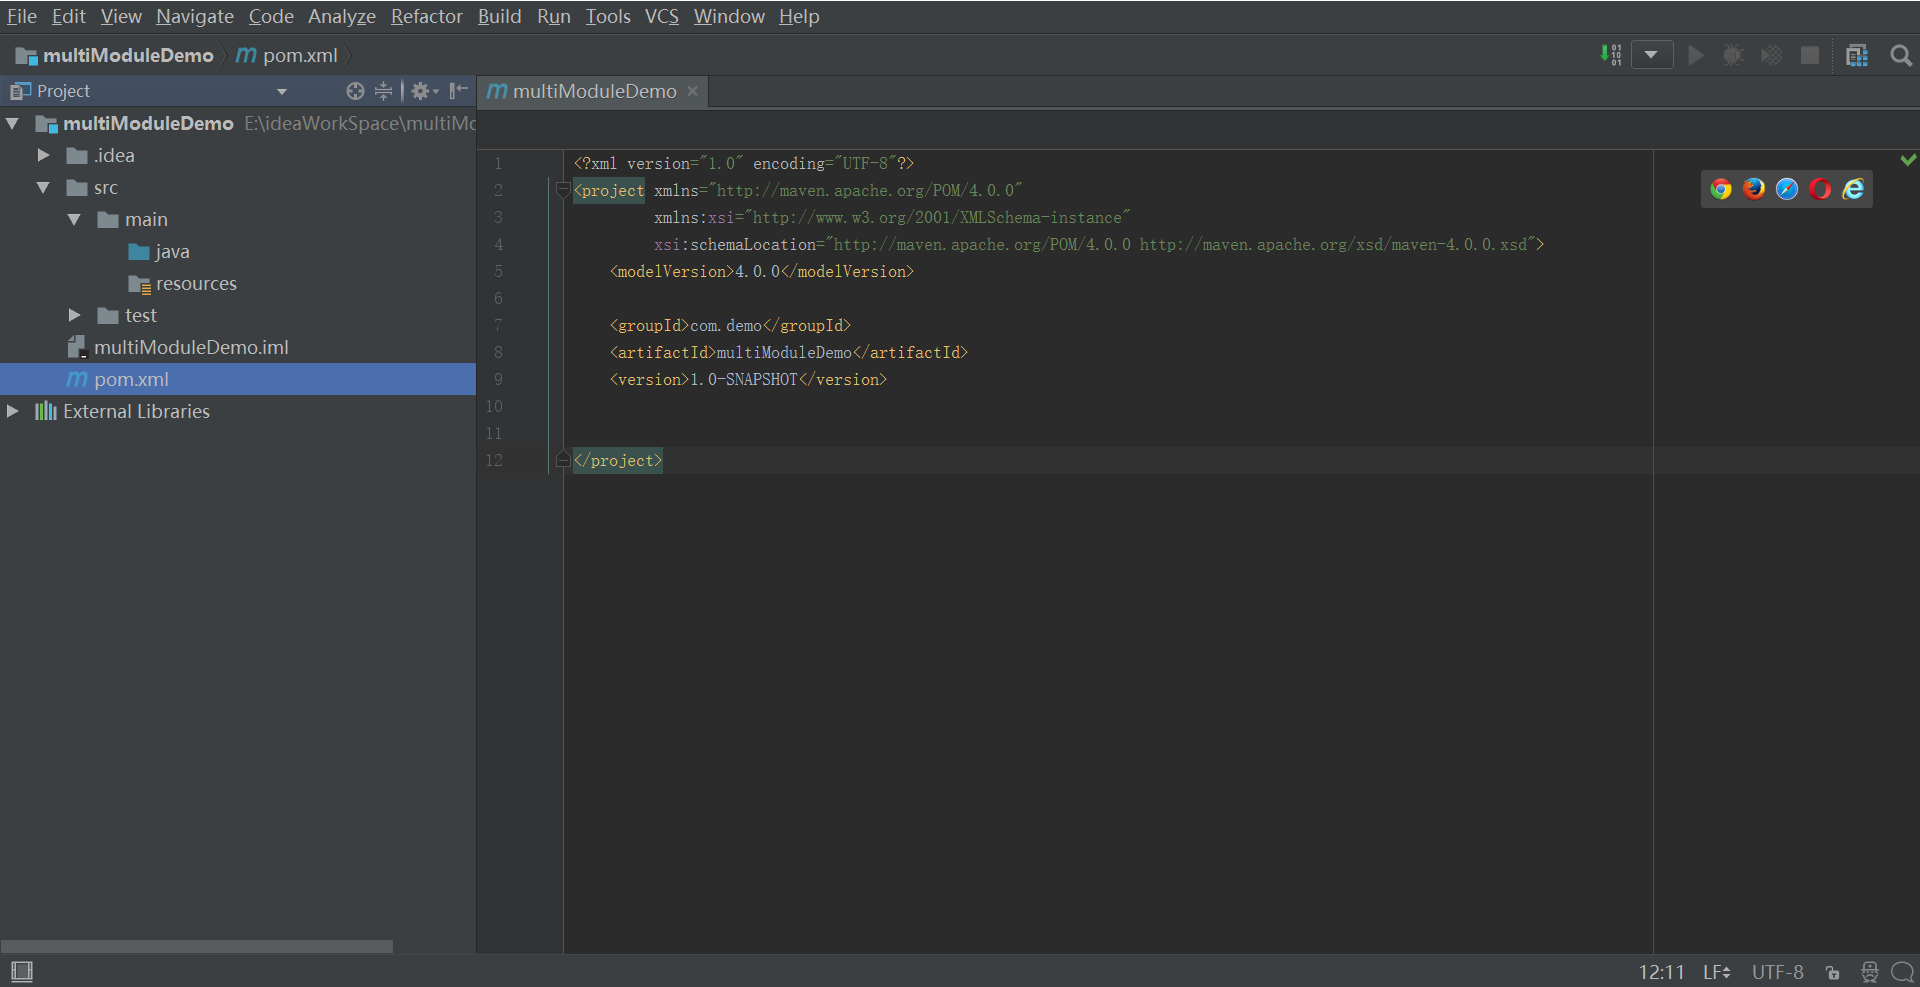
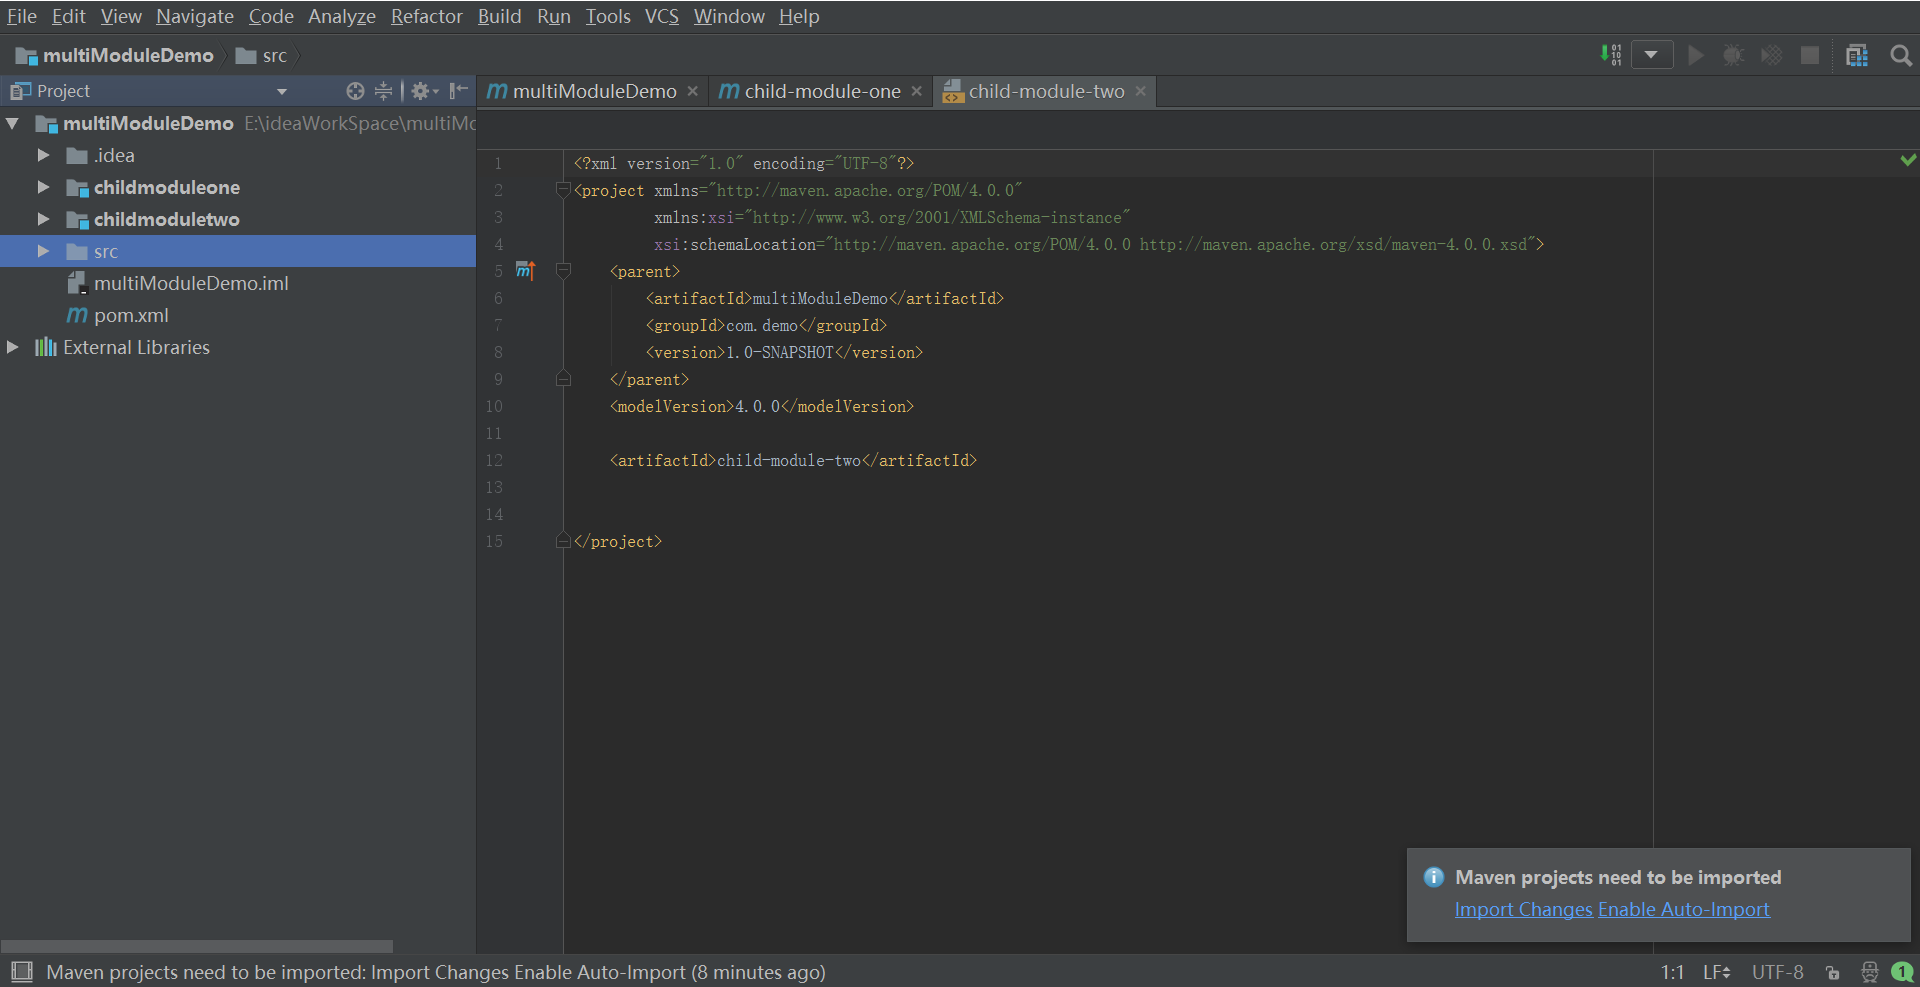
4.创建好后
5. 在主项目名称上点右键,创建第一个子模块
6

7
8 同理,在创建一个模块,创建好后
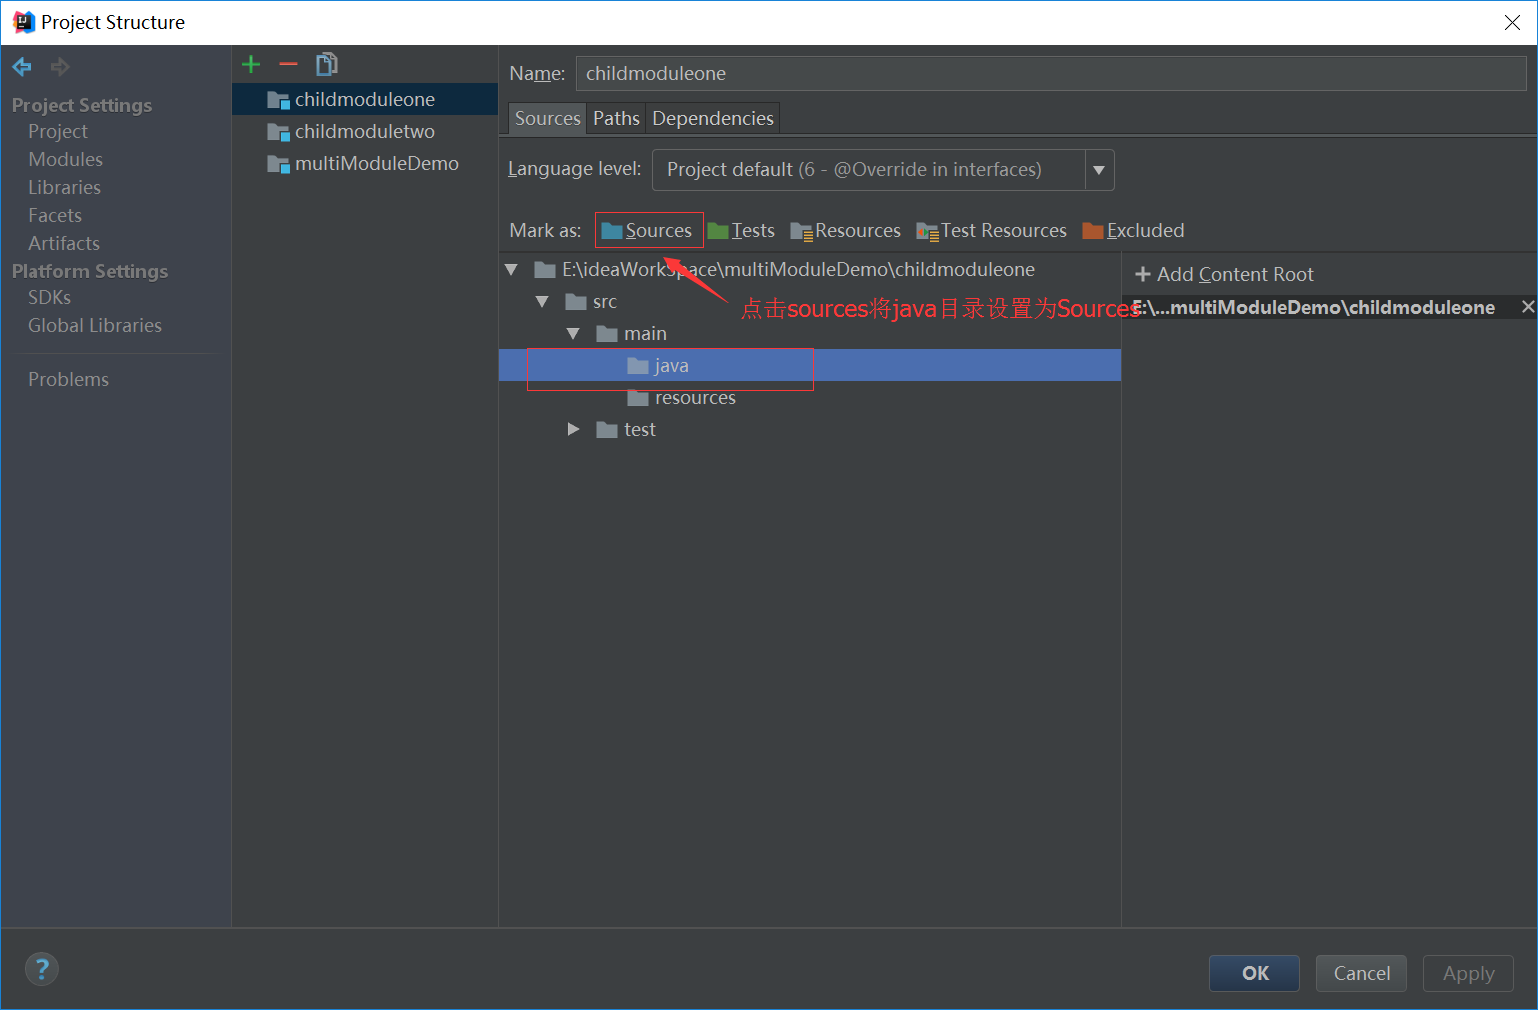
9 打开Project Structure将2个子模块的src/mian/java目录设置为Sources,只有设置为sources了,后面才能创建Class.
10 设置项目中childmoduletwo依赖于childmoduleone
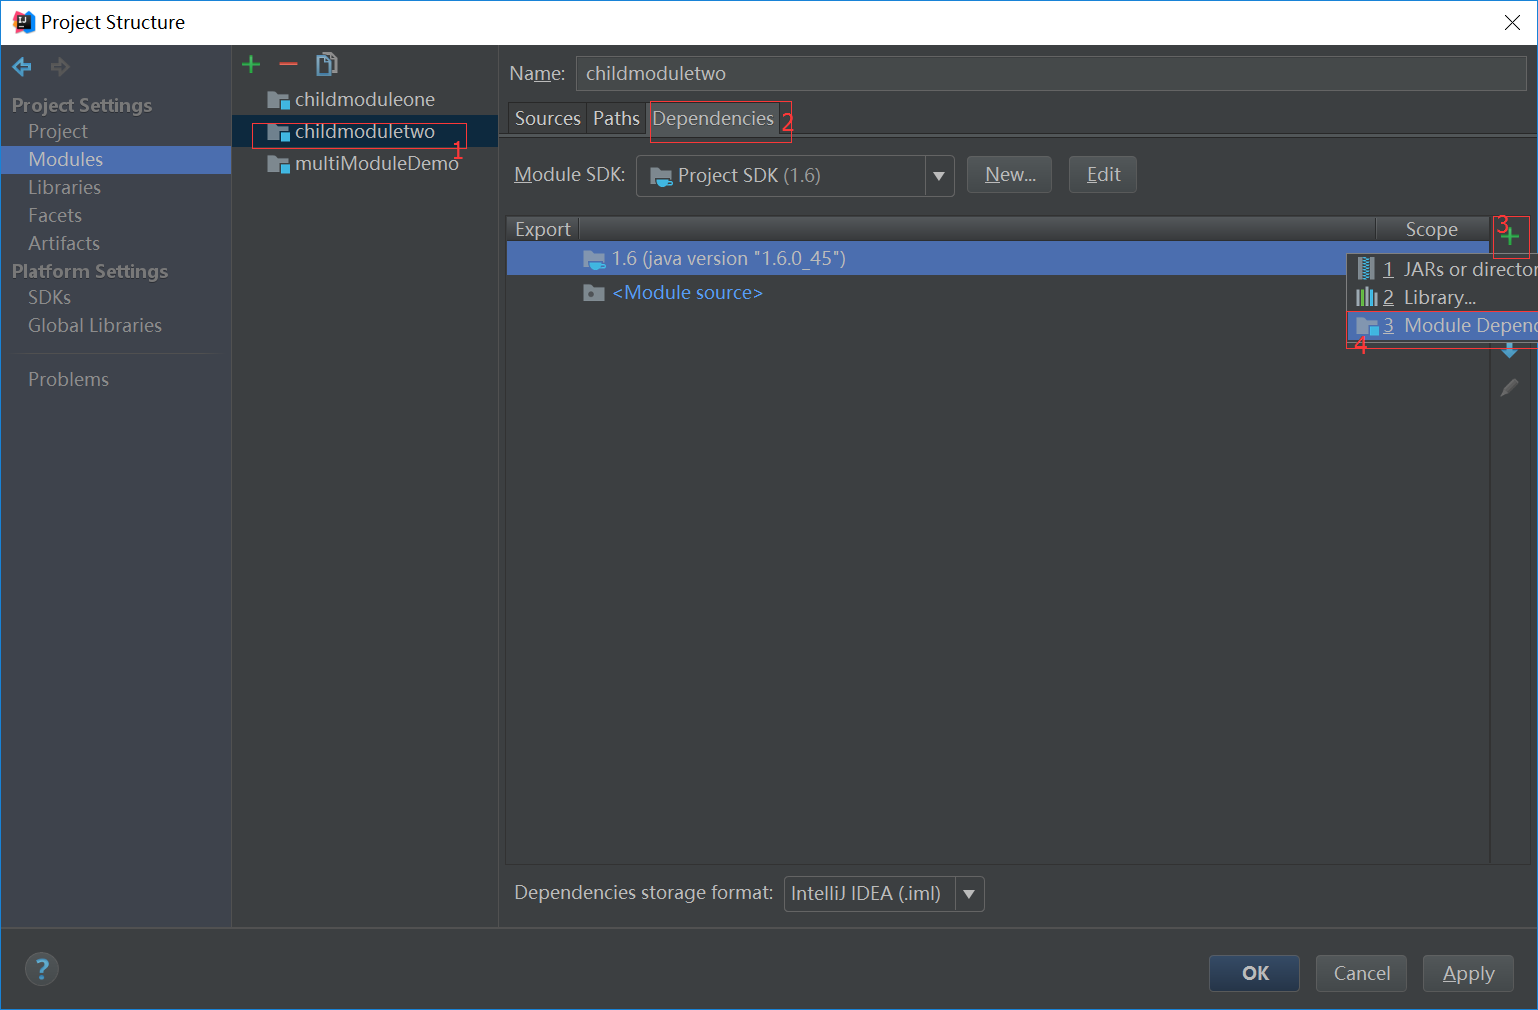
11

12 前面设置后,只是为了再调用依赖代码时静态编译通过,也就是说仅仅是在写代码时,childmoduletwo调用childmoduleone不提示错误,实际运行时会出错的。
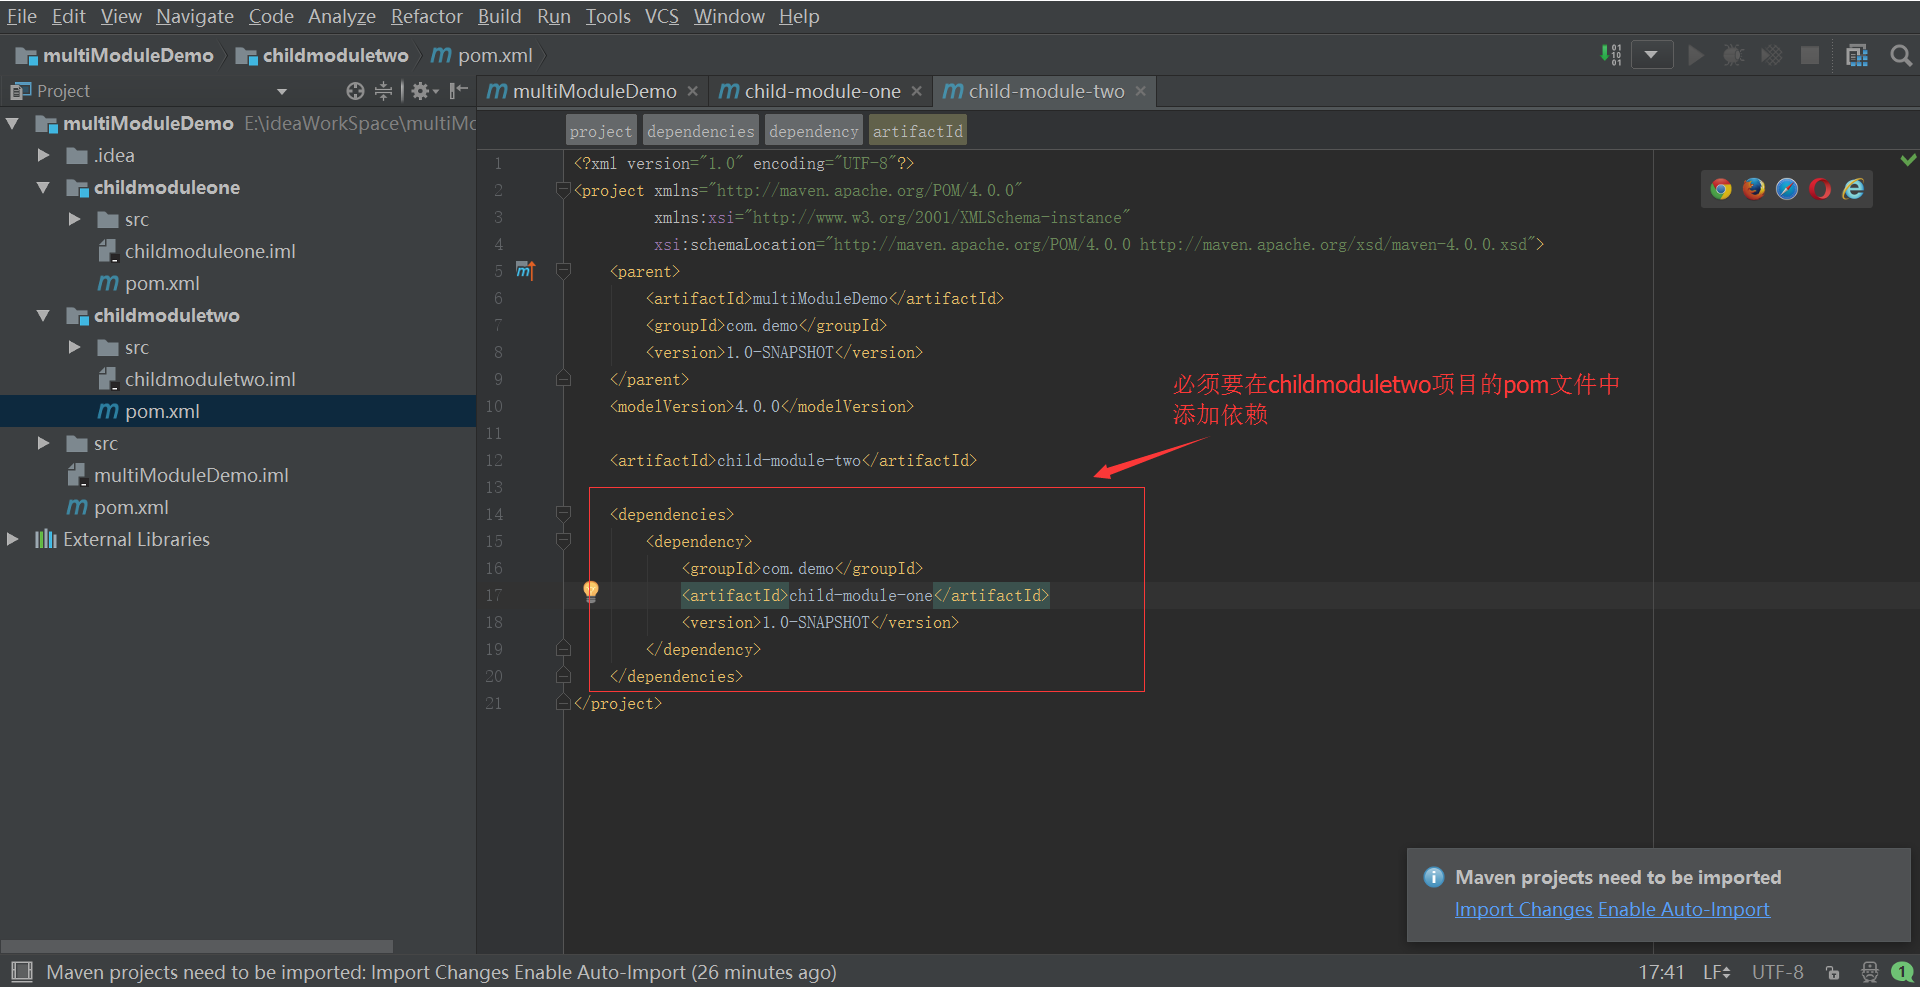
所以还需要在pom文件设置依赖。
13 childmoduleone中创建一个类One,写一个个测试方法,后面会被childmoduletwo调用

14 childmoduletwo中写一个类Two,用来调用One中的sayHello方法
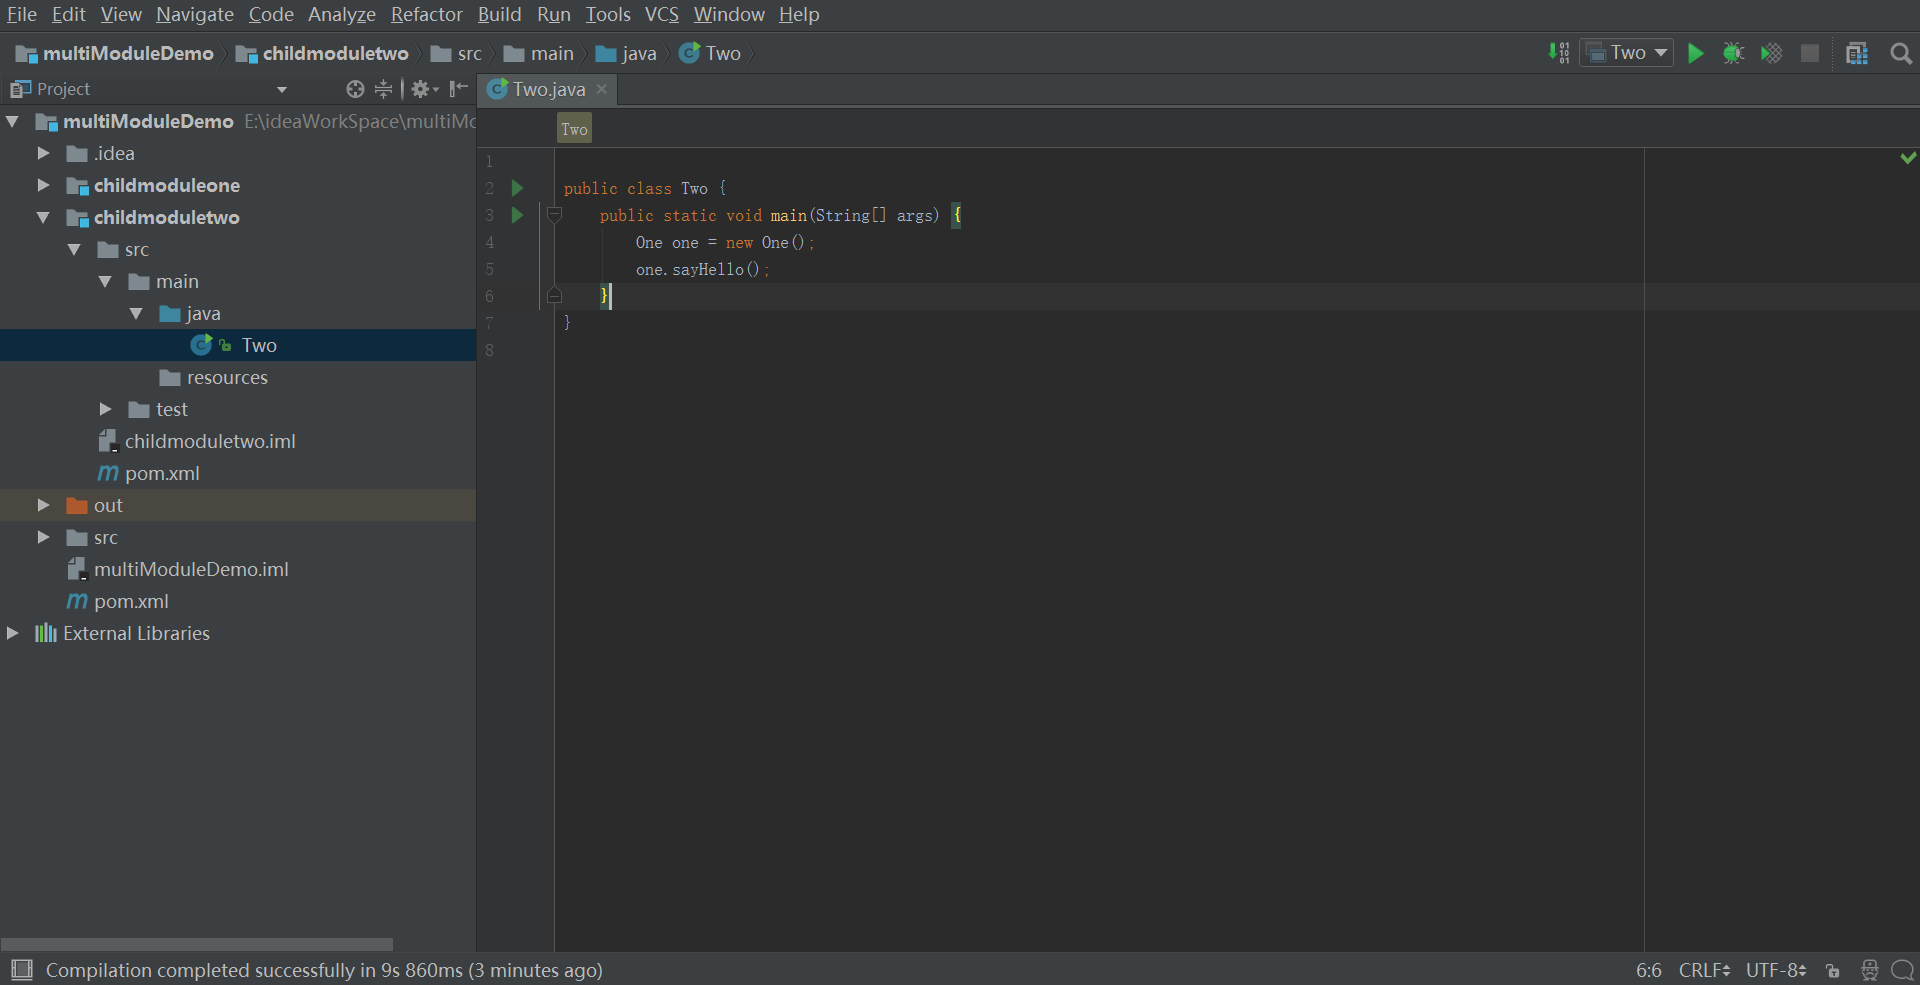
15 运行Two

ps: 现在很多大型项目都是划分多个模块的,有的模块之间还有依赖关系,本文创建了一个有多个模块的maven项目,并且在模块之间添加了依赖关系,最后简单测试了依赖模块的调用。
