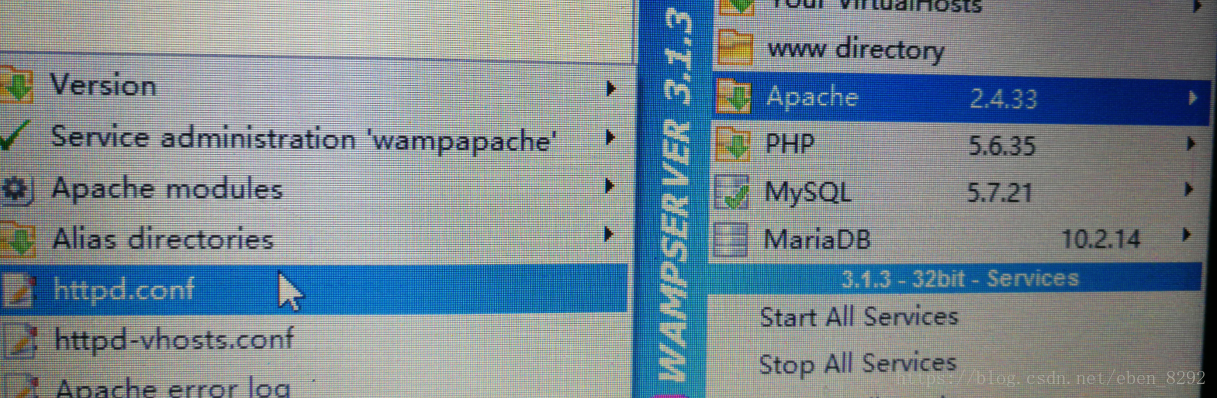
Apache配置文件可以通过以下方式打开:
# DocumentRoot: The directory out of which you will serve your
# documents. By default, all requests are taken from this directory, but
# symbolic links and aliases may be used to point to other locations.
#
DocumentRoot "C:/wamp/www/"
这块是Apache要执行的文件,可以修改到自己指定的目录下。
比如,我要修改成:
DocumentRoot "D:/demo/"
再找下面代码块
<Directory "D:/wamp/www/">
#code
</Directory>
如果修改了DocumentRoot后面的路径,相应的要把<Directory "D:/wamp/www/">路径改成一致的。
<Directory "D:/demo/">
#code
</Directory>
重启。
修改后,wamp控制面板www根目录还没有指向我们自己指定的根目录。所以我们要修改wamp配置文件。
打开D:\wamp\wampmanager.ini
再找下面代码块:
[Menu.Left]
……
……
Type: item; Caption: "phpMyAdmin"; Action: run; FileName: "C:\Windows\explorer.exe"; Parameters: "http://localhost/phpmyadmin/"; Glyph: 5
Type: item; Caption: "www 目录"; Action: shellexecute; FileName: "D:/wamp/www"; Glyph: 2
Type: submenu; Caption: "Apache"; SubMenu: apacheMenu; Glyph: 3
…………
把红色区域改成:
Type: item; Caption: "demo 目录"; Action: shellexecute; FileName: "D:/demo"; Glyph: 2
再打开D:\wamp\wampmanager.tpl
再找下面代码块:
[Menu.Left]
…………
Type: item; Caption: "${w_phpmyadmin}"; Action: run; FileName: "${c_navigator}"; Parameters: "http://localhost/phpmyadmin/"; Glyph: 5
Type: item; Caption: "${w_wwwDirectory}"; Action: shellexecute; FileName: "${wwwDir}"; Glyph: 2
Type: submenu; Caption: "Apache"; SubMenu: apacheMenu; Glyph: 3
……
把红色区域改成:
Type: item; Caption: "demo 目录"; Action: shellexecute; FileName: "D:/demo"; Glyph: 2
wamp3.0.6版本
在自定义网站根目录时,除了要修改httpd.conf外,还要修改httpd.vhosts.conf
httpd-vhosts.conf文件,将DocumentRoot值改为网站根目录(即和httpd.conf里的directory值相同),并将ServerName改为你的域名/ip即可

另外,有些时候在wamp托盘图标里打开httpd.conf或者其他文件的快捷方式,会提示找不到对应文件,这可能是安装时默认的notepad.exe的路径不对,需要更改wamp根目录下的wampmanager.conf文件里编辑器的路径
重启wamp。搞定!
