前言:
在一个网站中肯定会有大量的表单提交,但是如果每个表单都需要我们自己全部生写的话,就比较难受了,所以Django中的modelform就很有意思了。
Django中的form:木有对比就没有伤害。所以要知道Django的modelform的好,就要从普通的form来对比。
form:
先创建一个form_test项目:
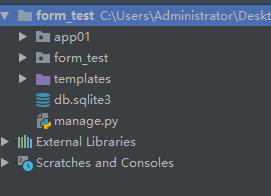
项目里有一个名字为app01 的app:在表里设计一些简单的表:
app01/models.py:
from django.db import models


# Create your models here.


# 书籍表
class Book(models.Model):
    title = models.CharField(max_length=32)  # 书名
    price = models.DecimalField(max_digits=8, decimal_places=2)  # 价格,111111.22
    date = models.DateField()  # 日期
    publishs = models.ForeignKey(to='Publish')  # 外键关联出版社
    authors = models.ManyToManyField(to='Author')  # 多对多关联作者

    def __str__(self): return self.title


# 出版社表
class Publish(models.Model):
    name = models.CharField(max_length=32)  # 出版社名字

    def __str__(self): return self.name


# 作者表
class Author(models.Model):
    name = models.CharField(max_length=32)  # 作者名字

    def __str__(self): return self.name
使用makemigrations和migrate创建数据表,就使用sql3表,想要使用mysql也可以使用。
创建完表,再创建一个超级管理员用户吧。createspueruser创建一个名为admin,密为admin1234的超级用户。
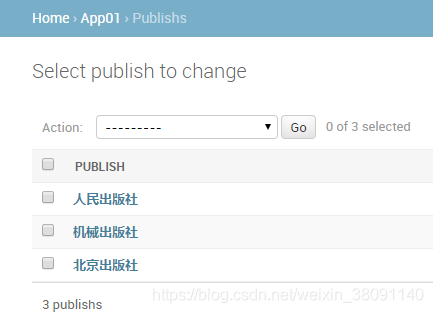
publish添加几个出版社:
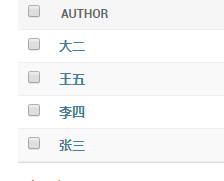
Author添加几个作者:
Book最后添加几本书籍:
做完这些工作后就可以开始正文了:
先添加一个查看页面app01/views.py:
from django.shortcuts import render, redirect

from .models import *


# Create your views here.

# 查看
def books(request):
    book_obj = Book.objects.all()
    return render(request, 'book.html', locals())
templates/book.html:
<!DOCTYPE html>
<html lang="en">
<head>
    <meta charset="UTF-8">
    <title>book</title>
</head>
<body>
<p><a href="/add/book/">添加书籍</a></p>
<table border="1">
    <tr>
        <th>序号</th>
        <th>书名</th>
        <th>出版时间</th>
        <th>价格</th>
        <th>出版社</th>
        <th>作者</th>
        <th>操作</th>
    </tr>
    {% for book in book_obj %}
        <tr>
            <td>{{ forloop.counter }}</td>
            <td>{{ book.title }}</td>
            <td>{{ book.date|date:'Y-m-d' }}</td>
            <td>{{ book.price }}</td>
            <td>{{ book.publishs.name }}</td>
            <td>
                {% for author in book.authors.all %}
                    {{ author }}、
                {% endfor %}
            </td>


            <td><a href="/edit/book/{{ book.pk }}">编辑</a></td>
        </tr>
    {% endfor %}
</table>
</body>
</html>
form_test/urls.py:
url(r'^book/$', books),
效果图:
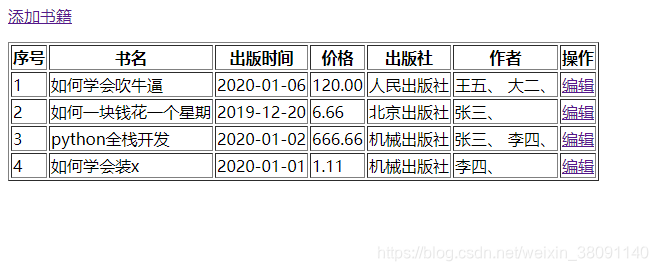
这里我没有添加样式啊,看不过眼的自己动手啊!!!
请注意我们的重点在于表单啊!!!
扫描二维码关注公众号,回复:
9305725 查看本文章

来吧,上面不是有添加和编辑吗!
先来一个添加吧!
app01/views.py:
# 增加
def add_book(request):

    # 提交数据走这里
    if request.method == 'POST':
        # 获取前台传递过来的数据
        title = request.POST.get('title')
        price = request.POST.get('price')
        date = request.POST.get('date')
        publish_id = request.POST.get('publish_id')
        author_id_list = request.POST.getlist('author_id_list')
        # 写入表
        book_obj = Book.objects.create(title=title, price=price, date=date, publishs_id=publish_id)
        # 对关联的作者信息进行写入
        book_obj.authors.add(*author_id_list)
        return redirect('/book/')
    # 出版社从数据库拿出去提供选择
    publish_obj = Publish.objects.all()
    # 作者亦是要从数据库拿出
    author_obj = Author.objects.all()
    return render(request, 'add_book.html', locals())
templates/add_book.html:
<!DOCTYPE html>
<html lang="en">
<head>
    <meta charset="UTF-8">
    <title>添加书籍</title>
</head>
<body>
<form action="" method="post">
    {% csrf_token %}
    <p>书名:<input type="text" name="title"></p>
    <p>价格:<input type="text" name="price"></p>
    <p>日期:<input type="date" name="date"></p>
    <p>出版社:<select name="publish_id" id="">
        {% for publish in publish_obj %}
           <option value="{{ publish.pk }}">{{ publish.name }}</option>
        {% endfor %}

    </select>
    </p>
    <p>作者:
        <select name="author_id_list" multiple>
        {% for author in author_obj %}
            <option value="{{ author.pk  }}">{{ author.name }}</option>
        {% endfor %}
    </select>
    </p>
    <input type="submit" value="提交">
</form>
</body>
</html>
form_test/urls.py:
url(r'^add/book/$', add_book),
效果图:

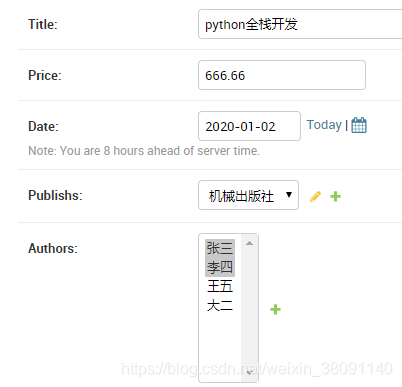
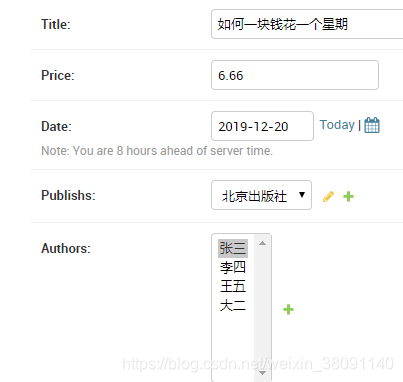
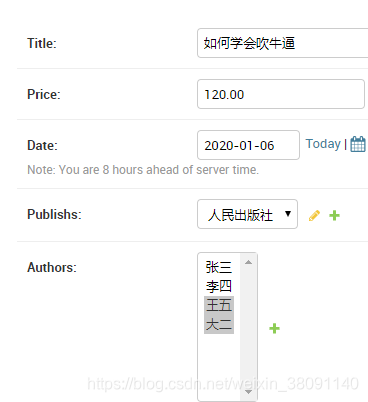
这就是添加,再来编辑:
app01/views.py:
def edit_book(request, id):
    # 提交表单数据
    if request.method == 'POST':
        # 获取前台传递过来的数据
        title = request.POST.get('title')
        price = request.POST.get('price')
        date = request.POST.get('date')
        publish_id = request.POST.get('publish_id')
        author_id_list = request.POST.getlist('author_id_list')
        # 对表中已存在数据进行修改
        Book.objects.filter(pk=id).update(title=title, price=price, date=date, publishs_id=publish_id)
        # 获取book表关联的author字段进行修改
        book_obj = Book.objects.filter(pk=id).first()
        book_obj.authors.set(author_id_list)
        return redirect('/book/')

    # 获取当前需要编辑数据
    book_obj = Book.objects.filter(id=id).first()
    publish_obj = Publish.objects.all()
    author_obj = Author.objects.all()
    return render(request, 'edit_book.html', locals())
templates/edit_book.html:
<!DOCTYPE html>
<html lang="en">
<head>
    <meta charset="UTF-8">
    <title>添加书籍</title>
</head>
<body>
<form action="" method="post">
    {% csrf_token %}
    <p>书名:<input type="text" name="title" value="{{ book_obj.title }}"></p>
    <p>价格:<input type="text" name="price" value="{{ book_obj.price }}"></p>
    <p>日期:<input type="date" name="date"value="{{ book_obj.date|date:'Y-m-d' }}"></p>
    <p>出版社:<select name="publish_id" id="">
        {% for publish in publish_obj %}
            {% if publish == book_obj.publishs %}
                <option selected value="{{ publish.pk }}">{{ publish.name }}</option>
            {% else %}
                <option value="{{ publish.pk }}">{{ publish.name }}</option>
            {% endif %}
        {% endfor %}
    </select>
    </p>
    <p>作者:
        <select name="author_id_list" multiple>
        {% for author in author_obj %}
            {% if author in book_obj.authors.all %}
                <option selected value="{{ author.pk  }}">{{ author.name }}</option>
            {% else %}
                <option value="{{ author.pk  }}">{{ author.name }}</option>
            {% endif %}
        {% endfor %}
    </select>
    </p>
    <input type="submit" value="提交">
</form>
</body>
</html>
url:
url(r'^edit/book/(\d+)$', edit_book),
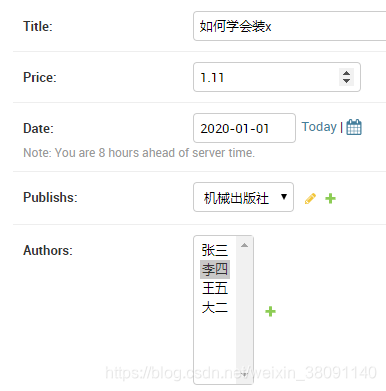
效果图:
这就是普通的form提交了,有没有发现这代码很是繁琐无味,并且前端自己也要动手很是不爽。
正是因为这原因才有了Django的modelform了。下一节介绍。
