寒假第一次周报---------Spring Boot再学习
第一部分
-
创建一个springboot项目:
我一直使用的都是idea这个编译器,可能也是使用习惯啦,idea用起来非常顺手,直接新建一个spring Initializr,直接勾选自己需要的某些依赖,一个springboot项目就搭建起来,非常方便快捷,比用maven去构建省时省力许多。 -
注解@springBootApplication:
这个注解加在项目启动类上的。这个注解是个组合注解由@springbootconfiguration + @EnableAutoConfiguration + @componentScan。 -
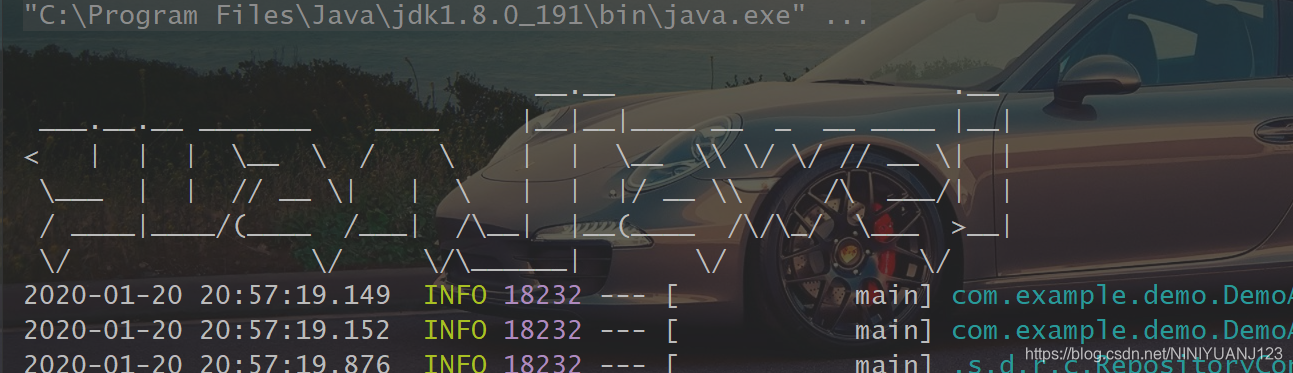
定制banner:
在resources目录下创建一个banner.txt文件,再在文件中写入文本即可,可以将文字写成艺术字体,去以下几个网站得到艺术字体(www.network-science.de/ascii + www.kammerl.de/ascii/AsciiSignature.php + patorjk.com/software/taag)
-
properties和yaml此类配置文件:
springboot项目中application.properties配置文件一共可以出现在如下4个位置
1.项目根目录下得config文件夹中。
2.项目根目录下。
3.classpath下的config文件夹中。
4.classpath下。
并且优先级顺序是从1到4以此。
spring提供了@Value注解以及EnvironmentAware接口来将SpringEnvironment中的数据注入到属性上。
例如: 在application,properties中加入如下数据
'book.name = 数据结构
book.price = 30
可以通过@configurationProperties(prefix = 要加载的配置文件前缀名)即可将配置数据注入到Bean中。如果使用YAML文件,那么可以将数据注入一个集合中。而且springboot采用了一种宽松的规则来进行属性绑定,如果bean中的属性名为authorName,那么配置文件中属性可以是book.aythor_name、book.author-name、book.aythorName或者book.AUTHORNAME。 -
springboot整合视图层技术
现在的企业级应用开发中,前后端分离是趋势,但是视图层技术还是占有一席之地。springboot对视图层技术提供了很好的支持,官方推荐使用的模板是Thymeleaf,我以前一直使用的都是freemarker这个模版引擎。
第二部分
最近几天一直在看springboot去整合web开发方面的知识
web这一部分一直看的就比较少,看的那部分也没有很细致的去了解,最近就打算把这部分好好研究研究。
- json
json是目前主流的前后端数据传输方式,在springboot中对相关的配置非常简化,直接在pom中添加web依赖,这个依赖中默认加入了jackson-databind作为json的处理器,此时不需要添加额外的json处理器就能返回一段json。其他具体操作在示例中都用了很多次了,这里就不多做赘述了(@RestController = @Controller + @ResponseBody)
1.gson是google的一个开源的json解析框架。
如果要使用gson,必须要先除去默认的jackson-databind,再添加gson的依赖就OK啦,但是如果要对日期数据进行格式化 ,需要开发者自定义HttpMessageConverter。
package com.example.demo;

import com.google.gson.Gson;
import com.google.gson.GsonBuilder;
import org.springframework.context.annotation.Bean;
import org.springframework.context.annotation.Configuration;
import org.springframework.http.converter.json.GsonHttpMessageConverter;

import java.lang.reflect.Modifier;

@Configuration
public class GsonConfig {
    @Bean
    GsonHttpMessageConverter gsonHttpMessageConverter(){
        GsonHttpMessageConverter converter = new GsonHttpMessageConverter();
        GsonBuilder builder = new GsonBuilder();
        builder.setDateFormat("yyyy-MM-dd");
        Gson gson = builder.create();
        converter.setGson(gson);
        return converter;
    }
}
- 文件上传
需要写一个HTML界面
<!DOCTYPE html>
<html lang="en">
<head>
    <meta charset="UTF-8">
    <title>Title</title>
</head>
<body>
<form action="/upload" method="post" enctype="multipart/form-data">
    <input type="file" name="uploadFile" value="请选择文件">
    <input type="submit" value="上传">
</form>
</body>
</html>
写一个controller
package com.example.demo;
import org.springframework.web.bind.annotation.PostMapping;
import org.springframework.web.bind.annotation.RestController;
import org.springframework.web.multipart.MultipartFile;
import javax.servlet.http.HttpServletRequest;
import java.io.File;
import java.io.IOException;
import java.text.SimpleDateFormat;
import java.util.Date;
import java.util.UUID;
@RestController
public class FileUploadController {
    SimpleDateFormat sdf = new SimpleDateFormat("yyyy/MM/dd");
    @PostMapping("/upload")
    public String upload(MultipartFile uploadFile, HttpServletRequest req){
        String realPath = req.getSession().getServletContext().getRealPath("/uploadFile");
        String format = sdf.format(new Date());
        File folder = new File(realPath + format);
        if (!folder.isDirectory()){
            folder.mkdirs();
        }
        String oldName = uploadFile.getOriginalFilename();
        String newName = UUID.randomUUID().toString() + oldName.substring(oldName.lastIndexOf("."),oldName.length());
        try {
            uploadFile.transferTo(new File(folder,newName));
            String filePath = req.getScheme() + "://" + req.getServerName() + ":" + req.getServerPort() + "/uploadFile" + format + newName;
            return filePath;
        } catch (IOException e) {
            e.printStackTrace();
        }
        return "上传失败!";
    }
}
16~22行代码表示规划上传文件的保存路径项目运行目录下的uploadFile文件夹,并在文件夹中通过对所有上传文件归类保存。
23~25行代码表示给上传的文件重命名,这是为了避免文件重名。
26行是文件保存操作。
27~30行是生成上传文件的路径,并在访问路径返回。
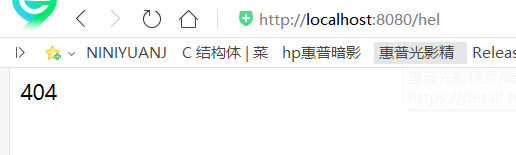
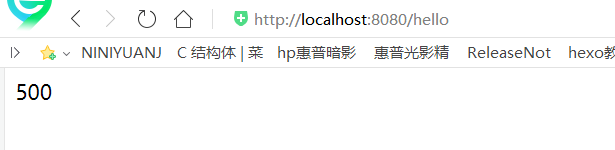
- 自定义错误页
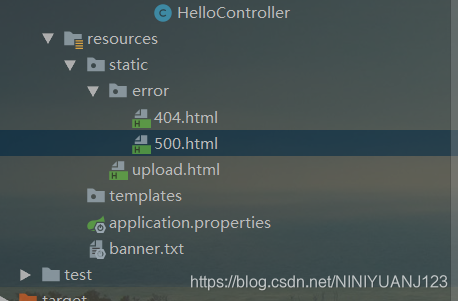
其实想定义错误页面其实很简单,提供4xx和5xx页面即可。如果开发者不需要向用户展示详细的错误信息,那么可以把错误信息定义成静态页面,直接在resource/static目录下创建error目录,然后在error目录下创建错误展示页面。错误展示页面的命名规则有两种:一种是4xx.html;另外一种是直接响应码命名文件,例如404.html,405.html,500.html,第二种划分更细,当出错时,不同错误会展示不同的错误页面。
编写一个controller测试一下
package com.example.demo;

import org.springframework.web.bind.annotation.GetMapping;
import org.springframework.web.bind.annotation.RestController;

@RestController
public class HelloController {
    @GetMapping("/hello")
    public String hello(){
        int i = 1/0;
        return "hello";
    }
}