版权声明:本文为 小异常 原创文章,非商用自由转载-保持署名-注明出处,谢谢!
本文网址:https://blog.csdn.net/sun8112133/article/details/103290289
文章目录
本篇主要介绍一款主流的 模板引擎 —— Thymeleaf,本篇只以简单的小例子对 Thymeleaf 模板引擎作简单的介绍,并不主要讲解其使用。
在过去开发 Web 项目时,我们会使用 JSP 作为动态资源来开发 Web 项目。但 Spring Boot 默认是不支持 JSP 的,因为它更推荐使用 模板引擎 来开发动态资源,而 Thymeleaf 是 Spring Boot 重点推荐的 模板引擎 工具。Spring Boot 将网页分为了 模板 和 数据 两个部分,再通过 模板引擎 将这两个部分结合到一起,最终构成了网页。
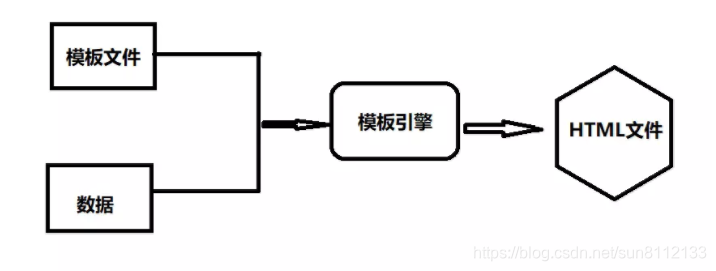
我们简单说一下什么是 模板引擎 吧,它就是为了将 用户界面 与 业务数据 这两者进行结合,如下图所示:
一、引入Thymeleaf
如果在新建 Spring Boot 项目时没有选择 Thymeleaf 这个场景,而后续想要在项目中引入,那就需要知道 Thymeleaf 这个场景的 Maven 依赖。我们可以通过官网进行查询,查询方式如下:
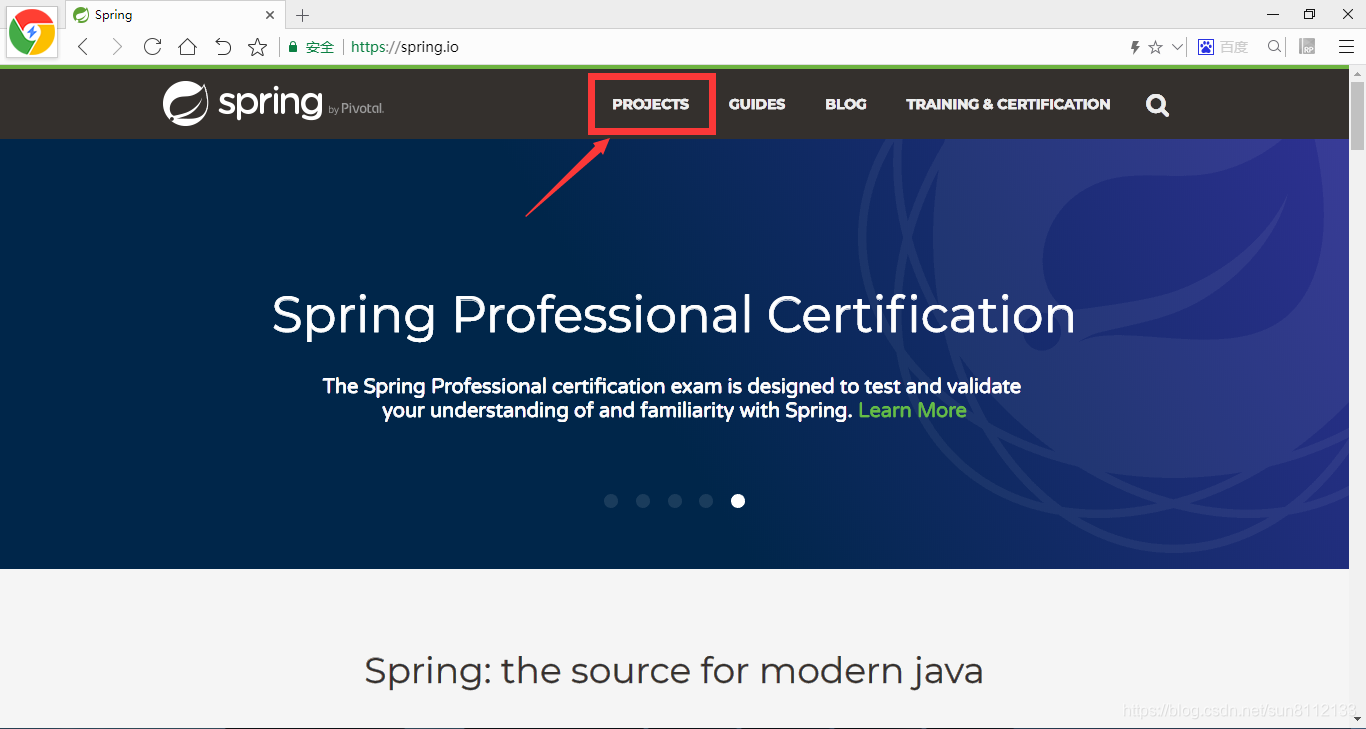
1、先进入Spring官网
Spring官网: https://spring.io
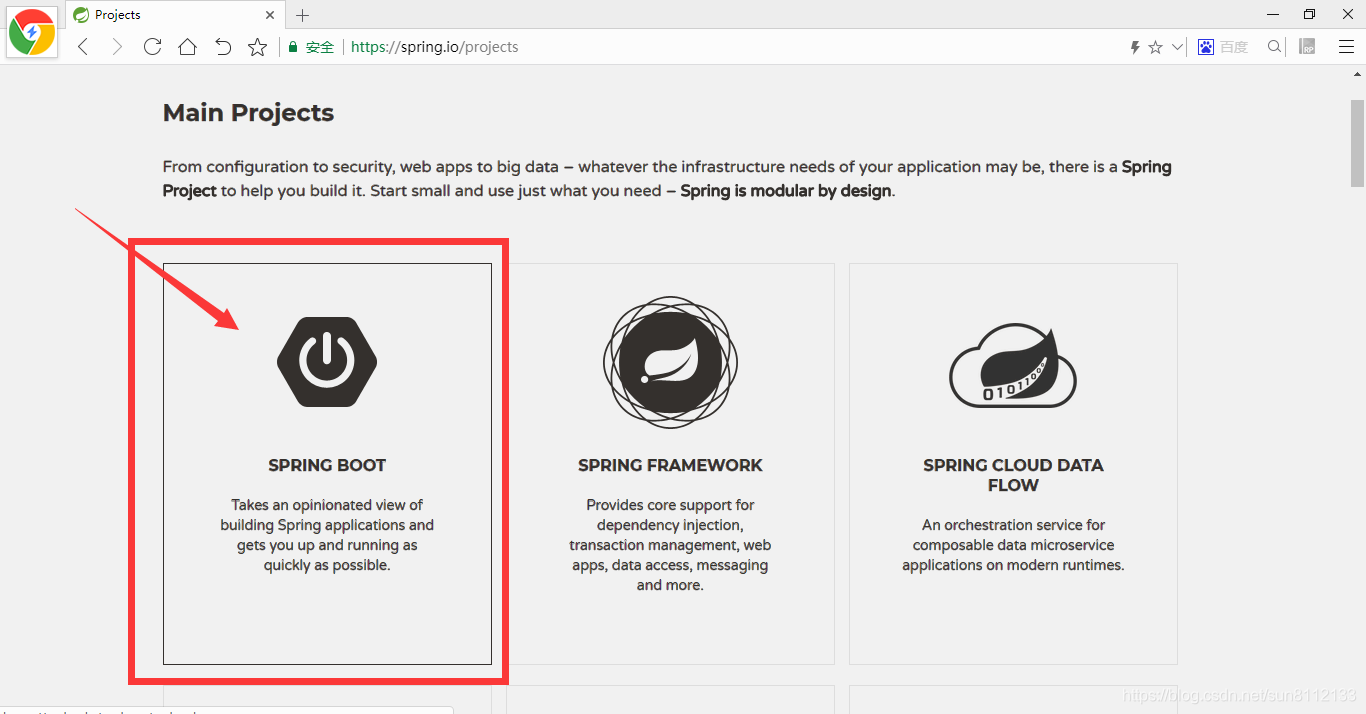
2、进入 Spring Boot
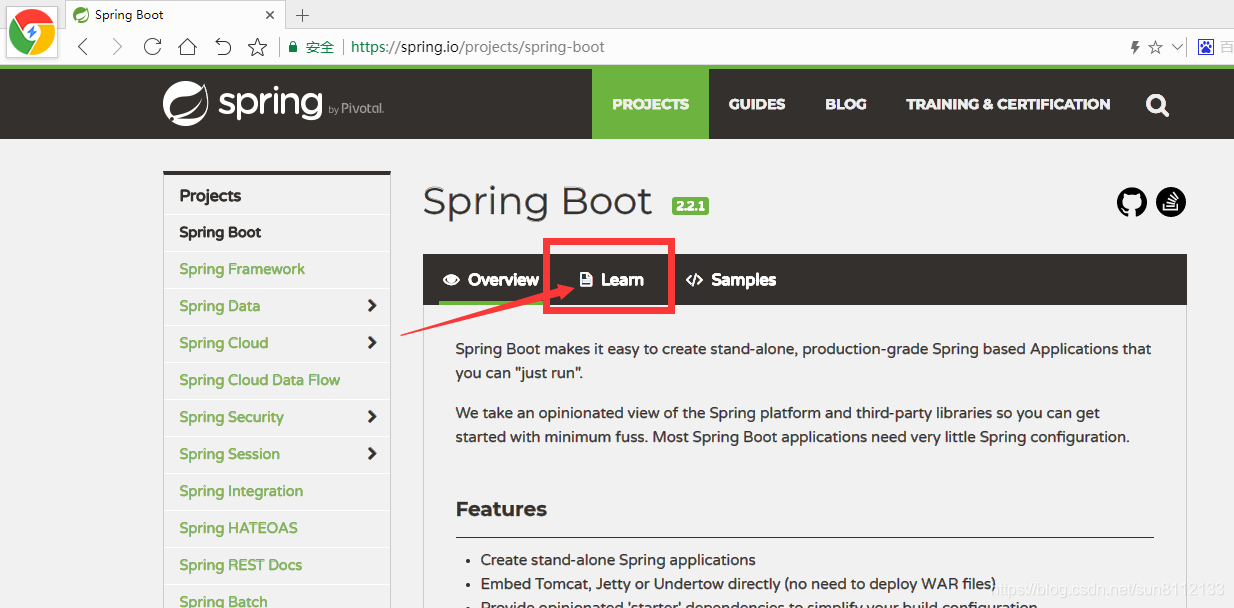
3、打开对应版本的白皮书(参考说明)
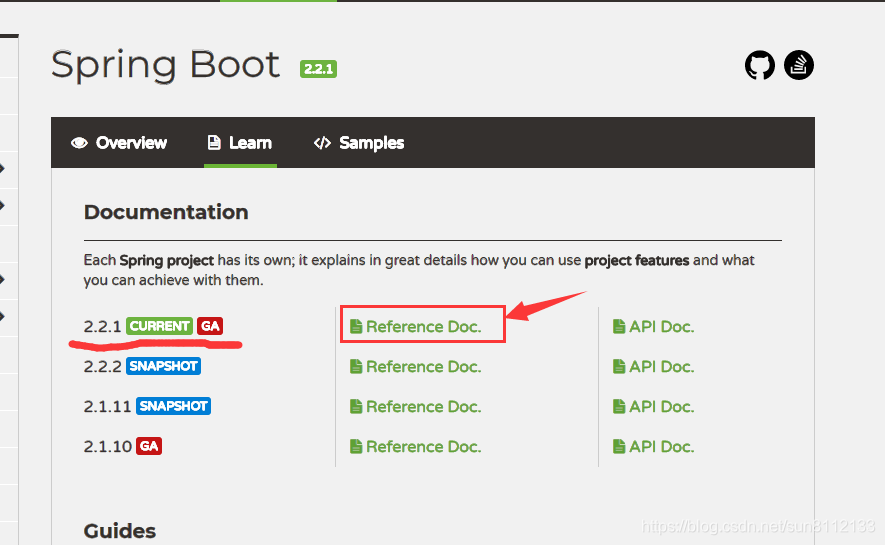
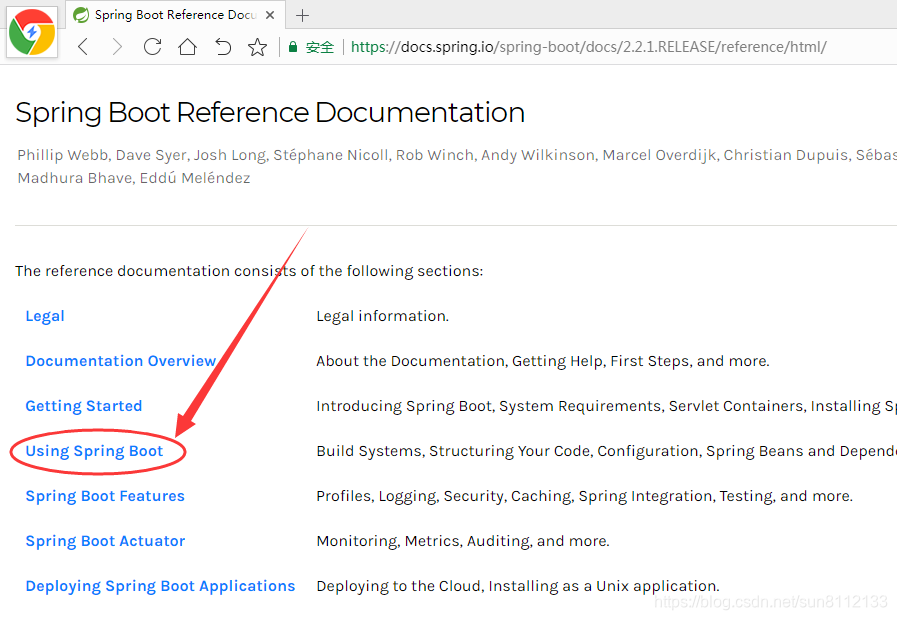
4、找到Using Spring Boot这一章内容
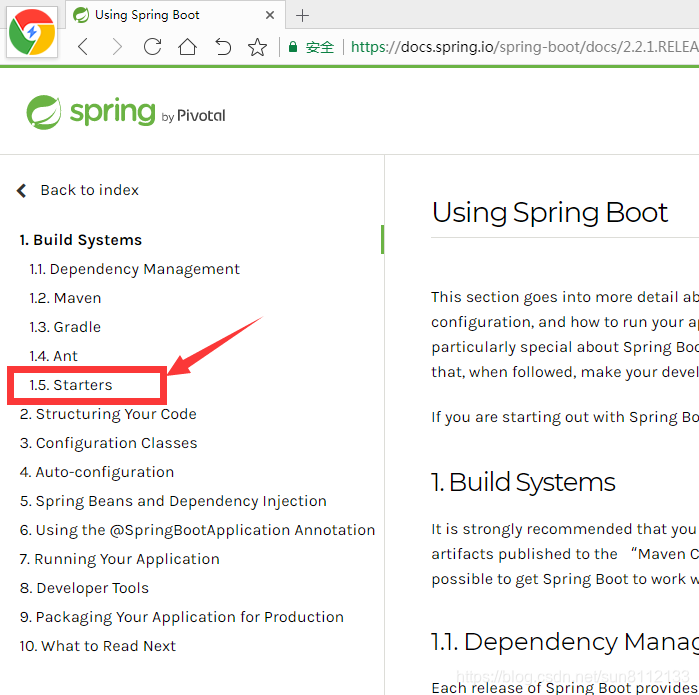
5、选择场景
6、搜索thymeleaf关键字
使用
Ctrl + F进行全局搜索关键字:thymeleaf
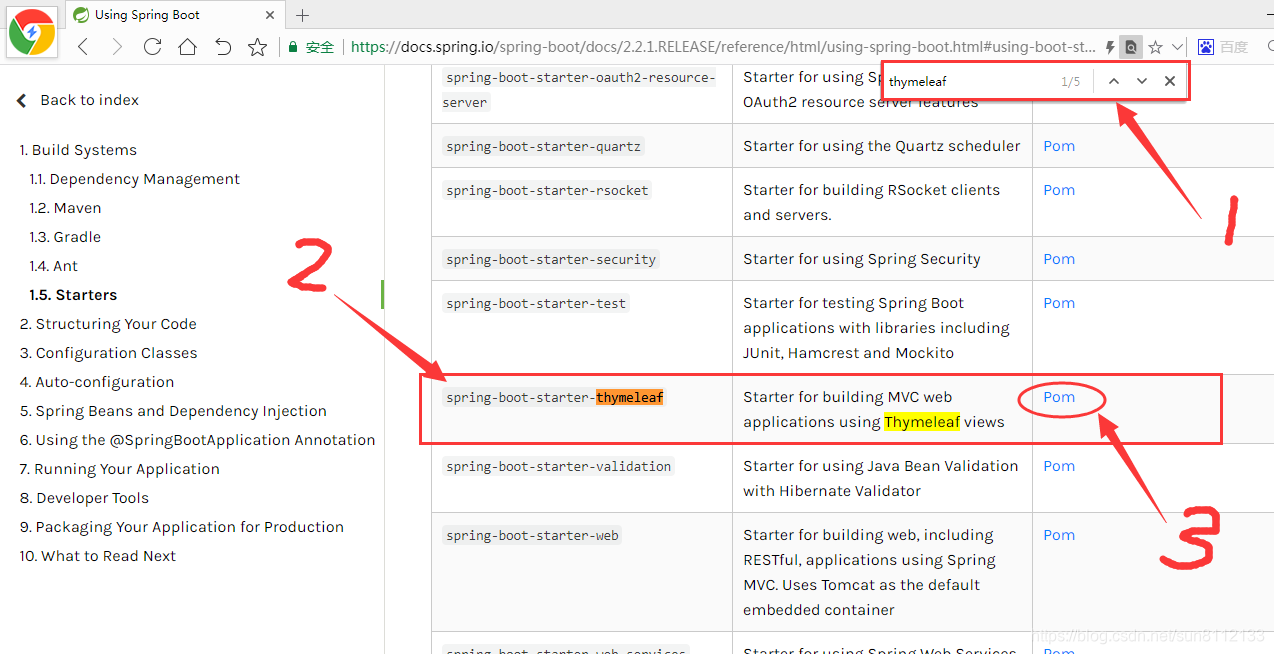
7、进入对应的Pom
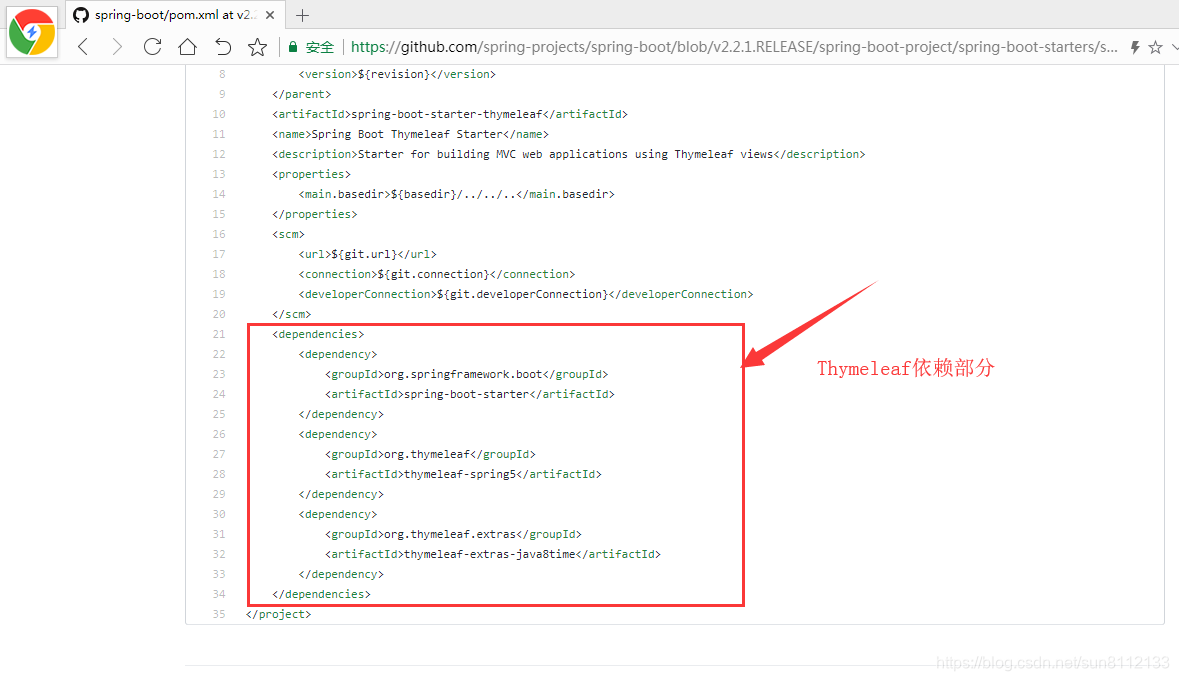
8、将依赖部分进行拷贝,并粘贴到项目的 pom.xml 文件中
<!-- 引入thymeleaf依赖 -->
<dependency>
    <groupId>org.springframework.boot</groupId>
    <artifactId>spring-boot-starter</artifactId>
</dependency>
<dependency>
    <groupId>org.thymeleaf</groupId>
    <artifactId>thymeleaf-spring5</artifactId>
</dependency>
<dependency>
    <groupId>org.thymeleaf.extras</groupId>
    <artifactId>thymeleaf-extras-java8time</artifactId>
</dependency>
二、Thymeleaf基本使用
Thymeleaf官网: https://www.thymeleaf.org
我们将 Thymeleaf 引入到了项目中,我们必然要知道这个模板文件应该怎么去写,写在哪里?
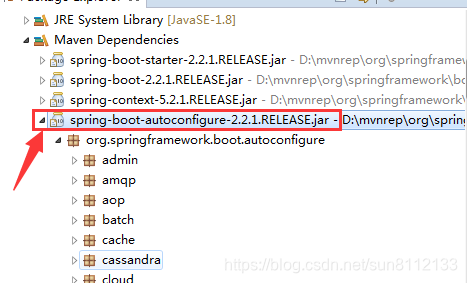
前面几章已经介绍过了,Spring Boot 可以将市场上大部分主流的 Java Web 技术进行整合,Thymeleaf 也不例外。我们想要了解一款工具的配置,只需要找到 XxAutoCongifutation类 和 XxProperties类 即可。
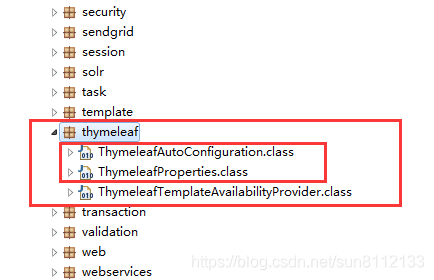
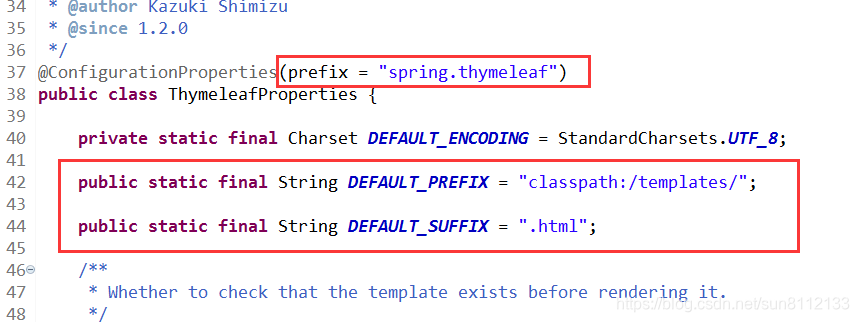
通过 ThymeleafProperties 源码得知:使用 Thymeleaf 只需要将 模板文件 放入目录:"classpath:/templates/" 中,并且该模板文件的后缀名是 “.html” 即可。
注意: 在以前传统的 Web 项目中,静态资源修改后,是不需要重启的;但是在 Spring Boot 项目中,资源一旦修改,必须重启程序才能生效。
三、Thymeleaf 小例子
1、小例子
先来一个小例子让大家体验一下。
-
result.html
这个文件是模板文件,位于 “classpath:/templates/” 目录下。
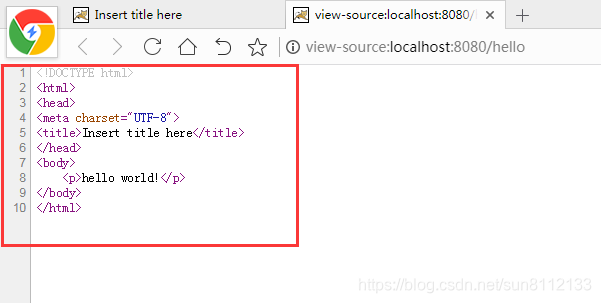
<!DOCTYPE html> <html xmlns:th="http://www.thymeleaf.org"> <head> <meta charset="UTF-8"> <title>Insert title here</title> </head> <body> <p th:text="${hello}">Welcome to Thymeleaf!</p> </body> </html> -
Controller.java
@Controller public class BootController { @RequestMapping("/hello") public String hello(Map<String, String> map) { map.put("hello", "hello world!"); // 在 request 域中放入值 return "result"; } } -
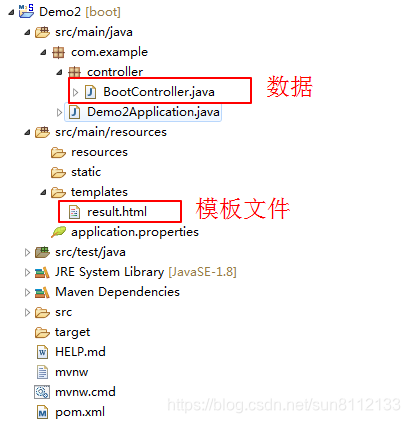
目录结构
-
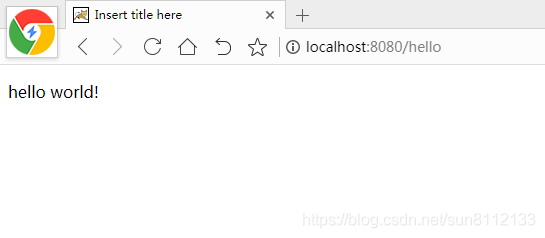
浏览器页面
-
生成的源代码
2、小例子讲解
上面这个小例子中,html文件 就相当于 模板文件,Controller类 相当于 数据。
<p th:text="${hello}">Welcome to Thymeleaf!</p>
以上这段代码,先从 ${hello} 中取值,如果有值,则直接显示值。如果没有值,则会显示 “Welcome to Thymeleaf!” 。而 th 就是替换原有 html 的值(“Welcome to Thymeleaf!”),而数据是从 Controller类 中获取的。
语法格式:
th:html属性名=值
我们还可以这样写:
-
result.html
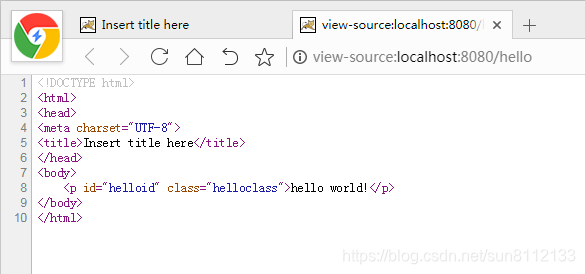
<p id="pid" class="pclass" th:id="${id}" th:class="${class}" th:text="${hello}">Welcome to Thymeleaf!</p> -
Controller.java
@Controller public class BootController { @RequestMapping("/hello") public String hello(Map<String, String> map) { map.put("hello", "hello world!"); map.put("id", "helloid"); map.put("class", "helloclass"); return "result"; } } -
生成的源代码
其实在 Thymeleaf 中,获取文本值还有另外一种写法 ——
th:utext。
两者的区别是:
th:text:获取文本值(转义,会解析HTML标签等);th:utext:获取文本值(不转义,会原样输出)。
3、遍历
在 Thymeleaf 中遍历使用的属性是:
th:each。请参考下列实例:
-
result.html
<div th:each="prod : ${prods}"> <h4 th:text="${prod.name}">Onions</h4> <h4 th:text="${prod.price}">2.41</h4> </div> -
Product.java
public class Product { private String name; private double price; // ... get() & set() ... } -
Controller.java
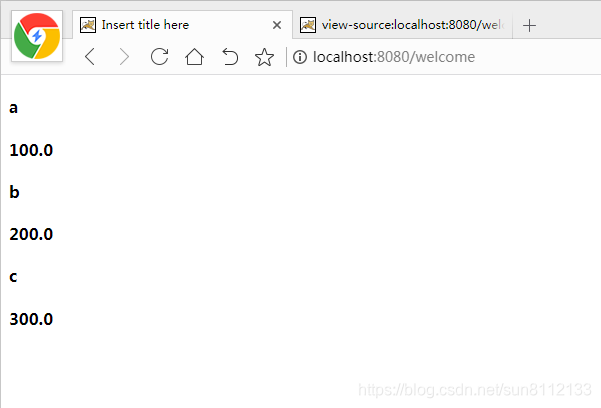
@RequestMapping("/welcome")
public String welcome(Map<String,Object> map) {
    List<Product> prods = new ArrayList<Product>();
    prods.add(new Product("a",100));
    prods.add(new Product("b",200));
    prods.add(new Product("c",300));
    map.put("prods", prods);   // 在 request 域中放入值
    return "result";
}
-
浏览器页面
-
生成的源代码
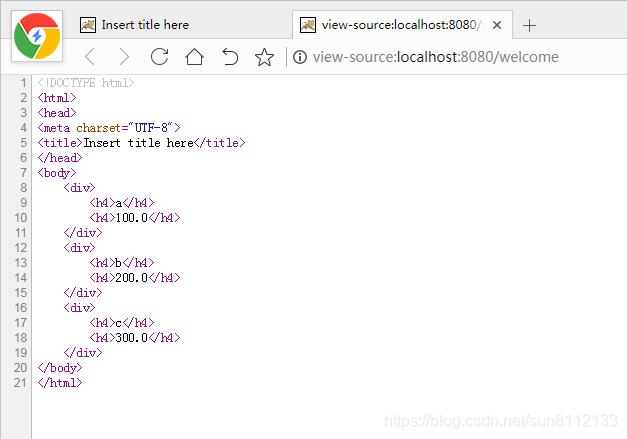
注: 其中 th:each="prod : ${prods},${prods} 表示是一个集合,prod 表示每一项。
