ide:pycharm community 2019.3.1
python版本:3.7.6
先新建一个项目,取名flask_demo1
如果没有使用虚拟环境,可以忽略venv目录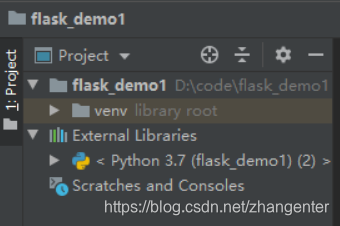
安装flask
pip install flask
第一个程序文件
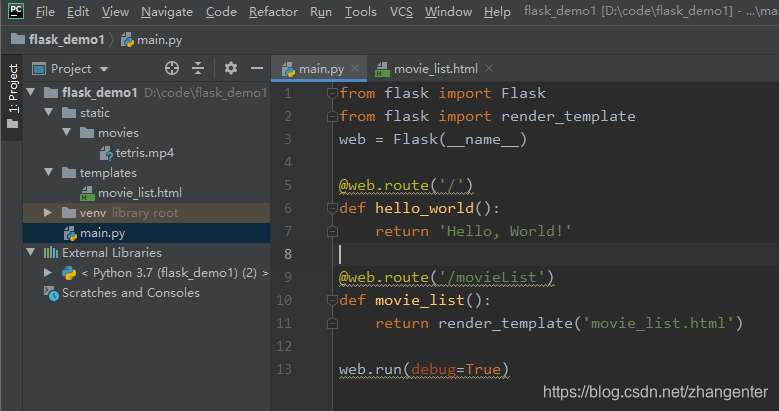
新建一个py文件,比如叫main.py,代码如下
from flask import Flask
web = Flask(__name__)

@web.route('/')
def hello_world():
    return 'Hello, World!'

web.run(debug=True)
在pycharm里已经可以运行(Shift+F10)了
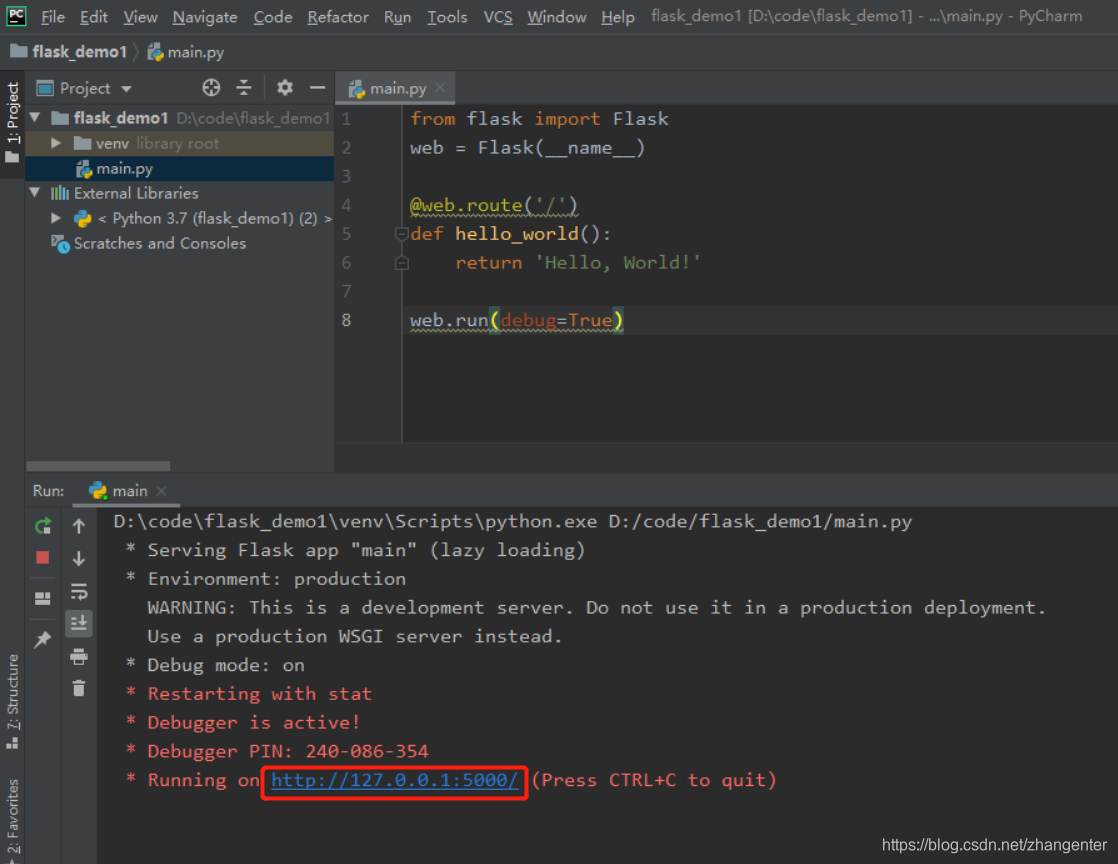
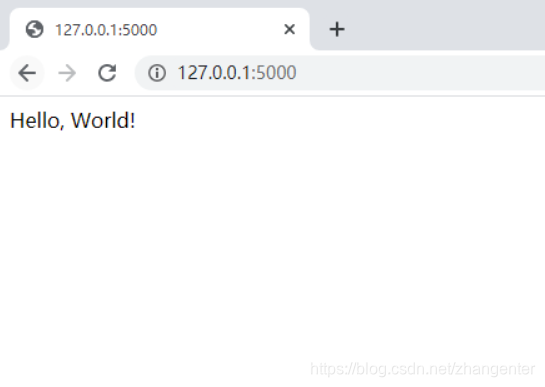
看到网站运行在5000端口,打开浏览器,输入http://127.0.0.1:5000 已经看到了页面
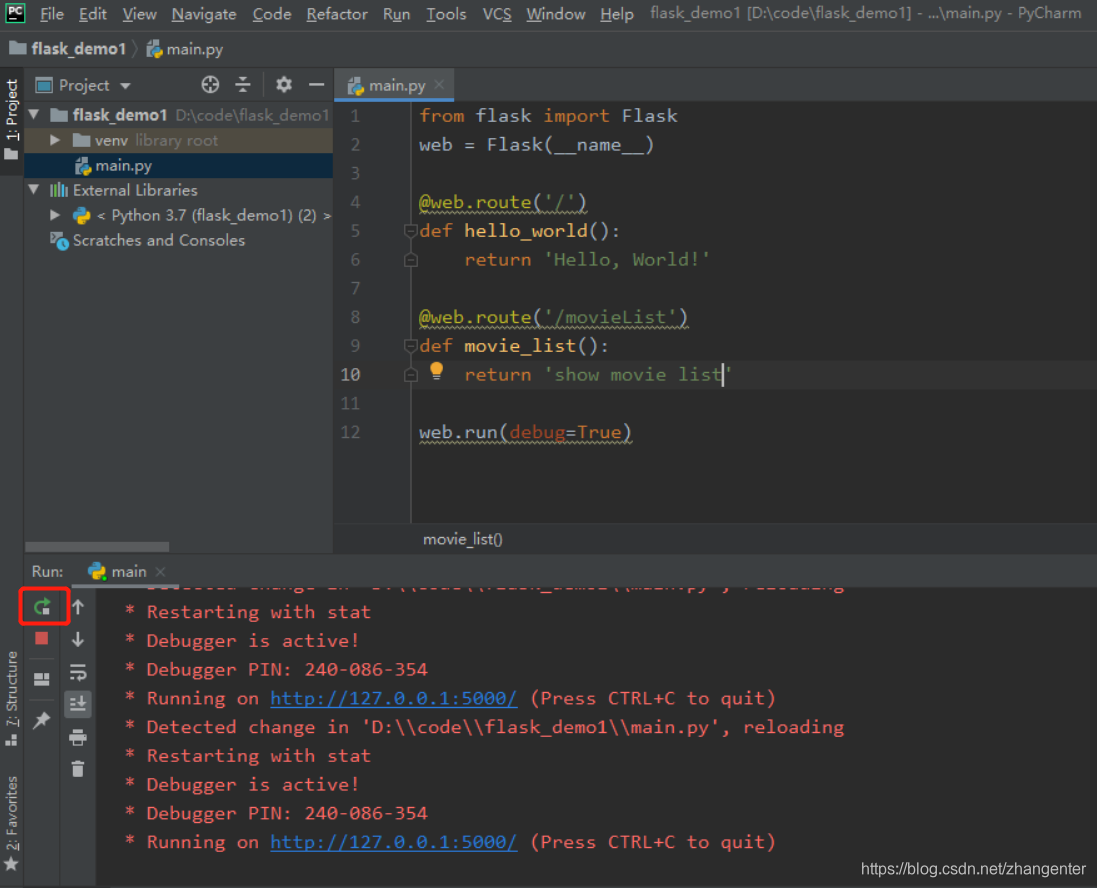
我们在main.py添加一个movieList路由,代码变成
from flask import Flask
web = Flask(__name__)
@web.route('/')
def hello_world():
return 'Hello, World!'
@web.route('/movieList')
def movie_list():
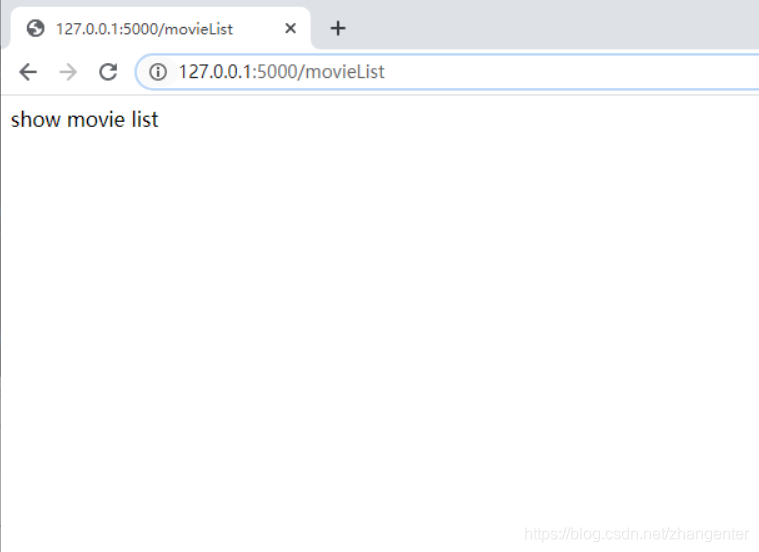
return 'show movie list'
web.run(debug=True)
一般情况下在pycharm里ctrl+s保存这个main.py文件后,服务会自动重启,如果没有的话就执行Ctrl+F5或点下面的重启按钮进行服务重启
这时候去浏览器访问http://127.0.0.1:5000/movieList 可以看到这个新路由是可以使用的
我们修改下函数movie_list,让它返回一个html
from flask import Flask
web = Flask(__name__)

@web.route('/')
def hello_world():
    return 'Hello, World!'

@web.route('/movieList')
def movie_list():
    return '''
    <!DOCTYPE html>
<html>
<body>
<video width="400" height="300" controls="controls">
  <source src="my_movie.mp4" type="video/mp4" />
</video>
</body>
</html>
    '''

web.run(debug=True)
保存代码让服务重启后,我们去浏览器刷新下页面,可以看到一个视频播放器了
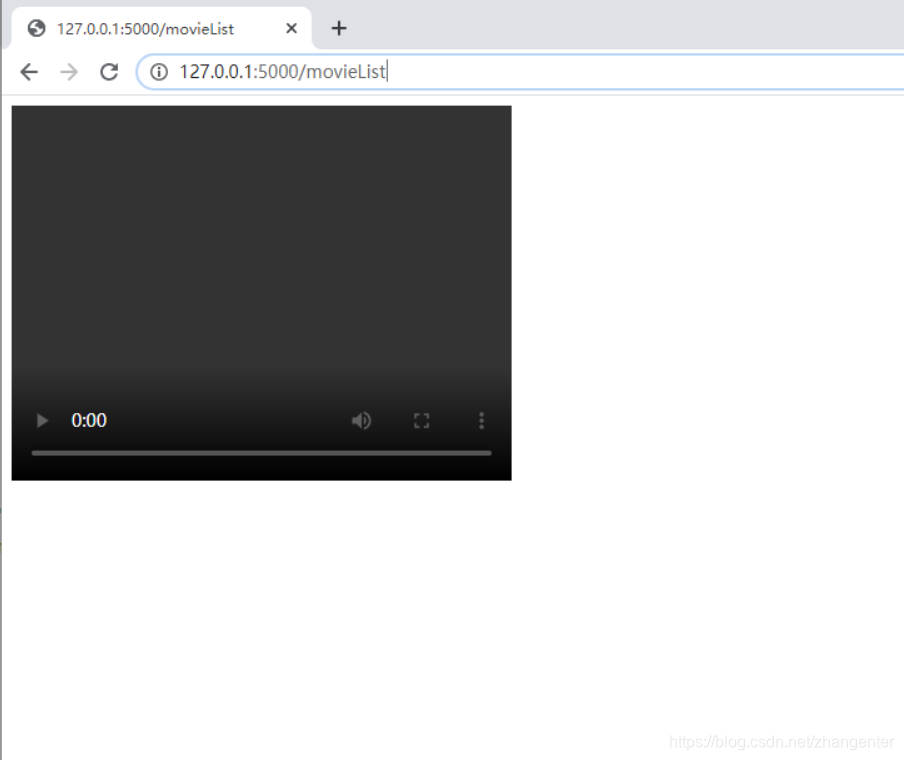
当然,因为现在我们的项目里没有视频文件,所以目前也是无法播放的。
在项目下建一个static目录,在static里再建一个movies目录,在里面放一个mp4文件,我这里放了一个tetris.mp4,同时movie_list里也要做对应的修改,指明使用的视频文件static/movie/tetris.mp4
几个示例的mp4文件已经上传百度网盘,如需可自行下载(链接: https://pan.baidu.com/s/1VxKtHN_24gzx7DcwKMPg_A 提取码: tbiu)
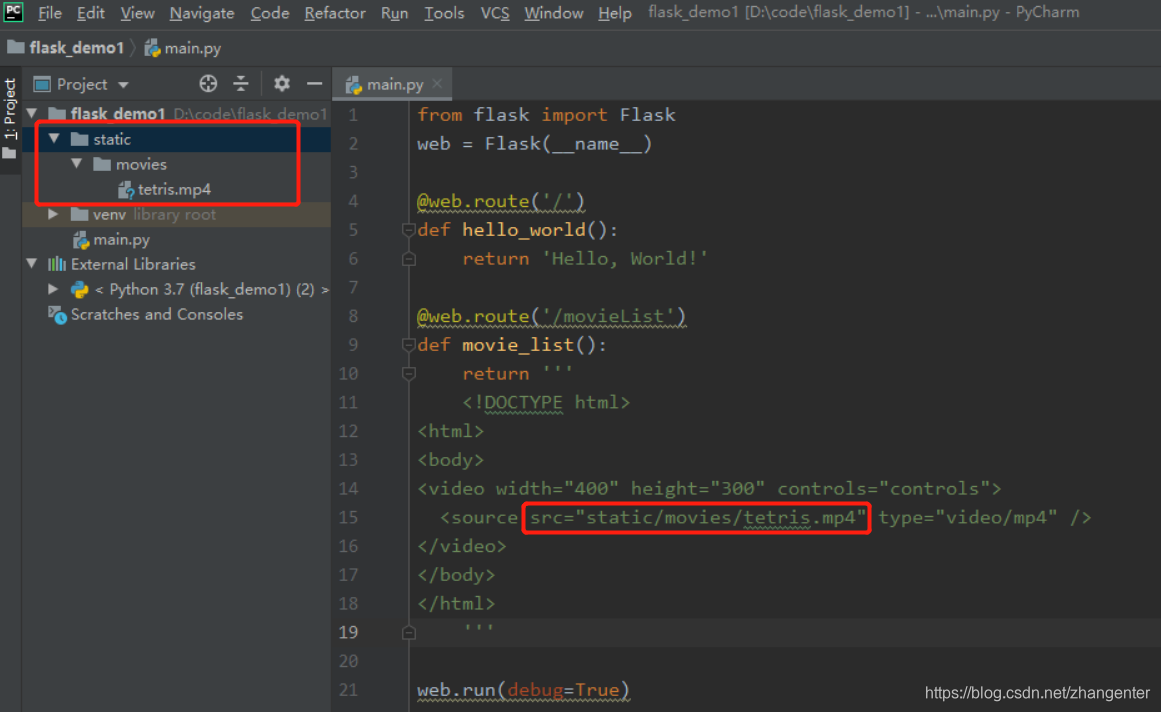
保存及服务重启后再去浏览器看,视频文件已经成功加载,点击播放已经可以播放了

模板的使用
通过上面的程序,我们已经实现了对服务器本地视频的播放,但是如果页面都是以这种
@web.route('/movieList')
def movie_list():
    return '''
    <!DOCTYPE html>
<html>
<body>
<video width="400" height="300" controls="controls">
  <source src="my_movie.mp4" type="video/mp4" />
</video>
</body>
</html>
    '''
全部字符串的形式返回,那么html的开发效率实在太低,所以我们现在用模板去实现。
首先在项目目录新建一个templates目录,在templates目录里新建一个movie_list.html文件
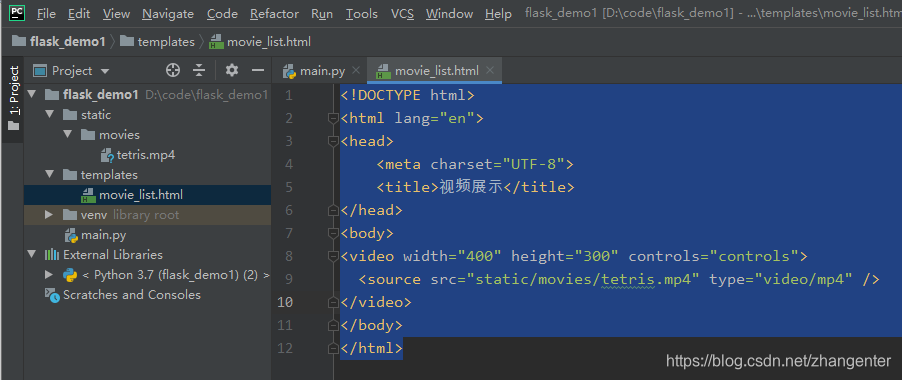
文件内容如下
<!DOCTYPE html>
<html lang="en">
<head>
    <meta charset="UTF-8">
    <title>视频展示</title>
</head>
<body>
<video width="400" height="300" controls="controls">
  <source src="static/movies/tetris.mp4" type="video/mp4" />
</video>
</body>
</html>
然后在main.py里导入render_template
from flask import render_template
将movie_list的代码修改如下
@web.route('/movieList')
def movie_list():
    return render_template('movie_list.html')
修改后重启服务,页面可以正常使用。
下面我们四个视频文件都放到static/movies/目录下,我们尝试用循环去渲染模板。
movie_list函数的代码修改如下,将movies以数组的形式传到渲染引擎进行渲染。
@web.route('/movieList')
def movie_list():
    movies = ['tetris.mp4','guess.mp4','bfcontrol1.mp4','bfcontrol2.mp4']
    return render_template('movie_list.html', movies=movies)
templates/movie_list.html模板里的代码改成如下:
<!DOCTYPE html>
<html lang="en">
<head>
    <meta charset="UTF-8">
    <title>视频展示</title>
</head>
<body>
{% for movie in movies %}
    <video width="400" height="300" controls="controls">
      <source src="static/movies/{{movie}}" type="video/mp4" />
    </video>
{% endfor %}
</body>
</html>
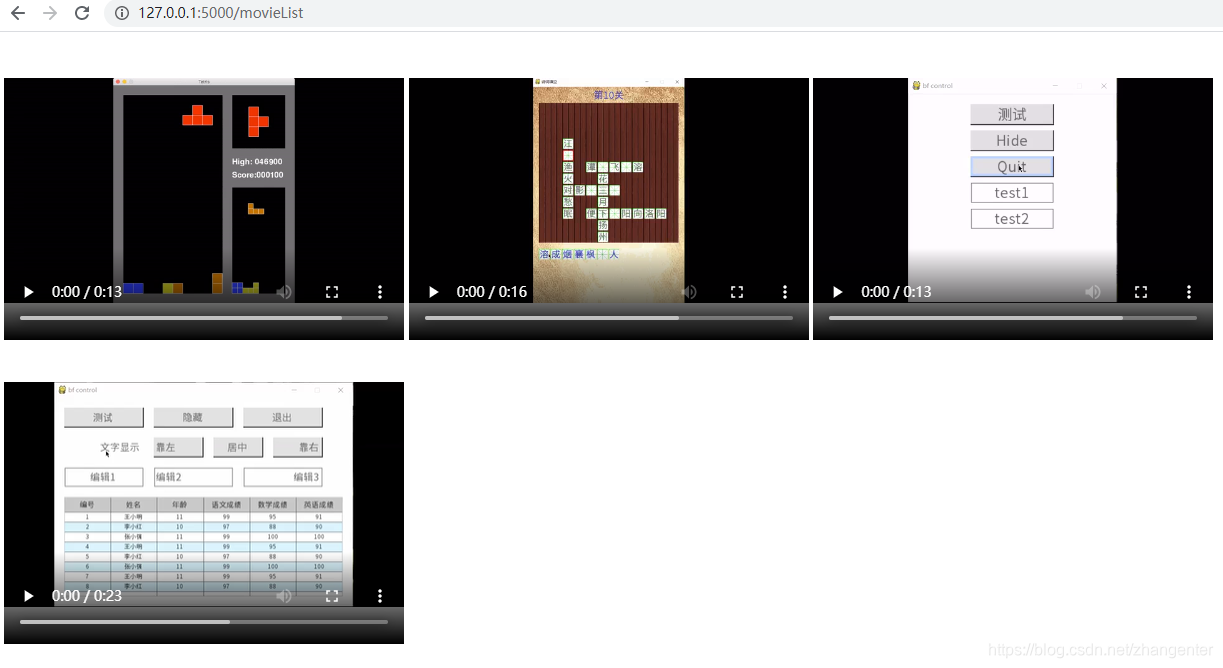
重启刷新后可以看到,四个视频都已经加载出来了
下一步我们再给视频增加一个标题,我们对movie数组的结构稍作修改,movie_list函数的代码修改如下
@web.route('/movieList')
def movie_list():
    movies = [{'file':'tetris.mp4','title':'俄罗斯方块'},
              {'file':'guess.mp4','title':'诗词填空'},
              {'file':'bfcontrol1.mp4','title':'pygame控件1'},
              {'file':'bfcontrol2.mp4','title':'pygame控件2'}]
    return render_template('movie_list.html', movies=movies)
movie_list.html中使用file和title
<!DOCTYPE html>
<html lang="en">
<head>
    <meta charset="UTF-8">
    <title>视频展示</title>
</head>
<body>
{% for movie in movies %}
    <div width="400px" height="350px" >
        <video width="400" height="225" controls="controls">
          <source src="static/movies/{{movie['file']}}" type="video/mp4" />
        </video>
        <p>{{movie['title']}}</p>
    </div>
{% endfor %}
</body>
</html>
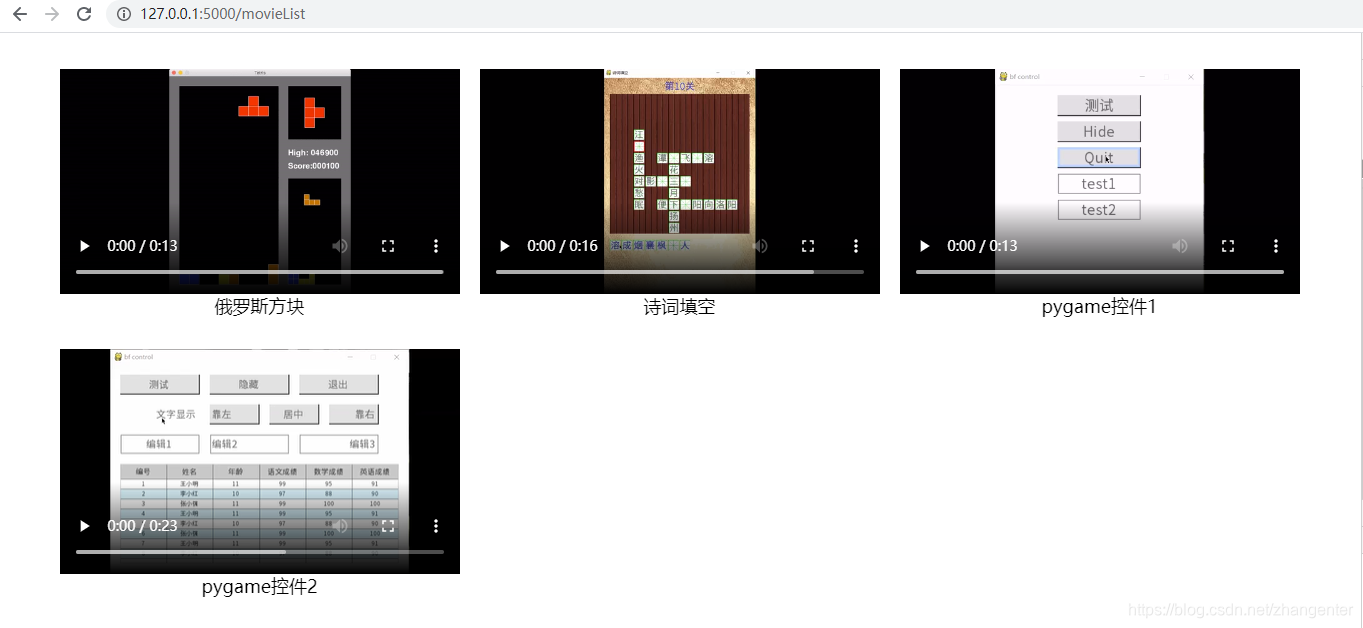
可以看到标题也正常显示了

页面增加样式做下排版的完善和自适应,movie_list.html改为
<!DOCTYPE html>
<html lang="en">
<head>
    <meta charset="UTF-8">
    <title>视频展示</title>
    <style>
    .box-out {
      position:relative;
      #border:solid 1px #555;
      float:left;
      padding:0px 10px;
    }
    .box-in {
      position:absolute;
      left:0;
      top:0px;
      right:0;
      bottom:0;
      margin:auto;
    }
    .title-in {
      position:absolute;
      top:240px;
      left:0;
      right:0;
      margin:auto;
      text-align:center;
      height:50px;
      line-height:50px;
      font-size:18px;
    }
    </style>
</head>
<body>
<div id="container">
{% for movie in movies %}
    <div class="box-out" style="height:280px;width:400px;">
        <video class="movie box-in" data-file="{{movie['file']}}" width="400" height="225" controls >
          <source src="static/movies/{{movie['file']}}" type="video/mp4" />
        </video>
        <p class="title-in" >{{movie['title']}}</p>
    </div>
{% endfor %}
</div>
<script>
    // 调整页面水平居中
    function resetContentPos(){
       var div = document.getElementById("container"); // 获取主容器
       var allWidth = document.body.clientWidth;  // 浏览器的宽度
       var n = parseInt(allWidth / 420);  // 按浏览器的宽度计算,能显示几个视频
       var contentWidth = n * 420; // 几个视频加起来的总宽度
       div.style.marginLeft = (allWidth-contentWidth)/2+"px"; // 主容器往右移动一般的剩余宽度,对进行居中
    }
    (function(){
        resetContentPos(); // 调整页面水平居中
    })();
    window.onresize = function(){
        resetContentPos(); // 调整页面水平居中
    }
</script>
</body>
</html>
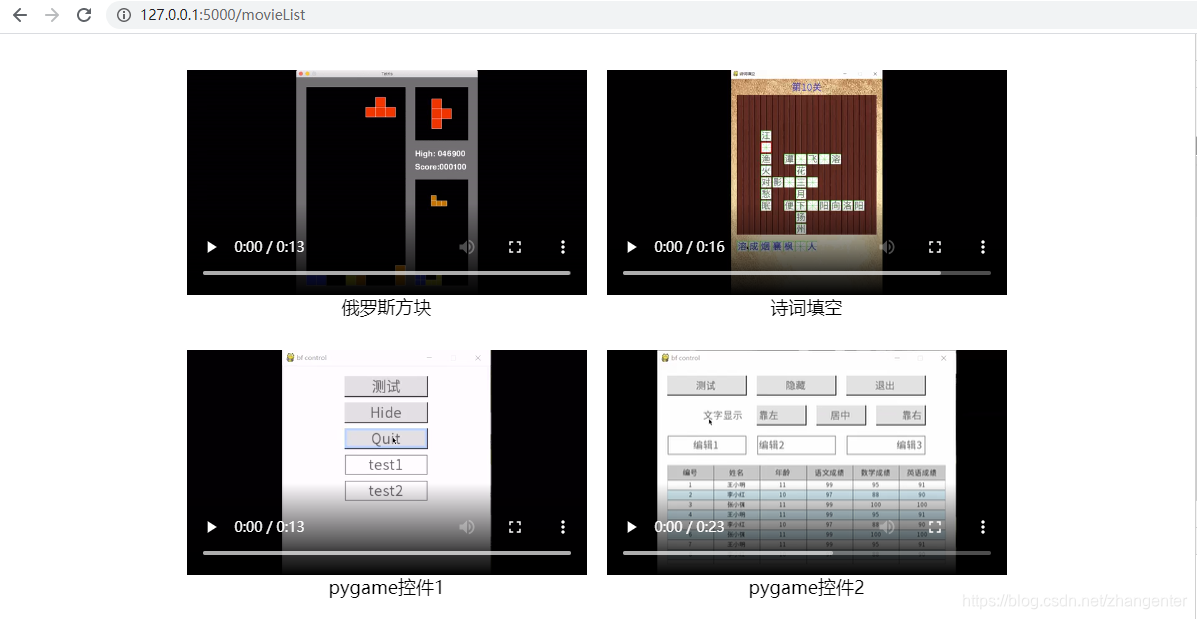
页面排版如下
当页面更窄时显示如下
数据存储
下面要对网站上的操作数据做存储,比如点击播放视频后记录每个视频的点击次数,下次加载页面按播放次数进行排序,为了简化网站实现,我们这次先不使用数据库,先使用xml文件读写。
在项目目录下新建一个file目录,然后在目录里建立一个movies.xml文件,文件内容如下:
<?xml version="1.0" encoding="UTF-8"?>
<root>
    <movie file="tetris.mp4" title="俄罗斯方块"></movie>
    <movie file="guess.mp4" title="诗词填空"></movie>
    <movie file="bfcontrol1.mp4" title="pygame控件1"></movie>
    <movie file="bfcontrol2.mp4" title="pygame控件2"></movie>
</root>
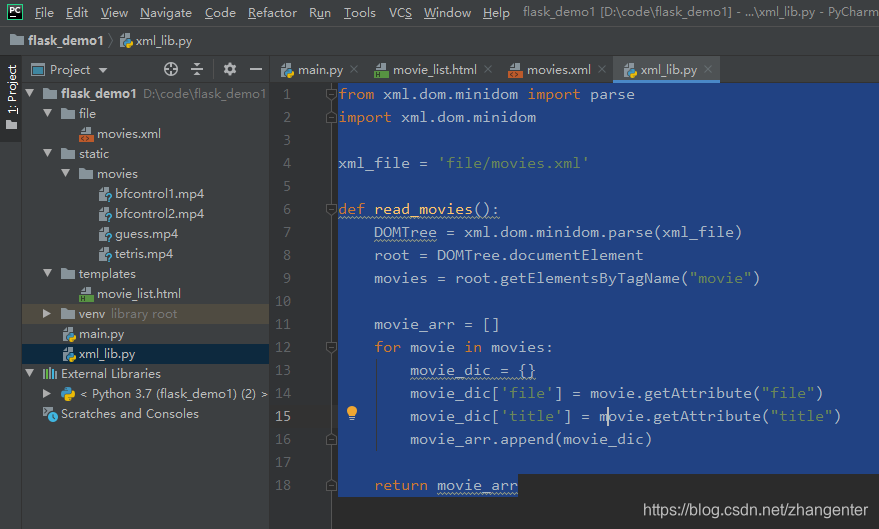
我们在项目目录下,在新建一个xml_lib.py的python文件,用来做xml文件的操作,导入xml.dom库来进行操作,写一个read_movies函数来对xml里的视频信息进行读取
from xml.dom.minidom import parse
import xml.dom.minidom

xml_file = 'file/movies.xml'

def read_movies():
    DOMTree = xml.dom.minidom.parse(xml_file)
    root = DOMTree.documentElement
    movies = root.getElementsByTagName('movie')

    movie_arr = []
    for movie in movies:
        movie_dic = {}
        movie_dic['file'] = movie.getAttribute('file')
        movie_dic['title'] = movie.getAttribute('title')
        movie_arr.append(movie_dic)

    return movie_arr
目前的目录结构是这样的
然后我们在main.py里使用xml_lib里的read_movies函数,修改后main.py的代码变成
from flask import Flask
from flask import render_template
web = Flask(__name__)
import xml_lib
@web.route('/')
def hello_world():
    return 'Hello, World!'

@web.route('/movieList')
def movie_list():
    return render_template('movie_list.html', movies=xml_lib.read_movies())

web.run(debug=True)
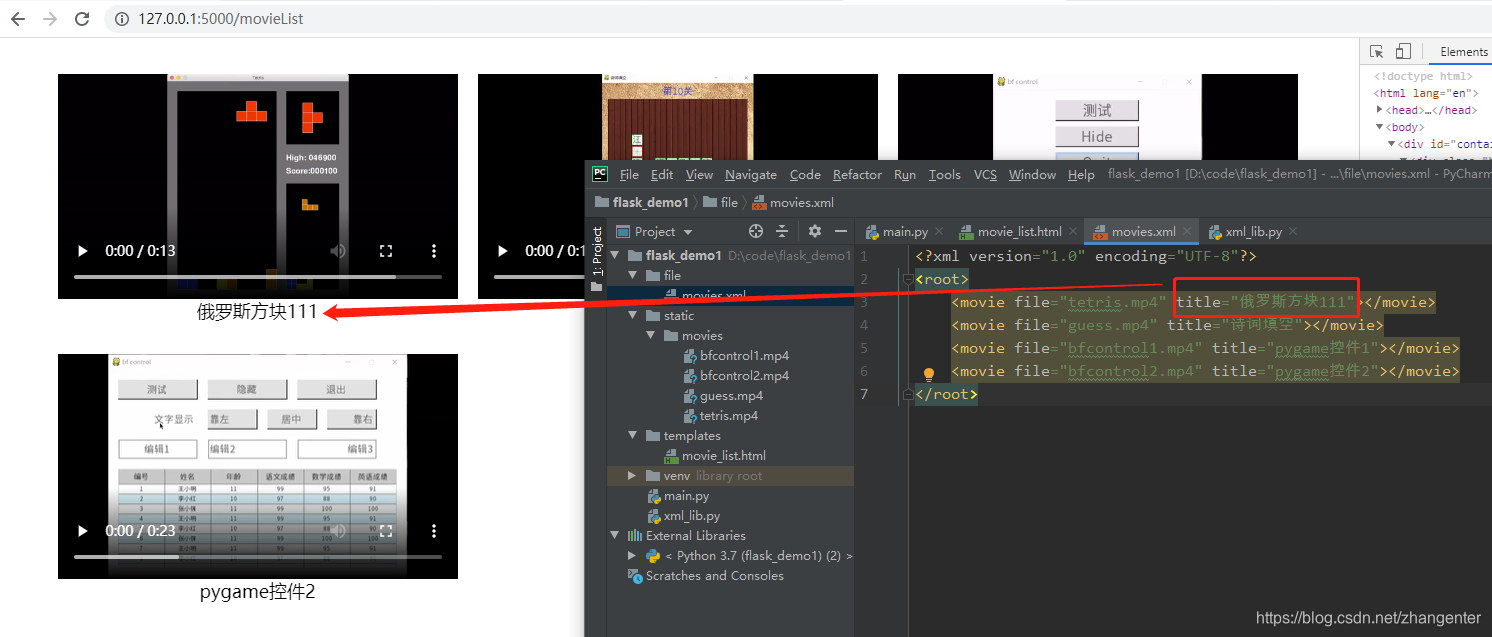
现在我们的网站已经会使用xml中的配置进行展示,如果在xml里修改视频的title,可以看到刷新网页马上也能看到title的变化。
我们给video添加个class名称叫movie,再添加一个数据项data-file,绑定视频的名称,用于在点击后传到服务器
        <video class="movie box-in" data-file="{{movie['file']}}" width="400" height="225" controls >
          <source src="static/movies/{{movie['file']}}" type="video/mp4" />
        </video>
在javascript里,我们对播放事件进行绑定
    (function(){
        resetContentPos(); // 调整页面水平居中

        var movie_items = document.getElementsByClassName('movie'); // 获取所有class含有movie的项,即所有视频
        for(var i=0;i<movie_items.length;i++){ // 遍历视频
             movie_items[i].addEventListener('play',function(t){ // 绑定视频的播放事件
                  var filename = t.target.dataset.file; // 获取data-file的值
                  alert(filename);
             })
        }
    })();
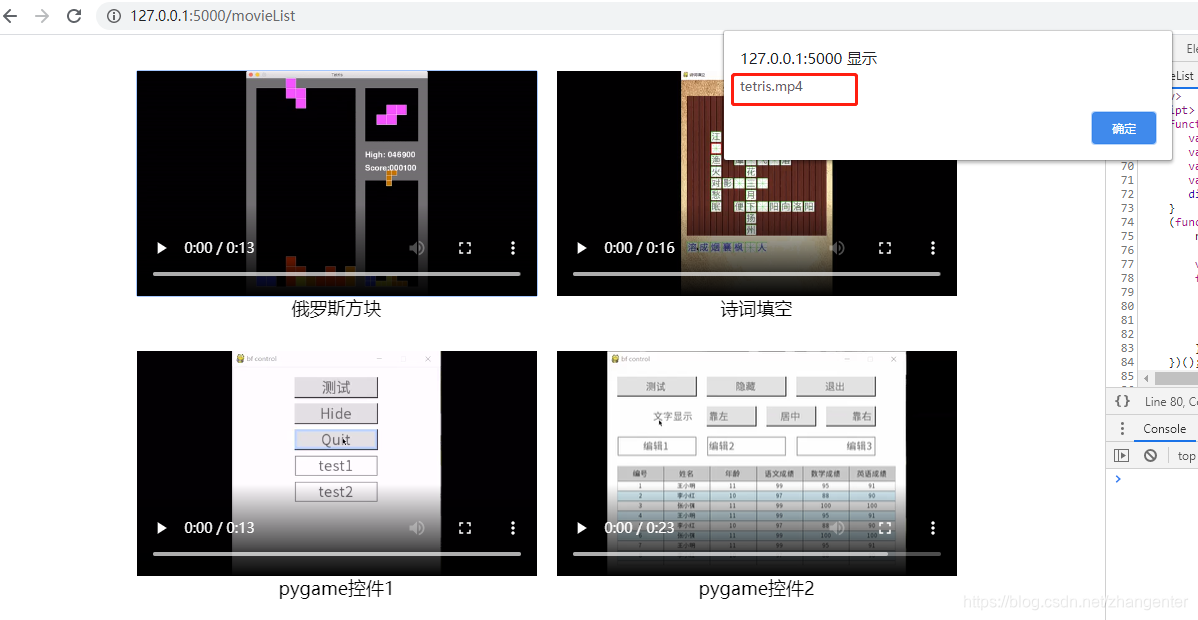
刷新网站,我们看到,当点击视频时,会弹出对应的名称了。
现在回到,服务端,我们要保存每个视频的点击次数,那么先再xml_lib.py里写一个incr_movie的函数,用以给对应的视频增加次数,incr_movie的函数代码如下
def incr_movie(name):
    movies = read_movies()  # 先读出电影

    dom = xml.dom.minidom.Document()  # 创建dom树
    root_node = dom.createElement('root')  # 创建根节点
    dom.appendChild(root_node)  # 将根节点加入dom树
    for movie_dic in movies:  # 遍历xml读出来的所有的电影
        movie_node = dom.createElement('movie')  # 创建movie节点
        filename = movie_dic['file']  # 字典中获取名称
        movie_node.setAttribute('file', filename)  # 给movie节点设置file属性
        title = movie_dic['title']  # 字典中获取标题
        movie_node.setAttribute('title', title)  # 给movie节点设置title属性
        count = movie_dic.get('count', 0)  # 字典中获取视频的点击次数,如果没有次数默认为0
        if filename == name:  # 如果正是当前要增加点击次数的,那么点击次数+1
            count += 1
        movie_node.setAttribute('count', str(count))  # 给movie节点设置count属性
        root_node.appendChild(movie_node)  # 将movie节点加入root节点
    with open(xml_file, 'w', encoding='utf-8') as fs:
        dom.writexml(fs, indent='', addindent='\t', newl='\n', encoding='UTF-8')
我们再main.py再增加一个路由incrMovie,代码如下
@web.route('/incrMovie')
def incr_movie():
    name = request.args.get('name')  # 从请求参数里取出name参数的值
    xml_lib.incr_movie(name)
    return '1'
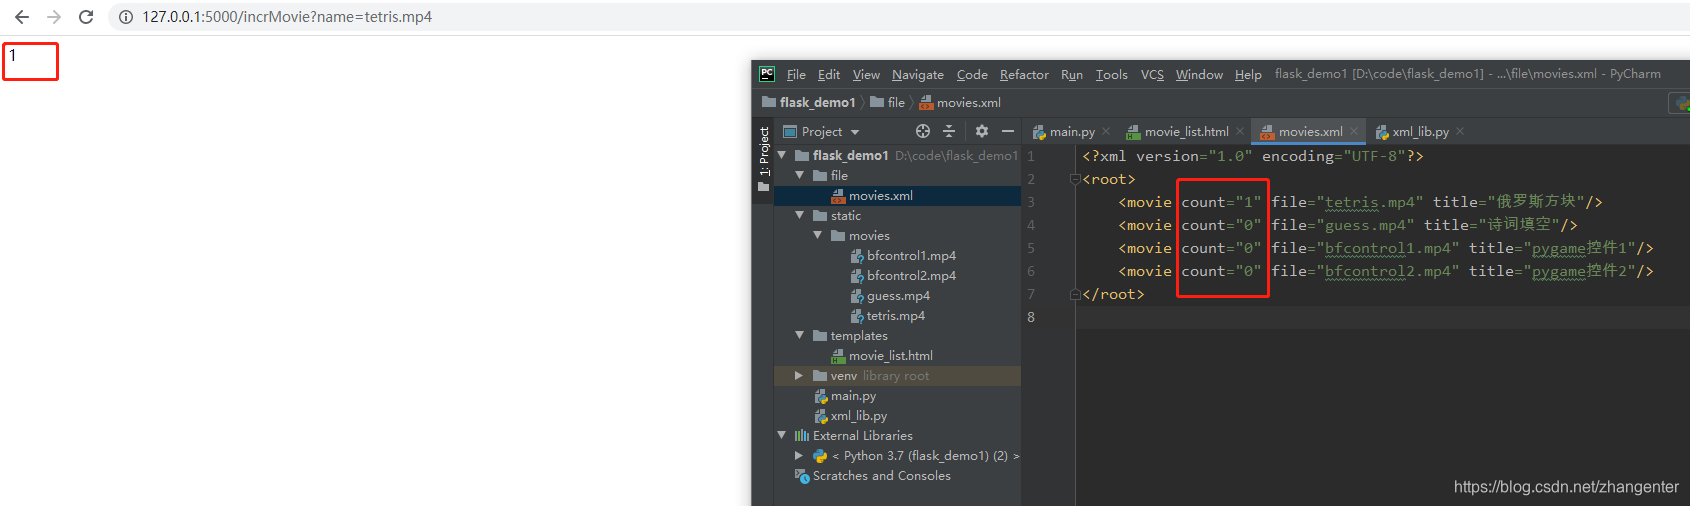
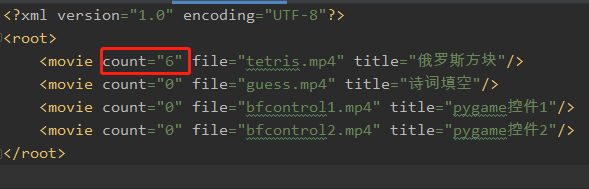
这时候重启网站,我们在浏览器里输入http://127.0.0.1:5000/incrMovie?name=tetris.mp4
正常的情况下,我们会看到页面返回1,查看xml会发现movie多了一个属性count
我们能还要对xml_lib的read_movies稍作修改,因为之前它没有读count,现在要增加count的读取,修改后
read_movies的代码如下
def read_movies():
    DOMTree = xml.dom.minidom.parse(xml_file)
    root = DOMTree.documentElement
    movies = root.getElementsByTagName('movie')

    movie_arr = []
    for movie in movies:
        movie_dic = {}
        movie_dic['file'] = movie.getAttribute('file')
        movie_dic['title'] = movie.getAttribute('title')
        if movie.hasAttribute('count'):
            movie_dic['count'] = int(movie.getAttribute('count'))
        else:
            movie_dic['count'] = 0
        movie_arr.append(movie_dic)

    return movie_arr
这样,重启网站后,每次访问http://127.0.0.1:5000/incrMovie?name=tetris.mp4这个链接,都会看到对应的视频的count在增加
好了,后端处理完了,让我们回到前端去使用这个接口,因为没有引用任何js库,也没用jquery,所以我们就用原生的网络请求,movie_list.html修改后的代码如下
<!DOCTYPE html>
<html lang="en">
<head>
    <meta charset="UTF-8">
    <title>视频展示</title>
    <style>
    .box-out {
      position:relative;
      #border:solid 1px #555;
      float:left;
      padding:0px 10px;
    }
    .box-in {
      position:absolute;
      left:0;
      top:0px;
      right:0;
      bottom:0;
      margin:auto;
    }
    .title-in {
      position:absolute;
      top:240px;
      left:0;
      right:0;
      margin:auto;
      text-align:center;
      height:50px;
      line-height:50px;
      font-size:18px;
    }
    </style>
</head>
<body>
<div id="container">
{% for movie in movies %}
    <div class="box-out" style="height:280px;width:400px;">
        <video class="movie box-in" data-file="{{movie['file']}}" width="400" height="225" controls >
          <source src="static/movies/{{movie['file']}}" type="video/mp4" />
        </video>
        <p class="title-in" >{{movie['title']}}</p>
    </div>
{% endfor %}
</div>
<script>
    // 调整页面水平居中
    function resetContentPos(){
       var div = document.getElementById("container"); // 获取主容器
       var allWidth = document.body.clientWidth;  // 浏览器的宽度
       var n = parseInt(allWidth / 420);  // 按浏览器的宽度计算,能显示几个视频
       var contentWidth = n * 420; // 几个视频加起来的总宽度
       div.style.marginLeft = (allWidth-contentWidth)/2+"px"; // 主容器往右移动一般的剩余宽度,对进行居中
    }
    (function(){
        resetContentPos(); // 调整页面水平居中

        var movie_items = document.getElementsByClassName('movie'); // 获取所有class含有movie的项,即所有视频
        for(var i=0;i<movie_items.length;i++){ // 遍历视频
             movie_items[i].addEventListener('play',function(t){ // 绑定视频的播放事件
                  var filename = t.target.dataset.file; // 获取data-file的值
                  var xhr = new XMLHttpRequest();
                  xhr.open('GET','incrMovie?name='+filename);
                  xhr.setRequestHeader('Content-Type', 'text/plain');
                  // 监听服务器响应事件
                  xhr.onreadystatechange = function(){
                      //响应完成,请求成功
                      if(xhr.readyState == 4 && xhr.status == 200){
                           console.log(xhr.responseText);
                      }
                  }
                  // 发送到服务器
                  xhr.send(null);
             })
        }
    })();
    window.onresize = function(){
        resetContentPos(); // 调整页面水平居中
    }
</script>
</body>
</html>
好了,不同的视频点击播放,我们看到count都再增加了,当然现在暂停和播放也是计数的(如果想播放完成才算一次,那么就把addEventListener的play事件改成ended事件),我们对播放次数排序还没有做,这个排序我们就放到movie_list路由这吧,修改main.py的movie_list函数,排序就一行代码
movies.sort(key=lambda x: x[‘count’], reverse=True)
修改后movie_list的全部代码如下
@web.route('/movieList')
def movie_list():
    movies = xml_lib.read_movies()
    # 按count排序,降序排序
    movies.sort(key=lambda x: x['count'], reverse=True)
    return render_template('movie_list.html', movies=movies)
好了,至此要实现的功能基本完成,再进行不同的视频点击后,刷新网页,我们会看到视频会按照播放次数进行排序。

这里还存在一个并发的坑,因为网站的并发性,xml的读写操作可能会同时触发,所以可能会出现报错,从安全考虑,我们需要给xml_lib的读写操作引入线程锁,修改后的代码如下
from xml.dom.minidom import parse
import xml.dom.minidom
import threading

xml_file = 'file/movies.xml'

lock = threading.RLock()
def read_movies():
    lock.acquire()  # 锁住读
    DOMTree = xml.dom.minidom.parse(xml_file)
    lock.release()  # 释放锁
    root = DOMTree.documentElement
    movies = root.getElementsByTagName('movie')

    movie_arr = []
    for movie in movies:
        movie_dic = {}
        movie_dic['file'] = movie.getAttribute('file')
        movie_dic['title'] = movie.getAttribute('title')
        if movie.hasAttribute('count'):
            movie_dic['count'] = int(movie.getAttribute('count'))
        else:
            movie_dic['count'] = 0
        movie_arr.append(movie_dic)

    return movie_arr

def incr_movie(name):
    movies = read_movies()  # 先读出电影
    dom = xml.dom.minidom.Document()  # 创建dom树
    root_node = dom.createElement('root')  # 创建根节点
    dom.appendChild(root_node)  # 将根节点加入dom树
    for movie_dic in movies:  # 遍历xml读出来的所有的电影
        movie_node = dom.createElement('movie')  # 创建movie节点
        filename = movie_dic['file']  # 字典中获取名称
        movie_node.setAttribute('file', filename)  # 给movie节点设置file属性
        title = movie_dic['title']  # 字典中获取标题
        movie_node.setAttribute('title', title)  # 给movie节点设置title属性
        count = movie_dic.get('count', 0)  # 字典中获取视频的点击次数,如果没有次数默认为0
        if filename == name:  # 如果正是当前要增加点击次数的,那么点击次数+1
            count += 1
        movie_node.setAttribute('count', str(count))  # 给movie节点设置count属性
        root_node.appendChild(movie_node)  # 将movie节点加入root节点

    lock.acquire()  # 锁住写
    with open(xml_file, 'w', encoding='utf-8') as fs:
        dom.writexml(fs, indent='', addindent='\t', newl='\n', encoding='UTF-8')
    lock.release()  # 释放锁
最后附上main.py的完整代码
from flask import Flask, render_template, request
web = Flask(__name__)
import xml_lib
@web.route('/')
def hello_world():
    return 'Hello, World!'

@web.route('/movieList')
def movie_list():
    movies = xml_lib.read_movies()
    # 按count排序,降序排序
    movies.sort(key=lambda x: x['count'], reverse=True)
    return render_template('movie_list.html', movies=movies)

@web.route('/incrMovie')
def incr_movie():
    name = request.args.get('name')  # 从请求参数里取出name参数的值
    xml_lib.incr_movie(name)
    return '1'

web.run(debug=True)
完整的项目目录已经上传到 https://download.csdn.net/download/zhangenter/12162662
