竞态条件与临界区
public class Demo{
  public int i = 0;
  public void incr(){
    i++;
  }
}
多个线程访问了相同的资源,向这些资源做了写操作时,对执行顺序有要求。
临界区: incr 方法内部就是临界区域,关键部分代码的多线程并发执行,会对执行结果产生影响。
竞态条件: 可能发生在临界区域内的特殊条件。多线程执行incr 方法中的 i++ 关键代码时,产生了竞态条件。
共享资源
- 如果一段代码是线程安全的,则它不包含竞态条件。只有当多个线程更新共享资源时,才会发生竞态条件。
- 栈封闭时,不会在线程之间共享的变量,都是线程安全的。
- 局部对象引用本身不共享,但是引用的对象存储在共享堆中。如果方法内创建的对象,只是在方法中传递,并且不对其他线程可用,那么也是线程安全的。
public void someMethod(){
  LocalObject localObject = new LocalObject();

  localObject.callMethod();
  method2(localObject);
}

public void method2(LocalObject localObject){
  localObject.setValue("value");
}
判断规则:如果创建、使用和处理资源,永远不会逃脱单个线程的控制,该资源的使用是线程安全的。
不可变对象
创建不可变的共享对象在线程间共享时不会被修改,从而实现线程安全。
实例被创建,value变量就不能再被修改,这就是不可变性。
public class Demo{
  private int value = 0;
  public Demo(int value){
    this.value = value;
  }
  public int getValue(){
		return this.value;
  }
  //不提供对象内属性的设置方法
}
原子操作定义
原子操作可以是一个步骤,也可以是多个操作步骤,但是其顺序不可以被打乱,也不可以被切割而只执行其中的一部分(不可中断性)。
将整个操作视作一个整体是原子性的核心特征。
public class Demo{
  public int i = 0;
  public void incr(){
    i++; //进行i++的步骤实际分为三步:1. 加载i 2.计算+i 3.赋值
  }

  public static void main(String[] args) throws InterruptedException {
        Demo ld = new Demo();

        for (int i = 0; i < 2; i++) {
            new Thread(() -> {
                for (int j = 0; j < 10000; j++) {
                    ld.incr();
                }
            }).start();
        }
        Thread.sleep(2000L);
        System.out.println(ld.i);
    }
}
结果输出后你会发现i的值不为20000,就是因为进行i++的步骤实际分为三步,不为原子性操作。
CAS机制
Compare and swap比较和交换。属于硬件同步原语,**处理器提供基本内存操作的原子性保证。**CAS操作需要输入两个数值,一个旧值(期望操作前的值)和一个新值,在操作期间先比较下旧值有没有发生变化,如果没有发生变化,才交换新值,发生了变化则不交换。
Java中的sun.misc.Unsafe类,提供了compareAndSwapInt()和compareAndSwapLong()等几个方法实现CAS。
public class LockDemo1 {
    volatile int value = 0;

    static Unsafe unsafe;//直接操控内存,修改对象,数组内存...强大的API
    private static long valueOffset;//偏移量

    static {
        try {
            // 反射技术获取unsafe值
            Field field = Unsafe.class.getDeclaredField("theUnsafee");
            field.setAccessible(true);
            unsafe = (Unsafe)field.get(null);
            // 获取到 value 属性偏移量(用于定于value属性在内存中的具体地址)
            valueOffset = unsafe.objectFieldOffset(LockDemo1.class
                    .getDeclaredField("value"));
        } catch (Exception e) {
            e.printStackTrace();
        }
    }

    public void add() {
        // TODO xx00
        // i++;// JAVA 层面三个步骤
        // CAS + 循环 重试
        int current;
        do {
            // 操作耗时的话, 那么 线程就会占用大量的CPU执行时间
            current = unsafe.getIntVolatile(this, valueOffset);
        } while (!unsafe.compareAndSwapInt(this, valueOffset, current, current + 1));
        // 可能会失败
    }

    public static void main(String[] args) throws InterruptedException {
        LockDemo1 ld = new LockDemo1();

        for (int i = 0; i < 2; i++) {
            new Thread(() -> {
                for (int j = 0; j < 10000; j++) {
                    ld.add();
                }
            }).start();
        }
        Thread.sleep(2000L);
        System.out.println(ld.value);
    }
}
输出结果:20000
当然我们只需要理解其中的原理,JDK给我们准备了现成的API。
保证原子操作的其他方法
- 利用synchronized
public class LockDemo2 {
    int i = 0;

    public void add() {
        synchronized (this) {
            i++;
        }
    }

    public static void main(String[] args) throws InterruptedException {
        LockDemo2 ld = new LockDemo2();

        for (int i = 0; i < 2; i++) {
            new Thread(() -> {
                for (int j = 0; j < 10000; j++) {
                    ld.add();
                }
            }).start();
        }
        Thread.sleep(2000L);
        System.out.println(ld.i);
    }
}
输出结果:20000
- 利用Lock
public class LockDemo3 {
    volatile int i = 0;

    Lock lock = new ReentrantLock();

    public void add() {
        lock.lock();
        try {
            // TODO  很多业务操作
            i++;
        }finally {
            lock.unlock();
        }
    }

    public static void main(String[] args) throws InterruptedException {
        LockDemo3 ld = new LockDemo3();

        for (int i = 0; i < 20; i++) {
            new Thread(() -> {
                for (int j = 0; j < 10000; j++) {
                    ld.add();
                }
            }).start();
        }
        Thread.sleep(2000L);
        System.out.println(ld.i);
    }
}
输出结果:20000
J.U.C包内的原子操作封装类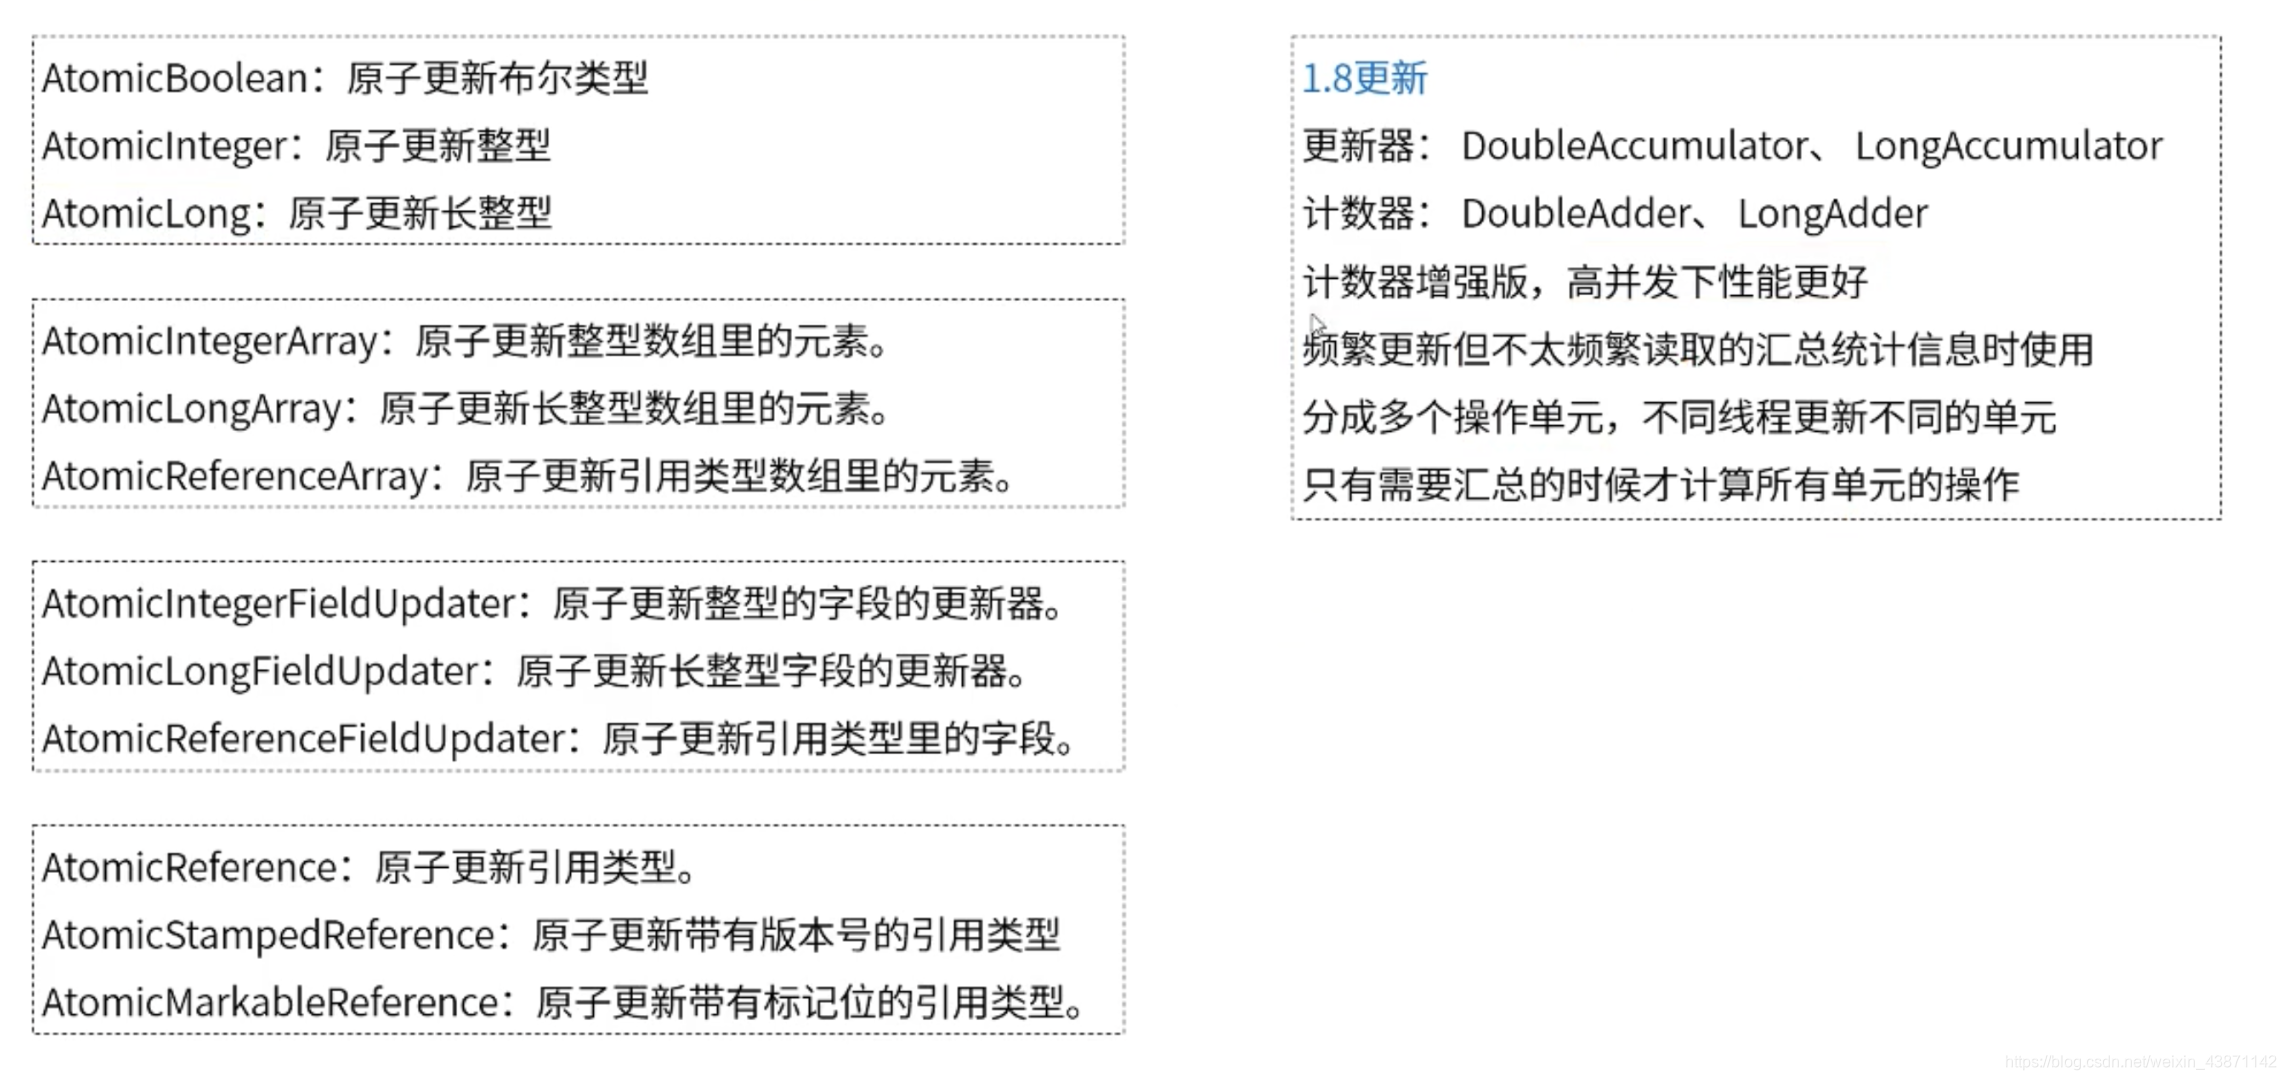
// atomic 相关测试代码
public class AtomicTest {
    public static void main(String[] args) throws InterruptedException {
        // 自增
        AtomicInteger atomicInteger = new AtomicInteger(0);
        for (int i = 0; i < 2; i++) {
            new Thread(() -> {
                for (int j = 0; j < 10000; j++) {
                    atomicInteger.incrementAndGet();
                }
            }).start();
        }
        Thread.sleep(2000L);
        System.out.println(atomicInteger.get());
    }
}
// LongAccumulator是LongAdder增强版,处理累加之外,可以自行定义其他计算
public class LongAccumulatorDemo {
    public static void main(String[] args) throws InterruptedException {
        LongAccumulator accumulator = new LongAccumulator(new LongBinaryOperator() {
            @Override
            public long applyAsLong(long left, long right) {
                // 返回最大值,这就是自定义的计算
                return left < right ? left : right;
            }
        }, 0);

        // 1000个线程
        for (int i = 0; i < 1000; i++) {
            int finalI = i;
            new Thread(() -> {
                accumulator.accumulate(finalI); // 此处实际就是执行上面定义的操作
            }).start();
        }

        Thread.sleep(2000L);
        System.out.println(accumulator.longValue()); // 打印出结果
    }

}
synchronized、AtomicLong和LongAdder三者的性能比较
// 测试用例: 同时运行2秒,检查谁的次数最多
public class LongAdderDemo {
    private long count = 0;

    // 同步代码块的方式
    public void testSync() throws InterruptedException {
        for (int i = 0; i < 3; i++) {
            new Thread(() -> {
                long starttime = System.currentTimeMillis();
                while (System.currentTimeMillis() - starttime < 2000) { // 运行两秒
                    synchronized (this) {
                        ++count;
                    }
                }
                long endtime = System.currentTimeMillis();
                System.out.println("SyncThread spend:" + (endtime - starttime) + "ms" + " v" + count);
            }).start();
        }
    }

    // Atomic方式
    private AtomicLong acount = new AtomicLong(0L);

    public void testAtomic() throws InterruptedException {
        for (int i = 0; i < 3; i++) {
            new Thread(() -> {
                long starttime = System.currentTimeMillis();
                while (System.currentTimeMillis() - starttime < 2000) { // 运行两秒
                    acount.incrementAndGet(); // acount++;
                }
                long endtime = System.currentTimeMillis();
                System.out.println("AtomicThread spend:" + (endtime - starttime) + "ms" + " v-" + acount.incrementAndGet());
            }).start();
        }
    }

    // LongAdder 方式
    private LongAdder lacount = new LongAdder();
    public void testLongAdder() throws InterruptedException {
        for (int i = 0; i < 3; i++) {
            new Thread(() -> {
                long starttime = System.currentTimeMillis();
                while (System.currentTimeMillis() - starttime < 2000) { // 运行两秒
                    lacount.increment();
                }
                long endtime = System.currentTimeMillis();
                System.out.println("LongAdderThread spend:" + (endtime - starttime) + "ms" + " v-" + lacount.sum());
            }).start();
        }
    }

    public static void main(String[] args) throws InterruptedException {
        LongAdderDemo demo = new LongAdderDemo();
        demo.testSync();
        demo.testAtomic();
        demo.testLongAdder();
    }
}
输出结果:
SyncThread spend:2000ms v22957789
AtomicThread spend:2000ms v-36239545
AtomicThread spend:2000ms v-36309497
SyncThread spend:2007ms v22957790
AtomicThread spend:2004ms v-36332774
SyncThread spend:2015ms v22957791
LongAdderThread spend:2000ms v-40279545
LongAdderThread spend:2000ms v-40835325
LongAdderThread spend:2000ms v-40855171
由此可以看出在相同时间内三个方法同时累加并且互相争抢CPU的性能,最终运行结果是LongAdder在两秒运行次数最多。
