VS Code作为一款强大的编辑器,之前用来作为sublime的替代品,但是VS Code功能越来越强大,也越来越好用,sublime已经秒成渣。
VS Code自带了Git 编译 和 调试功能。
了解最近的VSC 对C++的支持:https://code.visualstudio.com/docs/languages/cpp
简单记录下VSC下怎么编译调试C++,适用环境为Ubuntu16.04 / VSC Version 1.17 / Cmake编译。VSC的编译多依赖于你的环境,不同的环境不能完全一样,但是基本思想是一样的。
首先C/C++编程,先添加一个插件
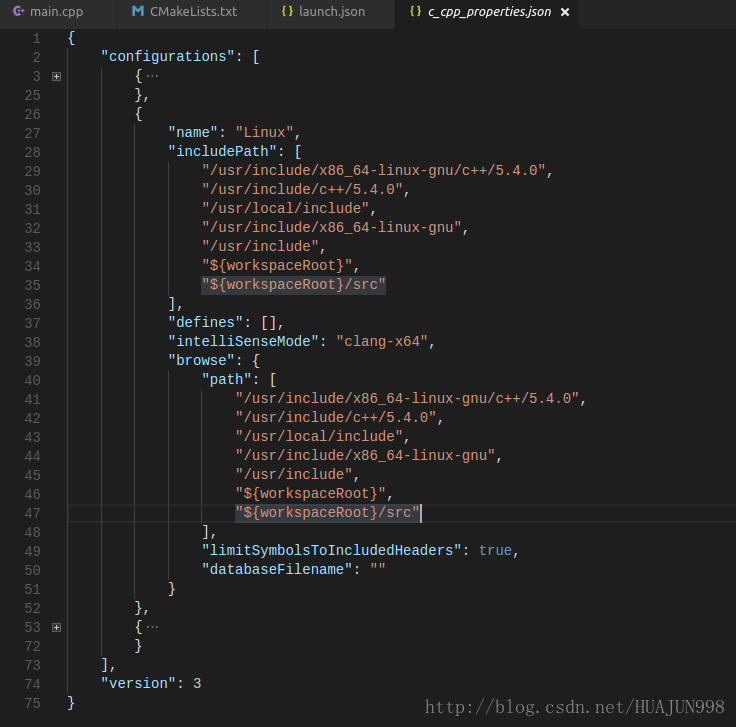
c_cpp_properties.json :
这个文件用来添加你的头文件路径,根据平台,添加相应的路径就可以了,例如我的Ubuntu下的配置为:
编译需要两个重要的配置文件 tasks.json 和 launch.json,tasks文件用来编译,launch文件用来调试。
新建tasks.json 的方法:
- 打开控制面板(ctrl + shift + p)
- 选择 Tasks: Configure Task Runner命令
- 选择 Others来创建一个task
新建的tasks.json文件
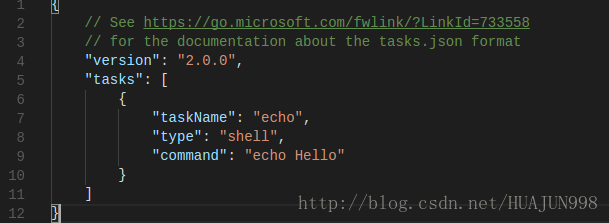
taskName 就是一个 随便起个名字。
type 任务类型,一般填”shell”
command 是真正运行的命令
args 是命令参数
一个例子
{
    "version": "2.0.0",
    "tasks": [
        {
            "taskName": "build hello world",
            "type": "shell",
            "command": "g++",
            "args": [
                "-g", "helloworld.cpp"
            ]
        }
    ]
}
这个文件表示 使用 g++ 编译helloworld.cpp文件。相当于在控制台输入”g++ -g helloworld.cpp”。
实际上task的作用就是将你的编译过程,写成一个VSC的文件,从这个角度出发,我们看另一个例子
{
    "version": "2.0.0",
    "tasks": [
        {
            "taskName": "build main",
            "type": "shell",
            "command": "./build.sh",
            "args": [],
            "group": {
                "kind": "build",
                "isDefault": true
            }
        }
    ]
}
正常我们使用Cmake编译,需要以下步骤
- mkdir build
- cd build
- cmak ..
- make
我将这几步写成一个脚本 build.sh ,在tasks.json中运行脚本,编译程序。相当于在控制台运行”./build.sh”。
其中的 “group” 将我们的task添加到build组,这样我们可以使用快捷键 ctrl+shift+B 直接运行编译。
新建launch.json
- 导航到Debug视图,就是左边第四个图标
- 点击configure图标,一个齿轮
- 选择 C++ (GDB/LLDB)
新建的launch.json文件如下
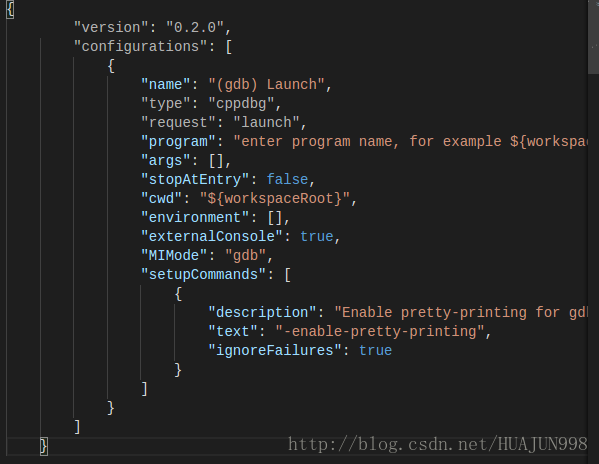
name 可以随便起
type 选择 “cppdbg”
request 有两种 ”launch” 和 “attach”,我们用”launch”就可以了。
program 配置为task编译出来的可执行文件路径。
args 为可执行文件的输入参数
其他的不多介绍
一个例子
{
    "version": "0.2.0",
    "configurations": [
        {
            "name": "Debug",
            "type": "cppdbg",
            "request": "launch",
            "program": "${workspaceRoot}/build/test_vsc",
            "args": ["hhh"],
            "stopAtEntry": false,
            "cwd": "${workspaceRoot}",
            "environment": [],
            "externalConsole": true,
            "MIMode": "gdb",
            "setupCommands": [
                {
                    "description": "Enable pretty-printing for gdb",
                    "text": "-enable-pretty-printing",
                    "ignoreFailures": true
                }
            ]
        }
    ]
}
运行我编译出来的文件test_vcs文件
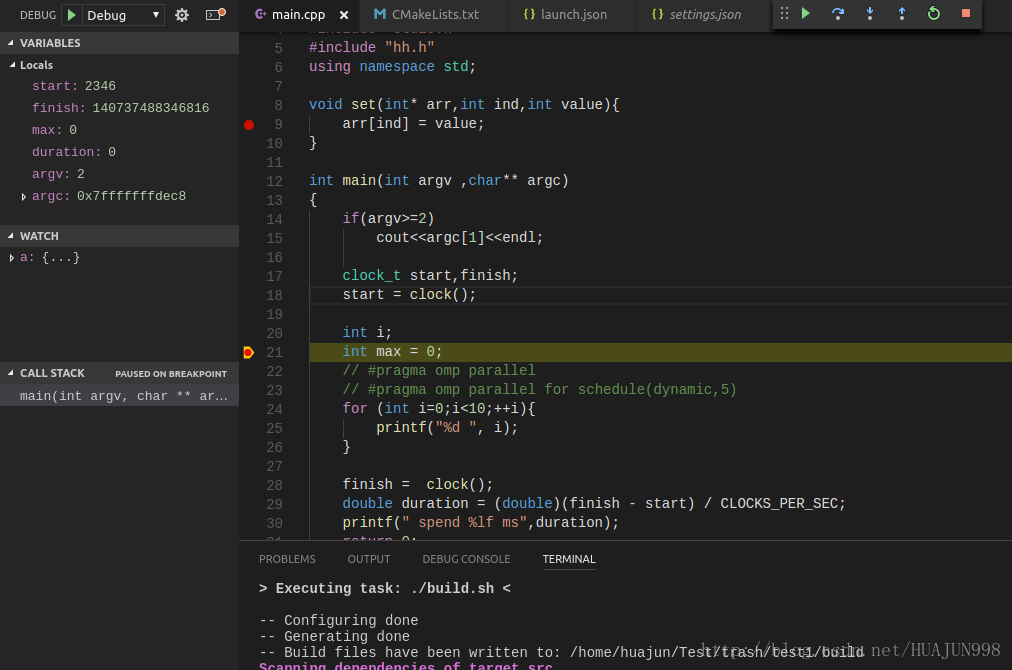
设置断点,点击调试按键,运行如下
注意:如果想要使用GDB调试,必须设置编译选项使能GDB
例如在CMakeLists.txt加入下面这句
SET(CMAKE_CXX_FLAGS “${CMAKE_CXX_FLAGS} -O3 -g -ggdb”)