JavaScript操作属性
使用DOM操作css
使用DOM操作css的用法非常简单 格式如下
现在有二个盒子和一个按钮 按一下按钮一就改变盒子的宽度和颜色
按下按钮二就显示盒子当前的宽度
<!DOCTYPE html>
<html>
 <head>
  <meta charset="utf-8">
  <title></title>
  <style type="text/css">
   #box1{width:200px; height: 200px; background-color: red;}
  </style>

  <script type="text/javascript">
   window.onload=function(){
     var box1=document.getElementById("box1");
     var btn01=document.getElementById("btn01");

     //改变元素样式
     btn01.onclick=function(){
     box1.style.width="300px";
     box1.style.backgroundColor="yellow";
     }

     //读取元素样式
     var btn02=document.getElementById("btn02");
     btn02.onclick=function(){
        console.log(box1.style.width);
     }
   };
  </script>
 </head>
 <body>
  <button id="btn01">点我</button>
  <button id="btn02">点我2</button>
  <br /><br>
  <div id="box1"></div>
 </body>
</html>
运行之后,点一下按钮一
一个宽高各200px的红色盒子变成了宽300px长不变的黄色盒子。
接着点击按钮二会显示盒子的宽度为300px.
我们f12查看一下其实在点击按钮一这个样式加入的为一个内联样式

而当我们不点击按钮一,直接点击按钮二时打印出来的却为空.

这就说明这个方法虽然简单 但却只能操作内联样式,而内联样式都有比较高的优先级,所以通过JS修改的样式往往会立即显示
获取当前显示样式
getComputedStyle()这个方法获取元素当前的样式
* 这个方法是window的方法 可以直接使用
* 需要二个参数
* 第一个:要获取样式的元素
* 第二个:可以传递一个伪元素,一般都传null
var obj=getComputedStyle(box1,null);//依旧使用上面的box1
alert(obj.width);//不点击按钮一显示的为200px,点击过后显示300px
/*
IE8及以下不兼容
使用alert(box1.currentStyle.width);即可
*/
其他样式相关属性
以下这些属性都是不带px 返回一个数字 可以直接计算
1.
alert(box1.clientWidth);
alert(box1.clientHeight);
/*
可见高度
获取元素整个大小
带边框 内边距 内容区
*/
如下面样式的盒子会打印的长宽都为100
#box1{width: 100px; height: 100px; background-color: red;}但加上下面的会打印120
#box1{width: 100px; height: 100px; background-color: red;padding: 10px;}2.
alert(box1.offsetLeft)
alert(box3.clientHeight);
//当前元素相对于其定位父元素的水平偏移量
给定这么二个盒子
#box1{width: 100px; height: 100px; background-color: red}
#box2{padding: 100px;background-color: #7FFFD4;}
<div id="box2" style="position: relative;">
   <div id="box1"></div>
</div>
box2是box1的父元素并且开启了定位那么打印box1.offsetLeft和box3.clientHeight都会是100, 因为这里box2的内边距是100px。
那么去掉padding再次打印当然是0, 没有父元素或者父元素没有开启定位那就是相对窗口了。
3.
现在写一个box3和box4设定一点样式
#box3{width: 300px; height: 200px; background-color: aqua; overflow: auto;}
#box4{width: 200px; height: 300px; background-color: yellow;}
<div id="box3">
   <div id="box4"></div>
  </div>
效果是这样的

alert(box3.scrollHeight);
alert(box3.scrollWidth);
alert(box3.scrollTop);
alert(box3.scrollLeft);
这里如果是clientWidth那么输出的是200因为是可见高度嘛,这里只显示200px。
但如果是scrollHeight就为300因为它是返回可以滚动的高度。
而scrollTop则是获取你滚动条滚动了多少 如果你不滚动返回值为0。如果你滚动至底则返回100 因为总长度300你现在上面显示了200个px当然要拖动100才能显示底下全部的。
jQuery操作属性
使用jquery对象操作css
<script>
$(function () {
//逐个设置
$("div").eq(0).css("width","100px");
$("div").eq(0).css("height","100px");
$("div").eq(0).css("background","red");
//链式设置
//如果大于三步 分开
$("div").eq(1).css("width","200px").css("height","200px").css("background","yellow");
//批量设置
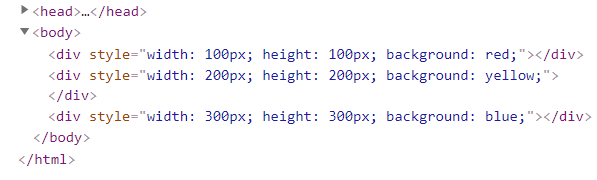
$("div").eq(2).css({
width:"300px",
height:"300px",
background:"blue"
});
//获取css样式
console.log($("div").eq(2).css("width"));
});
</script>
<body>
<div></div>
<div></div>
<div></div>
</body>
同样操作的肯定是内联样式
jquery文本值操作
<script>
        $(function () {
            var btn=document.getElementsByTagName("button");
            btn[0].onclick=function () {
                $("div").html("<p>我是一个段落<span>我是span</span></p>");
                /*
                和元素js中的innerHTML一模一样
                * */
            }
            btn[1].onclick=function () {
                console.log($("div").html());
            }
            btn[2].onclick=function () {
                $("div").text("<p>我是一个段落<span>我是span</span></p>");
                //和元素innerText一模一样
            }
            btn[3].onclick=function () {
                console.log($("div").text());
            }
            btn[4].onclick=function () {
                $("input").val("<p>我是一个段落<span>我是span</span></p>");
            }
            btn[5].onclick=function () {
                console.log($("input").val());
            }

        });
     </script>
</head>
<body>
<button id="btn01"> 设置html</button>
<button id="btn02"> 获取html</button>
<button id="btn03"> 设置text</button>
<button id="btn04"> 获取text</button>
<button id="btn05"> 设置value</button>
<button id="btn06"> 获取value</button>
<div>
</div>
<input type="text">
</body>
非常简单的几个方法
第一个二个方法就是把div里面设置成这个新标签(之前有的标签都会清除)以及获取这个div里面的所有标签三四二个方法就是设置div文本值和获取文本值 最后
就是设置一个value为指定的值以及获取value
jquery操作类
这里一共三个方法也非常简单 一般在为标签添加样式的时候一般也是用增加删除类的方式
<style>
        .box1{width: 100px; height: 100px; background-color: red;}
        .box2{width: 200px; height: 200px; background-color: yellow;}
        .box3{border: aqua 10px solid;}
    </style>

     <script>
        $(function () {
            var btn01=document.getElementById("btn01");
            btn01.onclick=function () {
                $("div").addClass("box2");//添加多个以空格隔开
            }

            var btn02=document.getElementById("btn02");
            btn02.onclick=function () {
                $("div").removeClass("box2");//删除多个以空格隔开
            }

            var btn03=document.getElementById("btn03");
            btn03.onclick=function () {
                $("div").toggleClass("box3");//添加多个以空格隔开
            }
        });
     </script>
    <script src="../JS/jquery 1.12.4.js"></script>

<body>
<button id="btn01"> 添加类</button>
<button id="btn02"> 删除类</button>
<button id="btn03"> 切换类</button>
<br><br>
<div class="box1"></div>
</body>
这里就是一个长宽各100的红色盒子 再点击添加类后便获得类box2并显示box2里的样式

因为后面一个如果与前面一个属性相同会覆盖前面的
删除类就是删除指定的类
这里的切换类就是如果你的对象里面没有这个类就添加 有则删除
最后,春节快乐!!!!!!!!!!
