生成设备节点以及编写简单应用调用驱动
生成设备节点
Linux到2.6版本时改动巨大,针对以前版本的资料直接跳过
学习要“以始为终”工作用不到的就不去浪费时间
关于杂项设备
杂项设备(设备号10)
对一部分字符设备的封装,还有一部分不好归类驱动也归到了杂项设备
为什么引入杂项设备
- 节省主设备号
如果所有的驱动都是用字符设备,那么所有的设备号很快就用完了,总共255个设备号 - 驱动写起来相对简单
如果直接使用封装好的杂项设备,那么就可以减少一步注册主设备号的过程
初始化部分源文件在“driver/char/misc.c”强制编译,Linux官方带的,为了一些简单的驱动更容易实现,给字符设备做了一个简单的封装
杂项设备注册头文件“linux/miscdevice.h”
	struct miscdevice  {
		int minor;//设备号,一般自动分配
		const char *name;//生成设备节点的名称(随意)
		const struct file_operations *fops;//指向一个设备节点文件
		struct list_head list;
		struct device *parent;
		struct device *this_device;
		const char *nodename;
		mode_t mode;
	};
两个重要的函数
extern int misc_register(struct miscdevice * misc);//杂项设备节点注册
extern int misc_deregister(struct miscdevice *misc);//卸载
杂项设备内核文件结构体
注册设备节点本质也就是新建了一个特殊文件,包含文件名、打开、关闭、操作等函数
包含文件结构体的头文件是“linux/fs.h”
文件的结构体file_operations如下 非常重要!!

参数很多,根据需求选择
必选的参数是:
- .owner 一般是THIS_MODULE
- .open 打开文件函数
- .release 关闭文件函数
这里在必选之外使用参数 - .unlocked_ioctl对GPIO操作,应用向底层驱动传值
如何生成设备节点
代码
#include <linux/init.h>
#include <linux/module.h>
/*driver register*/
#include <linux/platform_device.h>

/*注册杂项设备头文件*/
#include <linux/miscdevice.h>
/*注册设备节点的文件结构体*/
#include <linux/fs.h>

#define DRIVER_NAME "hello_ctl"
#define DEVICE_NAME "hello_ctl_dev"//设备名
MODULE_LICENSE("Dual BSD/GPL");
MODULE_AUTHOR("GYY");

/*打开文件函数*/
static int hello_open(struct inode * pinode , struct file * pfile )
{
	printk(KERN_EMERG "Hello OPEN !!\n");
	return 0;
}
/*关闭文件函数*/
static int hello_release(struct inode * pinode, struct file * pfile)
{
	printk(KERN_EMERG "Hello RELEASE !!\n");
	return 0;
}
/*IO控制函数*/
static long hello_ioctl(struct file * pfile, unsigned int cmd, unsigned long arg)
{
	printk("cmd is %d,arg is %d\n",cmd,arg);
	return 0;
}
/*杂项设备内核文件结构体,要注册函数*/
static struct file_operations hello_ops = {
	.owner = THIS_MODULE,//所有者,THIS_MODULE
	.open = hello_open,
	.release = hello_release,
	.unlocked_ioctl = hello_ioctl,

};

/*杂项设备节点结构体*/
static struct miscdevice hello_dev = {
	.minor = MISC_DYNAMIC_MINOR,//自动分配设备号
	.name = DEVICE_NAME,//设备名
	.fops = &hello_ops,//该成员为杂项设备内核文件结构体
};


static int hello_probe (struct platform_device *pdv){

	printk(KERN_EMERG "\tinitialized\n");
	/*生成设备节点*/
	misc_register(&hello_dev);

	return 0;
}

static int hello_remove (struct platform_device *pdv){

	printk(KERN_EMERG "\tremove\n");
	misc_deregister(&hello_dev);
	return 0;
}

static void hello_shutdown (struct platform_device *pdv){


}

static int hello_suspend (struct platform_device *pdv,pm_message_t state){

	return 0;
}

static int hello_resume (struct platform_device *pdv){

	return 0;
}


struct platform_driver hello_driver = {
	.probe = hello_probe,
	.remove = hello_remove,
	.shutdown = hello_shutdown,
	.suspend = hello_suspend,
	.resume = hello_resume,
	.driver = {
		.name = DRIVER_NAME,
		.owner = THIS_MODULE,
	}
};


static int hello_init(void)
{
	int DriverState;
	printk(KERN_EMERG "HELLO WORLD enter!\n");
	DriverState=platform_driver_register(&hello_driver);

	printk(KERN_EMERG "\t%d\n",DriverState);
	return 0;
}

static void hello_exit(void)
{
	printk(KERN_EMERG "HELLO WORLD exit!\n");
	platform_driver_unregister(&hello_driver);
}

module_init(hello_init);
module_exit(hello_exit);
代码分析
接下来我们对代码进行简要的分析,下面的部分和我们前面注册驱动的代码是基本相同的,我们在hello_probe (也就是驱动的初始化函数)中调用了misc_register()来注册杂项设备节点,杂项设备节点就像是一个挂载在设备上的设备一样,它的本质也是一个设备,所以说如果注册成功我们应该可以在/dev/中查看到我们注册的设备hello_ctl_dev。我们在hello_remove中调用了misc_deregister()来卸载杂项设备节点,说明我们rmmod这个模块后/dev/中的hello_ctl_dev就不存在了。
结果演示
安装模块

查看/dev/
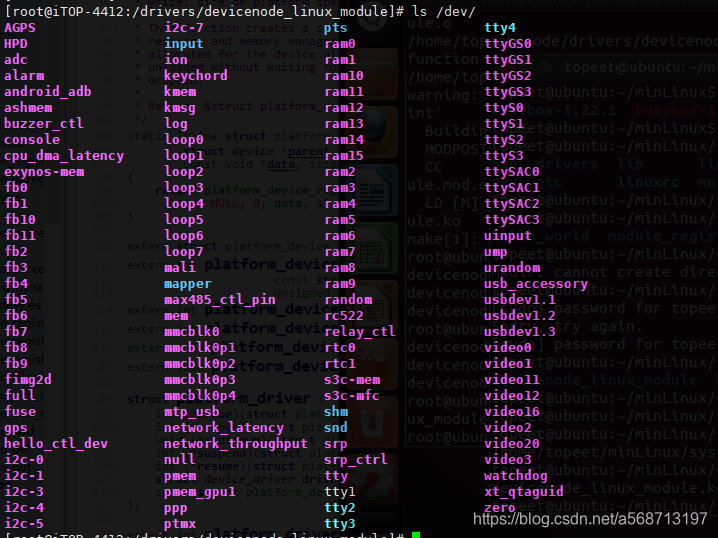
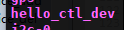
存在hello_ctl_dev,设备节点生成成功
卸载模块

查看/dev/
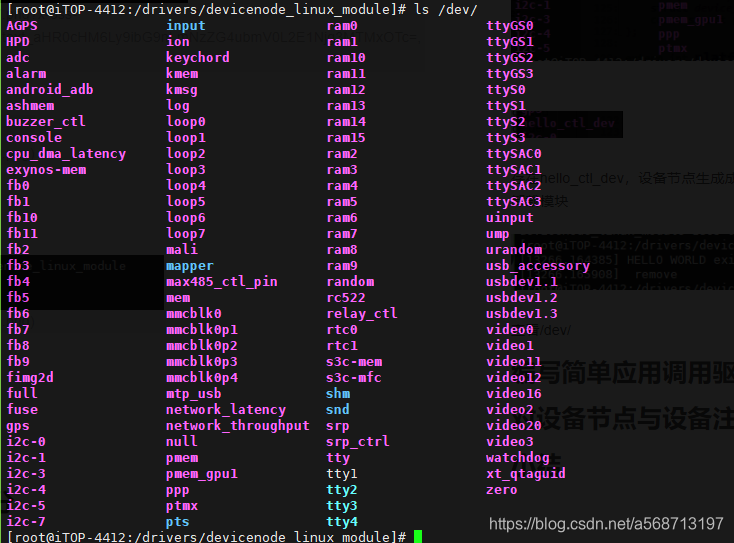
我们的设备节点不存在了
编写简单应用调用驱动
基本原理
在前面我们生成了设备节点,而且也给设备节点注册了内核文件结构体,同时在内核文件结构体中我们也注册了open、close、ioctl的函数,我们做这些的目的是什么呢,当然是将这些函数供给上层的应用使用,这样才能完成我们驱动开发的使命。
当然,Linux一切皆文件的准则大大的方便了我们的操作,我们只要把/dev/中的设备节点作为一个文件进行操作那么就可以调用我们的驱动, Linux系统调用中的文件操作被映射为我们所写的驱动函数(这个过程还不是特别的了解),我们调用系统调用的函数,实质上执行了我们驱动中的函数。
写代码前应知道的
需要的头文件
打印头文件:#include <stdio.h>
应用中调用文件需要的头文件
- #include <sys/types.h>基本系统数据类型。系统的基本数据类型在32位编译环境中保持32位值,并会在64位编译环境中增长为64位值
- #include <sys/stat.h>系统调用函数头文件。可以调用普通文件,目录,管道,socket,字符,块的属性
- #include <fcntl.h>定义了open函数
- #include <unistd.h>定义了close函数
- #include <sys/ioctl.h>定义了ioctl函数
调用的函数
open函数是返回文件描述符
ioctl是应用向驱动传值
close关闭打开的文件
编译代码
使用交叉编译器 arm-none-linux-gnueabi-gcc
实验
代码
#include <stdio.h>

#include <sys/types.h>
#include <sys/stat.h>
#include <fcntl.h>
#include <unistd.h>
#include <sys/ioctl.h>

int main()
{
	int fd;//文件描述符
	char *hello_node = "/dev/hello_ctl_dev";//文件地址

	/*O_RDWR可读可写,O_NDELAY非阻塞方式打开*/
	if((fd = open(hello_node,O_RDWR|O_NDELAY)) < 0)
	{
		printf("APP open %s failed\n",hello_node);
	}
	else
	{
		printf("APP open %s success\n",hello_node);
		ioctl(fd,1,6);//调用ioctl
	}
	close(fd);//关闭文件
}
代码分析
我们调用open函数来打开文件并返回了文件描述符,当我们执行open函数时,系统会执行我们在驱动代码中所写的hello_open这个函数,应当会打印“Hello OPEN !!”,如果文件描述符不小于0(打开成功)那么会打印我们在应用程序中所写的“APP open /dev/hello_ctl_dev success”,接下来我们调用了ioctl函数,系统会去调用我们在驱动代码中所写的hello_ioctl函数,这个函数将我们的参数打印了出来,所以会打印“cmd is 1,arg is 6”,接下来我们调用close关闭文件,系统会去调用我们在驱动代码中所写hello_release函数,这个函数会打印“Hello RELEASE !!”,这就是我们整个应用程序的分析。
注意:由于printk打印和printf打印的优先级问题,应用程序中的printf打印会在最后被打印,并不是程序逻辑的错误
结果演示
注意:要先生成设备节点在执行应用程序
执行应用程序
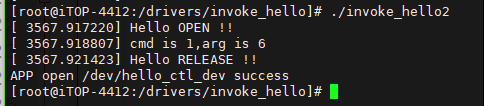
说明我们的分析是正确的,系统调用的文件操作函数调用了我们在驱动中所写的函数,我们做到了对上层的接口。
对设备节点与设备注册、驱动注册的区分
生成节点的代码可以放到任何地方,和驱动注册和设备注册关系不是那么严密,甚至没有驱动注册,也是可以生成设备节点的
我们在前面的设备节点生成时在驱动注册的时候在probe函数中生成了设备节点,但这并不是必须的,我们完全可以在init函数中进行设备节点的生成。
代码演示
#include <linux/init.h>
#include <linux/module.h>
/*driver register*/
#include <linux/platform_device.h>

/*注册杂项设备头文件*/
#include <linux/miscdevice.h>
/*注册设备节点的文件结构体*/
#include <linux/fs.h>

#define DEVICE_NAME "hello_ctl_dev"//设备名
MODULE_LICENSE("Dual BSD/GPL");
MODULE_AUTHOR("GYY");

static int hello_open(struct inode * pinode , struct file * pfile )
{
	printk(KERN_EMERG "Hello OPEN !!\n");
	return 0;
}

static int hello_release(struct inode * pinode, struct file * pfile)
{
	printk(KERN_EMERG "Hello RELEASE !!\n");
	return 0;
}

static long hello_ioctl(struct file * pfile, unsigned int cmd, unsigned long arg)
{
	printk("cmd is %d,arg is %d\n",cmd,arg);
	return 0;
}

static struct file_operations hello_ops = {
	.owner = THIS_MODULE,
	.open = hello_open,
	.release = hello_release,
	.unlocked_ioctl = hello_ioctl,

};

static struct miscdevice hello_dev = {
	.minor = MISC_DYNAMIC_MINOR,//自动分配设备号
	.name = DEVICE_NAME,//设备名
	.fops = &hello_ops,
};

static int hello_init(void)
{
	printk(KERN_EMERG "HELLO WORLD enter!\n");
	misc_register(&hello_dev);
	return 0;
}

static void hello_exit(void)
{
	printk(KERN_EMERG "HELLO WORLD exit!\n");
	misc_deregister(&hello_dev);
}

module_init(hello_init);
module_exit(hello_exit);
在这个代码中我们删掉了所有关于驱动注册的部分,直接在hello_init函数中进行设备节点的生成,但是我们的内核文件结构体是没有改变的,说明我们要实现的功能是相同的
测试
安装模块

执行应用程序

应用程序执行的结果和我们上面的结果是相同的
重点区分
设备节点是“对上”的,为了让应用程序可以调用
一定注意生成设备节点和设备注册没有关系,而且设备节点名称不需要和设备名称相同
一般情况下,是将设备节点注册放到probe中,但是放到init函数中的驱动也是有的
