1、什么是selinux?
selinux是强制访问控制系统的实现,且位于Linux Kernel中。它使用一个安全策略来控制这些实体(用户、进程、应用和文件)之间的交互,如,它可以指明某一个进程访问哪些资源。
强制访问控制系统的用途在于增强系统抵御攻击的能力。
2、selinux状态
  enforcing   //强制,如果违反了策略,则无法继续操作
  disabled    //关闭,安全级别最低
  permissive  //警告,selinux有效,即使是违法策略,依旧可以继续操作,但是会有警告,查看警告信息:cat /var/log/audit/audit.log

命令查询当前selinux状态: getenforce
设置当前selinux状态
A. 文件编辑:vim /etc/sysconfig/selinux
注:文件编辑方式完成之后,需要reboot,修改才能生效;B. 命令修改:setenforce 0 | 1
      setenforce  0      设置selinux为警告模式
      setenforce  1      设置selinux为强制模式
注:命令修改是临时的,重启之后selinux将会恢复修改之前的状态;
例1:通过文件编辑方式改变selinux的状态( 编辑完文件之后,一定要reboot 才会生效)


例 2:通过命令改变当前selinux状态(临时)

3、selinux产生的影响
selinux:1)影响程序的访问文件,通过安全上下文来控制的;
2)影响程序的服务程序功能,通过sebool值来控制的;selinux开启后会关闭系统认为所有认为不安全的操作, 在某种程度上 , 它可以被看作是与标准权限系统并行的权限系统。
- 系统上的文件和其他资源都设置了权限标签 ,控制哪些用户对哪些文件具有哪些访问权;一般来说,只有同时具有欧通系统访问权限和selinux访问权限,才能访问文件;
4、 selinux安全上下文
在seLinux中,访问控制属性叫做安全上下文。
当安全上下文匹配时,才会被访问允许;若不匹配时则不被允许。
(1)临时修改安全上下文
 [root@localhost ftp]# touch /mnt/westos  //建立文件
 [root@localhost ftp]# cd /mnt
 [root@localhost mnt]# ls -Z    //查看安全上下文
 -rw-r--r--. root root unconfined_u:object_r:mnt_t:s0   westos
 [root@localhost mnt]# chcon -t public_content_t westos   //临时安全上下文为public_content_t
 [root@localhost mnt]# ls -Z   //查看安全上下文
 -rw-r--r--. root root unconfined_u:object_r:public_content_t:s0 westos
 [root@localhost mnt]# getenforce  //查看当前selinux的状态
 Enforcing
 [root@localhost mnt]# vim /etc/sysconfig/selinux  //重启selinux,reboot2次,先修改selinux为disabled,后修改为enforcing
 [root@localhost mnt]# reboot
 [root@localhost mnt]# vim /etc/sysconfig/selinux
 [root@localhost mnt]# reboot
 [root@localhost ~]# cd /mnt
 [root@localhost mnt]# ls -Z  //重启后查看安全上下文,会发现之前的改动并未生效
 -rw-r--r--. root root unconfined_u:object_r:default_t:s0 westos


(2)永久修改安全上下文
semanage fcontext -l //内核指定的所有文件的安全上下文的列表 ; man semanage fontext 查询semanage用法
//永久改动
[root@localhost ~]# mkdir /westos
[root@localhost ~]# vim /etc/vsftpd/vsftpd.conf
                    anon_root=/westos //修改ftp服务的默认目录,添加这一行
[root@localhost ~]# systemctl restart vsftpd  //重启vsftpd服务
[root@localhost ~]# ls -Zd /westos  //查看目录的安全上下文,为default_t
[root@localhost ~]# semanage fcontext -a -t public_content_t '/westos(/.*)?'  //永久修改selinux; 其中,-a  添加 ; -t 指定类型 ;(/.*)目录的所有文件
[root@localhost ~]# semanage fcontext -l | grep /westos  //查看westos的安全上下文是不是public_content_t
    /westos(/.*)?                                      all files          system_u:object_r:public_content_t:s0
[root@localhost ~]# restorecon -FvvR /westos    //刷新
    restorecon reset /westos context unconfined_u:object_r:default_t:s0->system_u:object_r:public_content_t:s0
    restorecon reset /westos/westosfile context unconfined_u:object_r:default_t:s0->system_u:object_r:public_content_t:s0
[root@localhost ~]# touch /.autorelabel  //建立文件,相当与selinux 自动初始化
//测试
[root@localhost ~]# ls -Zd /westos   //查看目录i的安全上下文


5、selinux布尔值
selinux布尔值是更改selinux的开关;有时候,selinux的访问权限可选可通过selinux布尔值触发,可以提高系统安全性。
// 安装lftp软件
[root@localhost ~]# lftp 172.25.254.247 -u student //登陆本地用户
Password:
lftp student@172.25.254.247:~> ls
-rw-r--r-- 1 1000 1000 2410 May 12 03:45 passwd
lftp student@172.25.254.247:~> put /etc/passwd //上传文件失败
put: Access failed: 553 Could not create file. (passwd)
lftp student@172.25.254.247:~> quit
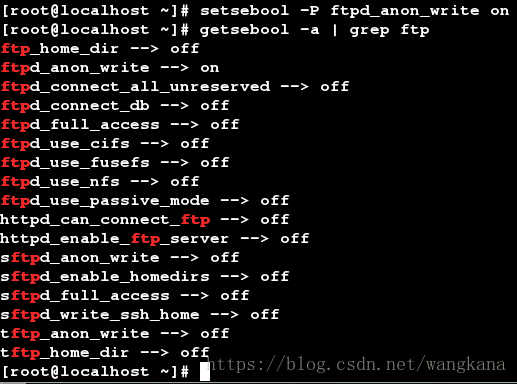
[root@localhost ~]# setsebool -P ftpd_anon_write on //修改布尔值(把匿名用户写权限开启);其中 -P 永久修改
[root@localhost ~]# getsebool -a | grep ftp //用于显示布尔值,查看进程的开启或关闭情况
ftp_home_dir --> on
[root@localhost ~]# lftp 172.25.254.247 -u student //
Password:
lftp student@172.25.254.247:~> ls
lftp student@172.25.254.247:~> put /etc/passwd
2005 bytes transferred
lftp student@172.25.254.247:~> ls
-rw-r--r-- 1 1000 1000 2005 May 15 17:07 passwd
lftp student@172.25.254.247:~> quit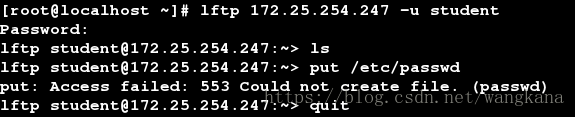

6、监控selinux冲突
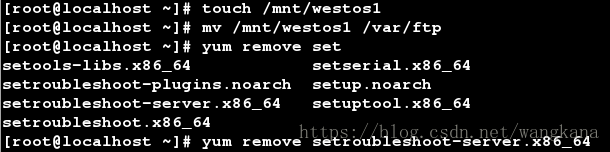
  [root@localhost ~]#  touch /mnt/westos
  [root@localhost ~]#  mv /mnt/westos /var/ftp/
  [root@localhost ~]#  >/var/log/messages  //清空日志
  [root@localhost ~]#  cat /var/log/messages //检查是否清空
  [root@localhost ~]#  >/var/log/audit/audit.log
[root@localhost ~]# cat /var/log/audit/audit.log 

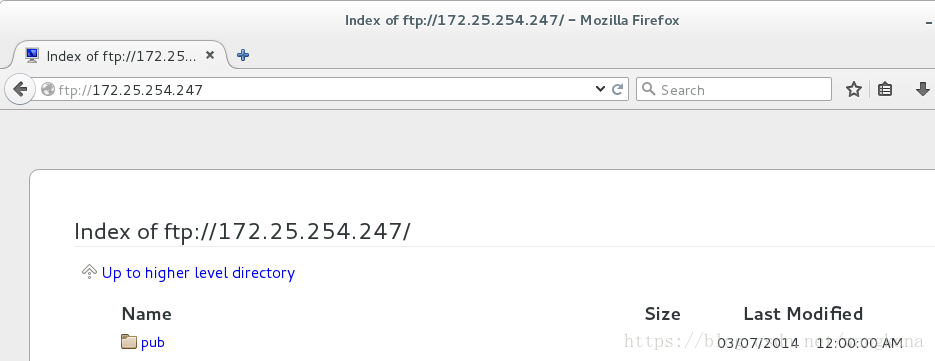
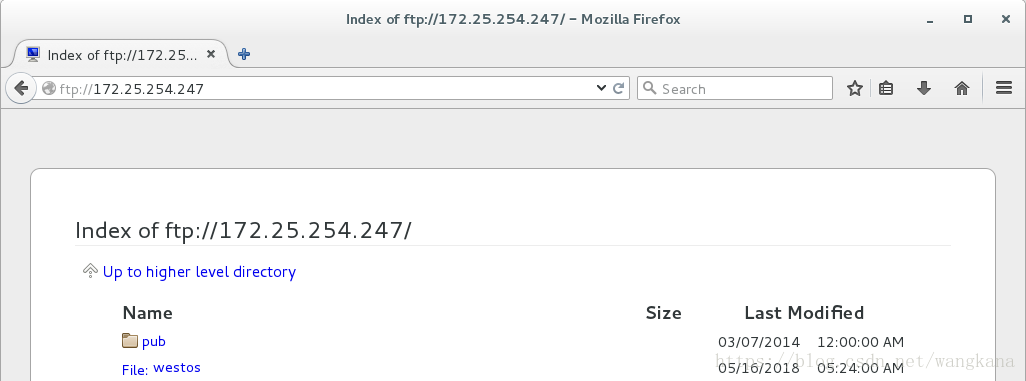
查询浏览器,输入 ftp:172.25.254.247 //看不到westos文件
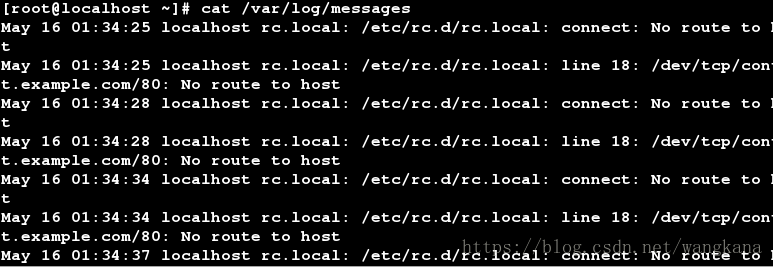
[root@localhost ~]# cat /var/log/messages//查看报错信息,会有程序提供解决方案 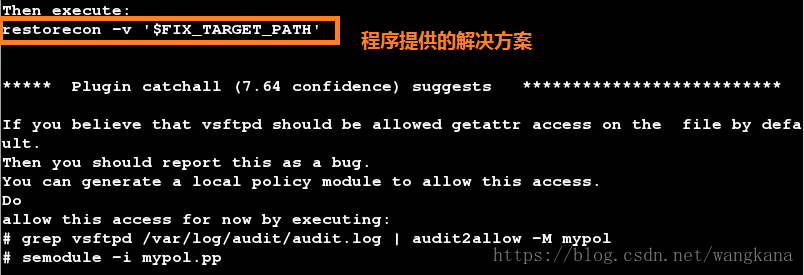
[root@localhost ~]# restorecon -v /var/ftp/* //这是系统提供的解决方案 查询浏览器,输入 ftp:172.25.254.247 //可以看到westos文件
这里我们需要注意的是:
- 提供解决方案的不是系统而是一个软件程序,但此工具不安全,只是解决当前不能访问的问题;
- 如果删除此工具,在日志/var/log/messages下是不会看到解决方案;

此时我们刷新一下浏览器,在日志下我们并没有看到解决方案
当 重新安装软件后,清空日志,再次在浏览器输入ftp://172.25.254.247,查询,日志/var/log/messages中可以看到解决方案。
7、tcp和udp协议 ##
TCP协议:必须要经过三次”对话”才能建立起来,即交互式连接;三次”对话”的目的是使数据包的发送和接收同步,经过三次”对话”之后,主机A才向主机B正式发送数据。
TCP协议能为应用程序提供可靠的通信连接,对可靠性要求高的数据通信系统往往使用TCP协议传输数据。
UDP协议:在正式通信前不必与对方先建立连接,不管对方状态就直接发送。与手机短信非常相似:你在发短信的时候,只需要输入对方手机号就OK了。
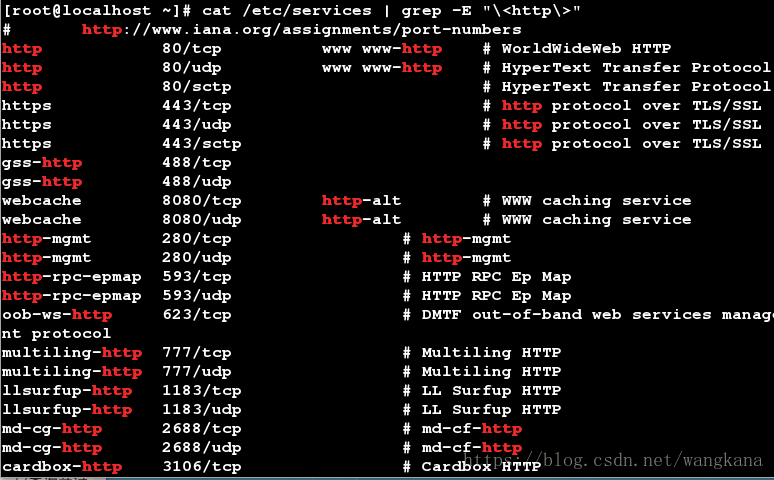
cat /etc/services //查询每一个服务对应端口
cat /etc/services | grep -E "\<http\>"//查询http服务对应端口端口
修改http服务的端口实例
首先,设置selinux为enforcing
[root@localhost ftp]# yum install httpd     //安装httpd ; http默认端口80
[root@localhost ftp]# vim /etc/httpd/conf/httpd.conf   //在文件第42行,修改httpd服务端口为6161,即Listen=6161


[root@localhost ftp]# systemctl restart httpd         //因为修改默认端口,而修改后的端后不在默认列表里,重启服务时报错;
    Job for httpd.service failed. See 'systemctl status httpd.service' and 'journalctl -xn' for details.
[root@localhost ftp]# semanage port -l | grep http   //查询并过滤http对应的端口有哪些;
    http_cache_port_t              tcp      8080, 8118, 8123, 10001-10010
    http_cache_port_t              udp      3130
    http_port_t                    tcp      80, 81, 443, 488, 8008, 8009, 8443, 9000
    pegasus_http_port_t            tcp      5988
    pegasus_https_port_t           tcp      5989
[root@localhost ftp]# semanage port -a -t http_port_t -p tcp 6161   //让htppd使用默认列表之外的端口
[root@localhost ftp]# systemctl restart httpd                       //重启httpd服务成功
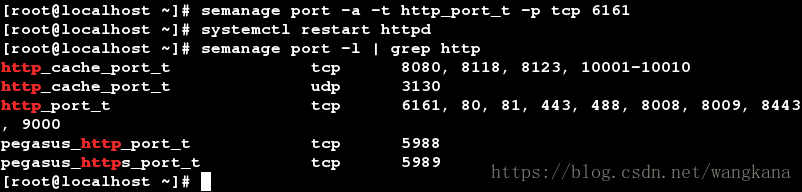
semanage port -l | grep http 查询可以看到修改默认端口成功(http_port_t 的端口列表增添了6161这个端口)