文章目录
1、虚拟环境中安装Tensorflow
[失败]采用安装包安装Tensorflow[失败]
安装tf参考:
20180523_ubuntu+python2.7+tensorflow-gpu安装
sudo pip install tensorflow_gpu-1.8.0-cp27-cp27mu-manylinux1_x86_64.whl
出现两处报错:
ERROR: markdown 3.1.1 has requirement setuptools>=36, but you'll have setuptools 20.7.0 which is incompatible.

ERROR: Cannot uninstall 'enum34'. It is a distutils installed project and thus we cannot accurately determine which files belong to it which would lead to only a partial uninstall.
解决:
sudo pip install setuptools==39.0.0
sudo pip install --ignore-installed enum34
安装好后输入:
python
import tensorflow as tf
报错:
ImportError: No module named tensorflow
[成功]采用conda安装Tensorflow[成功]
感觉上面的问题解决不了了,把整个虚拟环境卸载掉,下一步打算重建虚拟环境,利用conda安装tf1.8-gpu
(drl) fyo@fyo:~$ conda install tensorflow-gpu==1.8.0 -c https://mirrors.tuna.tsinghua.edu.cn/anaconda/pkgs/main
Fetching package metadata .................
Solving package specifications: .

Package plan for installation in environment /home/fyo/anaconda3/envs/drl:

The following NEW packages will be INSTALLED:

    _tflow_select:     1.1.0-gpu             https://mirrors.tuna.tsinghua.edu.cn/anaconda/pkgs/main
    absl-py:           0.8.1-py27_0          https://mirrors.tuna.tsinghua.edu.cn/anaconda/pkgs/main
    astor:             0.8.0-py27_0          https://mirrors.tuna.tsinghua.edu.cn/anaconda/pkgs/main
    backports:         1.0-py_2              https://mirrors.tuna.tsinghua.edu.cn/anaconda/pkgs/main
    backports.weakref: 1.0.post1-py_1        https://mirrors.tuna.tsinghua.edu.cn/anaconda/pkgs/main
    blas:              1.0-mkl               https://mirrors.tuna.tsinghua.edu.cn/anaconda/pkgs/main
    bleach:            1.5.0-py27_0          https://mirrors.tuna.tsinghua.edu.cn/anaconda/pkgs/free
    c-ares:            1.15.0-h7b6447c_1001  https://mirrors.tuna.tsinghua.edu.cn/anaconda/pkgs/main
    enum34:            1.1.6-py27_1          https://mirrors.tuna.tsinghua.edu.cn/anaconda/pkgs/main
    funcsigs:          1.0.2-py27_0          https://mirrors.tuna.tsinghua.edu.cn/anaconda/pkgs/main
    futures:           3.3.0-py27_0          https://mirrors.tuna.tsinghua.edu.cn/anaconda/pkgs/main
    gast:              0.3.2-py_0            https://mirrors.tuna.tsinghua.edu.cn/anaconda/pkgs/main
    grpcio:            1.16.1-py27hf8bcb03_1 https://mirrors.tuna.tsinghua.edu.cn/anaconda/pkgs/main
    html5lib:          0.9999999-py27_0      https://mirrors.tuna.tsinghua.edu.cn/anaconda/pkgs/free
    intel-openmp:      2019.4-243            https://mirrors.tuna.tsinghua.edu.cn/anaconda/pkgs/main
    libgfortran-ng:    7.3.0-hdf63c60_0      https://mirrors.tuna.tsinghua.edu.cn/anaconda/pkgs/main
    libprotobuf:       3.10.1-hd408876_0     https://mirrors.tuna.tsinghua.edu.cn/anaconda/pkgs/main
    markdown:          3.1.1-py27_0          https://mirrors.tuna.tsinghua.edu.cn/anaconda/pkgs/main
    mkl:               2019.4-243            https://mirrors.tuna.tsinghua.edu.cn/anaconda/pkgs/main
    mkl-service:       2.3.0-py27he904b0f_0  https://mirrors.tuna.tsinghua.edu.cn/anaconda/pkgs/main
    mkl_fft:           1.0.15-py27ha843d7b_0 https://mirrors.tuna.tsinghua.edu.cn/anaconda/pkgs/main
    mkl_random:        1.1.0-py27hd6b4f25_0  https://mirrors.tuna.tsinghua.edu.cn/anaconda/pkgs/main
    mock:              3.0.5-py27_0          https://mirrors.tuna.tsinghua.edu.cn/anaconda/pkgs/main
    numpy:             1.16.5-py27h7e9f1db_0 https://mirrors.tuna.tsinghua.edu.cn/anaconda/pkgs/main
    numpy-base:        1.16.5-py27hde5b4d6_0 https://mirrors.tuna.tsinghua.edu.cn/anaconda/pkgs/main
    protobuf:          3.10.1-py27he6710b0_0 https://mirrors.tuna.tsinghua.edu.cn/anaconda/pkgs/main
    six:               1.13.0-py27_0         https://mirrors.tuna.tsinghua.edu.cn/anaconda/pkgs/main
    tensorboard:       1.8.0-py27hf484d3e_0  https://mirrors.tuna.tsinghua.edu.cn/anaconda/pkgs/main
    tensorflow:        1.8.0-0               https://mirrors.tuna.tsinghua.edu.cn/anaconda/pkgs/main
    tensorflow-base:   1.8.0-py27hee38f2d_0  https://mirrors.tuna.tsinghua.edu.cn/anaconda/pkgs/main
    tensorflow-gpu:    1.8.0-h7b35bdc_0      https://mirrors.tuna.tsinghua.edu.cn/anaconda/pkgs/main
    termcolor:         1.1.0-py27_1          https://mirrors.tuna.tsinghua.edu.cn/anaconda/pkgs/main
    werkzeug:          0.16.0-py_0           https://mirrors.tuna.tsinghua.edu.cn/anaconda/pkgs/main

Proceed ([y]/n)?
不继续,按照别人的教程输入:
conda install tensorflow-gpu==1.8.0
结果跟之前的提示一模一样,得,就这么着,安装呗~~
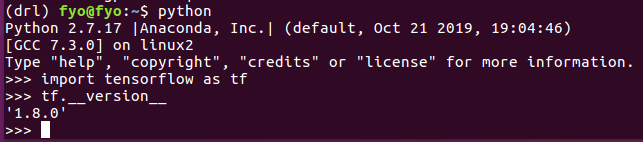
OK,看样子效果不错
2、虚拟环境中安装cuda、cudnn
[失败]采用conda安装cuda、cudnn[失败]
NVIDIA-Linux-x86_64-390.87.run(已安装)
cuda_9.0.176_384.81_linux.run(有)
cudnn7(无)
GCC 4.8(无)
Bazel 0.10.0(无)
tensorflow_gpu-1.8.0(无)
添加conda国内镜像:
conda config --add channels https://mirrors.tuna.tsinghua.edu.cn/anaconda/pkgs/free/
conda config --add channels https://mirrors.tuna.tsinghua.edu.cn/anaconda/pkgs/main/
conda config --add channels https://mirrors.tuna.tsinghua.edu.cn/anaconda/cloud/pytorch/
conda config --set show_channel_urls yes
安装cuda:
conda install cudatoolkit=9.0 -c https://mirrors.tuna.tsinghua.edu.cn/anaconda/pkgs/free/linux-64/

安装cudnn:
conda install cudnn=7.0.5 -c https://mirrors.tuna.tsinghua.edu.cn/anaconda/pkgs/main/linux-64/

说明第一步安装cuda和第二步安装cudnn有冲突,待会儿在重新安装cuda或者upgrade一下咯。
重新安装cuda:
conda install cudatoolkit=9.0 -c https://mirrors.tuna.tsinghua.edu.cn/anaconda/pkgs/free/linux-64/

感觉这样仍然会有问题,于是没有继续。.
想起来有一个cuda9.0的包,于是跑去
sudo sh cuda_9.0.176_384.81_linux.run --no-opengl-libs
最后也没有结果。下一步完全按照网上的教程来进行下载和安装!
[失败]采用安装包安装cuda、cudnn[失败]
20180830_ROS开发笔记(8)——Turtlebot3 Gazebo仿真环境下深度强化学习DQN(Deep Q-Learning)开发环境构建
20180523_ubuntu+python2.7+tensorflow-gpu安装
20180131_Ubuntu 16.04 GTX950M + cuda9.0 + cuDNN7.0 + TensorFlow 1.5 / 1.8 安装记录
重点文章:NVIDIA cuDNN CUDA Tensorflow版本对应
最终决定按照深度学习环境搭建来搭建
下载cudnn:
官网
安装cuda参考ubuntu16.04驱动+cuda9.0+cudnn7.0
[成功]采用conda安装cuda、cudnn[成功]
上一步的过程中感觉问题多多,恰好搜见这篇博客,于是再次转向conda安装:
ubuntu16.04 通过anaconda建立虚拟环境,安装tensorflow1.10,cuda9.0,cudnn7.1.2
conda config --add channels https://mirrors.tuna.tsinghua.edu.cn/anaconda/pkgs/free/
conda config --add channels https://mirrors.tuna.tsinghua.edu.cn/anaconda/pkgs/main/
conda config --add channels https://mirrors.tuna.tsinghua.edu.cn/anaconda/cloud/pytorch/
conda config --set show_channel_urls yes
安装cuda:
conda install cudatoolkit=9.0 -c https://mirrors.tuna.tsinghua.edu.cn/anaconda/pkgs/free/linux-64/
安装cudnn:
conda install cudnn=7.1.2
可以!!版本真的是个大麻烦。。。cudnn7.0.5愣是不行,cudnn7.1.2立马就好。。。坑爹啊。。。

看样子是安装好了吧?另外一种方法测试时好像不成功:
nvcc-v
3、虚拟环境中安装ROS
安装ROS Kinetic参考:
20180714_Ubuntu16.04环境下ROS Kinetic的安装
另外,参考20180830_ROS开发笔记(8)——Turtlebot3 Gazebo仿真环境下深度强化学习DQN(Deep Q-Learning)开发环境构建,多了一个命令在Anaconda中安装ROS 依赖包:
pip install -U rosinstall msgpack empy defusedxml netifaces
4、编译
mkdir -p ~/auv_ws/src
cd auv_ws/src/
catkin_init_workspace
cd ..
catkin_make
source devel/setup.bash
sudo apt install ros-kinetic-uuv-simulator
然后编译,出现2个报错:
In file included from /home/fyo/auv_ws/build/uuv_simulator/uuv_gazebo_plugins/uuv_gazebo_plugins/Double.pb.cc:4:0:
/home/fyo/auv_ws/build/uuv_simulator/uuv_gazebo_plugins/uuv_gazebo_plugins/Double.pb.h:10:40: fatal error: google/protobuf/port_def.inc: No such file or directory

In file included from /home/fyo/auv_ws/build/uuv_simulator/uuv_gazebo_plugins/uuv_gazebo_plugins/Accel.pb.cc:4:0:
/home/fyo/auv_ws/build/uuv_simulator/uuv_gazebo_plugins/uuv_gazebo_plugins/Accel.pb.h:10:40: fatal error: google/protobuf/port_def.inc: No such file or directory
解决不了,那干脆卸载ros,卸载虚拟环境
重新建立虚拟环境,先安装ros,测试好之后再装tf、cuda和cudnn
如果这条思路不行的话,那就重装系统,安装anaconda,建立虚拟环境,先安装ros,测试好之后再装tf、cuda和cudnn
