目录
前言
本文在WSL(windows subsystem for linux),基于Anconda3 安装Caffe-faster-rcnn CPU版本。计划是在笔记本上构建CPU环境用于代码理解,以及推理的测试。模型训练计划用云平台实现。
通过conda 创建虚拟环境
conda create -n caffe_py27 python=2.7
提示:更新相关系统源,conda源
后续进入caffe_py27进行操作
conda activate caffe_py27
Git下载Faster rcnn库

原始的下载指令:git clone --recursive https://github.com/rbgirshick/py-faster-rcnn.git
由于github下载速度较慢,利用码云(https://gitee.com/)进行下载。
git clone https://gitee.com/shaozhechen/py-faster-rcnn.git
cd ./py-faster-rcnn/
下载caffe-fast-rcnn(!注意,作者库中@0dcd397为对应的上传版本!我重复装了几次才发现…)
git clone https://gitee.com/liu1guo2qiang3/caffe-fast-rcnn.git
cd ./caffe-fast-rcnn
git checkout 0dcd397 #这个同步到指定版本的commit
安装python依赖
进入.\py-faster-rcnn\caffe-fast-rcnn\python目录
pip install -r requirements.txt
提示:
You are using pip version 9.0.1, however version 20.0.2 is available.
You should consider upgrading via the ‘pip install --upgrade pip’ command.
pip install --upgrade pip
Collecting pip
Downloading https://files.pythonhosted.org/packages/54/0c/d01aa759fdc501a58f431eb594a17495f15b88da142ce14b5845662c13f3/pip-20.0.2-py2.py3-none-any.whl (1.4MB)
4% |█▍ | 61kB 4.2kB/s eta 0:05:33E
网络链接中断
可以直接复制链接通过迅雷下载,在利用如下命令安装(安装文件需要拷贝至当前目录)
pip install pip-20.0.2-py2.py3-none-any.whl
很多是由于网络不好超时导致;可以尝试增加等待延时
sudo pip install --default-timeout=100 future
提示

通过命令更新
pip install --upgarde python-dateutil
更新成功
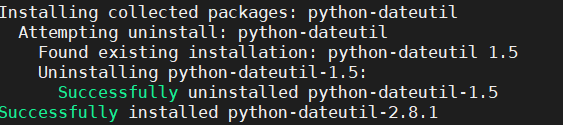
此外,需要将requirements.txt 中的相关版本修改: python-dateutil>=1.4,<2.9
有很多库在线更新太慢,基本都是通过迅雷下载,然后再安装;部分上传至csdn资源,请自行下载。
编译配置修改
进入目录.\py-faster-rcnn\caffe-fast-rcnn
复制配置文件
cp Makefile.config.example Makefile.config
去除注释
 CPU_ONLY := 1
 WITH_PYTHON_LAYER := 1
配置python路径(基于Anaconda3 python2.7)
 ANACONDA_HOME := $(HOME)/anaconda3/envs/caffe_py27
 PYTHON_INCLUDE := $(ANACONDA_HOME)/include \
		 $(ANACONDA_HOME)/include/python2.7 \
		 $(ANACONDA_HOME)/lib/python2.7/site-packages/numpy/core/include \
 PYTHON_LIB := $(ANACONDA_HOME)/lib
添加hd5f库路径
/usr/include/hdf5/serial及/usr/lib/x86_64-linux-gnu/hdf5/serial
INCLUDE_DIRS := $(PYTHON_INCLUDE) /usr/local/include /usr/include/hdf5/serial
LIBRARY_DIRS := $(PYTHON_LIB) /usr/local/lib /usr/lib /usr/lib/x86_64-linux-gnu/hdf5/serial
ps:不知道自己python路径的:
python #进入python脚本
import sys
print(sys.executable)
编译lib
进入目录\py-faster-rcnn\lib
修改setup.py内容
注释对应下列内容
#CUDA = locate_cuda()  only cpu
#self.set_executable('compiler_so', CUDA['nvcc'])  only cpu

# Extension('nms.gpu_nms',
        # ['nms/nms_kernel.cu', 'nms/gpu_nms.pyx'],
        # library_dirs=[CUDA['lib64']],
        # libraries=['cudart'],
        # language='c++',
        # runtime_library_dirs=[CUDA['lib64']],
        # this syntax is specific to this build system
        # we're only going to use certain compiler args with nvcc and not with
        # gcc the implementation of this trick is in customize_compiler() below
        # extra_compile_args={'gcc': ["-Wno-unused-function"],
                            # 'nvcc': ['-arch=sm_35',
                                     # '--ptxas-options=-v',
                                     # '-c',
                                     # '--compiler-options',
                                     # "'-fPIC'"]},
        # include_dirs = [numpy_include, CUDA['include']]
    # ),
然后 make
提示:

pip install easydict
提示:
ImportError: No module named cv2
pip install opencv-python
编译Caffe
进入目录…\py-faster-rcnn\caffe-fast-rcnn
make
make pycaffe
正常不会报错,如果报错查看是否缺少东西或者版本冲突
测试
需要下载模型:
./data/scripts/fetch_faster_rcnn_models.sh
外网下载过慢:
提供百度盘下载链接:
链接: https://pan.baidu.com/s/13yZmsgZI72sAwyKbBzzKEw 提取码: jmz6
由于使用cpu,需要修改lib中的相关内容
/lib/fast_rcnn/nms_wrapper.py
修改结果如下:
from fast_rcnn.config import cfg
#from nms.gpu_nms import gpu_nms
from nms.cpu_nms import cpu_nms

def nms(dets, thresh, force_cpu=False):
    """Dispatch to either CPU or GPU NMS implementations."""

    if dets.shape[0] == 0:
        return []
    # if cfg.USE_GPU_NMS and not force_cpu:
        # return gpu_nms(dets, thresh, device_id=cfg.GPU_ID)
    else:
        return cpu_nms(dets, thresh)
进入.\py-faster-rcnn
python .tools/demo.py --cpu
最终成功!!!
Loaded network /mnt/d/9_deeplearning/caffe_rcnn_try/py-faster-rcnn/data/faster_rcnn_models/VGG16_faster_rcnn_final.caffemodel
~~~~~~~~~~~~~~~~~~~~~~~~~~~~~~~~~~~
Demo for data/demo/000456.jpg
Detection took 29.743s for 300 object proposals
~~~~~~~~~~~~~~~~~~~~~~~~~~~~~~~~~~~
Demo for data/demo/000542.jpg
Detection took 21.961s for 161 object proposals
~~~~~~~~~~~~~~~~~~~~~~~~~~~~~~~~~~~
Demo for data/demo/001150.jpg
Detection took 22.609s for 194 object proposals
~~~~~~~~~~~~~~~~~~~~~~~~~~~~~~~~~~~
Demo for data/demo/001763.jpg
Detection took 20.895s for 196 object proposals
~~~~~~~~~~~~~~~~~~~~~~~~~~~~~~~~~~~
Demo for data/demo/004545.jpg
Detection took 22.609s for 300 object proposals
PS:
下图出现关于“roi_pooling_param”是caffe版本错误,需要用作者对应上传的“ 0版本dcd397”

关于多个protobuf库
可以通过protoc --version 查看版本;
此外还可以查看安装了有哪些版本
conda list 和pip list
上述两个命令可能出现不同的版本,可以卸载不需要的版本
conda 中protobuf库包括:libprotobuf以及protobuf
conda remove libprotobuf
pip uninstall protobuf
最终我安装protobuf版本为2.6.1
通过pip install protobuf==2.6.1 安装成功
参考链接:
[1].https://www.jianshu.com/p/30fcc3df764d
