爬取网络图片其实与爬取文本信息实质上没有太大的区别,在抓取网络图片的过程中主要需要确定网络图片的地址,图片的格式,图片的保存路径。
假定某网络图片的网络地址是http://img.xshuma.com/201309/161539130907740379.jpg
首先要对图片保存的命名方式进行设定,假设我要保存为161539130907740379.jpg,结合我之前分享过的关于字符串分割的博文,用split()方法一行代码就可以得到命名结果,保存图片的路径就自定义设置为D盘的某个文件夹D:\pics。
方法一【requests.get+open】:
import os
import requests

url = 'http://img.xshuma.com/201309/161539130907740379.jpg'
path = 'D://pics'

if not os.path.exists(path):
    os.makedirs(path)

#设置图片保存位置
imgpath = path + '//' + os.path.split(url)[1]

try:
    if not os.path.exists(imgpath):
        #对网络图片地址发送get请求
        t = requests.get(url)
        with open('imgpath','wb')as f:
            #将请求内容写入指定的imgpath
            f.write(t.content)
        f.close()
        print('Saving Success!')
    else:
        print('Already Existed!')
except:
    print('File Error!')
方法二【urllib.request.urlretrieve】:
这个方法需要注意一点:urlretrieve()方法在python3中的urllib.request模块中,与python2有差异。
import urllib.request as request
import os

url = 'http://img.xshuma.com/201309/161539130907740379.jpg'
path = 'D://pics'

if not os.path.exists(path):
    os.makedirs(path)

imgpath = path + '//' + os.path.split(url)[1]

#使用urlretrieve方法将图片从指定的网络地址下载下来
request.urlretrieve(url,imgpath)
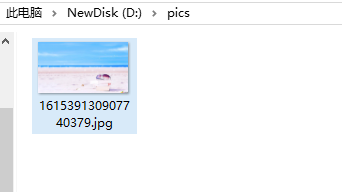
最后结果如图:
经验总结:这两个方法都很好用,方法一从文件读写的思路来进行保存图片到本地的操作,方法二则是利用python提供的强大函数库来解决问题,如果是经验不足的小白建议从方法一出发去理解文件读取的操作,如果是经常要用到这方面的操作,建议用方法二,一行代码就能完成发送请求和写入文件信息的操作,达到事半功倍的效果,这才是python啊。

