上篇我们大致了解了如何运用OpenCV在Android上进行图片但简单处理
Android OpenCV应用篇二:图片处理
接下来我们就运用之前的一些相关技术来搞点事情:
如何从一张图片中将文字提取出来?
前言
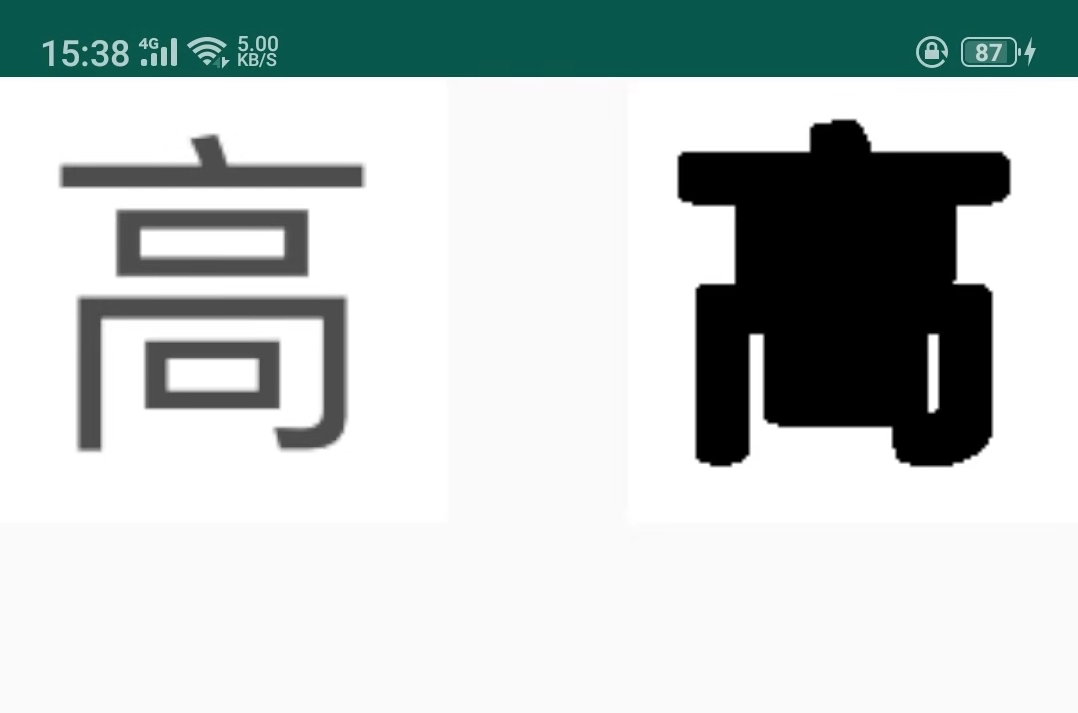
在开始之前,我们先来看一个字
高
可以看到,这个字体是上中下结构,相应的,我们的汉字还有左中右结构等等,我们如何在识别的过程中,不会吧这些特殊结构的字体识别成多个?


看一下高字的腐蚀效果:
当然,我们传统的都是认为白纸黑字,但实际上并不一定都是这一,所以在此之前我们需要进行排除环境影响,如何处理?
这里也是用到我们上一篇但知识:
- 降噪
- 阈值化
开始我们的文字提取
OK前面大致介绍了一下基本操作,我们下面总结一下,然后开始实现
步骤:
- 阈值化
- 腐蚀
- 降噪
- 文字区域检测
- 文字提取
第一步:阈值化&腐蚀
由于字体大小,或其他一些字体间的间距、行宽等影响,不同的字体图片可能需要用到等腐蚀效果不同,这里我们只进行原理上的处理,我选了一张比较适中等图片进行操作演示。
    /**
     * 阈值化,并腐蚀
     * @param src
     */
    private void erode(Mat src) {
        // 阈值化
        Imgproc.threshold(src, src, 100, 255, Imgproc.THRESH_BINARY);
//        Imgproc.adaptiveThreshold(opMat,opMat,255.0,Imgproc.ADAPTIVE_THRESH_GAUSSIAN_C,Imgproc.THRESH_BINARY,3,0.0);

        Mat erodeKernel = Imgproc.getStructuringElement(Imgproc.MORPH_ELLIPSE, new Size(5, 5));
        Imgproc.erode(src, src, erodeKernel);
    }
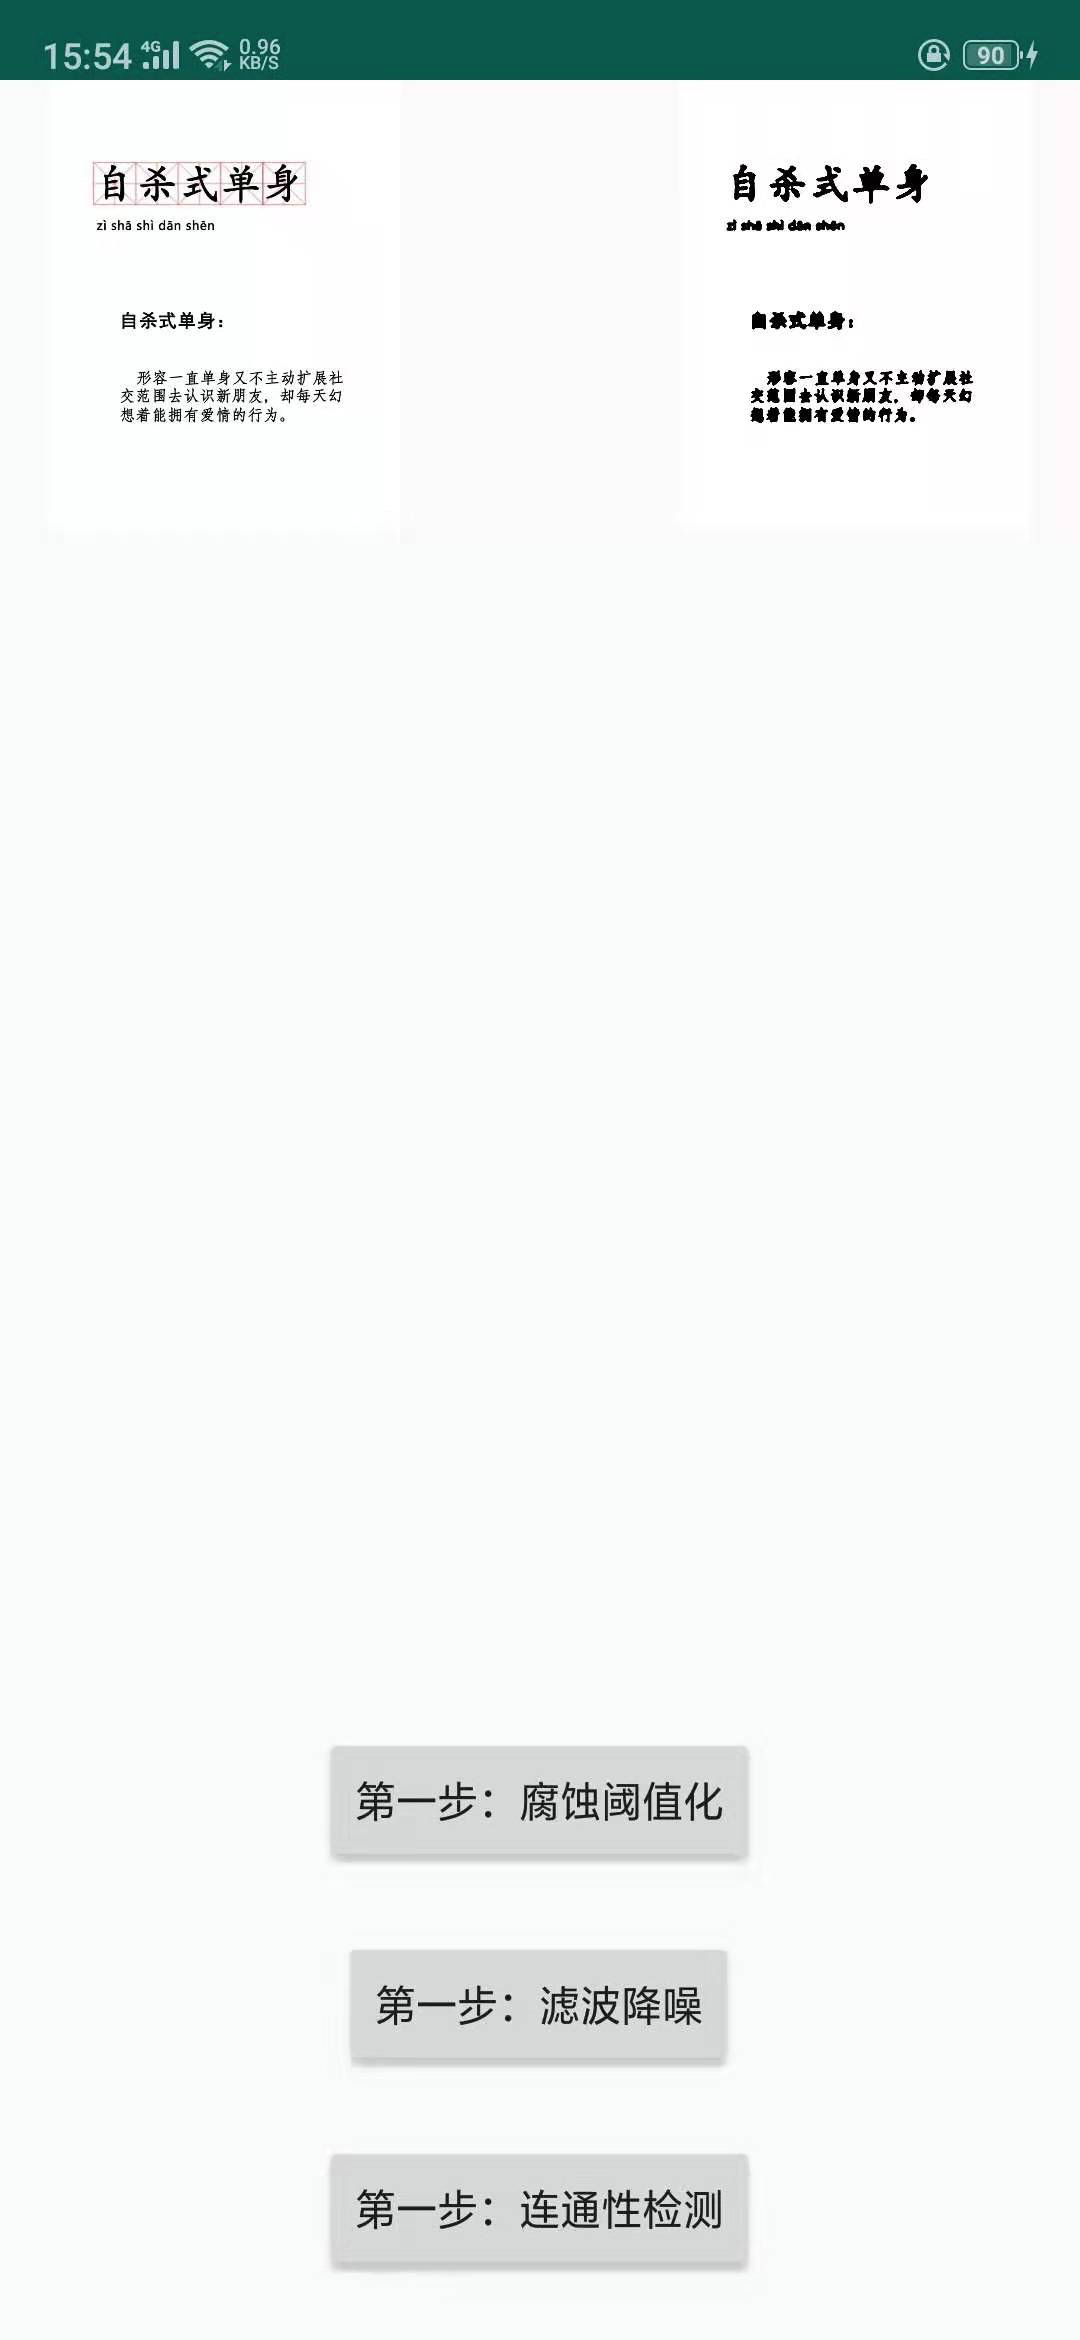
第一步处理效果:

可以看出,完全转换成了白纸黑字,标题上等红色背景框完全除去掉了。但可以看出有明显的噪声,比如身字左下角有一个点等。
第二步 滤波降噪
这里我们采用最为简单的中值滤波进行降噪
    /**
     * 采用中值滤波进行降噪
     *
     * @param src
     */
    private void medianBlur(Mat src) {
        Imgproc.medianBlur(src, src, 7);
    }
处理后的效果:
第三步 区域检测
区域检测,这里我们采用检测连通区域再根据联通区域计算边框的方式进行检测,当然,还有其他的一些检测方法,比如轮廓检测法、边缘检测等方法。
- 连通区域检测
- Rect边框计算
连通区域检测
首先进行连通区域检测,这里我们采用种子填充法进行连通区域检测,比较常用的还有两遍扫描法等
种子填充法
详情请查阅 百度百科
下面开始进行种子填充算法,为了方便展示填充效果,我将每个连通区域都进行了重新赋值,这样就可以得到一个不同颜色值的联通区域展示图。具体代码如下:
    /**
     * 种子填充法进行联通区域检测
     */
    private Mat seedFill(Mat binImg, Mat src) {
        // 用来记录连通区域都数据图
        Mat lableImg = new Mat();
        // 这个是用来展示连通区域都效果图。
        Mat showMat = new Mat(binImg.size(), CvType.CV_8UC3);
        // 不需要记录额外都数据,一个通道就够了。
        binImg.convertTo(lableImg, CvType.CV_32SC1);

        int rows = lableImg.rows();
        int cols = lableImg.cols();

        double lable = 0;

        for (int r = 0; r < rows; r++) {
            for (int c = 0; c < cols; c++) {
                // 获取种子像素点
                double[] data = lableImg.get(r, c);
                if (data == null || data.length < 1) {
                    continue;
                }
                if (data[0] == 255) {
                	// 不是我们要都种子像素,继续
                    // 展示图背景设置为白色
                    showMat.put(r, c, 255, 255, 255);
                    continue;
                }
                if (data[0] != 0) {
                    // 已经标记过了,继续
                    continue;
                }

                // 走到这里说明找到了新的种子像素点,新的填充开始
                lable++;
                // 随机生成一个颜色,用来填充展示图
                double[] color = {Math.random() * 255, Math.random() * 255, Math.random() * 255};

                // 开始种子填充
                LinkedList<Point> neighborPixels = new LinkedList<>();
                neighborPixels.push(new Point(r, c));

                while (!neighborPixels.isEmpty()) {
                    Point curPx = neighborPixels.pop();
                    int row = (int) curPx.x;
                    int col = (int) curPx.y;
                    lableImg.put(row, col, lable);
                    showMat.put(row, col, color);

                    // 左边
                    double[] left = lableImg.get(row, col - 1);
                    if (left != null && left.length > 0 && left[0] == 0) {
                        neighborPixels.push(new Point(row, col - 1));
                    }

                    // 右边
                    double[] right = lableImg.get(row, col + 1);
                    if (right != null && right.length > 0 && right[0] == 0) {
                        neighborPixels.push(new Point(row, col + 1));
                    }

                    // 上边
                    double[] top = lableImg.get(row - 1, col);
                    if (top != null && top.length > 0 && top[0] == 0) {
                        neighborPixels.push(new Point(row - 1, col));
                    }

                    // 下边
                    double[] bottom = lableImg.get(row + 1, col);
                    if (bottom != null && bottom.length > 0 && bottom[0] == 0) {
                        neighborPixels.push(new Point(row + 1, col));
                    }
                }
            }
        }
        // 返回展示图
        return showMat;
    }
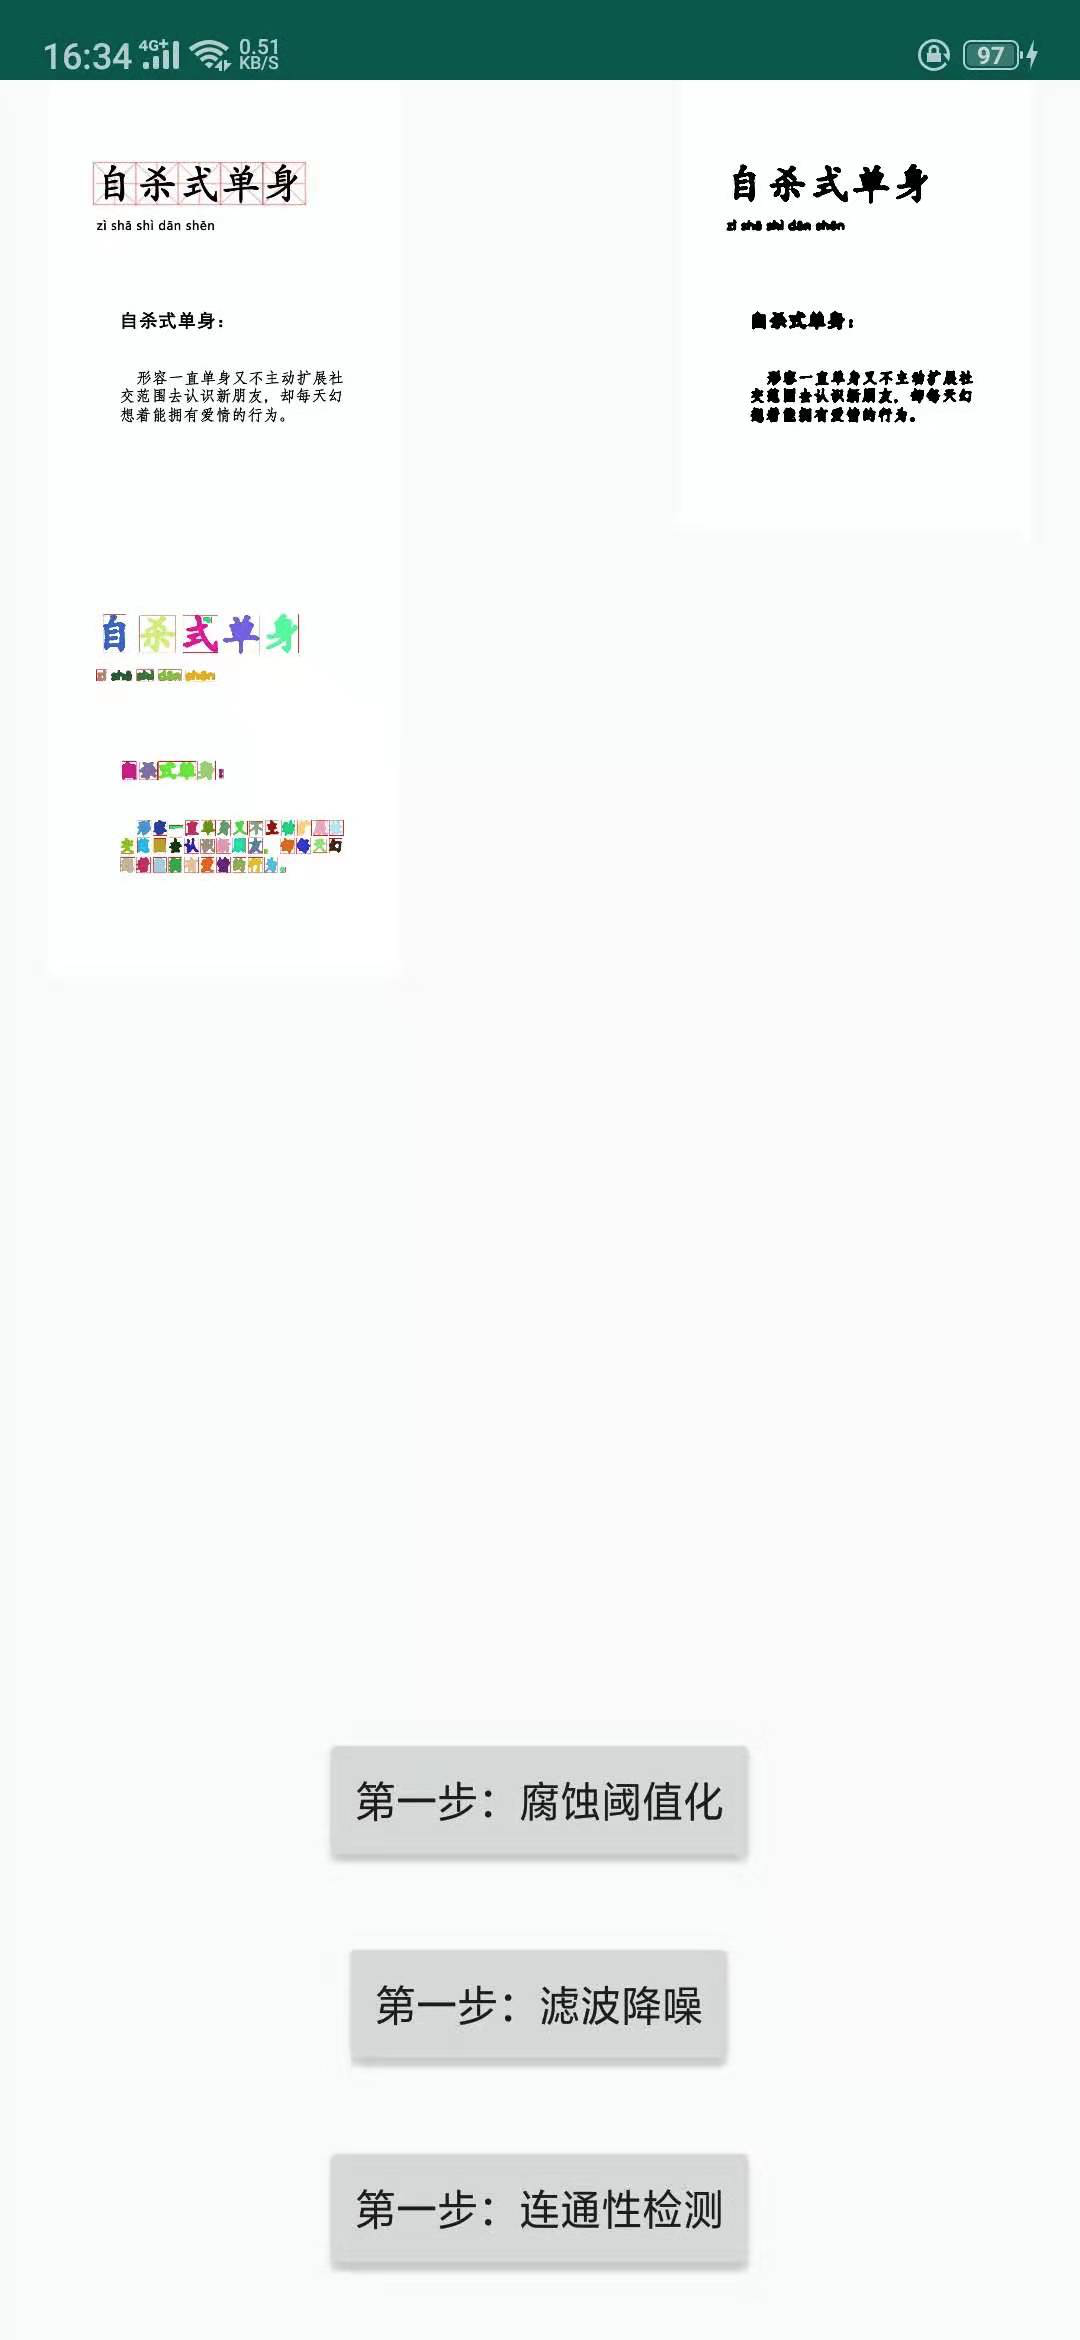
效果如下:

从最下面都那幅图可以看出,我们进行都连通区域检测还是比较成功的,可以发现每个字体都是不同都颜色,有一点缺陷就是式字的那个点没有连通进去,还有拼音都连成了一体。这个就是前面有提到的字体、风格、字体大小、间距等等影响。当然,这些缺陷都是可以通过更智能但处理方式进行优化的。
字体边框计算
通过上一步骤的检测,我们可以得到每个连通区域的像素点,修改上一步骤的代码,在开始新的连通区域检测之前,我们定义一个连通区域坐标点列表集合:
List<List<Point>> texts = new LinkedList<>();
在进行连通区域检测的时候,每次出栈一个点,就将这个点加入到这个坐标点集合中去:
Point curPx = neighborPixels.pop();
int row = (int) curPx.x;
int col = (int) curPx.y;
textPoint.add(new Point(col, row));
这样当我们把连通区域检测完成之后就得到一个连通区域点集合的列表:texts
然后开始计算每个连通区域的边框
        for (List<Point> data : texts) {
            MatOfPoint mat = new MatOfPoint();
            mat.fromList(data);
            Rect rect = Imgproc.boundingRect(mat);
            Imgproc.rectangle(showMat, rect.tl(), rect.br(), new Scalar(255, 0, 0, 255));
        }
上述代码我们利用连通区域点集合计算连通区域边框,并将边框绘制到了效果图上,下面我们看下效果:
截取文字
下面我们进行文字的截取,并将他们展示在一个列表中。
继续修改上一步的代码:
        // 定义一个文字图片列表用来保存截取出来的文字。
        List<Mat> textMats = new LinkedList<>();
        for (List<Point> data : texts) {
            MatOfPoint mat = new MatOfPoint();
            mat.fromList(data);
            // 计算边框
            Rect rect = Imgproc.boundingRect(mat);
            // 绘制边框
            Imgproc.rectangle(showMat, rect.tl(), rect.br(), new Scalar(255, 0, 0, 255));
            // 利用边框截取文字,并加入到列表中。
            textMats.add(src.submat(rect));
        }
        adapter.setData(textMats);
我们在得到每个连通区域后,利用Mat提供的截取方法进行图片的截取,然后我们得到一个文字图片列表,并把它们展示在一个ListView中:


下面是我从阅读软件中截的一张图,字体、间距等都是比较常规的,我们看下效果:

可以看出效果还不错,除了第一行都标题由于色值原因被过滤掉了,正文基本上都成功提取出来了。
在来看下另一张丰富排版都提取效果:
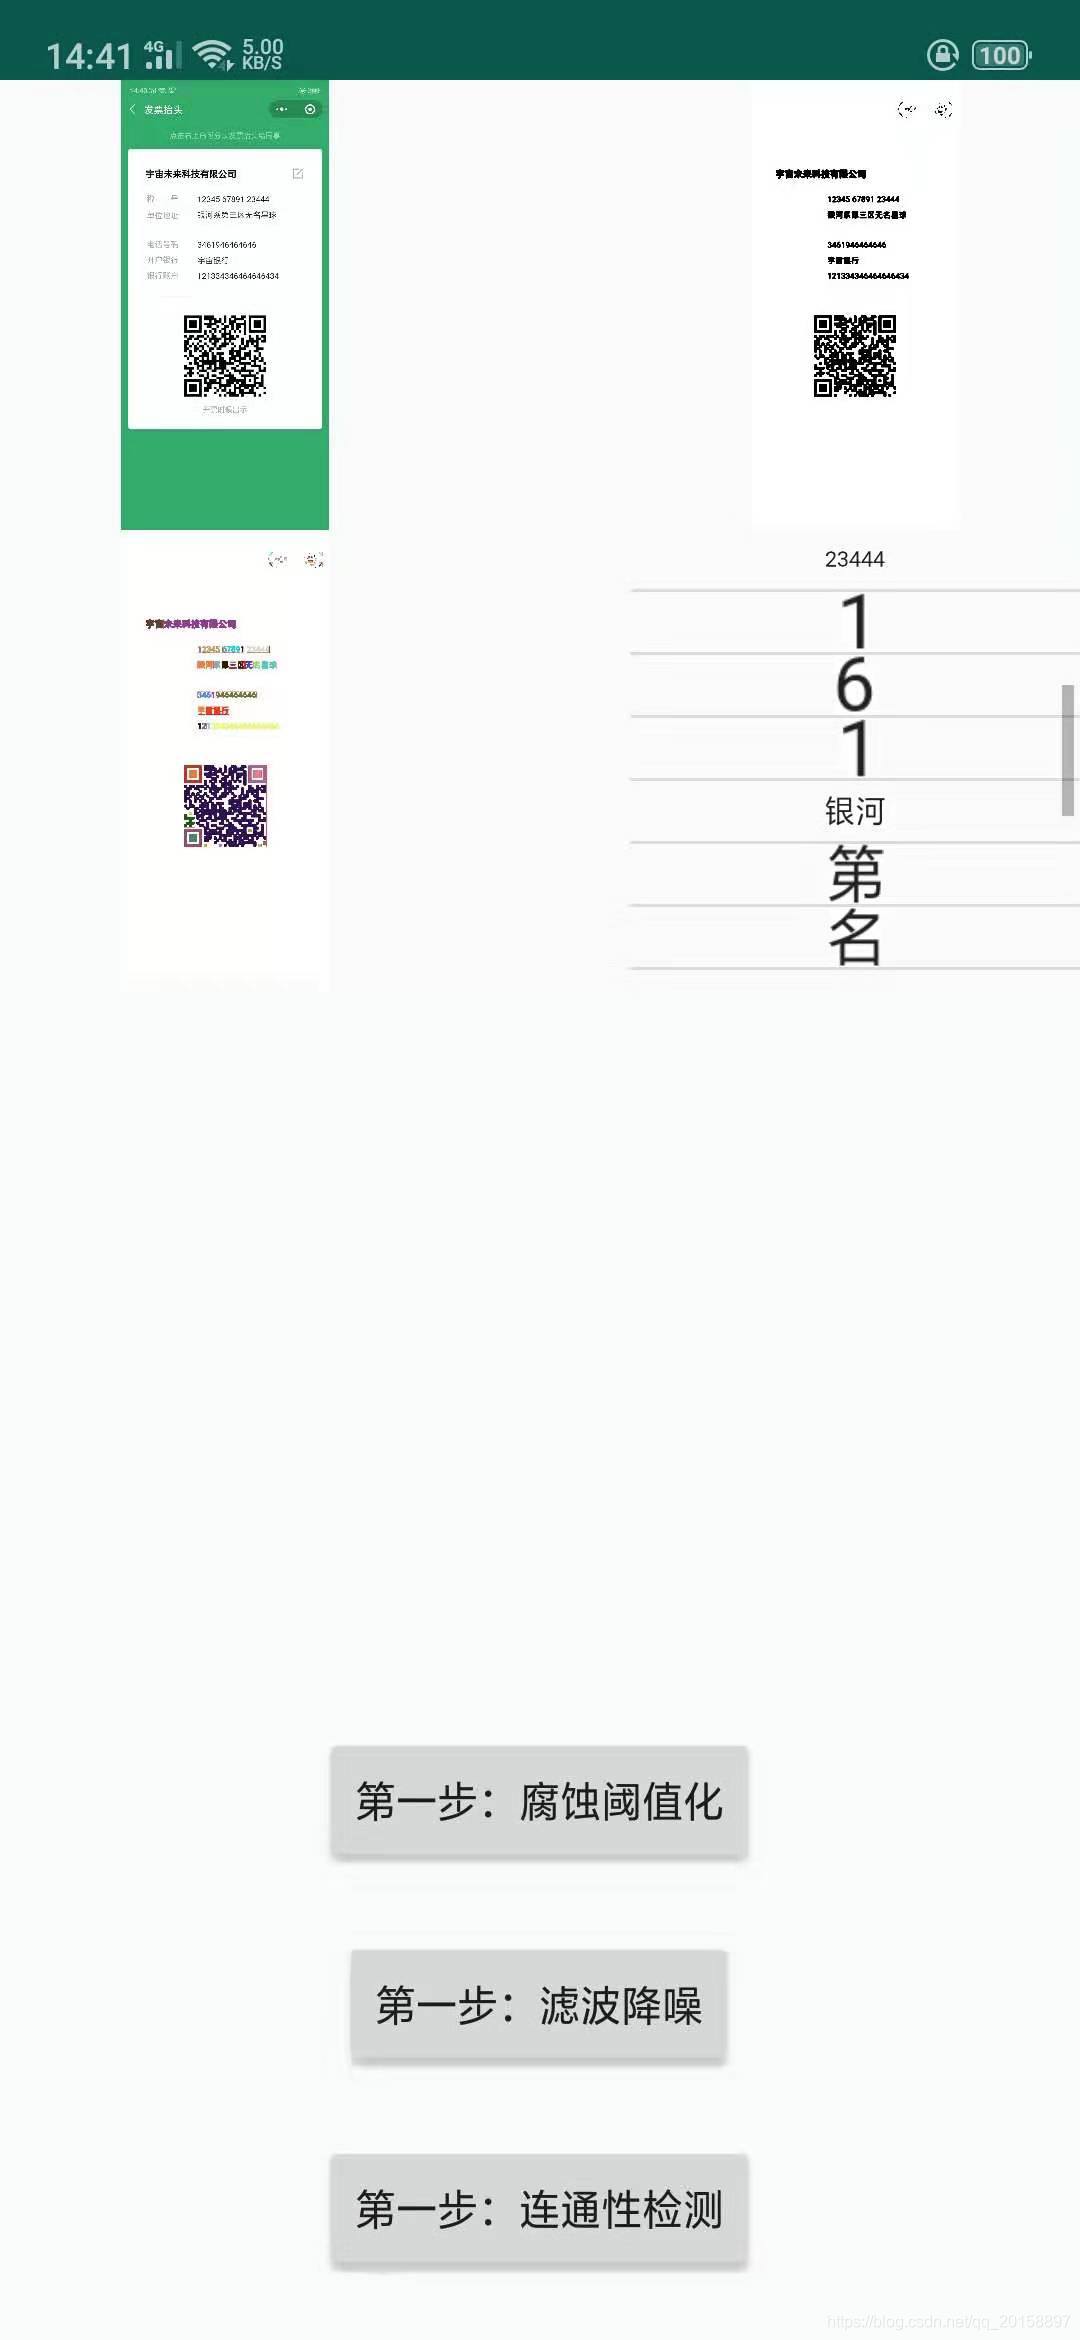
可以看的出来,从这个图片中提取文字效果就每那么好了,对待这种排版,我们需要一种更为智能都识别方式。
最为基本的应用我们就分享到这了。结合文字匹配程序,我们可以在此基础上做更多好玩的工具:身份证信息提取、发票信息提取、名片信息提取等等。
附上完整的关键部分处理代码:
import android.graphics.Bitmap;
import android.os.Bundle;
import android.view.LayoutInflater;
import android.view.View;
import android.view.ViewGroup;
import android.widget.BaseAdapter;
import android.widget.ImageView;
import android.widget.ListView;
import com.hankang.opencv.R;
import com.hankang.opencv.base.BasePicturePickActivity;
import org.opencv.android.Utils;
import org.opencv.core.*;
import org.opencv.imgproc.Imgproc;

import java.util.ArrayList;
import java.util.LinkedList;
import java.util.List;

public class TextActivity extends BasePicturePickActivity {
    private ImageView imageView;
    private ImageView imageView2;
    private ImageView imageView3;
    private Mat src;
    private Mat org;
    private ListView listView;
    private TextAdapter adapter;

    static {
        System.loadLibrary("opencv_java3");

    }


    @Override
    protected void onCreate(Bundle savedInstanceState) {
        super.onCreate(savedInstanceState);
        setContentView(R.layout.activity_text_layout);
        imageView = findViewById(R.id.image1);
        imageView2 = findViewById(R.id.image2);
        imageView3 = findViewById(R.id.image3);
        listView = findViewById(R.id.listview);
        adapter = new TextAdapter();
        listView.setAdapter(adapter);


        findViewById(R.id.button1).setOnClickListener(new View.OnClickListener() {
            @Override
            public void onClick(View v) {
                erode(src);
                showResult(src, imageView2);
            }
        });

        findViewById(R.id.button2).setOnClickListener(new View.OnClickListener() {
            @Override
            public void onClick(View v) {
                medianBlur(src);
                showResult(src, imageView2);
            }
        });

        findViewById(R.id.button3).setOnClickListener(new View.OnClickListener() {
            @Override
            public void onClick(View v) {
                Mat result = seedFill(src, org);
                showResult(result, imageView3);
//                adapter.setData(result);
            }
        });
    }


    /**
     * 阈值化,并腐蚀
     *
     * @param src
     */
    private void erode(Mat src) {
        // 阈值化
        Imgproc.threshold(src, src, 100, 255, Imgproc.THRESH_BINARY);
//        Imgproc.adaptiveThreshold(opMat,opMat,255.0,Imgproc.ADAPTIVE_THRESH_GAUSSIAN_C,Imgproc.THRESH_BINARY,3,0.0);

        Mat erodeKernel = Imgproc.getStructuringElement(Imgproc.MORPH_ELLIPSE, new Size(5, 5));
        Imgproc.erode(src, src, erodeKernel);
    }

    /**
     * 采用中值滤波进行降噪
     *
     * @param src
     */
    private void medianBlur(Mat src) {
        Imgproc.medianBlur(src, src, 7);
    }


    /**
     * 种子填充法进行联通区域检测
     */
    private Mat seedFill(Mat binImg, Mat src) {
        Mat lableImg = new Mat();
        Mat showMat = new Mat(binImg.size(), CvType.CV_8UC3);
        binImg.convertTo(lableImg, CvType.CV_32SC1);

        int rows = lableImg.rows();
        int cols = lableImg.cols();

        double lable = 0;
        List<List<Point>> texts = new LinkedList<>();

        for (int r = 0; r < rows; r++) {
            for (int c = 0; c < cols; c++) {
                // 获取种子
                double[] data = lableImg.get(r, c);
                if (data == null || data.length < 1) {
                    continue;
                }
                if (data[0] == 255) {
                    // 背景
                    showMat.put(r, c, 255, 255, 255);
                    continue;
                }
                if (data[0] != 0) {
                    // 已经标记过了
                    continue;
                }

                // 新的填充开始
                lable++;
                double[] color = {Math.random() * 255, Math.random() * 255, Math.random() * 255};

                // 开始种子填充
                LinkedList<Point> neighborPixels = new LinkedList<>();
                neighborPixels.push(new Point(r, c));

                List<Point> textPoint = new LinkedList<>();

                while (!neighborPixels.isEmpty()) {
                    Point curPx = neighborPixels.pop();
                    int row = (int) curPx.x;
                    int col = (int) curPx.y;
                    textPoint.add(new Point(col, row));
                    lableImg.put(row, col, lable);
                    showMat.put(row, col, color);

                    // 左边
                    double[] left = lableImg.get(row, col - 1);
                    if (left != null && left.length > 0 && left[0] == 0) {
                        neighborPixels.push(new Point(row, col - 1));
                    }

                    // 右边
                    double[] right = lableImg.get(row, col + 1);
                    if (right != null && right.length > 0 && right[0] == 0) {
                        neighborPixels.push(new Point(row, col + 1));
                    }

                    // 上边
                    double[] top = lableImg.get(row - 1, col);
                    if (top != null && top.length > 0 && top[0] == 0) {
                        neighborPixels.push(new Point(row - 1, col));
                    }

                    // 下边
                    double[] bottom = lableImg.get(row + 1, col);
                    if (bottom != null && bottom.length > 0 && bottom[0] == 0) {
                        neighborPixels.push(new Point(row + 1, col));
                    }
                }
                texts.add(textPoint);
            }
        }

        List<Mat> textMats = new LinkedList<>();
        for (List<Point> data : texts) {
            MatOfPoint mat = new MatOfPoint();
            mat.fromList(data);
            Rect rect = Imgproc.boundingRect(mat);
            Imgproc.rectangle(showMat, rect.tl(), rect.br(), new Scalar(255, 0, 0, 255));
            textMats.add(src.submat(rect));
        }
        adapter.setData(textMats);

        return showMat;
    }


    @Override
    public void onImageLoadSuccess() {
        if (getImageBitmap() == null) {
            return;
        }
        imageView.setImageBitmap(getImageBitmap());
        src = new Mat(getImageBitmap().getHeight(), getImageBitmap().getWidth(), CvType.CV_8UC4);
        Utils.bitmapToMat(getImageBitmap(), src);
        org = new Mat();
        src.copyTo(org);
        Imgproc.cvtColor(src, src, Imgproc.COLOR_RGBA2GRAY);
    }

    class TextAdapter extends BaseAdapter {

        List<Mat> data = new ArrayList<>();

        @Override
        public int getCount() {
            return data.size();
        }

        public void setData(List<Mat> data) {
            this.data.clear();
            this.data.addAll(data);
            notifyDataSetChanged();
        }

        @Override
        public Object getItem(int position) {
            return data.get(position);
        }

        @Override
        public long getItemId(int position) {
            return 0;
        }

        @Override
        public View getView(int position, View convertView, ViewGroup parent) {
            ViewHolder holder;
            View view;
            if (convertView == null) {
                holder = new ViewHolder();
                view = LayoutInflater.from(TextActivity.this).inflate(R.layout.layout_list_item, null, false);
                holder.imageView = view.findViewById(R.id.image);
                view.setTag(holder);
            } else {
                holder = (ViewHolder) convertView.getTag();
                view = convertView;
            }


            Mat mat = data.get(position);
            Bitmap bitmap = Bitmap.createBitmap(mat.cols(), mat.rows(), Bitmap.Config.ARGB_8888);
            Utils.matToBitmap(mat, bitmap);
            holder.imageView.setImageBitmap(bitmap);

            return view;
        }

        class ViewHolder {
            public ImageView imageView;
        }
    }
}
当然,我们这里只是简单的运用OpenCV进行文字的提取,配合一些其他技术例如:TensorFlow,或者其他的一些人工智能,机器学习技术,我们可以将提取出来的文字图片进行文字识别翻译等等。
在此基础上,我们可以做更多的事情,比如:将图片式的文字自动转换成text文本,拍照翻译、拍照提取文字等等。
