一、mybatis的别名
		<typeAliases>
            <!-- a)内置别名
                    常用基本类型 和包装类型 8 个 以及集合类型
            -->
           <!-- b)自定义别名(1)单独配置类的实现
            <typeAlias type="cn.itsource.mybatis.query.ProductQuery" alias="productQuery"></typeAlias>
            <typeAlias type="cn.itsource.mybatis.domain.Product" alias="product"></typeAlias>-->
           <!-- (2)配置包形式 推荐-->
            <package name="cn.itsource.mybatis.query"></package>
            <package name="cn.itsource.mybatis.domain"></package>
        </typeAliases>
二、映射器Mapper
使用映射器的步骤:
1.创建项目,配置mybatis
<?xml version="1.0" encoding="UTF-8"?>
<!DOCTYPE configuration PUBLIC "-//mybatis.org//DTD Config 3.0//EN"
        "http://mybatis.org/dtd/mybatis-3-config.dtd">
<configuration>
    <!--引入jdbc.propeties文件-->
    <properties resource="jdbc.properties" />
    <!-- 环境们 (很多环境的意思)default:默认使用哪一个环境(必需对应一个环境的id)-->
    <environments default="development">
        <!--一个环境  id:为这个环境取唯一一个id名称-->
        <environment id="development">
            <!--事务管理   type:JDBC(支持事务)/MANAGED(什么都不做)-->
            <transactionManager type="JDBC" />
            <!-- 数据源, 连接池  type(POOLED):MyBatis自带的连接池 -->
            <dataSource type="POOLED">
                <!-- 连接数据库的参数 -->
                <property name="driver" value="${driverClassName}" />
                <property name="url" value="${url}" />
                <property name="username" value="${username}" />
                <property name="password" value="${password}" />
            </dataSource>
        </environment>
    </environments>
    <!-- 这个mappers代表的是相应的ORM映射文件 -->
    <mappers>
        <mapper resource="cn/itcast/mybatis/domain/ProductMapper.xml" />
    </mappers>
</configuration>
2.创建xxxMapper,我这里叫做ProductMapper(注意:这是一个接口),就类似于三层架构的dao层
3. 在对应的ProductMapper.xml 配置namespace 和 标签里面id (namespace+id) == (ProductMapper包路径+方法)
<?xml version="1.0" encoding="UTF-8" ?>
<!DOCTYPE mapper
        PUBLIC "-//mybatis.org//DTD Mapper 3.0//EN"
        "http://mybatis.org/dtd/mybatis-3-mapper.dtd">

<mapper namespace="cn.itsource._01_mapper.mapper.ProductMapper">
    <select id="findAll"  resultType="product">
        select * from product
    </select>
</mapper>
4.测试Mapper
三、高级查询注意事项
(1)错误写法:
<if test="productName != null">
and productName like '%#{productName}%'
</if>
正确写法: --存在sql注入问题
<if test="productName != null">
and productName like '%${productName}%'
</if>
正确写法:
<if test="productName != null">
and productName like concat('%',#{productName},'%')
</if>
(2)特殊符号转义:
<!-- salePrice minPrice 和maxPrice之间 特殊符号需要转义-->
<!-- <if test="minPrice != null and maxPrice != null">
and salePrice > #{minPrice} and salePrice < #{maxPrice}
</if>-->
<if test="minPrice != null and maxPrice != null">
<![CDATA[
and salePrice > #{minPrice} and salePrice <= #{maxPrice}
]]>
</if>
四、结果映射
处理的是对象里面的字段名和数据库的列名不一致的情况
解决办法一:使用别名
 <select id="findAll"  resultType="product">
            select id,productName pName,salePrice,costPrice,cutoff from product
 </select>
解决办法二:将返回值设为map
<mapper namespace="cn.itcast.mybatis.result.mapper.ProductMapper">
    <select id="findAll" resultMap="productMap">
		select * from product
	</select>
	<resultMap id="productMap" type="product">
		<id property="id" column="id"></id>
		<result property="pName" column="productName"></result>
	</resultMap>
</mapper>
五、关系处理
1关系有哪些?
1.1一对一 , 例如 :一个身份证对 一个人 一夫一妻 qq 和qq空间
1.2 一对多,例如 一个老师 对应多个学生 / 产品分类 对应多个产品 / 1个部门对应多个员工
1.3多对一,和一对多 相反
1.4多对多,例如: 多个老师 对应多个学生 (一对多或者多对一组合情况)
用户 和 角色
角色和权限
mybatis怎么处理关系:
一对一 :mybatis处理一方
多对一:mybatis处理一方
多对多: mybatis处理多方
一对多:mybatis处理多方
2.对一方的处理:多对一/一对一
<!--嵌套结果:只发送一条sql语句
<select id="findAll" resultMap="productMap">
select p.*,dir.id did,dir.name from product p join productdir dir on p.dir_id=dir.id
</select>
<resultMap id="productMap" type="product">
<id property="id" column="id"></id>
<result property="pName" column="productName"></result>
<result property="salePrice" column="salePrice"></result>
<result property="supplier" column="supplier"></result>
<result property="brand" column="brand"></result>
<result property="cutoff" column="cutoff"></result>
<result property="costPrice" column="costPrice"></result>
<!–处理一方方式一–>
<!–<association property="dir" javaType="ProductDir">
<id property="id" column="did"></id>
<result property="name" column="name"></result>
</association>–>
<!–方式二–>
<result property="dir.id" column="did"></result>
<result property="dir.name" column="name"></result>
</resultMap>-->
<!--嵌套查询:发送多条sql语句-->
<select id="findAll" resultMap="productMap">
select p.* from product p
</select>
<resultMap id="productMap" type="product">
<id property="id" column="id"></id>
<result property="pName" column="productName"></result>
<result property="salePrice" column="salePrice"></result>
<result property="supplier" column="supplier"></result>
<result property="brand" column="brand"></result>
<result property="cutoff" column="cutoff"></result>
<result property="costPrice" column="costPrice"></result>
<!--处理一方-->
<association property="dir" column="dir_id" javaType="ProductDir" select="selectProductDir">
</association>
</resultMap>
<select id="selectProductDir" parameterType="long" resultType="productDir">
select dir.* from productdir dir where id=#{dir_id}
</select>
3.对多方的处理:一对多/多对多
<!--嵌套结果-->
    <!--<select id="findAll"  resultMap="productDirMap">
		select dir.id did,dir.name,p.* from productdir dir join product p on dir.id=p.dir_id
	</select>
	<resultMap id="productDirMap" type="productDir">
		<id property="id" column="did"></id>
		<result property="name" column="name"></result>
		<collection property="products" javaType="product">
			<id property="id" column="id"></id>
			<result property="pName" column="productName"></result>
			<result property="salePrice" column="salePrice"></result>
			<result property="supplier" column="supplier"></result>
			<result property="brand" column="brand"></result>
			<result property="cutoff" column="cutoff"></result>
			<result property="costPrice" column="costPrice"></result>
		</collection>
	</resultMap>-->
	<!--一对多分页,使用嵌套查询-->
	<select id="findAll"  resultMap="productDirMap">
		select dir.id did,dir.name from productdir dir limit 0,2
	</select>
	<resultMap id="productDirMap" type="productDir">
		<id property="id" column="did"></id>
		<result property="name" column="name"></result>
		<collection property="products" column="did" ofType="product"  select="selectProduct" >
		</collection>
	</resultMap>
	<select id="selectProduct" parameterType="long" resultMap="productMap">
		select * from product where dir_id=#{did}
	</select>
	<resultMap id="productMap" type="product">
		<id property="id" column="id"></id>
		<result property="pName" column="productName"></result>
	</resultMap>
4.mybatis缓存
4.1.mybatis一级缓存
属于sqlSession级别缓存(entityManager类似)
命中条件:
mybatis一级缓存 命中(同一个SqlSessionFactory 同一个SqlSession 同一个ID)
 public void testMapper(){
        //得到mapper --映射器 (动态代理)

        SqlSession sqlSession1 =  MybatisUtil.INSTANCE.getSqlSession();
        //mybatis一级缓存 命中(同一个SqlSessionFactory 同一个SqlSession 同一个ID)
        ProductMapper mapper1 = sqlSession1.getMapper(ProductMapper.class);
        System.out.println(mapper1.findOne(19L));

        ProductMapper mapper2 = sqlSession1.getMapper(ProductMapper.class);
        System.out.println(mapper2.findOne(19L));

    }
4.2.mybatis二级缓存
命中条件: 同一个SqlSessionFactory 不同的SqlSession 同一个ID
什么叫序列化: 把对象转换成二进制的信息 这个过程
为什么需要序列化: 用在网络传输
反序列化:把二进制内容转成对象的形式 这个过程
六、SSM整合
常用开发框架整合:
sss – springmvc+spring+springjdbc (项目一)
sssdj – springmvc+spring+springdatajpa(项目二) 中小型的项目
ssm – springmvc+spring+mybatis(项目三/项目四) 中型项目/大型项目
6.1步骤
1.创建项目,导包
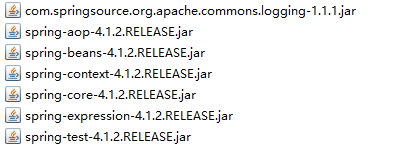
spring:
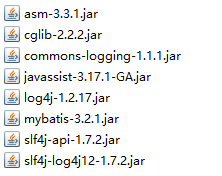
mybatis:
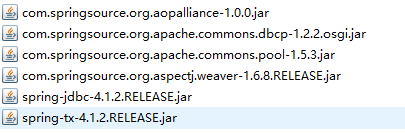
spring+mybatis:
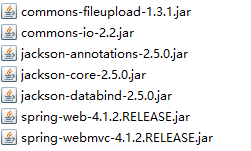
springmvc:
以及额外的mysql驱动包和spring+mybatis的核心包

2.写配置文件
第一个,配置spring+mybatis的核心配置文件applicationContext.xml
<?xml version="1.0" encoding="UTF-8"?>
<beans xmlns="http://www.springframework.org/schema/beans"
       xmlns:xsi="http://www.w3.org/2001/XMLSchema-instance"
       xmlns:context="http://www.springframework.org/schema/context"
       xmlns:tx="http://www.springframework.org/schema/tx"
       xsi:schemaLocation="
       http://www.springframework.org/schema/beans http://www.springframework.org/schema/beans/spring-beans.xsd
       http://www.springframework.org/schema/context http://www.springframework.org/schema/context/spring-context.xsd
       http://www.springframework.org/schema/tx http://www.springframework.org/schema/tx/spring-tx.xsd
">
    <!--1.扫描包-->
    <context:component-scan base-package="cn.itcast.ssm"></context:component-scan>
    <context:annotation-config /><!--激活spring的bean-->
    <!--2.引入jdbc.properties-->
    <context:property-placeholder location="classpath:jdbc.properties"/>
    <!--3.配置数据库连接池-->
    <!--创建dataSource -->
    <bean id="dataSource" class="org.apache.commons.dbcp.BasicDataSource" destroy-method="close">
        <property name="driverClassName" value="${jdbc.driverClassName}" />
        <property name="url" value="${jdbc.url}" />
        <property name="username" value="${jdbc.username}" />
        <property name="password" value="${jdbc.password}" />
    </bean>
    <!--4.配置SqlSessionFactory-->
    <bean id="sqlSessionFactory" class="org.mybatis.spring.SqlSessionFactoryBean">
        <!--连接池-->
        <property name="dataSource" ref="dataSource"/>
        <property name="mapperLocations" value="classpath:cn/itcast/ssm/mapper/*Mapper.xml" />
        <property name="typeAliasesPackage"><!--别名的配置-->
            <value>
                cn.itcast.ssm.domain
            </value>
        </property>
    </bean>
    <!--5.扫描mapper-->
    <bean class="org.mybatis.spring.mapper.MapperScannerConfigurer">
        <property name="basePackage" value="cn.itcast.ssm.mapper" ></property>
    </bean>
    <!--事务配置-->
    <!--配置事务管理器-->
    <bean id="transactionManager" class="org.springframework.jdbc.datasource.DataSourceTransactionManager">
        <property name="dataSource" ref="dataSource" />
    </bean>
    <!--开启事务注解的支持,默认会去找一个名称叫做transactionManager的事务管理器 -->
    <tx:annotation-driven transaction-manager="transactionManager" />
</beans>
第二步,写springmvc的核心配置文件
<?xml version="1.0" encoding="UTF-8"?>
<beans xmlns="http://www.springframework.org/schema/beans" xmlns:xsi="http://www.w3.org/2001/XMLSchema-instance"
       xmlns:context="http://www.springframework.org/schema/context"
       xmlns:mvc="http://www.springframework.org/schema/mvc"
       xsi:schemaLocation="http://www.springframework.org/schema/beans
       http://www.springframework.org/schema/beans/spring-beans.xsd
       http://www.springframework.org/schema/context
       http://www.springframework.org/schema/context/spring-context.xsd
       http://www.springframework.org/schema/mvc
       http://www.springframework.org/schema/mvc/spring-mvc.xsd">
    <!--扫描controller-->
    <context:component-scan base-package="cn.itcast.ssm.web.controller" />
    <!--静态资源处理-->
    <mvc:default-servlet-handler />
    <!--识别@requestMapper等注解支持-->
    <mvc:annotation-driven />
    <!--配置视图解析器-->
    <bean class="org.springframework.web.servlet.view.InternalResourceViewResolver">
        <property name="prefix" value="/WEB-INF/views/" />
        <property name="suffix" value=".jsp" />
    </bean>
</beans>
第三步,写jdbc.properties文件并将其引入applicationContext.xml文件
jdbc.driverClassName=com.mysql.jdbc.Driver
jdbc.url=jdbc:mysql:///mybatis
jdbc.username=root
jdbc.password=123456
第四步,配置日志文件log4j.properties
log4j.rootLogger=ERROR, stdout
#log4j.rootLogger=NONE
log4j.logger.cn.itcast=TRACE

log4j.appender.stdout=org.apache.log4j.ConsoleAppender
log4j.appender.stdout.layout=org.apache.log4j.PatternLayout
log4j.appender.stdout.layout.ConversionPattern=%d %p [%c] - %m%n
第五步,配置web.xml文件
<?xml version="1.0" encoding="UTF-8"?>
<web-app xmlns="http://xmlns.jcp.org/xml/ns/javaee"
         xmlns:xsi="http://www.w3.org/2001/XMLSchema-instance"
         xsi:schemaLocation="http://xmlns.jcp.org/xml/ns/javaee http://xmlns.jcp.org/xml/ns/javaee/web-app_4_0.xsd"
         version="4.0">
    <!-- 监听器-->
    <context-param>
        <param-name>contextConfigLocation</param-name>
        <param-value>classpath:applicationContext.xml</param-value>
    </context-param>
    <listener>
        <listener-class>org.springframework.web.context.ContextLoaderListener</listener-class>
    </listener>

    <!--核心控制器-->
    <servlet>
        <servlet-name>dispatchServlet</servlet-name>
        <servlet-class>org.springframework.web.servlet.DispatcherServlet</servlet-class>
        <init-param>
            <param-name>contextConfigLocation</param-name>
            <param-value>classpath:applicationContext-mvc.xml</param-value>
        </init-param>
        <load-on-startup>1</load-on-startup>
    </servlet>
    <servlet-mapping>
        <servlet-name>dispatchServlet</servlet-name>
        <url-pattern>/</url-pattern>
    </servlet-mapping>
    <!--编码过滤器-->
    <filter>
        <filter-name>characterEncodingFilter</filter-name>
        <filter-class>org.springframework.web.filter.CharacterEncodingFilter</filter-class>
        <init-param>
            <param-name>encoding</param-name>
            <param-value>utf-8</param-value>
        </init-param>
    </filter>
    <filter-mapping>
        <filter-name>characterEncodingFilter</filter-name>
        <url-pattern>/*</url-pattern>
    </filter-mapping>
</web-app>
第六步,测试配置是否成功
七、什么是序列化?
把java对象转换二进制过程
什么情况下使用序列化?
1、在网络中直接传输一个java对象。
2、在数据库的Blob(二进制)字段(列)中,直接存一个java对象会出问题
3、当前,需要把java对象放入内存(本地的临时文件)中
java.io.ObjectInputStream
java.io.ObjectOutputStream
4.HttpSession里面存放对象,tomcat的内存不足(500M)的时候,钝化到硬盘
