python中easygui模块的使用方法
1、 导入Easy GUI模块
使用easygui之前,我们应先导入easygui模块
普通方法导入easygui:
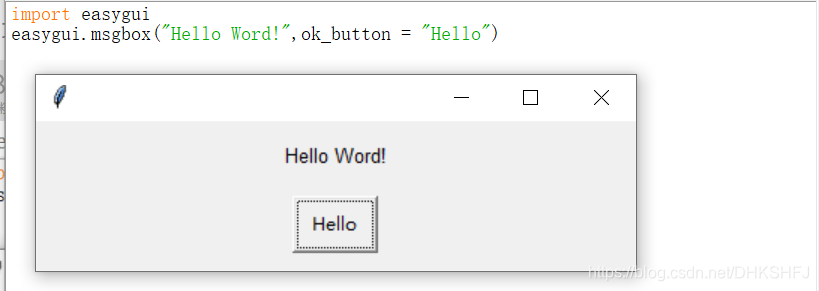
import easygui此时,当我们使用easygui时,必须在函数名前加上easygui,例如:
import easygui
easygui.msgbox("Hello Word!")
运行结果如下:
同样,我们还可以通过修改函数名的方法,方便自己使用,例如:
import easygui as g
g.msgbox("Hello Word!")
同样可以使用将函数全部导入的方法:
from easygui as *导入之后,可以直接使用easygui的内部函数,例如:
msgbox("Hello Word!")三种方法均有同样的运行结果
2、EasyGui中msgbox函数的具体用法*
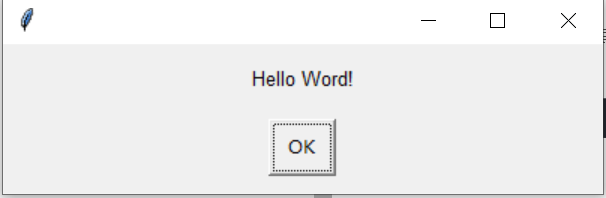
当我们仅仅显示一串字符串时,我们可以使用上面的方法:
import easygui
easygui.msgbox("Hello Word!")
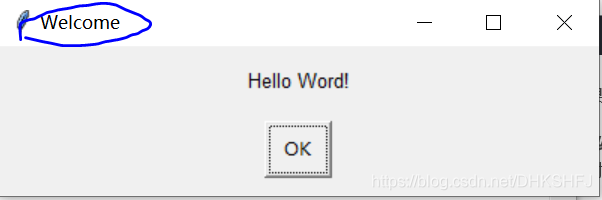
当然,我们还可以在他的基础上增加一个标题,例如:
import easygui
easygui.msgbox("Hello Word!","Welcome")
代码运行如下:
``
结果中的welcome则为标题。
此外,我们还可以修改“OK”
例如,我们将“OK”修改为“Hello”:
import easygui
easygui.msgbox("Hello Word!","welcome","Hello")
显示结果如下:
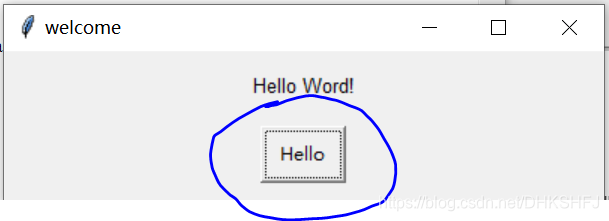
如图所示,我们将“OK”改为“Hello“
因此,我们可以总结,在msgbox()函数中内部参数的各个用法:
msgbox(”需要显示的信息“,”标题“,”按钮“)
上面的显示其实时easygui.msgbox(msg = “Hello Word!”,title = “welcome”,ok_button = =“Hello”),
如果将easygui.msgbox(“Hello Word!”,“welcome”,“Hello”)中去掉标题,此时,我们不可以直接删除”welcome“,我们可以尝试运行:
本应属于按键的”Hello“,此时,成为了标题,可见,参数之间是有顺序的,当我们非要使用这个参数时,我们可以修改代码为:
import easygui
easygui.msgbox("Hello Word!",ok_button = "Hello")
此时,运行结果将会是我们所预期的:
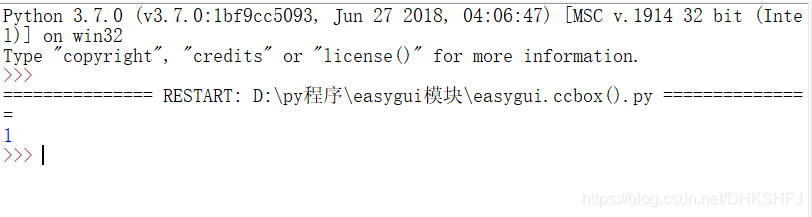
3、easygui中ccbox()的使用方法
同样,ccbox()里面仍有许多参数
ccbox(msg = " ",title = " ",choices = (‘C[o]ntinue’,C[a]ncel),image = None,default_choice = “C[o]ntinue”, cancel_choice = “C[a]ncel”)
ccbox()提供了一个选择,并相应返回True和False
注意:C[o]ntinue 中[o]表示快捷键,也就是在键盘上输入O字符,就相当于点击‘Continue“按键
具体实例如下:
import easygui
easygui.ccbox(msg = "你喜欢我吗?",title = "表白",choices = ("喜欢","不喜欢"))
代码运行结果如下:

ccbox()还可以返回True和False
我们可以将结果输出如下程序:
import easygui
out = easygui.ccbox(msg = "你喜欢我吗?",title = "表白",choices = ("喜欢","不喜欢"))
print(out)
当我们点击”喜欢“时,程序运行输出结果为:
可见,当我们点击”喜欢“时,输出为”1”,则为True。
4、EasyGui中ynbox()函数的使用方法
ynbox()与ccbox()的区别在于choices的参数值不同,其余相同,
ynbox(msg = " ",title = " ",choices =(’[]Yes’,’[No]’),image = None,default_choice = “[]Yes”, cancel_choice = “[No]”)
例如:
import easygui
easygui.ynbox(msg = "你喜欢我吗?",title = "表白")
程序运行结果如下:

既然与ccbox()相同,则应该具备返回值。我们可以将代码修改为:
import easygui
out = easygui.ynbox(msg = "你喜欢我吗?",title = "表白")
print('你的选择是:',out)
当我们点击Yes时,运行代码输出结果为:

由此可以看出,当选择“Yes”时,返回为1,即为True
5、easy中buttonbox()的使用方法
buttonbox()提供了多个按钮的功能,它的使用方法如下:
buttonbox(msg=’’, title=’ ', choices=(‘Button[1]’, ‘Button[2]’, ‘Button[3]’), image=None, images=None, default_choice=None, cancel_choice=None, callback=None, run=True)
import easygui
easygui.buttonbox(choices =('One','Two','Three','Four'))
运行结果如下:
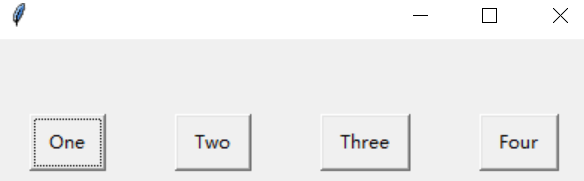
由代码可知,提供了四个选项,并且,buttonbox()有返回值,可以将选项输出,由此,我们可以将代码修改为:
import easygui
out = easygui.buttonbox(choices =('One','Two','Three','Four'))
print('你的选择是:',out)
当我们点击“Two“,查看代码的输出结果为:

此外,我们还可以插入图片,以下是利用buttonbox()做的一个简单得表白程序:
import easygui
fin = easygui.buttonbox(msg = "你喜欢我吗?",choices = ('喜欢','不喜欢','滚'),image = '微信图片2.jpg',title = "表白程序")
while True:
if fin == "滚" or fin == "不喜欢":
fin = easygui.buttonbox(msg = "你喜欢我吗?",choices = ('喜欢','不喜欢','滚'),image = '微信图片2.jpg',title = "表白程序")
else :
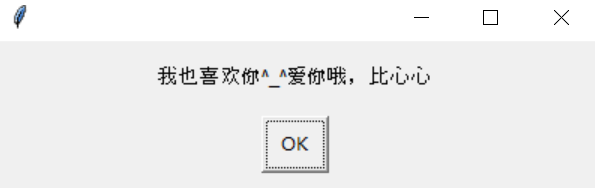
easygui.msgbox("我也喜欢你^_^爱你哦,比心心")
break
运行代码,输出结果为:
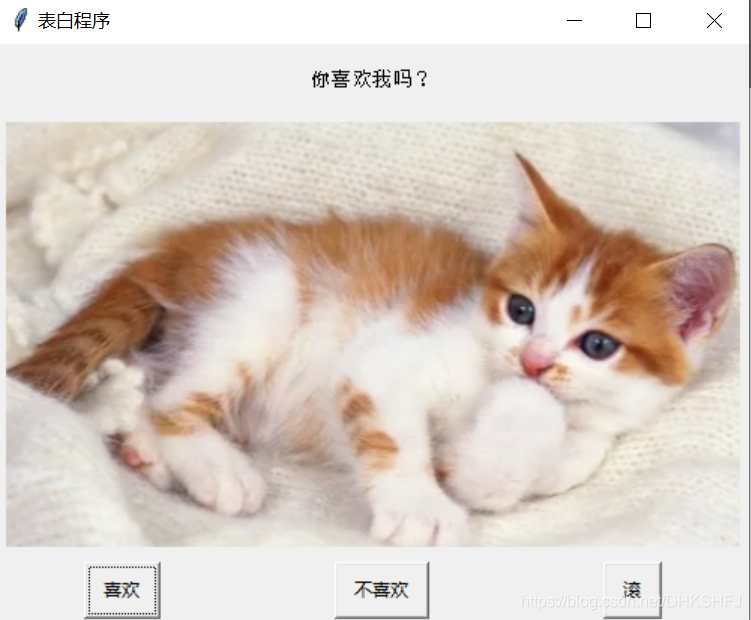
由代码可知,我们只能点击’喜欢‘才能退出该程序,点击喜欢之后的结果为:
6、Easy GUI中indexbox()函数的使用方法
boolbox(msg=‘Shall I continue?’, title=’ ‘, choices=(’[Y]es’, ‘[N]o’), image=None, default_choice=‘Yes’, cancel_choice=‘No’)
与buttonbox()的使用方法一样,区别在于当用户选择第一个按钮的时候返回序号0,选择第二个按钮时返回序号1.
例程如下:
import easygui
out = easygui.indexbox(choices =('One','Two','Three','Four'))
print('你的选择是:',out)
点击’Two‘,运行结果如下:

此时输出结果不再是’Two‘,而是他所在的位置,当我们点击’Three‘时,输出的结果为2.
7、EasyGui中boolbox()的使用方法
boolbox(msg=‘Shall I continue?’, title=’ ‘, choices=(’[Y]es’, ‘[N]o’), image=None, default_choice=‘Yes’, cancel_choice=‘No’)
如果第一个按钮被选中返回True,否则返回False,具体例子如下:
import easygui
fin = easygui.boolbox(msg = "你喜欢我吗?",title = "表白")
print(fin)
代码运行结果为:

8、EasyGui中choicebox()的使用方法
choicebox(msg=‘Pick an item’, title=’’, choices=[], preselect=0, callback=None, run=True)
choicebox()为用户提供了一个可选择的列表,使用序列(元组或列表)作为选项,这些选项按照字母进行排序
具体应用代码如下:
import easygui
import os
m=list(os.listdir("D:\\py程序"))
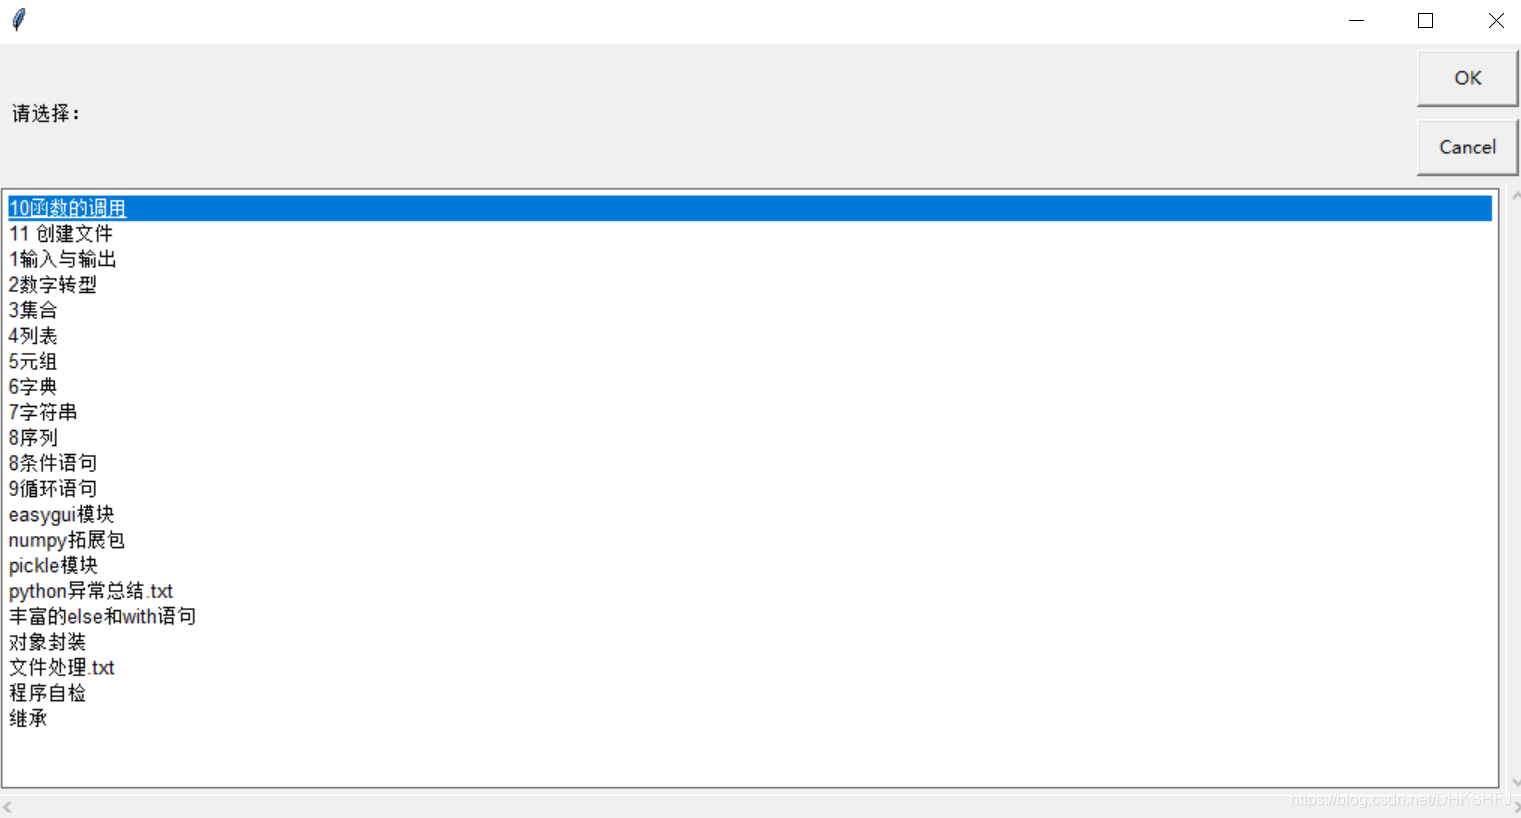
easygui.choicebox(msg = "请选择:",title = "",choices = m )
程序代码运行结果为:
我们还可以通过修改代码,观察,此函数是否有返回值,修改后的代码为:
import easygui
import os
m=list(os.listdir("D:\\py程序"))
out = easygui.choicebox(msg = "请选择:",title = "",choices = m )
print(out)
运行此程序,发现,它可以将选择的结果返回:

9、EasyGui中multchoicebox()的使用方法
multchoicebox(msg=‘Pick an item’, title=’’, choices=[], preselect=0, callback=None, run=True)
multchoicebox() 函数也是提供一个可选择的列表,与 choicebox() 不同的是,multchoicebox() 支持用户选择 0 个,1 个或者同时选择多个选项。
multchoicebox() 函数也是使用序列(元祖或列表)作为选项,这些选项显示前会按照不区分大小写的方法排好序。
应用历程如下
import easygui
import os
m=list(os.listdir("D:\\py程序"))
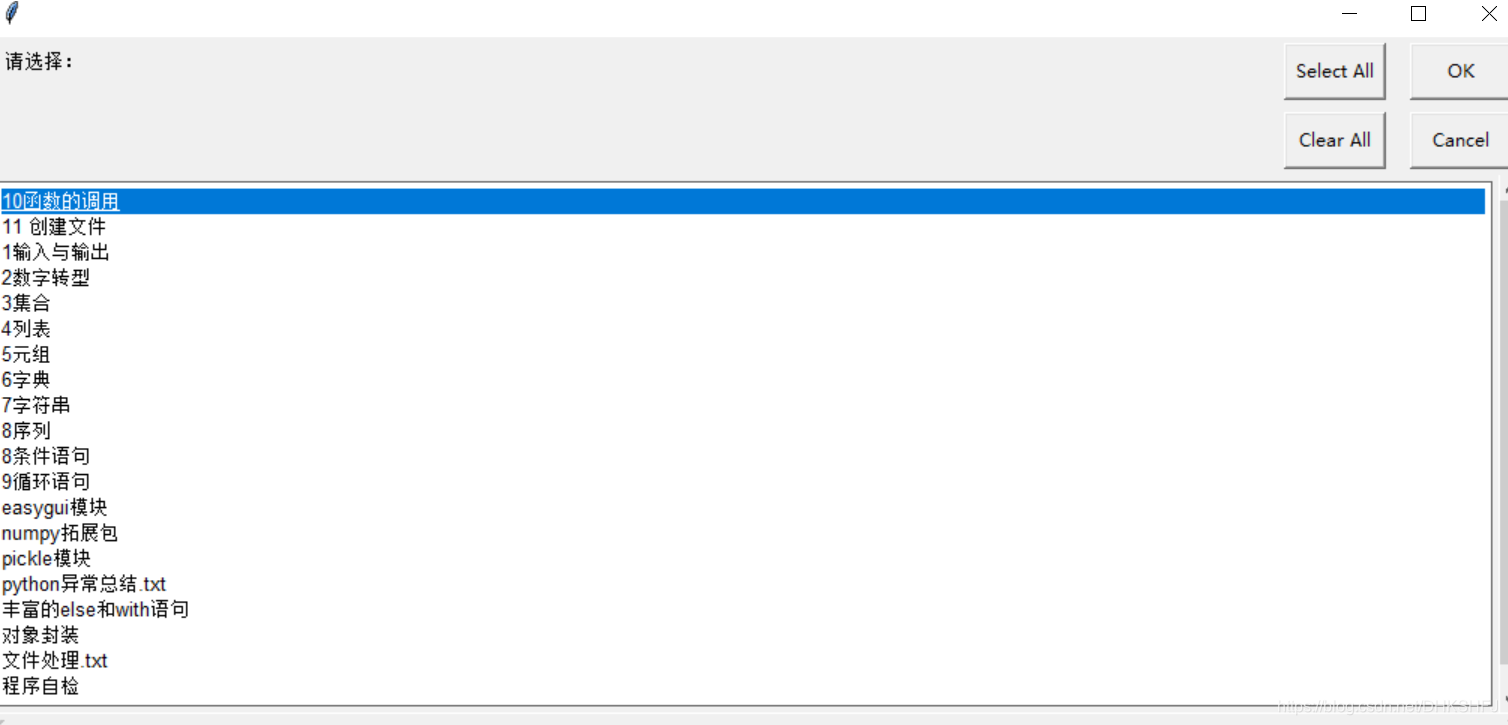
easygui.multchoicebox(msg = "请选择:",title = "",choices = m )
运行结果为:
同样,我们可以通过修改代码查看是否含有返回值,修改后的代码为:
import easygui
import os
m=list(os.listdir("D:\\py程序"))
out = easygui.multchoicebox(msg = "请选择:",title = "",choices = m )
print(out)
当我们点击全选时,运行输出结果如下:

可见,此函数可以将选择的输出。
10、EasyGui中enterbox()的使用方法
enterbox(msg=‘Enter something.’, title=’ ‘, default=’’, strip=True, image=None, root=None)
enterbox() 为用户提供一个最简单的输入框,返回值为用户输入的字符串。
默认返回的值会自动去除首尾的空格,如果需要保留首尾空格的话请设置参数 strip=False。
参考例子如下:
import easygui
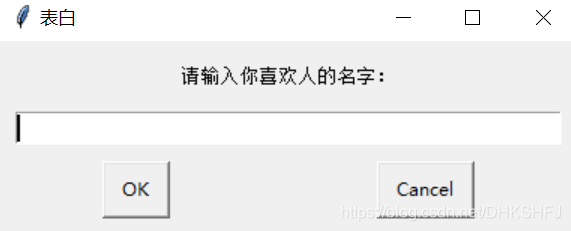
fin = easygui.enterbox(msg="请输入你喜欢人的名字:",title = "表白")
print(fin)
弹出的对话框为:
我们可以在对话框内输入任何字符串,例如输入小猪佩奇,其输出结果为:

11、Easy GUI中integerbox()的使用方法
integerbox(msg=’’, title=’ ', default=None, lowerbound=0, upperbound=99, image=None, root=None)
integerbox() 为用户提供一个简单的输入框,用户只能输入范围内(lowerbound 参数设置最小值,upperbound 参数设置最大值)的整型数值,否则会要求用户重新输入。
具体使用方法如下:
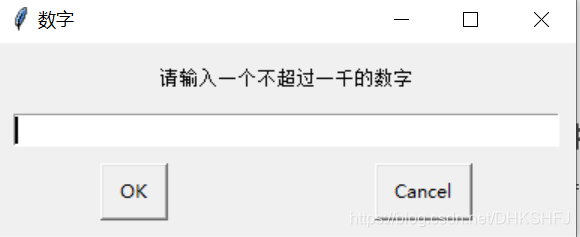
import easygui as g
g.integerbox("请输入一个不超过一千的数字","数字",lowerbound = 0,upperbound = 1000)
运行代码的结果为:
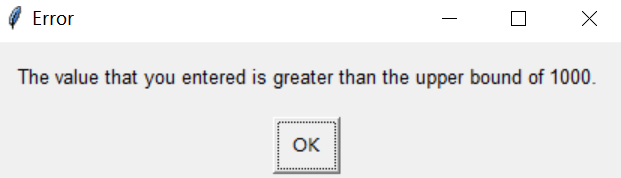
我们尝试输入一个数字,观察,是否含有返回值,此时,我们需要修改代码:
import easygui as g
out = g.integerbox("请输入一个不超过一千的数字","数字",lowerbound = 0,upperbound = 1000)
print("你输入的数字为:",out)
当我们输入的数字不在所选范围内时:
此时,需要重新输入一个新的数字,我们输入899,运行结果为:

12、Easy GUI中multenterbox()的具体使用方法
multenterbox(msg=‘Fill in values for the fields.’, title=’ ', fields=[], values=[], callback=None, run=True)
multenterbox() 为用户提供多个简单的输入框,要注意以下几点:
如果用户输入的值比选项少的话,则返回列表中的值用空字符串填充用户为输入的选项。
如果用户输入的值比选项多的话,则返回的列表中的值将截断为选项的数量。
如果用户取消操作,则返回域中的列表的值或者 None 值。
具体应用例子如下:
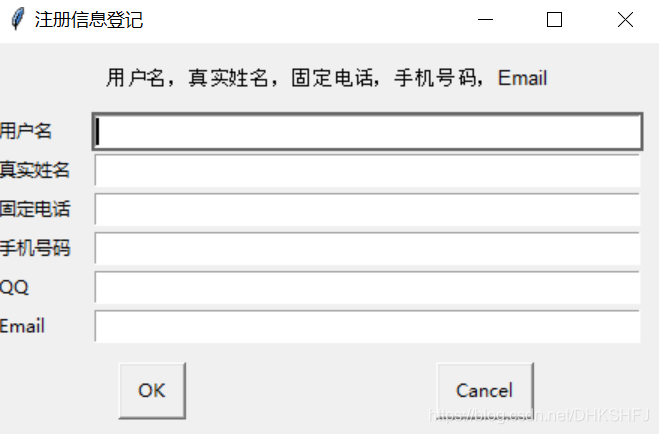
import easygui
list1 = ['用户名','真实姓名','固定电话','手机号码','QQ','Email']
fin = easygui.multenterbox('用户名,真实姓名,固定电话,手机号码,Email',title = "注册信息登记",fields = (list1))
print(fin)
输出框图为:
我们可以输入信息,输出结果为:
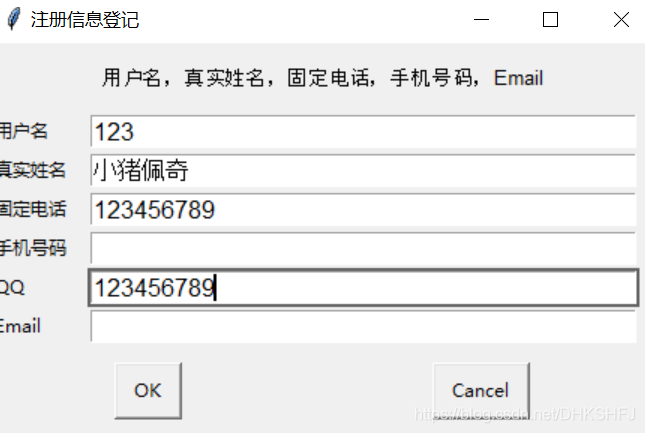

可以看出,当我们不输入时,返回值为None
13、Easy GUI中password()的使用方法
passwordbox(msg=‘Enter your password.’, title=’ ‘, default=’’, image=None, root=None)
passwordbox() 跟 enterbox() 样式一样,不同的是用户输入的内容用星号(*)显示出来,该函数返回用户输入的字符串:
具体例子如下:
import easygui
fin = easygui.passwordbox("请输入密码")
print(fin)
输出框架为:

将输入的密码输出为:

14、EasyGui中multpassword()的使用方法
multpasswordbox(msg=‘Fill in values for the fields.’, title=’ ', fields=(), values=(), callback=None, run=True)
multpasswordbox() 跟 multenterbox() 使用相同的接口,但当它显示的时候,最后一个输入框显示为密码的形式(*)
具体例子如下:
import easygui
list1 = ["用户名","密码"]
fin = easygui.multpasswordbox("请输入用户名和密码",title = "登录",fields = (list1))
print(fin)
输出框架为:
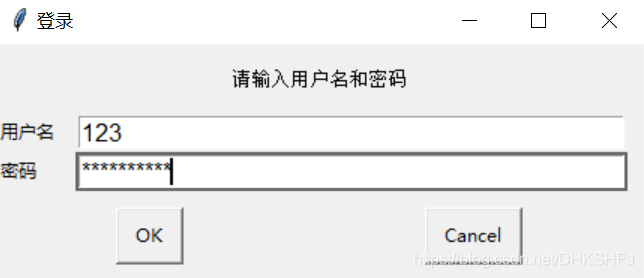
将输入的用户名与密码输出为:

15、Easy GUI中textbox()的使用方法为
textbox(msg=’’, title=’ ‘, text=’’, codebox=False, callback=None, run=True)
textbox() 函数默认会以比例字体(参数 codebox=True 设置为等宽字体)来显示文本内容(自动换行),这个函数适合用于显示一般的书面文字。
注:text 参数设置可编辑文本区域的内容,可以是字符串、列表或者元祖类型。
具体使用例程如下:
import easygui
f = open("文件处理.txt","r")
easygui.textbox("文件",text = f.read(),codebox = True)
f.close()
运行此代码的结果为: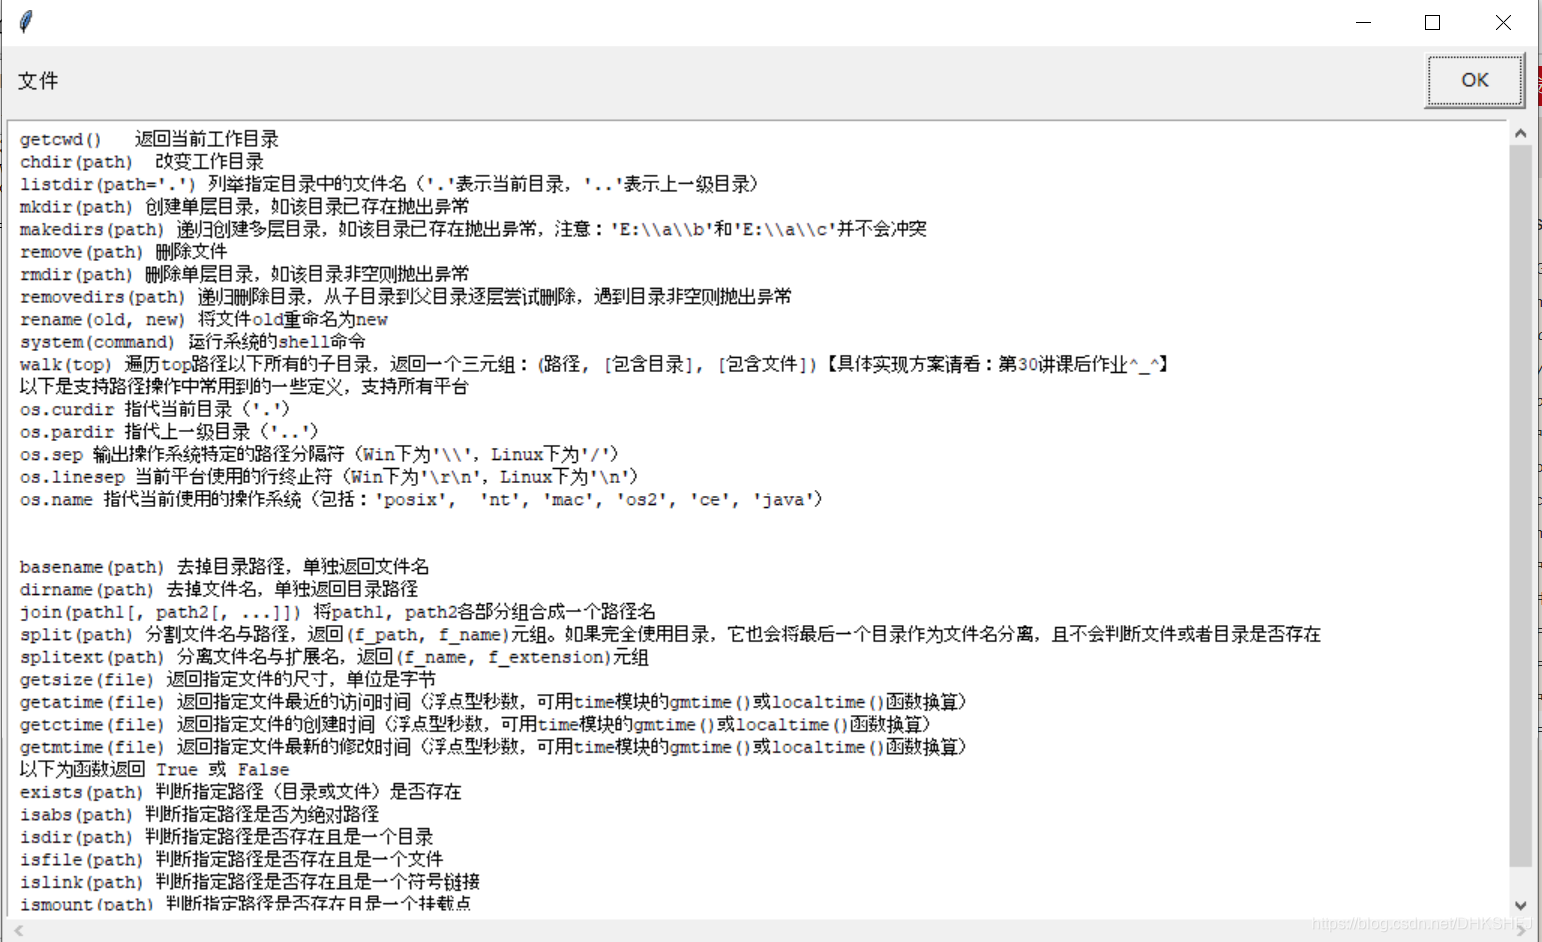
16、Easy GUI中diropenbox()的使用方法
diropenbox(msg=None, title=None, default=None)
diropenbox() 函数用于提供一个对话框,返回用户选择的目录名(带完整路径哦),如果用户选择 “Cancel” 则返回 None。
default 参数用于设置默认的打开目录(请确保设置的目录已存在)。
具体应用例程如下:
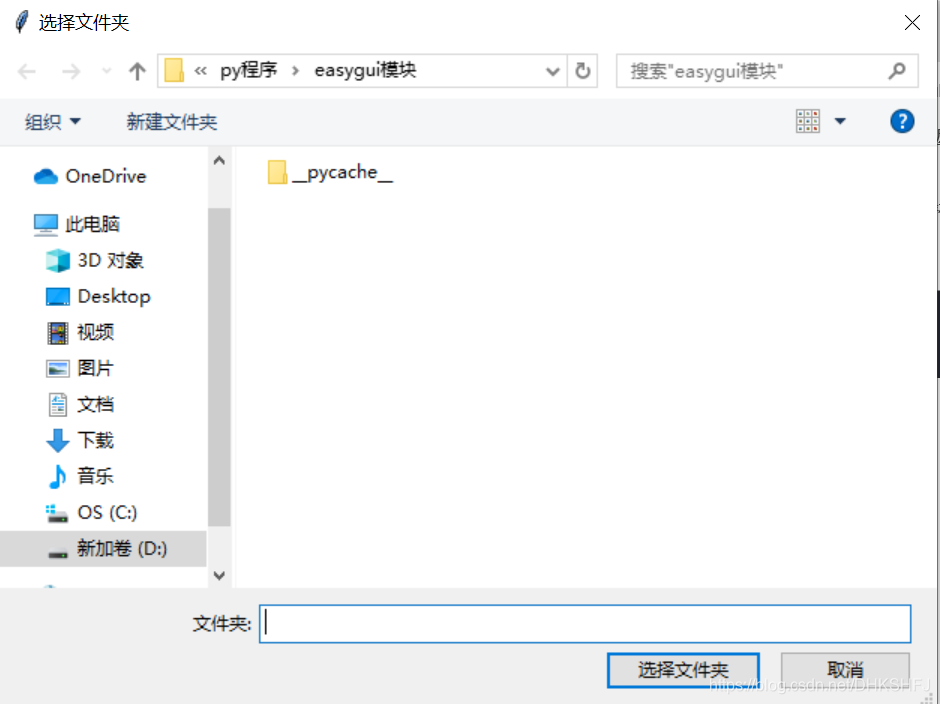
import easygui
fin = easygui.diropenbox()
print(fin)
运行结果为:
17、Easy GUI中fileopenbox()的使用方法
fileopenbox(msg=None, title=None, default=’*’, filetypes=None, multiple=False)
fileopenbox() 函数用于提供一个对话框,返回用户选择的文件名(带完整路径哦),如果用户选择 “Cancel” 则返回 None。
关于 default 参数的设置方法:
default 参数指定一个默认路径,通常包含一个或多个通配符。
如果设置了 default 参数,fileopenbox() 显示默认的文件路径和格式。
default 默认的参数是 ‘*’,即匹配所有格式的文件。
例如:
default=“c:/fishc/*.py” 即显示 C:\fishc 文件夹下所有的 Python 文件。
default=“c:/fishc/test*.py” 即显示 C:\fishc 文件夹下所有的名字以 test 开头的 Python 文件。
关于 filetypes 参数的设置方法:
可以是包含文件掩码的字符串列表,例如:filetypes = ["*.txt"]
可以是字符串列表,列表的最后一项字符串是文件类型的描述,例如:filetypes = [".css", [".htm", “*.html”, “HTML files”]]
具体使用代码如下:
import easygui
fin = easygui.fileopenbox()
print(fin)
运行结果如下:
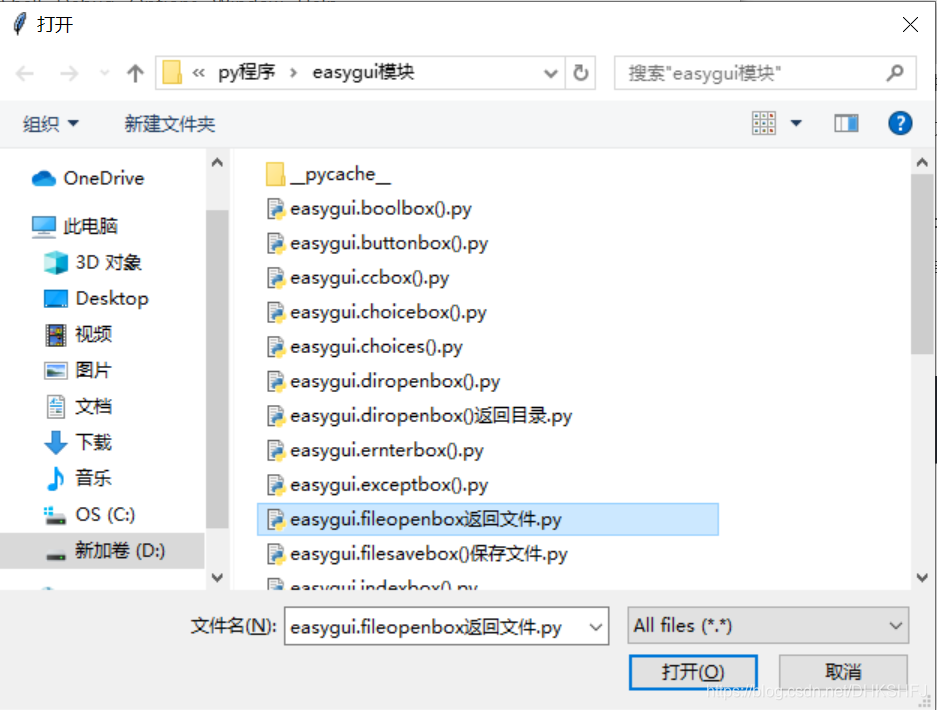
如下图所示,该函数可以返回选择文件的具体路径

18、Easy GUI中filesavebox()的使用方法
filesavebox(msg=None, title=None, default=’’, filetypes=None)
filesavebox() 函数提供一个对话框,让用于选择文件需要保存的路径(带完整路径哦),如果用户选择 “Cancel” 则返回 None。
default 参数应该包含一个文件名(例如当前需要保存的文件名),当然也可以设置为空的,或者包含一个文件格式掩码的通配符。
filetypes 参数的设置方法请参考 fileopenbox() 函数。
具体历程代码如下:
import easygui
out = easygui.filesavebox()
print(out)
运行结果为:
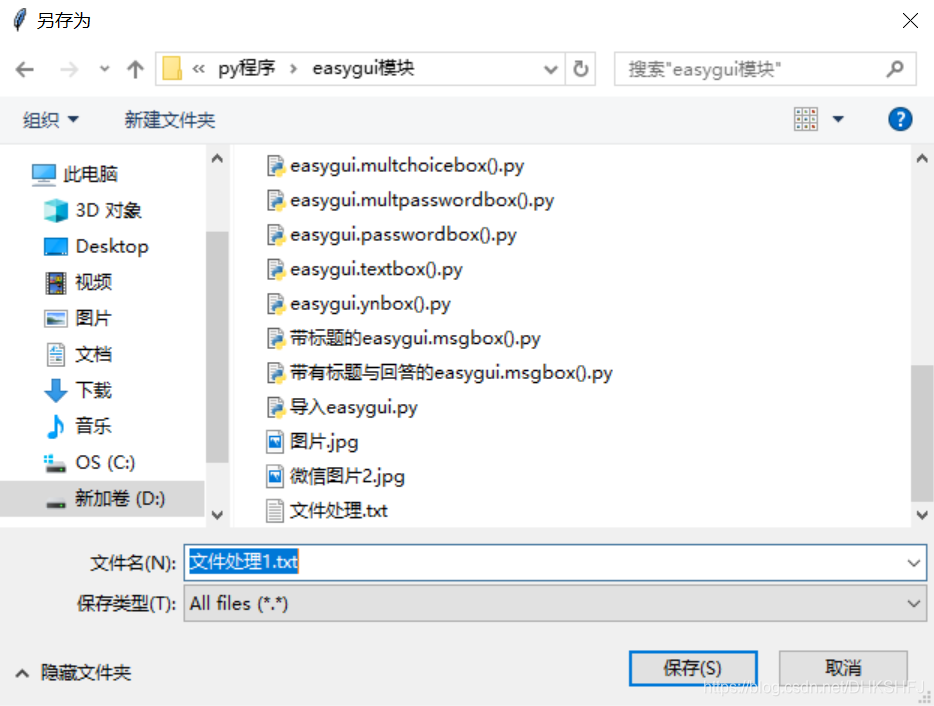
如下图所示,可以返回保存文件的具体路径:

19、Easy GUI中exceptiondox()的使用方法
使用 EasyGUI 编写 GUI 程序,有时候难免会产生异常。当然这取决于你如何运行你的应用程序,当你的应用程序崩溃的时候,堆栈追踪可能会被抛出,或者被写入到 stdout 标准输出函数中。
EasyGUI 通过 exceptionbox() 函数提供了更好的方式去处理异常。
当异常出现的时候,exceptionbox() 会将堆栈追踪显示在一个 codebox() 中,并且允许你做进一步的处理。
具体使用代码例程如下:
import easygui
try :
    int("abc")
except:
    easygui.exceptionbox()
运行结果如下:

如有错误,望更正。
