转 https://blog.csdn.net/flyfish111222/article/details/51886787
本博文介绍了MongoDB,并详细指引读者在Ubuntu下MongoDB的安装和使用。本教程在Ubuntu14.04下测试通过。
一、MongoDB介绍
MongoDB 是一个是一个基于分布式文件存储的数据库,介于关系数据库和非关系数据库之间,是非关系数据库当中功能最丰富,最像关系数据库的。他支持的数据结构非常松散,是类似json的bson格式,因此可以存储比较复杂的数据类型。Mongo最大的特点是他支持的查询语言非常强大,其语法有点类似于面向对象的查询语言,几乎可以实现类似关系数据库单表查询的绝大部分功能,而且还支持对数据建立索引。
二、安装MongoDB
MongoDB安装很简单,无需下载源文件,可以直接用apt-get命令进行安装。
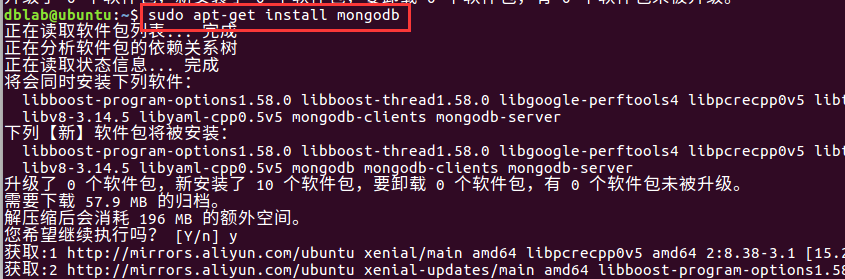
打开终端,输入以下命令:
sudo apt-get install mongodb- 1
截图如下:
安装完成后,在终端输入以下命令查看MongoDB版本:
mongo -version- 1
输出版本信息,表明安装成功,截图如下:

启动和关闭mongodb命令如下:
service mongodb start
service mongodb stop- 1
- 2
截图如下:

默认设置MongoDB是随Ubuntu启动自动启动的。
输入以下命令查看是否启动成功:
pgrep mongo -l #注意:-l是英文字母l,不是阿拉伯数字1- 1
截图如下:

卸载MongoDB
sudo apt-get --purge remove mongodb mongodb-clients mongodb-server- 1
三、使用MongoDB
shell命令模式
输入mongo进入shell命令模式,默认连接的数据库是test数据库,在此之前一定要确保你已经启动了MongoDB,否则会出现错误,启动之后运行成功,如下截图:

常用操作命令:
数据库相关
show dbs:显示数据库列表
show collections:显示当前数据库中的集合(类似关系数据库中的表table)
show users:显示所有用户
use yourDB:切换当前数据库至yourDB
db.help() :显示数据库操作命令
db.yourCollection.help() :显示集合操作命令,yourCollection是集合名
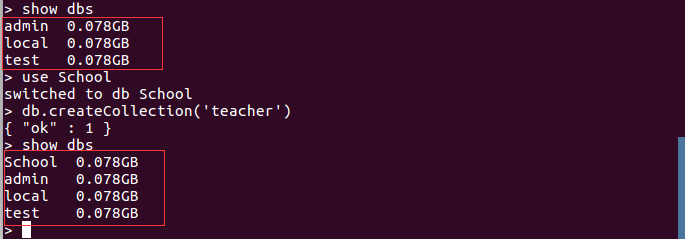
MongoDB没有创建数据库的命令,如果你想创建一个“School”的数据库,先运行use School命令,之后做一些操作(如:创建聚集集合db.createCollection('teacher')),这样就可以创建一个名叫“School”的数据库。截图如下:
下面以一个School数据库为例,在School数据库中创建两个集合teacher和student,并对student集合中的数据进行增删改查基本操作(集合Collection相当于关系型数据库中的表table)。
1、切换到School数据库
use School #切换到School数据库。MongoDB 无需预创建School数据库,在使用时会自动创建- 1
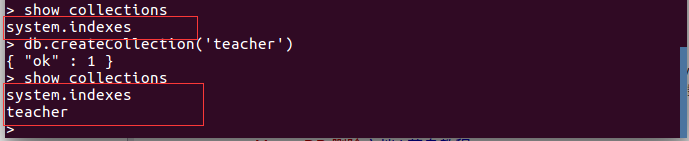
2、创建Collection
db.createCollection('teacher') #创建一个聚集集合。MongoDB 其实在插入数据的时候,也会自动创建对应的集合,无需预定义集合- 1
截图如下:
3、插入数据
与数据库创建类似,插入数据时也会自动创建集合。
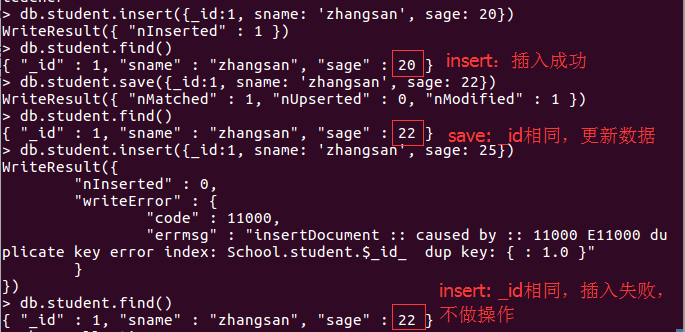
插入数据有两种方式:insert和save。
db.student.insert({_id:1, sname: 'zhangsan', sage: 20}) #_id可选
db.student.save({_id:1, sname: 'zhangsan', sage: 22}) #_id可选- 1
- 2
这两种方式,其插入的数据中_id字段均可不写,会自动生成一个唯一的_id来标识本条数据。而insert和save不同之处在于:在手动插入_id字段时,如果_id已经存在,insert不做操作,save做更新操作;如果不加_id字段,两者作用相同都是插入数据。截图如下:
添加的数据其结构是松散的,只要是bson格式均可,列属性均不固定,根据添加的数据为准。先定义数据再插入,就可以一次性插入多条数据,截图如下:
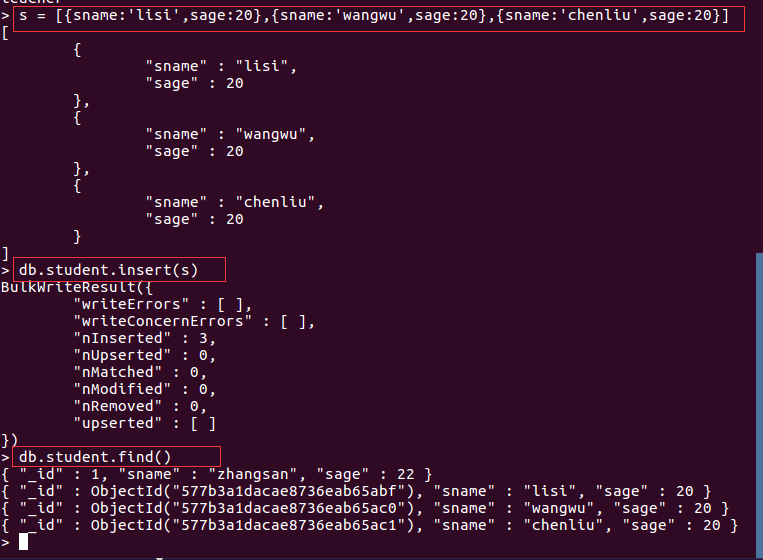
运行完以上例子,student 已自动创建,这也说明 MongoDB 不需要预先定义 collection ,在第一次插入数据后,collection 会自动的创建。截图如下:

3、查找数据
db.youCollection.find(criteria, filterDisplay)
criteria :查询条件,可选
filterDisplay:筛选显示部分数据,如显示指定列数据,可选(当选择时,第一个参数不可省略,若查询条件为空,可用{}做占位符,如下例第三句)
db.student.find()  #查询所有记录。相当于:select * from student
db.student.find({sname: 'lisi'})  #查询sname='lisi'的记录。相当于: select * from student where sname='lisi'
db.student.find({},{sname:1, sage:1}) #查询指定列sname、sage数据。相当于:select sname,sage from student。sname:1表示返回sname列,默认_id字段也是返回的,可以添加_id:0(意为不返回_id)写成{sname: 1, sage: 1,_id:0},就不会返回默认的_id字段了 db.student.find({sname: 'zhangsan', sage: 22}) #and 与条件查询。相当于:select * from student where sname = 'zhangsan' and sage = 22 db.student.find({$or: [{sage: 22}, {sage: 25}]}) #or 条件查询。相当于:select * from student where sage = 22 or sage = 25- 1
- 2
- 3
- 4
- 5
查询操作类似,这里只给出db.student.find({sname: 'lisi'})查询的截图,如下:

4、修改数据
db.youCollection.update(criteria, objNew, upsert, multi )
criteria: update的查询条件,类似sql update查询内where后面的
objNew : update的对象和一些更新的操作符(如$set)等,也可以理解为sql update查询内set后面的。
upsert : 如果不存在update的记录,是否插入objNew,true为插入,默认是false,不插入。
multi: mongodb默认是false,只更新找到的第一条记录,如果这个参数为true,就把按条件查出来多条记录全部更新。默认false,只修改匹配到的第一条数据。
其中criteria和objNew是必选参数,upsert和multi可选参数
举例如下:
db.student.update({sname: 'lisi'}, {$set: {sage: 30}}, false, true) #相当于:update student set sage =30 where sname = 'lisi';- 1
操作截图如下:

5、删除数据
db.student.remove({sname: 'chenliu'}) #相当于:delete from student where sname='chenliu'- 1
操作截图如下:

6、退出shell命令模式
输入exit或者Ctrl+C退出shell命令模式
注意:MongoDB相较安全性更偏向易用性,默认是没有开启用户权限的,如果想开启用户权限,可以参考Ubuntu下开启MongoDB用户权限。
Java API编程实例
第一步:下载Java MongoDB Driver驱动jar包,Java MongoDB Driver下载地址,默认的下载目录为~/下载或者~/Downloads
第二步:打开Eclipse,新建Java Project,新建Class,引入刚刚下载的jar包
第三步:编码实现
下面是源代码:
import java.util.ArrayList;
import java.util.List;

import org.bson.Document;
import com.mongodb.MongoClient;
import com.mongodb.client.MongoCollection; import com.mongodb.client.MongoCursor; import com.mongodb.client.MongoDatabase; import com.mongodb.client.model.Filters; public class TestMongoDB { /** * @param args */ public static void main(String[] args) { insert();//插入数据。执行插入时,可将其他三句函数调用语句注释掉,下同 // find(); //查找数据 // update();//更新数据 // delete();//删除数据 } /** * 返回指定数据库中的指定集合 * @param dbname 数据库名 * @param collectionname 集合名 * @return */ //MongoDB无需预定义数据库和集合,在使用的时候会自动创建 public static MongoCollection<Document> getCollection(String dbname,String collectionname){ //实例化一个mongo客户端,服务器地址:localhost(本地),端口号:27017 MongoClient mongoClient=new MongoClient("localhost",27017); //实例化一个mongo数据库 MongoDatabase mongoDatabase = mongoClient.getDatabase(dbname); //获取数据库中某个集合 MongoCollection<Document> collection = mongoDatabase.getCollection(collectionname); return collection; } /** * 插入数据 */ public static void insert(){ try{ //连接MongoDB,指定连接数据库名,指定连接表名。 MongoCollection<Document> collection= getCollection("test","student"); //实例化一个文档,文档内容为{sname:'Mary',sage:25},如果还有其他字段,可以继续追加append Document doc1=new Document("sname","Mary").append("sage", 25); //实例化一个文档,文档内容为{sname:'Bob',sage:20} Document doc2=new Document("sname","Bob").append("sage", 20); List<Document> documents = new ArrayList<Document>(); //将doc1、doc2加入到documents列表中 documents.add(doc1); documents.add(doc2); //将documents插入集合 collection.insertMany(documents); System.out.println("插入成功"); }catch(Exception e){ System.err.println( e.getClass().getName() + ": " + e.getMessage() ); } } /** * 查询数据 */ public static void find(){ try{ MongoCollection<Document> collection = getCollection("test","student"); //通过游标遍历检索出的文档集合 // MongoCursor<Document> cursor= collection.find(new Document("sname","Mary")). projection(new Document("sname",1).append("sage",1).append("_id", 0)).iterator(); //find查询条件:sname='Mary'。projection筛选:显示sname和sage,不显示_id(_id默认会显示) //查询所有数据 MongoCursor<Document> cursor= collection.find().iterator(); while(cursor.hasNext()){ System.out.println(cursor.next().toJson()); } }catch(Exception e){ System.err.println( e.getClass().getName() + ": " + e.getMessage() ); } } /** * 更新数据 */ public static void update(){ try{ MongoCollection<Document> collection = getCollection("test","student"); //更新文档 将文档中sname='Mary'的文档修改为sage=22 collection.updateMany(Filters.eq("sname", "Mary"), new Document("$set",new Document("sage",22))); System.out.println("更新成功!"); }catch(Exception e){ System.err.println( e.getClass().getName() + ": " + e.getMessage() ); } } /** * 删除数据 */ public static void delete(){ try{ MongoCollection<Document> collection = getCollection("test","student"); //删除符合条件的第一个文档 collection.deleteOne(Filters.eq("sname", "Bob")); //删除所有符合条件的文档 //collection.deleteMany (Filters.eq("sname", "Bob")); System.out.println("删除成功!"); }catch(Exception e){ System.err.println( e.getClass().getName() + ": " + e.getMessage() ); } } }每次执行完程序,都可以返回shell模式查看结果。如:在eclipse执行完更新操作后,在shell模式输入db.student.find(),可以查看student集合的所有数据,截图如下:
