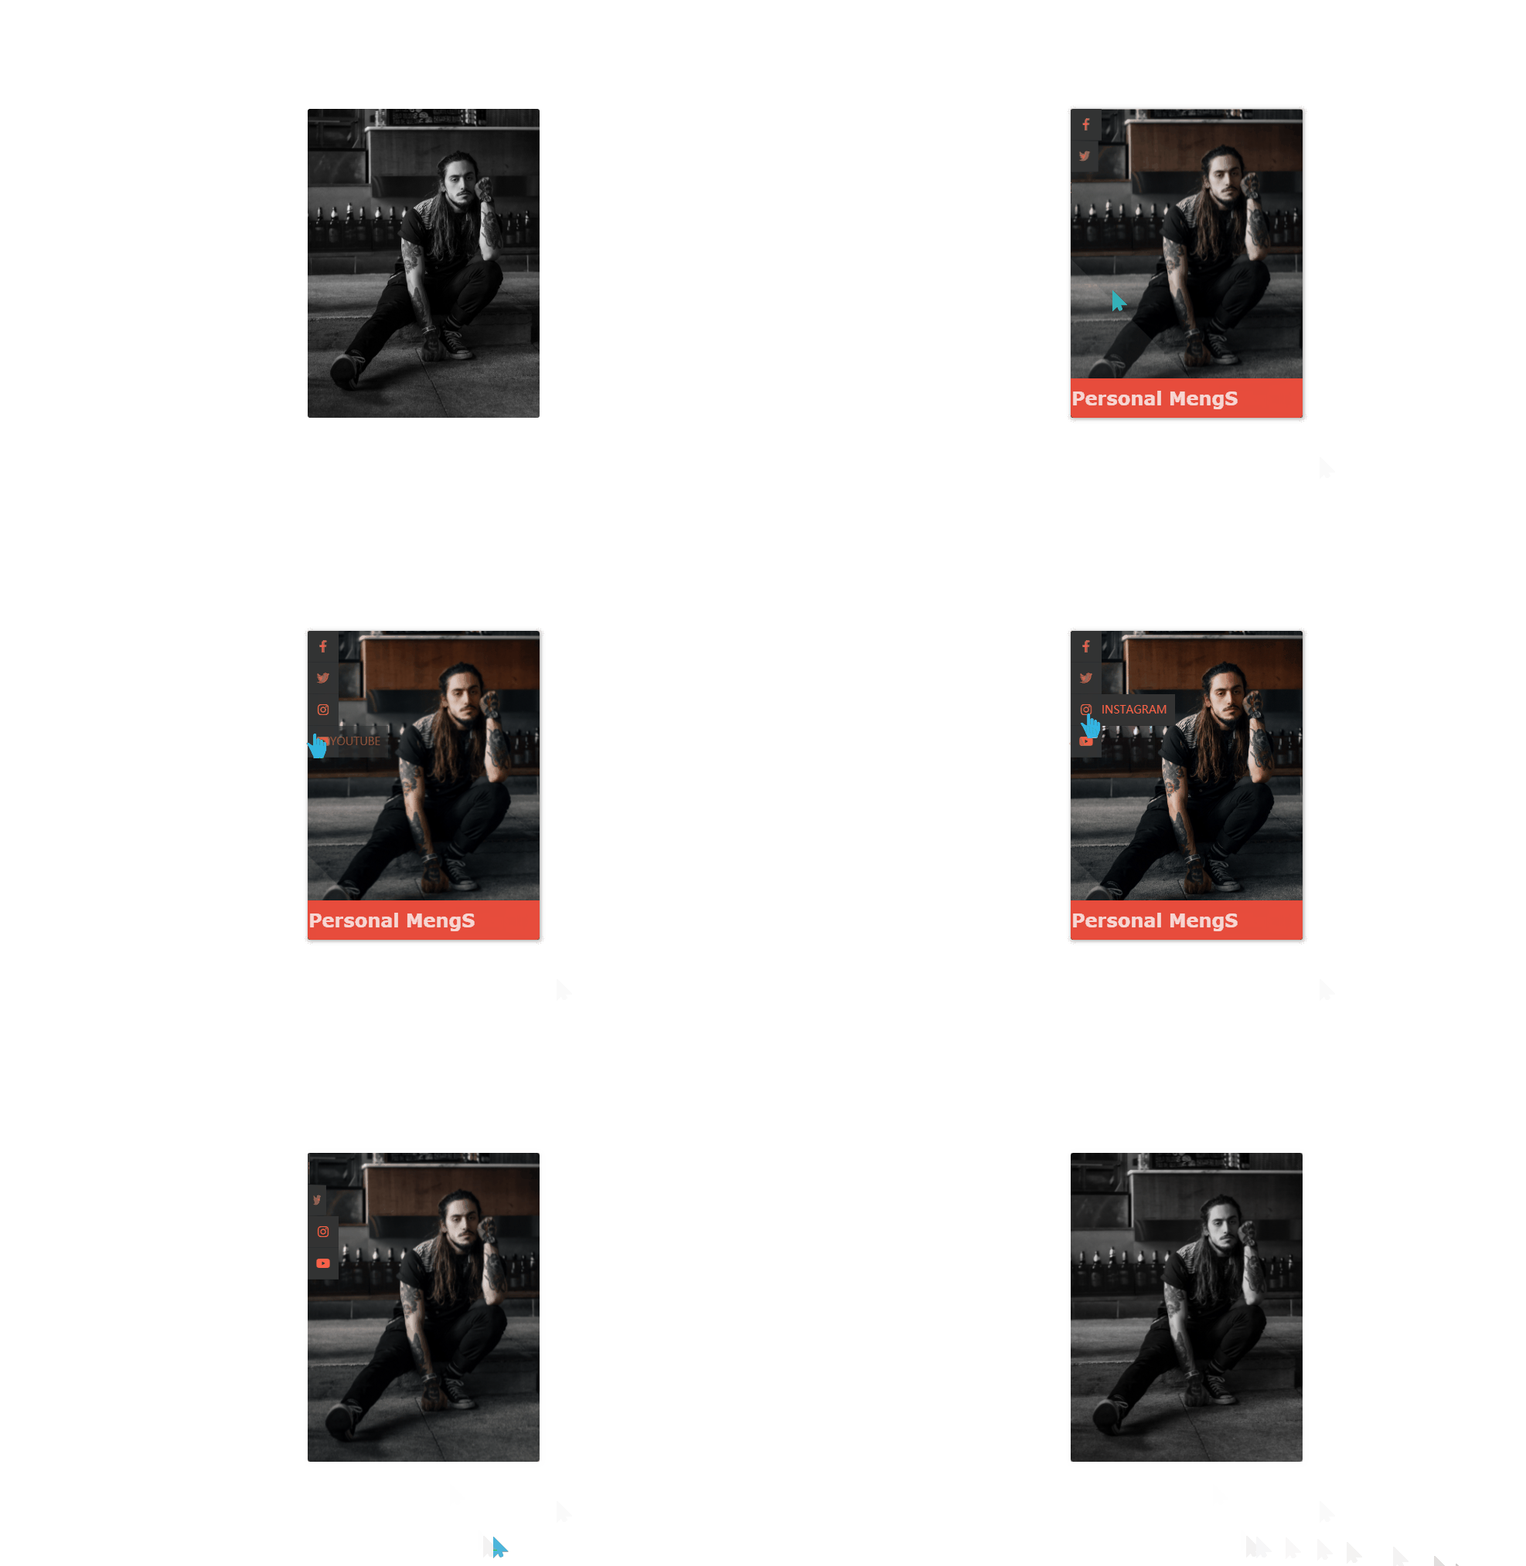
动态镜面个人主页
教程地址:原文地址(YouTube)
B站教程:原文转载(bilibili)
两个视频的内容相同,第二个为转载
效果图
代码区
以下代码为本人填写,转载请注明教程地址和本贴地址
html
  <div class="img-card">
    <img src="img/profile.jpg" alt="Error">
    <!-- 下方标题 -->
    <h2>Personal MengS</h2>
    <!-- 左侧四个图标 -->
		<ul>
			<li><i class="fab fa-facebook-f"></i><span>facebook</span></li>
			<li><i class="fab fa-twitter"></i><span>twitter</span></li>
			<li><i class="fab fa-instagram"></i><span>instagram</span></li>
			<li><i class="fab fa-youtube"></i><span>youtube</span></li>
		</ul>
	</div>
CSS
* {
  margin: 0; /* 外边距 */
  padding: 0; /* 内边距 */
}
body{
  display: flex; /* 弹性盒模型 */
  height: 100vh; /* 高度 */
  justify-content: center; /* 主轴:居中 */
  align-items: center; /* 交叉轴 */
  font-family: sans-serif; /* 字体 */
}
.img-card{
  position: relative; /* 相对布局 */
  height: 400px;
  width: 300px; /* 宽度 */
  overflow: hidden; /* 超出隐藏 */
  border-radius: 3px; /* 圆角 */
  transition: all 0.4s; /* 过渡时间 */
}
/* 悬停时 */
.img-card:hover{
  box-shadow: 1px 1px 6px 1px rgba(0, 0, 0, 0.3); /* 阴影 */
}

/* 图片相关 */

/* 图片大小 */
.img-card img{
  height: 100%;
  width: 100%;
  object-fit: cover; /* 可替换元素如何适应布局,cover保持宽高比进行裁剪到适当大小 */
  filter: grayscale(100%); /* 灰阶:使元素偏向灰色 */
  transition: 2s; /*  */
}
.img-card:hover img{
  /* 通过修改灰阶实现颜色变化 */
  filter: grayscale(0%);
  transform: scale(1.1); /* 放大 */
}

/* 以下为玻璃镜面 */

/* 模拟玻璃镜面 1 */
.img-card::before{
  content: ''; /* 内容 */
  position: absolute; /* 绝对定位 */
  top: 0; /* 距上部 */
  left: 180%; /* 距左部 */
  height: 100%;
  width: 75%;
  background: rgba(255, 255, 255, 0.1); /* 背景颜色 */
  z-index: 1; /* z轴层叠顺序 */
  opacity: 0.7; /* 透明度 */
  pointer-events: none; /* 使元素可以穿透点击 */
  transform: skew(45deg); /* 倾斜45度 */
  transition: .5s; /* 过渡时间 */
}
/* 模拟玻璃镜面 1 悬停时 */
.img-card:hover::before{
  /* 利用修改left的定位进行移动 */
  left: -180%;
}
/*  玻璃镜面 2  */
.img-card::after{
  content: '';
  position: absolute;
  top: 0;
  left: 180%;
  height: 100%;
  width: 100%;
  background: rgba(255, 255, 255, 0.2);
  z-index: 1;
  opacity: 0.7;
  pointer-events: none;
  transform: skew(45deg);
  transition: 0.3s;
}
/* 模拟玻璃镜面 2 悬停时 */
.img-card:hover::after{
  left: -130%;
  transition: 1s;
}

/* 标题 */

/* 标题 */
.img-card h2{
  position: absolute;
  bottom: 0;
  width: 100%;
  background: #e74c3c;
  padding: 10px 0;
  color: #f9d6d2;
  font-family: verdana;
  border: 1px solid #e64533;
  user-select: none; /* 用户不可选取 */
  z-index: 2;
  transform-origin: right;
  transform: perspective(500px) rotateY(-90deg); /* 透视距离,旋转 */
  transition: all 0.5s;
}
.img-card:hover h2{
  transform: perspective(500px) rotateY(0deg);
}

/* 左上角按钮 */

/* 按钮框体 */
.img-card ul{
  position: absolute;
  top: 0;
  left: 0;
  background: rgba(255, 255, 255, 0);
}
.img-card ul li{
  height: 40px;
  width: 40px;
  line-height: 40px;
  text-align: center; /* 内容水平居中 */
  cursor: pointer; /* 鼠标样式 */
  transform: perspective(800px) rotateY(90deg);
  transform-origin: left;
  background: #333;
  border-bottom: 1px solid rgba(0, 0, 0, 0.1);
  transition: all 0.5s;
}
.img-card:hover ul li{
  transform: perspective(800px) rotateY(0deg);
}
.img-card ul li:nth-child(1){
  /* 通过修改各个子元素的延时时间出现顺序效果 */
  transition-delay: 0.2s;
}
.img-card ul li:nth-child(2){
  transition-delay: .4s;
}
.img-card ul li:nth-child(3){
  transition-delay: .6s;
}
.img-card ul li:nth-child(4){
  transition-delay: .8s;
}
.img-card ul li i{
  color: tomato;
  background: rgba(255, 255, 255, 0);
}

/* 图标对应文字效果 */

ul li span{
  position: absolute;
  left: 0px;
  font-size: 14px;
  text-transform: uppercase; /* 大写 */
  background: #333;
  color:tomato;
  border-bottom: 1px solid rgba(0, 0, 0, 0.1);
  padding: 0 10px;
  opacity: 0;
  z-index: -1;
  transition: all 0.7s;
  pointer-events: none;
}
/* 通过修改透明度显示,修改left出现移动显示 */
ul li:hover span{
  left: 30px; /* 大小为li宽度 */
  opacity: 1;
  pointer-events: auto;
  transition: all 0.5s;
}
JS
教程地址:原文地址(YouTube)
B站教程:原文转载(bilibili)

