 ## Swift 编译过程
LLVM
百度百科LLVM
深入理解LLVM
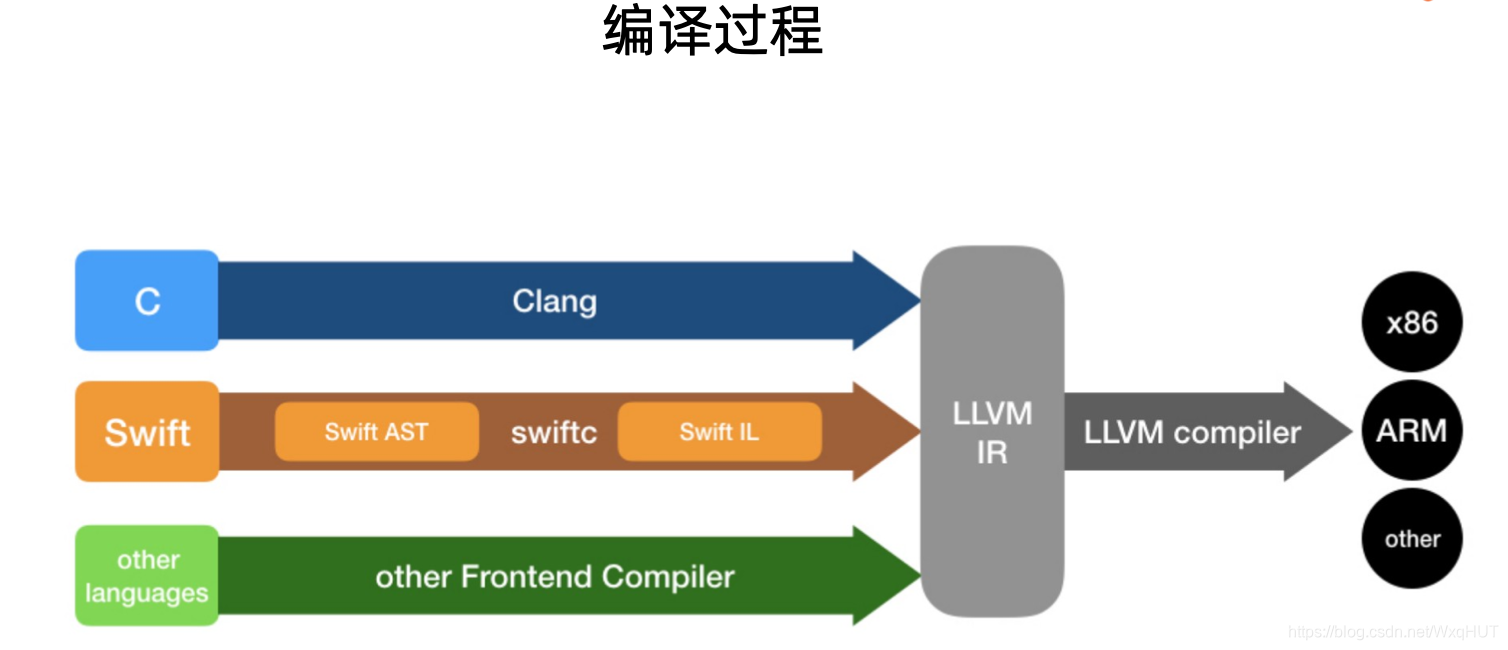
LLVM是构架编译器(compiler)的框架系统,以C++编写而成,用于优化以任意程序语言编写的程序的编译时间(compile-time)、链接时间(link-time)、运行时间(run-time)以及空闲时间(idle-time),对开发者保持开放,并兼容已有脚本,作为多种语言的后端。
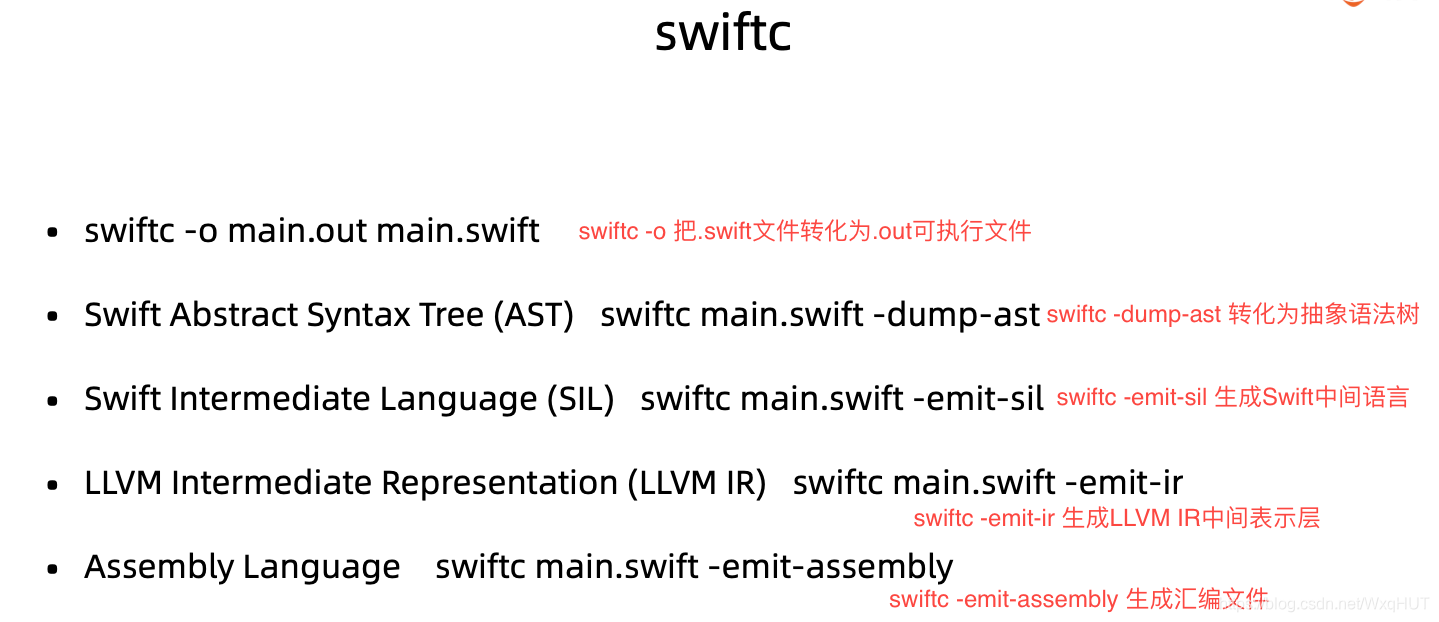
C/OC通过Clang编译器前端,Swift会先编译成Swift AST然后通过swiftc命令行参数编译成Swift IL(Swift的中间语言),最后编译成LLVM IR(LLVM的中间层表示),最终通过LLVM编译器在具体机器(x86 ARM等)上执行可执行文件。

Swift源码解析–> Swift抽象语法树–> 通过工具转化为Swift中间语言SIL–>通过分析工具转化为LLVM中间表示层–>通过LLVM的后端生成.o的可执行文件。
swiftc命令行工具
模式和模式匹配

模式是一种抽象的机构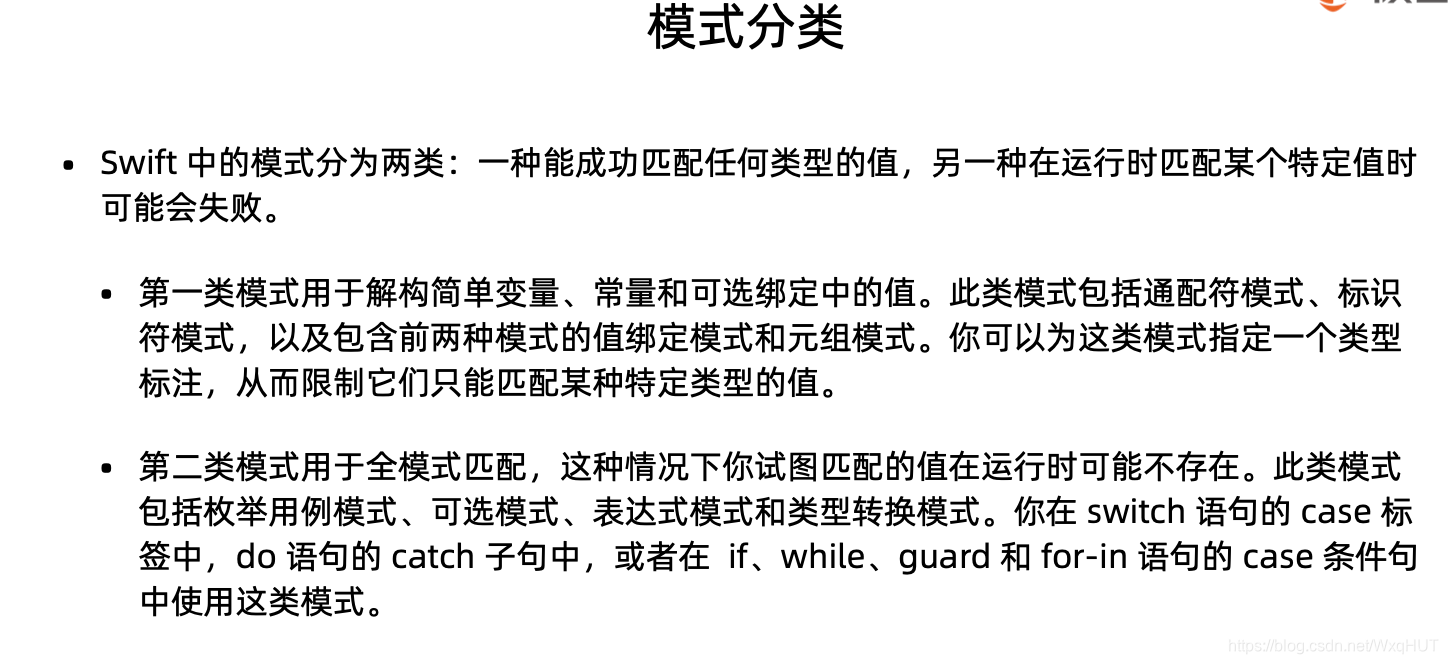

模式匹配
通配符模式 ( wildcard pattern)
- 通配符模式由一个下划线(_)构成,用于匹配并忽略任何值,当你想忽略被匹配的值时可以使用该模式。
for _ in 1...3{

}
标识符模式 (identifier pattern)
- 标识符模式可以匹配任何值,并将匹配的一个变量或者常量绑定起来
let someValue = 42
值绑定模式 value-binding pattern
- 值绑定模式把匹配到的值绑定给一个变量或者常量
let point = (3, 2)
switch point {
    //将point中的元素绑定到 x 和 y
case let (x, y):
    print("point is at x:(\(x), \(y)")
}
元组模式 (tupel pattern)
-
元组模式是由都好分隔的,具有零个或多个模式的列表,并由一对圆括号括起来。元组模式匹配到响应的元组类型值。
-
你可以使用类型标注去限制一个元组模式只能匹配那种元组类型。例如, 在常量声明 let(x ,y):(Int, Int) = (1,2)中的元组模式(x,y):(Int,Int)就只能匹配两个元素都是Int类型的元组。
-
当元组模式被用于 for-in 语句或者变量和常量声明时,它仅可以包含通配符模式,标识符模式,可选模式或者其他包含这下模式的元组模式。
let points = [(0, 0), (1, 0), (1, 1), (2, 0), (2, 1)]
for (x, y) in points where y==0 {
    print("\(x) and \(y)")
}
枚举用例模式 enumeration case pattern
- 枚举用例模式匹配现有的某个枚举类型的某个用例。枚举用例模式出现在switch 语句中的 case 标签中,以及if,while,guard,for-in语句的case条件中。
可选项模式 optional pattern
- 可选项模式匹配 Optional 枚举在some(Wrapped)中包装的值。
可选项模式为 for-in 语句提供了一种迭代数组的简便方式,只为数组中非 nil 的元素执行循环体
let someOptional: Int? = 42
if case .some(let x) = someOptional {
    print(x)//42
}

if case let x? = someOptional {
    print(x)//42
}

let arrayOfOptionalInts: [Int?] = [nil, 2, 3, nil, 5]
for case let number? in arrayOfOptionalInts {
    print("fond a \(number)")//2,3,5
}
类型转换模式 Type-Casting Pattern
有两种类型转换模式, is模式和as模式, is 模式只出现在switch语句中的case标签中。
- is 模式仅当一个值的类型在运行时和is模式右边的指定类型一致,或者是其子类的情况下,才会匹配这个值。is模式和is 运算符有相似表现,它们都可进行类型转换,但是is模式没有返回类型
- as 模式仅当一个值得类型在运行时和as模式右边指定类型一致或者是其子类的情况下,才会匹配这个值,如果匹配成功,被匹配的值得类型被转换成as模式右边指定的类型 返回
protocol Animal {
    var name: String{get}
}

struct Dog: Animal {
    var name: String {
        return "Dog"
    }
    var runSpeed: Int
}


struct Bird: Animal {
    var name: String {
        return "Bird"
    }
    var flyHeight: Int
}

struct Fish: Animal {
    var name: String {
        return "fish"
    }
    var depth: Int
}

let animals: [Any] = [Dog(runSpeed: 10), Bird(flyHeight: 1000), Fish(depth: 300)]
for animal in animals {
    switch animal {
    case let dog as Dog:
        print("\(dog.name) can run \(dog.runSpeed)")
    case let fish as Fish:
        print("\(fish.name) dive depth \(fish.depth)")
    case is Bird:
        print("bird can fly")
    default:
        print("unknown animal")
    }
}
表达式模式 expression pattern
- 表达式模式代表表达式模式的值,表达式模式只出现在 switch语句的case标签中
- 表达式模式代表的表达式会使用Swift 标准库中的 ~= 运算符与输入表达式的值进行比较。如果 ~= 运算符返回true, 则匹配成功。默认情况下, ~= 运算符来比较两个相同类型的值,它也可以将一个整形数组与一个Range实例中的一段整数区间做匹配
let point = (1,2)
switch point {
case (0,0):
    print("(0,0) is at the origin.")
case (-2...2, -2...2):
    print("(\(point.0), \(point.1)) is near the origin.")
default:
    print("the point is at (\(point.0),\(point.1))")
}
:(1, 2) is near the origin.
自定义类型默认是无法进行表达式模式匹配的,也需要重载 ~= 运算符
struct Employee {
    var salary: Int
}

//重载 ~= 才能对自定义的类进行 范围模式匹配
func ~= (left: ClosedRange<Int>, right: Employee) -> Bool  {
    return left.contains(right.salary)
}

var e: Employee = Employee(salary: 1000)

switch e {
case 0...1000:
    print("贫穷")
case 1000...5000:
    print("凑合")
case 5000...1000:
    print("富有")
default:
    print("土豪")
}
Array数组探秘
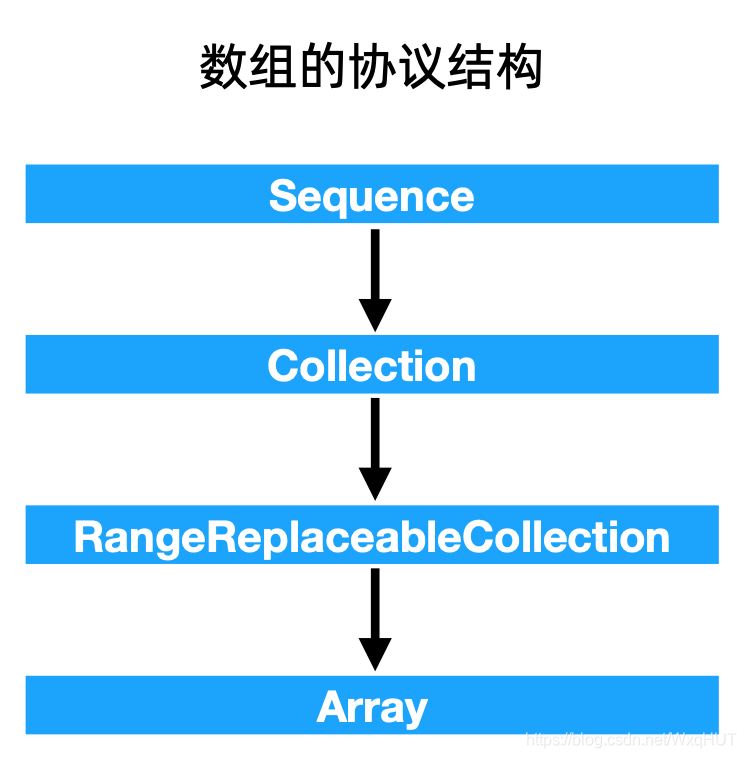
Sequence
一个序列代表是一系列具有相同类型的值,对这些值进行迭代。
Sequence中重要的两个参数就是Element和Iterator,Iterator遵循IteratorProtocol协议并且迭代器的数据类型和Sequence的元素类型相同.
还有一个重要方法makeIterator(),使序列获取迭代器,通过迭代器进行遍历操作。
public protocol Sequence {

    /// A type representing the sequence's elements.
    associatedtype Element where Self.Element == Self.Iterator.Element

    /// A type that provides the sequence's iteration interface and
    /// encapsulates its iteration state.
    associatedtype Iterator : IteratorProtocol

    /// Returns an iterator over the elements of this sequence.
    func makeIterator() -> Self.Iterator

    /// A value less than or equal to the number of elements in the sequence,
    /// calculated nondestructively.
    ///
    /// The default implementation returns 0. If you provide your own
    /// implementation, make sure to compute the value nondestructively.
    ///
    /// - Complexity: O(1), except if the sequence also conforms to `Collection`.
    ///   In this case, see the documentation of `Collection.underestimatedCount`.
    var underestimatedCount: Int { get }

    /// Call `body(p)`, where `p` is a pointer to the collection's
    /// contiguous storage.  If no such storage exists, it is
    /// first created.  If the collection does not support an internal
    /// representation in a form of contiguous storage, `body` is not
    /// called and `nil` is returned.
    ///
    /// A `Collection` that provides its own implementation of this method
    /// must also guarantee that an equivalent buffer of its `SubSequence`
    /// can be generated by advancing the pointer by the distance to the
    /// slice's `startIndex`.
    func withContiguousStorageIfAvailable<R>(_ body: (UnsafeBufferPointer<Self.Element>) throws -> R) rethrows -> R?
}
IteratorProtocol协议
迭代器协议实现Elment数据类型的定义和next()方法(返回一个可选值)。
IteratorProtocol 的核心是next()方法,这个方法在每次被调用时返回序列中的下一个值。当序列下一个值为空时,next()应该返回 nil。
public protocol IteratorProtocol {

    /// The type of element traversed by the iterator.
    associatedtype Element

    /// Advances to the next element and returns it, or `nil` if no next element
    /// exists.
    ///
    /// Repeatedly calling this method returns, in order, all the elements of the
    /// underlying sequence. As soon as the sequence has run out of elements, all
    /// subsequent calls return `nil`.
    ///
    /// You must not call this method if any other copy of this iterator has been
    /// advanced with a call to its `next()` method.
    ///
    /// The following example shows how an iterator can be used explicitly to
    /// emulate a `for`-`in` loop. First, retrieve a sequence's iterator, and
    /// then call the iterator's `next()` method until it returns `nil`.
    ///
    ///     let numbers = [2, 3, 5, 7]
    ///     var numbersIterator = numbers.makeIterator()
    ///
    ///     while let num = numbersIterator.next() {
    ///         print(num)
    ///     }
    ///     // Prints "2"
    ///     // Prints "3"
    ///     // Prints "5"
    ///     // Prints "7"
    ///
    /// - Returns: The next element in the underlying sequence, if a next element
    ///   exists; otherwise, `nil`.
    mutating func next() -> Self.Element?
}
了解了Sequence协议和IteratorProtocol协议,我们便可以自定义Sequence,来实现功能。以自定义斐波那契数列为例:
struct FibIterator: IteratorProtocol {
    //指定Elment类型
    typealias Element = Int
    //计数变量
    var count: Int = 0
    //init构造函数
    let number: Int
    init(_ number: Int) {
        self.number = number
    }
    //元组存放Fib序列
    var state = (0, 1)
    //mutating关键字 在实例方法中修改属性值
    //自定义next()方法,输出超过number个FibNumber输出nil,否则输出fibNumber
    mutating func next() -> FibIterator.Element? {
        count += 1
        if count > number {
            return nil
        }
        let FibNumber = state.0
        state = (state.1, state.0 + state.1)
        return FibNumber
    }
}

struct FibSequence: Sequence {
    //init构造函数
    let number: Int
    init(_ number: Int) {
        self.number = number
    }
    //指定Iterator类型
    typealias Iterator = FibIterator
    //自定义makeIterator()方法,获取迭代器
    func makeIterator() -> FibIterator {
        return FibIterator(number)
    }
}

let fibSeq = FibSequence(10)
for fibNum in fibSeq {
    print(fibNum)
}
//0
//1
//1
//2
//3
//5
//8
//13
//21
//34
总结:要想自定义Sequence,最基本需要以下步骤:
- 自定义Iterator(遵守IteratorProtocol协议),内部实现Element数据类型和
next()方法 - 自定义Sequence(遵守Sequence),内部实现Iterator的定义和
makeIterator()的方法
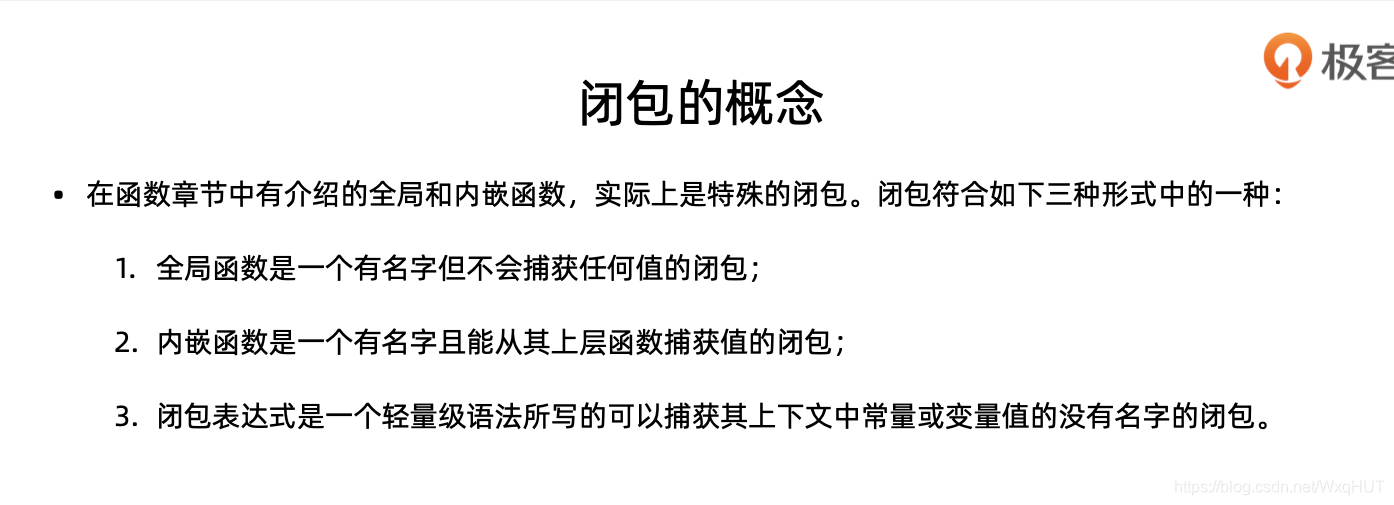
闭包
闭包简单理解就是闭合包裹上下文的常量或变量
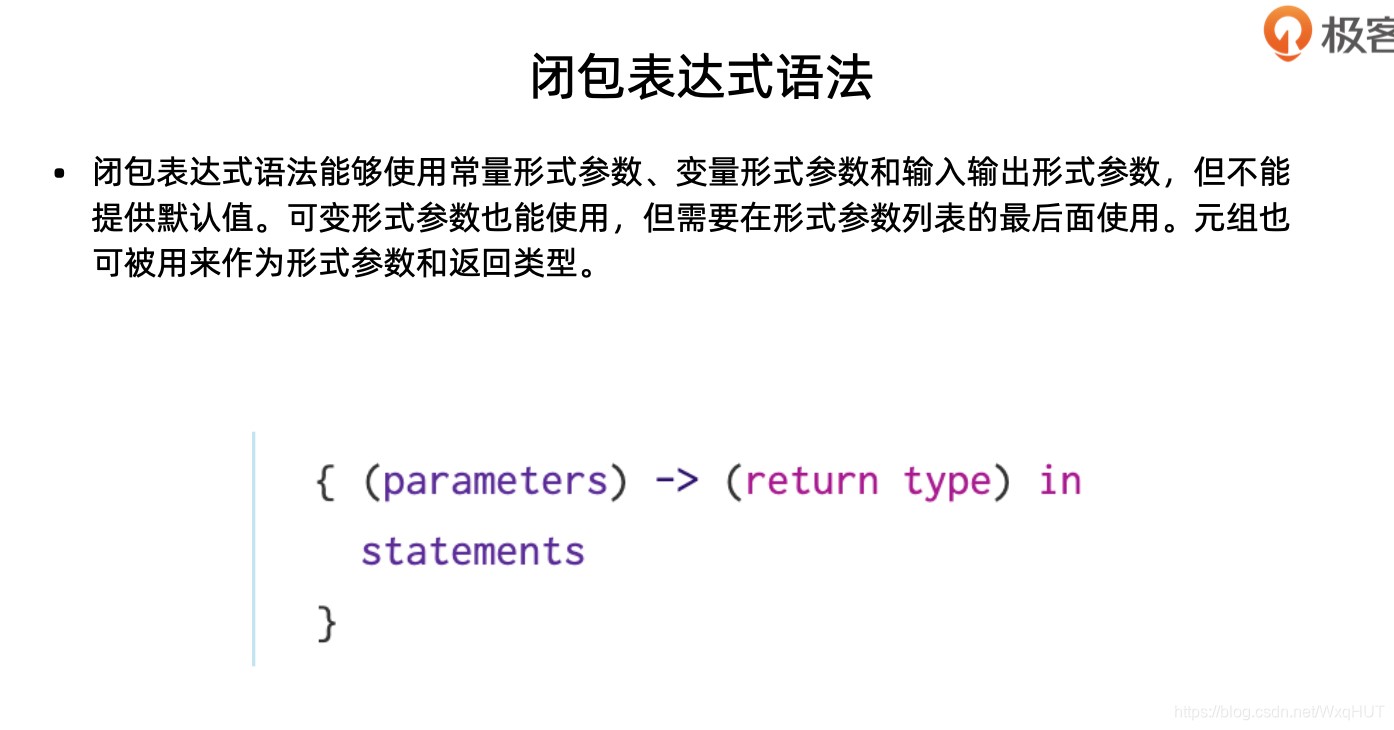
闭包表达式详解
闭包表达式的简化
- 闭包表达式中可以根据语境推断参数类型和返回值类型,故可以省略。
- 单表达式闭包能够通过从它们的声明中删掉 return 关键字来隐式返回它们单个表达式的结果。
- Swift 自动对行内闭包提供简写实际参数名,可以通过 $0 , $1 , $2 等名字来引用闭包 的实际参数值。
闭包逃逸
当闭包作为一个实际参数传递给一个函数的时候,并且它会在函数返回之后调用,我们就说这个闭包逃逸了。当你声明一个接受闭包作为形式参数的函数时,你可以在形式参数前写@escaping来明确闭包是允许逃逸的。按照闭包是否逃离函数作用域分为逃逸闭包和非逃逸闭包。
var providers: [() -> String] = []

func collectProviderColsure(provider: @escaping () -> String) {
    providers.append(provider)
}
闭包逃逸常常与异步、回调等操作进行处理。
自动闭包
自动闭包允许你延迟处理,因此闭包内部的代码直到你调用它的时候才会运行。对于 副作用或者占用资源的代码来说很有用,因为它可以允许你控制代码何时才进行求值。
var names = ["zhangshan", "lisi", "wagnwu"]

var closure = {names.remove(at: 0)}

print(names.count) // 3

print(closure()) // zhangshan

print(names.count) // 2
closure闭包延迟处理,在调用时才会执行内部代码。
通过 @autoclosure 标志标记它的形式参数使用了自动闭包。现在你可以调用函数就像它接收了一个 String 实际参数而不是闭包。实际参数自动地转换为闭包。
var names = ["zhangshan", "lisi", "wagnwu"]

func removeFirst(closure: @autoclosure () -> String) -> String {
    return closure()
}

let removeFirstName = removeFirst(closure: names.remove(at: 0)) //实际参数转化为闭包处理
print(removeFirstName) //zhangshan
print(names.count) //2
static 和 class 关键字
类的初始化
指定初始化器和便捷初始化器
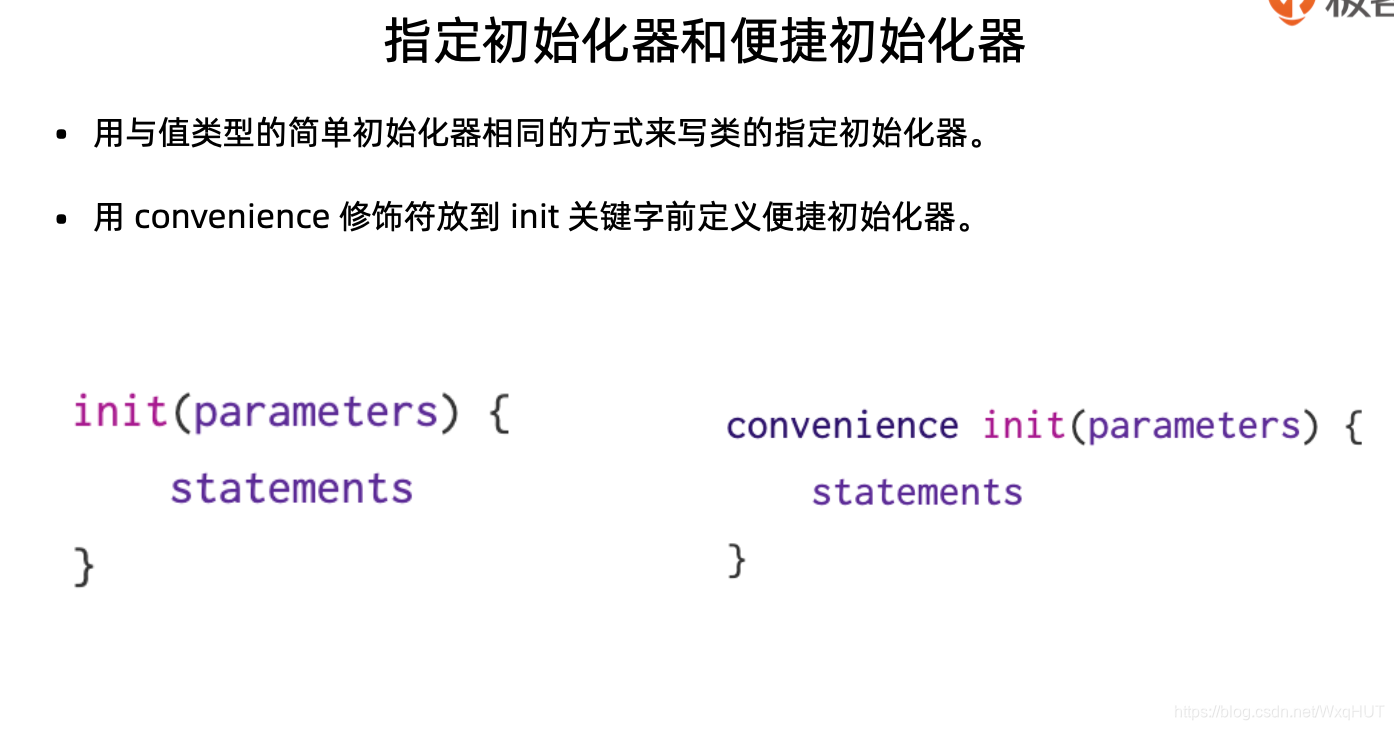
便携初始化器必须先调用本类的指定初始化器。
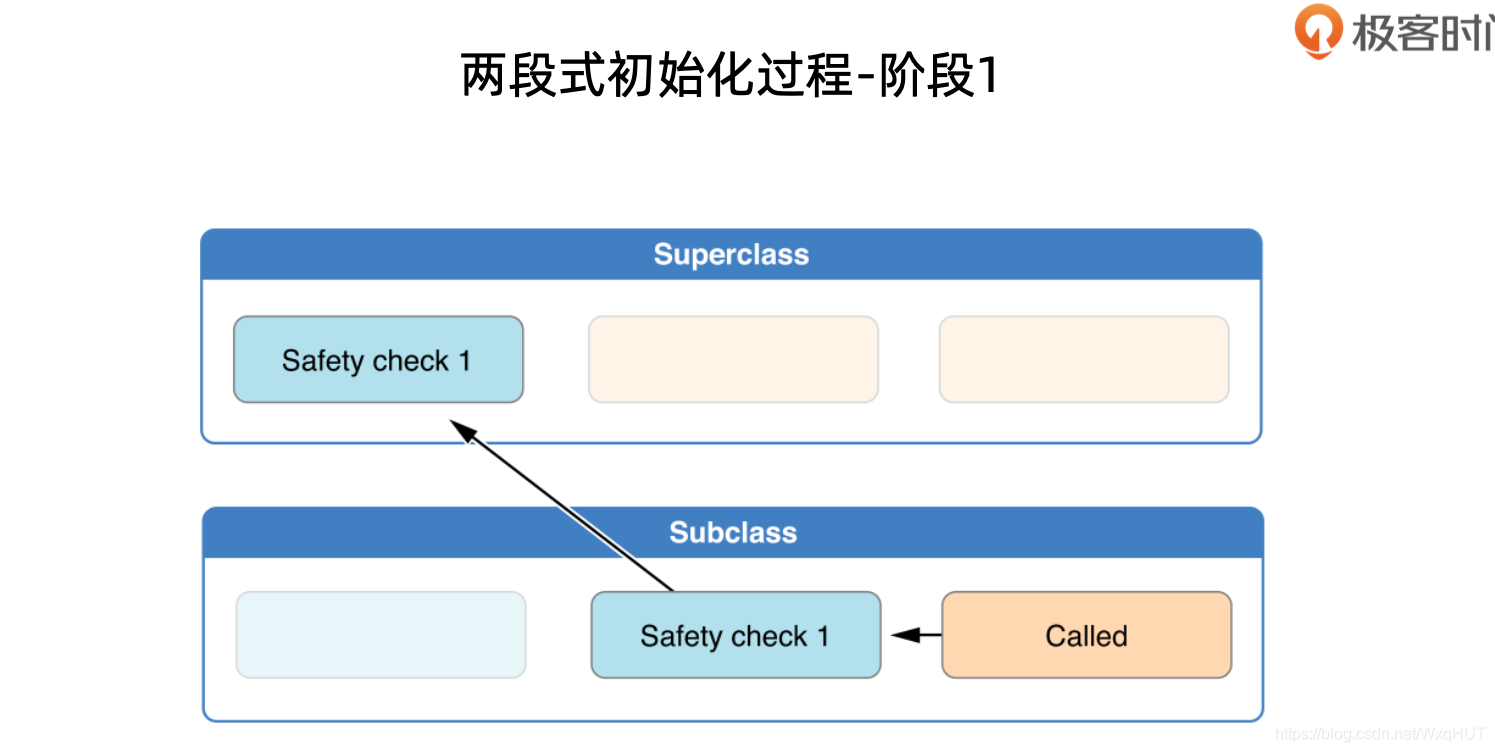
类初始化的安全检查
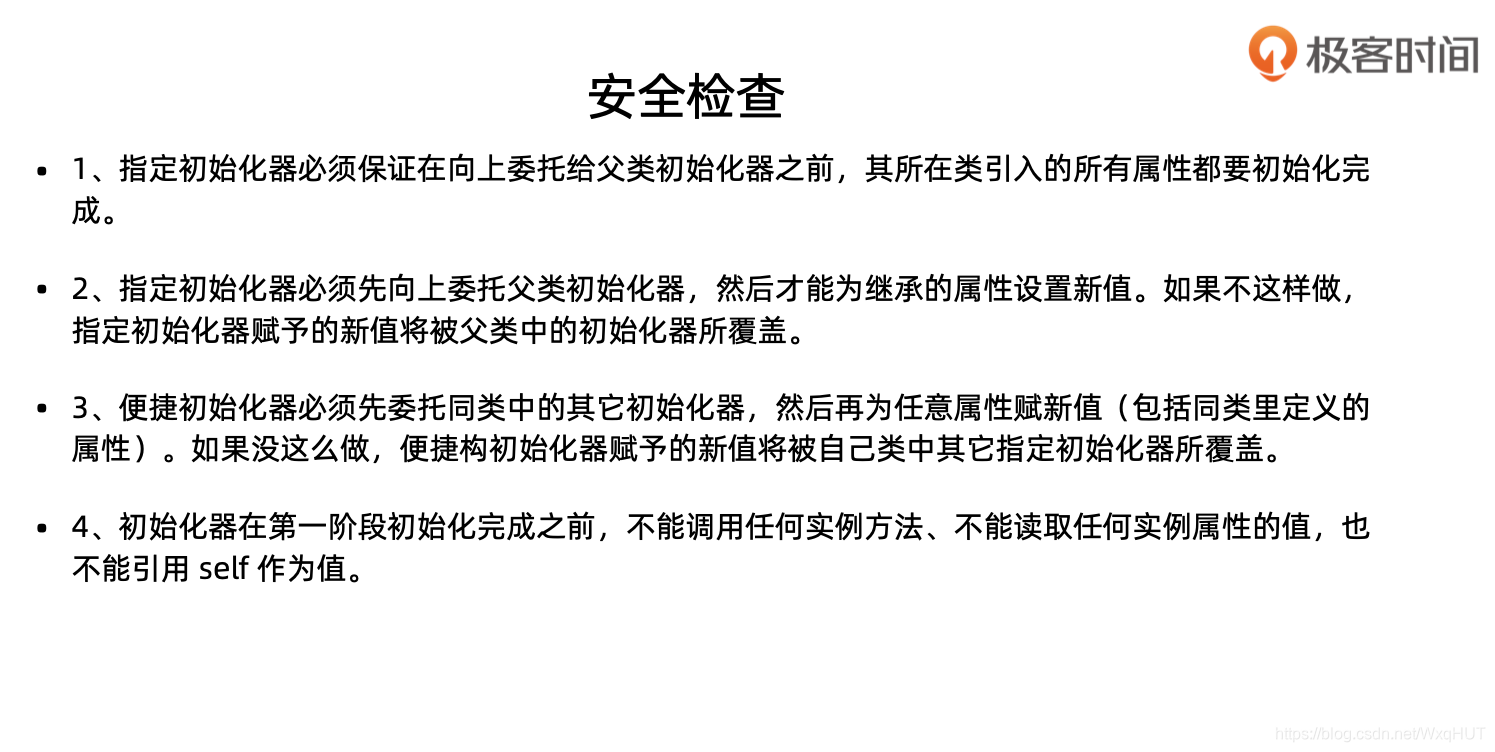
第一条(子类引入的存储属性必须在调用父类初始化构造器之前初始化完成)
class Person {
    var name: String
    var age: Int

    init(name: String, age: Int) {
        self.name = name
        self.age = age
    }

    convenience init() {
        self.init(name: "Ryan", age: 20)
    }
}

class Teacher: Person {
    var salary: Int

    init(name: String, age: Int, salary: Int) {
        super.init(name: name, age: age)
        self.salary = salary//Property 'self.salary' not initialized at super.init call
        //违背第一条,子类引入的所有属性必须在父类初始化器调用之前初始化完成
        self.name = self.name + "老师"
    }
}
第二条(在未调用父类初始化构造器前无法使用父类的存储属性)
class Person {
    var name: String
    var age: Int

    init(name: String, age: Int) {
        self.name = name
        self.age = age
    }

    convenience init() {
        self.init(name: "Ryan", age: 20)
    }
}

class Teacher: Person {
    var salary: Int

    init(name: String, age: Int, salary: Int) {
        self.salary = salary
        self.name = self.name + "老师"//'self' used in property access 'name' before 'super.init' call
        super.init(name: name, age: age)
    }
}
第三条(便携初始化构造器必须先调用本类指定初始化器才能对存储属性进行修改)
class Person {
    var name: String
    var age: Int

    init(name: String, age: Int) {
        self.name = name
        self.age = age
    }

    convenience init() {
        self.init(name: "Ryan", age: 20)
    }
}

class Teacher: Person {
    var salary: Int

    init(name: String, age: Int, salary: Int) {
        self.salary = salary
        super.init(name: name, age: age)
        self.name = self.name + "老师"
    }

    convenience init(salary: Int) {
        self.salary = 200//'self' used before 'self.init' call or assignment to 'self'
        self.init(name: "Ryan", age: 20, salary: 3000)
    }
}
第四条(存储属性未初始化完成前无法使用任何实例方法、不能读取任何实例属性对值)
class Person {
    var name: String
    var age: Int

    init(name: String, age: Int) {
        self.name = name
        self.age = age
    }

    convenience init() {
        self.init(name: "Ryan", age: 20)
    }
}

class Teacher: Person {
    var salary: Int

    init(name: String, age: Int, salary: Int) {
        self.salary = salary
        self.printInfo()//'self' used in method call 'printInfo' before 'super.init' call
        super.init(name: name, age: age)
        self.name = self.name + "老师"
    }

    convenience init(salary: Int) {
        self.init(name: "Ryan", age: 20, salary: 3000)
        self.salary = self.salary + 2000
    }

    func printInfo() {
        print("name: \(name), age: \(age), salary: \(salary)")
    }
}
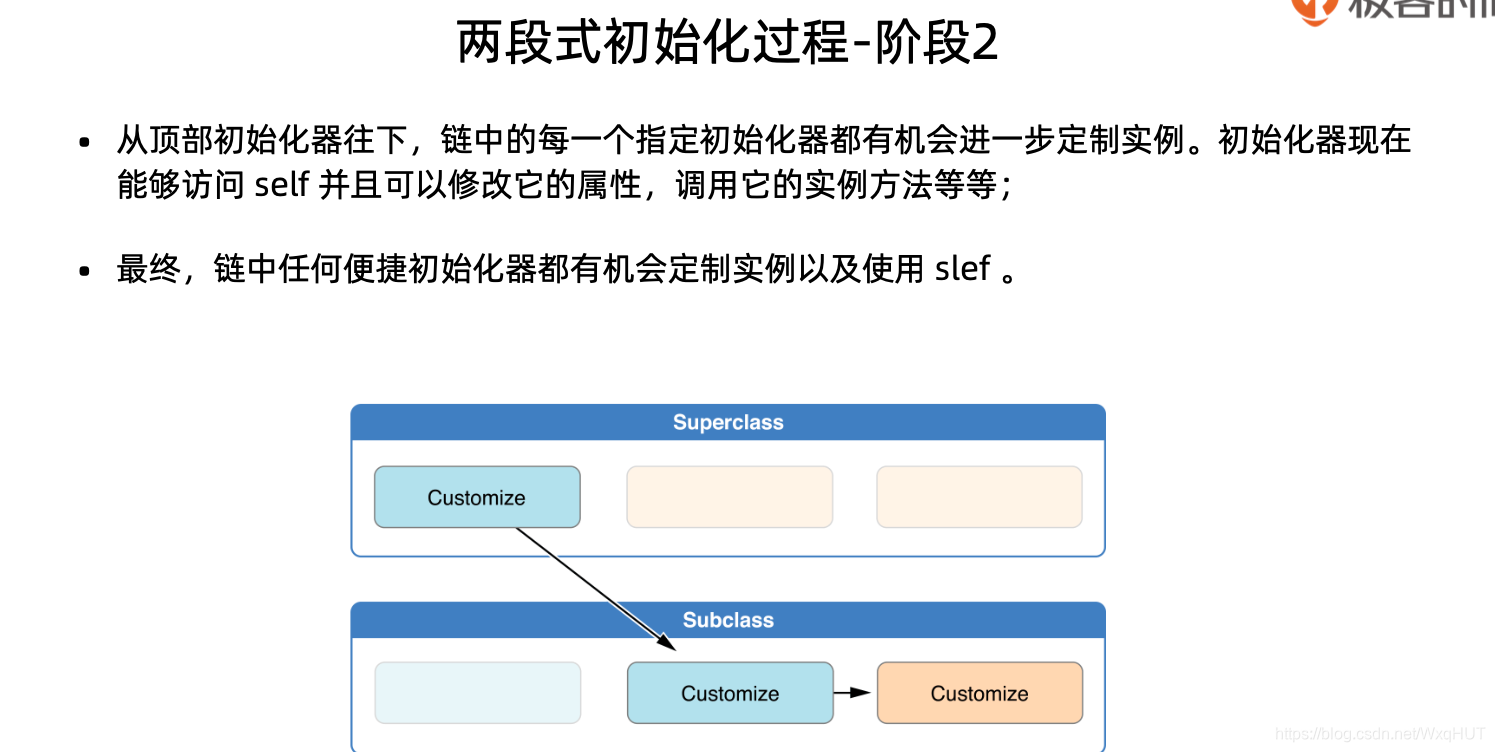
类的初始化两个阶段
简单理解为:
- 从下到顶的存储类型的初始化
- 从顶到下到对实例的定制