微信公众平台配置
(官网)[https://mp.weixin.qq.com/]
- 1.注册
- 2.登录
- 3.公众号基本信息填写:
- 设置 --> 公众号设置
4.接入配置
开发 --> 基本配置
(官方文档-入门指引)[https://mp.weixin.qq.com/wiki?t=resource/res_main&id=mp1472017492_58YV5]
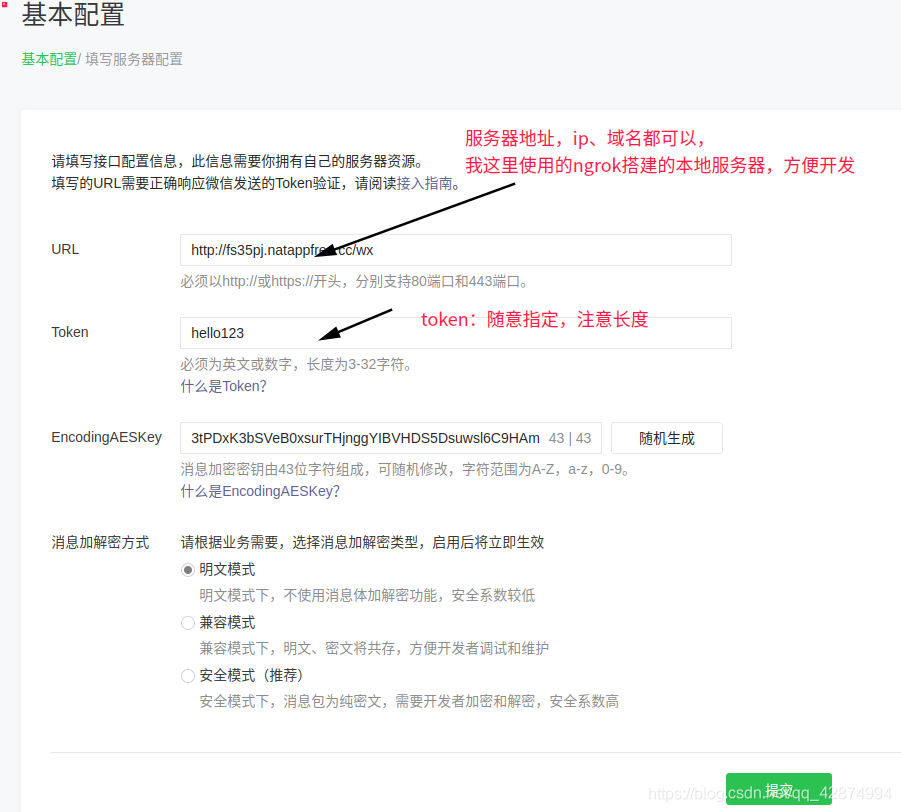
进入基本配置—> 修改配置(填写服务器配置)
本地服务器开发
-
1.natapp
https://natapp.cn/ -
官网新手教程很详细了
-
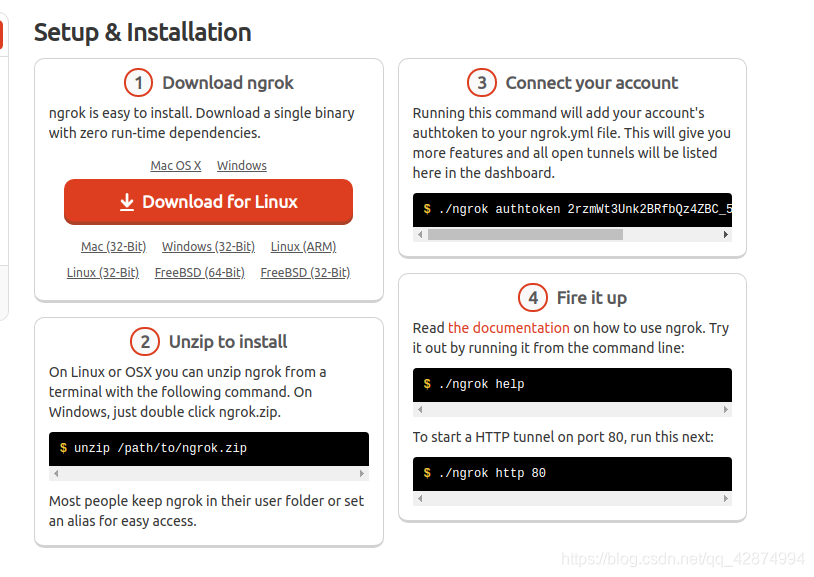
2.使用ngrok
官网https://ngrok.com/注册登录一下(可以使用Github快速注册登录)
[linux使用方法]
启动成功后如下:
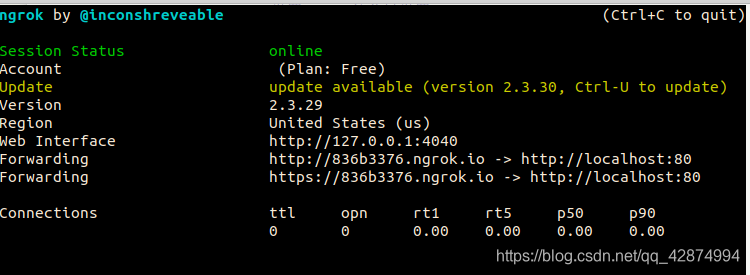
ps:为方便每次启动,可以创建一个shell脚本,将上面图片的3,4步粘贴即可
配置web服务器
这里使用django配置web服务(其他web框架同理)
需要的三方包
django 2.1.7
lxml
暂时需要这些,后面根据功能再加
- 路由
urls.py配置
path('wx', views.init_connet), - 创建一个应用
示例:python manage.py startapp connet
思路:
- connet中的
views.py配置
from django.http import HttpResponse
# Create your views here.
import hashlib
from utils import receive, reply,reply_help
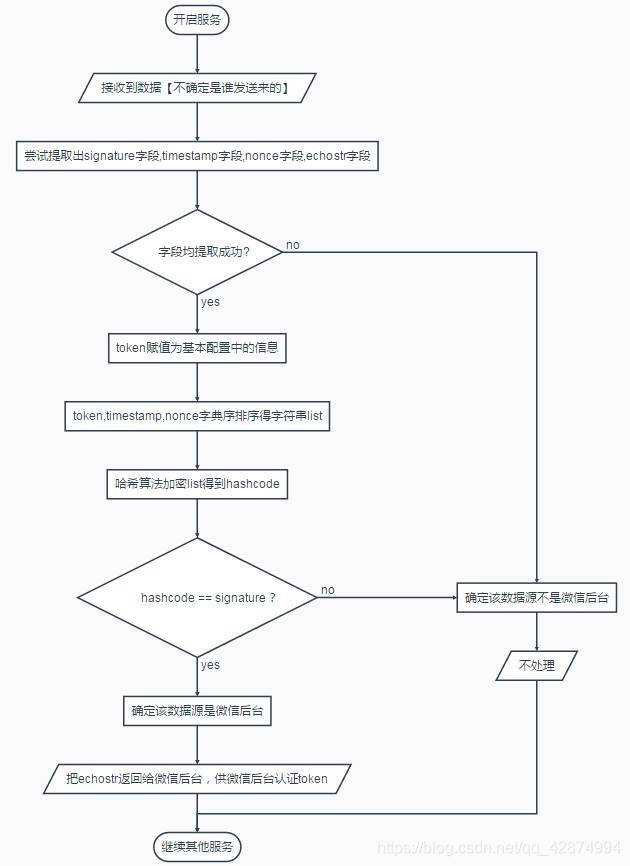
def init_connet(request):
if request.method == 'GET':
try:
if len(request.GET) == 0:
return "hello, this is handle view"
token = 'hello123' # 注意和配置页面的token一样
signature = request.GET.get('signature', '')
timestamp = request.GET.get('timestamp', '')
nonce = request.GET.get('nonce', '')
echostr = request.GET.get('echostr', '')
s = [timestamp, nonce, token]
s.sort()
s = ''.join(s)
sha1 = hashlib.sha1(s.encode('utf-8'))
hashcode = sha1.hexdigest()
print("handle/GET func: hashcode, signature: ", hashcode, signature)
if hashcode == signature:
print('====验证通过====')
return HttpResponse(echostr)
else:
print('====验证失败====')
return ""
except Exception as e:
print('===error===', e)
return e
将http://836b3376.ngrok.io/wx填入配置页面的URL
EncodingAESKey选择随机生成就好
- 启动项目
python manage.py runserver 80
必须以80端口启动项目
- 点击 提交按钮 验证配置
配置成功打印的日志

