知识点
1.线程概述
1.1 什么是线程
线程是程序执行的一条路径, 一个进程中可以包含多条线程
一个应用程序可以理解成就是一个进程
多线程并发执行可以提高程序的效率, 可以同时完成多项工作
1.2 多线程应用场景
VNC同时共享屏幕给多个电脑
迅雷开启多条线程一起下载
QQ同时和多个人一起视频
服务器同时处理多个客户端请求
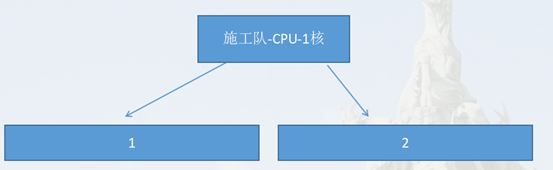
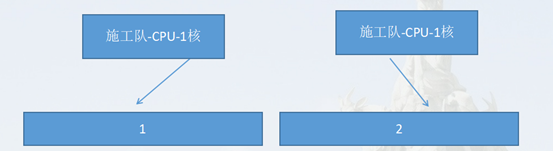
1.3并行和并发的区别
并行就是两个任务同时运行,就是甲任务进行的同时,乙任务也在进行。(需要多核CPU)
并发是指两个任务都请求运行,而处理器只能按受一个任务,就把这两个任务安排轮流进行,由于间时间隔较短,使人感觉两个任务都在运行(画图-任务调度)。
1.4 Java程序运行原理
Java命令会启动java虚拟机(JVM),等于启动了一个应用程序,也就是启动了一个进程。
该进程会自动启动一个 “主线程” ,然后主线程去调用某个类的 main 方法
一个应用程序有且只有一个主线程,程序员不能New主线程,可以New子线程。
1.5 JVM启动的是多线程吗?
JVM启动至少启动了垃圾回收线程和主线程,所以是多线程的。
main方法的代码执行的位置就是在主线程(路径)
一个进程有多个线程
finalize()这个方法在子线程(垃圾回收线程)执行
public class Demo01 {
	public static void main(String[] args) {
/*JVM的启动是多线程的吗?【面试题】*/

		System.out.println("AAAAA");
		System.out.println("BBBBB");
		System.out.println("CCCCC");
		System.out.println("DDDDD");

		//打印线程名称
		System.out.println(Thread.currentThread());//主线程

		for(int i = 0;i<2;i++){
			new Student();
			System.gc();//启动垃圾回收
		}
	}
}
class Student{
	//被垃圾回收器回收时,会调用
	//对象从内存释放时,会调用
	@Override
	protected void finalize() throws Throwable {
		// TODO Auto-generated method stub
		System.out.println("student 被回收了...");
		//打印线程名称
		System.out.println(Thread.currentThread());//子线程
	}
}
2.Java中线程的实现方式(重点)
2.1方式一、继承Thread
使用步骤:
1.定义类继承Thread
2.重写run方法
3.把新线程要做的事写在run方法中
4.创建线程对象
5.开启新线程, 内部会自动执行run方法
public class Demo01 {
public static void main(String[] args) {
/*主线程,程序员不能创建,程序员只能创建子线程*/
//1.创建子线程对象
MyThread t1 = new MyThread();
/**不能通过下面的方式来执行任务
* 因为这种试的任务是在主线程执行的*/
//t1.run();
//2.正确的执行任务的方式,调用start,内部会开启新线程,调用run方法
t1.start();
//3.再创建子线程
MyThread t2 = new MyThread();
t2.start();
//4.循环创建子线程
for(int i=0;i<10;i++){
MyThread th = new MyThread();
th.start();
}
}
}
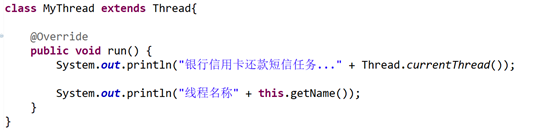
class MyThread extends Thread{
@Override
public void run() {
System.out.println("银行信用卡还款短信任务..." + Thread.currentThread());
System.out.println("线程名称" + this.getName());
}
}
2.2方式二、实现Runnable接口
实现步骤:
1.定义类实现Runnable接口
2.实现run方法
3.把新线程要做的事写在run方法中
4.创建自定义的Runnable的子类对象,创建Thread对象传入Runnable
5.调用start()开启新线程, 内部会自动调用Runnable的run()方法
public class Demo01 {
public static void main(String[] args) {
/* 线程实现的方式 (2) - 定义类实现Runnable接口
//1.创建runable对象
BankTask task = new BankTask();
//2.创建Thread对象
Thread t1 = new Thread(task);
//3.启动线程
t1.start();
//4.再开启2个线程
Thread t2 = new Thread(task);
t2.start();
Thread t3 = new Thread(task);
t3.start();
}
}
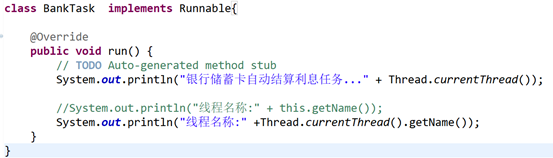
class BankTask implements Runnable{
@Override
public void run() {
// TODO Auto-generated method stub
System.out.println("银行储蓄卡自动结算利息任务..." + Thread.currentThread());
//System.out.println("线程名称:" + this.getName());
System.out.println("线程名称:" +Thread.currentThread().getName());
}
}
2.3两种方式的区别
区别:
继承Thread : 由于子类重写了Thread类的run(), 当调用start()时直接找子类的run()方法
实现Runnable : 构造函数中传入了Runnable的引用, 有个成员变量记住了它, 调用run()方法时内部判断成员变量Runnable的引用是否为空。

继承Thread
好处是:可以直接使用Thread类中的方法,代码简单
弊端是:如果已经有了父类,就不能用这种方法
实现Runnable接口
好处是:即使自己定义的线程类有了父类也没关系,因为有了父类也可以实现接口,代码更灵活
弊端是:不能直接使用Thread中的方法,需要先获取到线程对象后,才能得到Thread的方法,代码复杂
2.4 匿名内部类实现线程的两种方式
public static void main(String[] args) {
		//匿名内部类实现线程的两种方式
		/*Thread t1 = new Thread(){
			@Override
			public void run() {
				System.out.println("任务1...." + Thread.currentThread());
			}
		};
		t1.start();*/

		new Thread(){
			public void run() {
				System.out.println("任务1...." + Thread.currentThread());
			};
		}.start();


		/*Thread t2 = new Thread(new Runnable() {
			@Override
			public void run() {
				System.out.println("任务2...." + Thread.currentThread());
			}
		});
		t2.start();*/
		new Thread(new Runnable() {
			@Override
			public void run() {
				System.out.println("任务2...." + Thread.currentThread());
			}
		}).start();
	}
2.5 获取线程名字和设置名字
通过Thread的getName()方法获取线程对象的名字
通过setName(String)方法可以设置线程对象的名字
通过构造函数可以传入String类型的名字
每个线程系统都会默认分配个名字,主线程:main,子线程thread-0 …
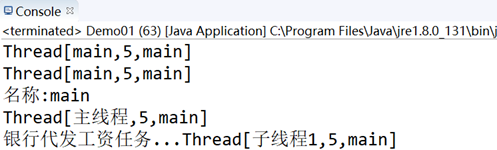
public class Demo01 {
	public static void main(String[] args) {
/*		获取线程名字和设置名字(掌握)
		//1.获取主线程对象
		Thread mainThread = Thread.currentThread();
		System.out.println(Thread.currentThread());
		System.out.println(mainThread);
		System.out.println("名称:" + mainThread.getName());

		//2.设置线程的名称
		mainThread.setName("主线程");
		System.out.println(mainThread);

		//3.设置子线程的名称
		MyThread myThread = new MyThread("子线程1");
		myThread.start();
	}
}

class MyThread extends Thread{

	public MyThread(String name) {
		super(name);
	}

	@Override
	public void run() {
		System.out.println("银行代发工资任务..." + Thread.currentThread());
	}
}
2.6 获取当前线程的对象
Thread.currentThread()方法用于获取当前线程对象
在不同的方法中,获取的线程对象名称是有可能不一样的
在main中获取的是主线程对象
在子线程的run方法中获取的是子线程对象
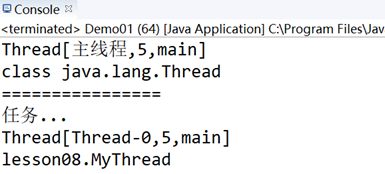
public class Demo01 {

	public static void main(String[] args) {
		//获取当前线程的对象(掌握)
		Thread mainThread = Thread.currentThread();
		mainThread.setName("主线程");
		//打印主线程对象
		System.out.println(mainThread);

		//打印主线程对象类名
		System.out.println(mainThread.getClass());

		System.out.println("================");
		//开启子线程
		MyThread mt = new MyThread();
		mt.start();
	}
}

class MyThread extends Thread{
	@Override
	public void run() {
		System.out.println("任务...");
		Thread subThread = Thread.currentThread();
		//打印子线程对象
		System.out.println(subThread);
		//打印子线程对象类名
		System.out.println(subThread.getClass().getName());

	}
}
3.线程的其它方法
3.1线程休眠(掌握)
Thread.sleep(毫秒), 控制当前线程休眠若干毫秒
1秒= 1000毫秒
1秒 = 1000毫秒* 1000微妙 * 1000纳秒(1000000000 )
主线程休眠
/*** 主线程休眠 */
	public static void test1() {
		for(int i=0;i<10;i++){
			System.out.println(i);
			//休眠【暂停】
			try {
				Thread.sleep(1000);//主线程休眠
			} catch (InterruptedException e) {
				// TODO Auto-generated catch block
				e.printStackTrace();
			}
		}
		System.out.println("AAAAAAAAAAAAAAAAAA");
	}
子线程休眠
/**
	 * 子线程休眠
	 */
	public static void test2() {
		//子线程休眠
		new Thread(){
			public void run() {
				for(int i=0;i<10;i++){
					System.out.println(Thread.currentThread() + " " + i);
					//休眠
					try {
						Thread.sleep(1000);
					} catch (InterruptedException e) {
						// TODO Auto-generated catch block
						e.printStackTrace();
					}
				}
			};
		}.start();


		System.out.println("AAAAAAAAAAAAAAAA");
	}
3.2守护线程(了解)
setDaemon(), 设置一个线程为守护线程, 该线程不会单独执行, 当其他非守护线程都执行结束后, 自动退出
特点:男守护女,女的死,男的也不想活了
3.3加入线程(了解)
join(), 当前线程暂停, 等待指定的线程执行结束后, 当前线程再继续
join(int), 可以等待指定的毫秒之后继续
3.4线程让出(了解)
yield() 让出cpu
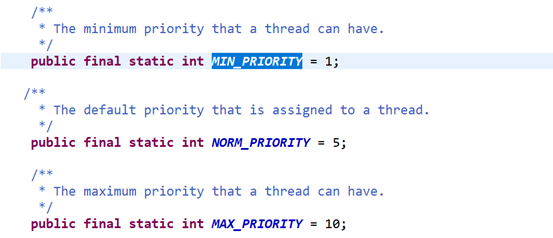
3.5线程优先级
setPriority()设置线程的优先级
默认优先级是5,最小优先级1,最高优先级10
可以设置2,3,4
Thread里面有静态常量
开发几乎不用,了解
4.线程与同步(重点)
什么是同步
同步就是加锁,不让其它人访问
synchronized指的就是同步的意思
什么情况下需要同步
当多线程并发, 有多段代码同时执行时, 我们希望某一段代码执行的过程中CPU不要切换到其他线程工作. 这时就需要同步.
如果两段代码是同步的, 那么同一时间只能执行一段, 在一段代码没执行结束之前, 不会执行另外一段代码.
同步代码块
使用synchronized关键字加上一个锁对象来定义一段代码, 这就叫同步代码块
多个同步代码块如果使用相同的锁对象, 那么他们就是同步的
同步方法
使用synchronized关键字修饰一个方法, 该方法中所有的代码都是同步的
非静态同步函数的锁是:this
静态同步函数的锁是:字节码对象(xx.class)
5.锁的总结
1.锁问题:
同步中,锁最好同一个对象,如果不是同一对象,还是会有线程安全问题
锁:this,代表当前对象
锁:如果 new 对象,就不是同一把锁
锁:字节码对象 String.class,内存中,只有一个字节码对象
开发中:一般都是this
2.在方法内部声明synchronized的就是 “同步代码块”
3.在声明方法的时候,添加 synchronized,就是同步方法
》如果是非静态方法,锁就是this
》如果是静态方法,锁就当前类的字节码对象
//TicketTask.class
public static synchronized void test1(){}
4.同步使用的建议:
同步加锁的时候,尽量让锁住的代码范围小一点,这样可以让其它线程等待时间少一点,性能高
6.死锁
死锁就是大家都抱着锁,不释放
public class Demo01 {

	private static String s1 = "筷子左";
	private static String s2 = "筷子右";

	public static void main(String[] args) {
		// TODO Auto-generated method stub

		//死锁(了解)
		//多线程同步的时候, 如果同步代码嵌套, 使用相同锁, 就有可能出现死锁

		new Thread(){
			public void run() {
				while(true){
					synchronized (s1) {
						System.out.println("线程A 拿到" + s1 + " 等待" + s2);
						synchronized (s2) {
							System.out.println("线程A 拿到" + s2 + " 开动吃饭...");
						}
					}
				}

			};
		}.start();

		new Thread(){
			public void run() {
				while(true){
					synchronized (s2) {
						System.out.println("线程B 拿到" + s2 + " 等待" + s1);
						synchronized (s1) {
							System.out.println("线程B 拿到" + s1 + " 开动吃饭。。");
						}
					}
				}
			};
		}.start();
	}

}
7.回顾线程安全的类
Vector,StringBuffer,Hashtable,Collections.synchroinzed(xxx)
Vector是线程安全的,ArrayList是线程不安全的
StringBuffer是线程安全的,StringBuilder是线程不安全的
Hashtable是线程安全的,HashMap是线程不安全的
8.单例设计模式(重点)
8.1什么是单例
保证类在内存中只有一个对象。
对象是new出来的,因此也就是说在程序中只能new一次对象
8.2单例实现的基本步骤
1》声明一个类,类中有一个静态属性,类型与类名相同
2》把空参构造方法声明为私有
3》在类中提供一个公共静态访问方法来返回该对象实例
8.3单例的多种写法
写法一 饿汉式
class Singleton{
	private static Singleton instance = new Singleton();
	private Singleton(){}
	public static Singleton getInstance(){
		return instance;
	}
}
写法二 懒汉式
class Singleton{
	private static Singleton instance;

	private Singleton(){}

	public static Singleton getInstance(){
		if(instance == null){
			instance = new Singleton();
		}
		return instance;
	}
}
写法三 另一种简单
class Singleton{
	public static final Singleton instance = new Singleton();
	private Singleton(){}
}
8.4饿汉式和懒汉式的区别
饿汉式是空间换时间,懒汉式是时间换空间
在多线程访问时,饿汉式不会创建多个对象,而懒汉式有可能会创建多个对象
如果考虑线程安全问题,用饿汉式
如果不考虑线程安全问题,用懒汉式
8.5Runtime类的使用
Runtime类是一个单例类
每个 Java 应用程序都有一个 Runtime 类实例,使应用程序能够与其运行的环境相连接。通过 getRuntime 方法获取当前运行时。
案例:自动关机
Runtime r = Runtime.getRuntime();
r.exec(“shutdown -s -t 300”);//300秒后关机
r.exec(“shutdown -a”); //取消关机
9. Timer定时器
Timer一种工具,用于在后台线程中执行的任务。可安排任务执行一次,或者定期重复执行。
方法
public void schedule(TimerTask task, long delay)
public void schedule(TimerTask task, long delay, long period)
public void schedule(TimerTask task, Date firstTime, long period)
public class Demo01 {

	public static void main(String[] args) {
		//Timer(计时器,定时器)
/*		一种工具,用于在后台线程中执行的任务。可安排任务执行一次,或者定期重复执行。
		方法
		public void schedule(TimerTask task, long delay)
		public void schedule(TimerTask task, long delay, long period)
		指定时间执行任务
		public void schedule(TimerTask task, Date firstTime, long period)*/


		test3();

	}

	public static void test3() {
		/**定时器的细节
		 * 1.定时器在子线程中执行
		 * 2.timer.cancel(); 取消定时器
		 */

		Timer timer = new Timer();
		timer.schedule(new TimerTask() {
			int count = 5;
			@Override
			public void run() {
				// TODO Auto-generated method stub
				System.out.println("任务A:" + count +"..." + Thread.currentThread());
				count --;
				if(count == 0){
					//取消定时器
					timer.cancel();
				}
			}
		}, 1000,2000);

		//timer.cancel();//主线程
	}

	public static void test2() {
		//3秒后执行任务,每隔两秒重复执行任务
		Timer timmer = new Timer();
		timmer.schedule(new TimerTask() {

			@Override
			public void run() {
				// TODO Auto-generated method stub
				System.out.println("任务A....." + new Date());

			}
		}, 3000, 2000);
	}

	//3秒后执行任务
	public static void test1() {
		//1.创建定时器
		Timer timmer = new Timer();

		//2.执行任务
		/**
		 * 1.3秒后执行任务
		 * 2.任务执行完后,程序没有退出
		 */
		timmer.schedule(new TimerTask() {

			@Override
			public void run() {
				// TODO Auto-generated method stub
				System.out.println("任务A....");

			}
		}, 3000);
	}
}
10.线程间的通讯(重点)
10.1什么时候需要通信
多个线程并发执行时, 在默认情况下CPU是随机切换线程的,如果我们希望他们有规律的执行, 就可以使用通信, 例如每个线程执行一次打印
10.2线程怎么通信
》如果希望线程等待, 就调用wait()
》如果希望唤醒等待的线程, 就调用notify();
notify是随机唤醒一个线程
notifyAll是唤醒所有线程
》这两个方法必须在同步代码中执行, 并且使用同步锁对象来调用
》如果方法中没有同步锁,会有异常IllegalMonitorStateException
10.3线程通讯的一些疑问
1.在同步代码块中,用哪个对象锁,就用哪个对象调用wait方法
2.为什么wait方法和notify方法定义在Object这类中?
因为锁对象可以是任意对象,Object是所有的类的基类,所以wait方法和notify方法需要定义在Object这个类中
3.sleep方法和wait方法的区别?
》sleep方法必须传入参数,参数就是时间,时间到了自动醒来
》wait方法可以传入参数也可以不传入参数,传入参数就是在参数的时间结束后等待,不传入参数就是直接等待
》sleep方法在同步函数或同步代码块中,不释放锁,睡着了也抱着锁睡
》wait方法在同步函数或者同步代码块中,释放锁
11.JDK1.5新特性互斥锁(重点)
11.1ReentrantLock介绍
使用ReentrantLock类也可以实现同步加锁
ReentrantLock叫[互斥锁],使用lock()和unlock()方法进行同步
11.2使用ReentrantLock类使用要点
使用ReentrantLock类的newCondition()方法可以获取Condition对象
需要等待的时候使用Condition的await()方法, 唤醒的时候用signal()方法
不同的线程使用不同的Condition, 这样就能区分唤醒的时候找哪个线程了
12.线程组
12.1概述
1.Java中使用ThreadGroup来表示线程组,它可以对一批线程进行分类管理,Java允许程序直接对线程组进行控制。
2.默认情况下,所有的线程都属于主线程组。
3.public final ThreadGroup getThreadGroup() 通过线程对象获取他所属于的组
4.public final String getName() 通过线程组对象获取组的名字
5.我们也可以给线程设置分组ThreadGroup(String name) 创建线程组对象并给其赋值名字
12.2创建线程对象
Thread(ThreadGroup?group, Runnable?target, String?name)
12.3代码演示
/**
 * 掌握:
 * 1.如何获取一个线程所属的线程组
 * 2.如果在创建一个子线程时,设置它所属的线程组
 * @author gyf
 *
 */
public class Demo01 {
	public static void main(String[] args) {
		//主线程
		Thread mainThread = Thread.currentThread();
		/**
		 * [main,5,main]
		 * main:线程名称
		 * 5:代先级
		 * main:当前线程所属的组名
		 */
		System.out.println("线程:" + mainThread);

		//获取线程的“线程组”对象
		ThreadGroup tg = mainThread.getThreadGroup();
		System.out.println("线程组:" + tg.getName());


		//创建子线程
		Thread t1 = new Thread(){
			@Override
			public void run() {
				System.out.println("线程A...");
			}
		};
		//t1.start();
		System.out.println("t1子线程的线程组:" + t1.getThreadGroup());

	   //创建一个线程组
		ThreadGroup abcGroup = new ThreadGroup("abc组");
		//创建子线程对象
		Thread t2 = new Thread(abcGroup, new Runnable() {

			@Override
			public void run() {
				// TODO Auto-generated method stub
				System.out.println("线程B");
			}
		});
		System.out.println("t2子线程的线程组:" + t2.getThreadGroup());
	}
}
13.线程池
13.1线程池概述
程序启动一个新线程成本是比较高的,因为它涉及到要与操作系统进行交互。而使用线程池可以很好的提高性能,尤其是当程序中要创建大量生存期很短的线程时,更应该考虑使用线程池。线程池里的每一个线程代码结束后,并不会死亡,而是再次回到线程池中成为空闲状态,等待下一个对象来使用。在JDK5之前,我们必须手动实现自己的线程池,从JDK5开始,Java内置支持线程池
13.2Java的内置线程池
1.JDK5新增了一个Executors工厂类来产生线程池,有如下几个方法
public static ExecutorService newFixedThreadPool(int nThreads)
public static ExecutorService newSingleThreadExecutor()
- 这些方法的返回值是ExecutorService对象,该对象表示一个线程池,
可以执行Runnable对象或者Callable对象代表的线程。
它提供了如下方法
Future<?> submit(Runnable task)
Future submit(Callable task)
3.使用步骤:
1.创建线程池对象
2.创建Runnable实例
3.提交Runnable实例
4.关闭线程池es.shutdown();
4.Runnable和Callable的区别
Runnable的run方法没有返回值
Callable的call方法有返回值,一般返回值也没用
13.3使用演示
public class Demo01 {
	public static void main(String[] args) {
		//案例:10个线程完成10个洗车任务
		/*for(int i = 0;i<10;i++){
			new Thread(){
				public void run() {
					System.out.println("洗车任务 " + Thread.currentThread());
				};
			}.start();
		}*/

		//案例:5个线程完成10个洗车的任务
		//1.创建线程池
		ExecutorService es = Executors.newFixedThreadPool(5);

		//2.添加任务-方式一
		/*for(int i=0;i<10;i++){
			es.submit(new Runnable() {
				@Override
				public void run() {
					System.out.println("洗车任务 " + Thread.currentThread());
				}
			});
		}*/

		//3.添加任务-方式二
		for(int i=0;i<10;i++){
			es.submit(new MyTask());
		}

	}
}

class MyTask implements Callable<Integer>{

	@Override
	public Integer call() throws Exception {
		System.out.println("洗车任务 " + Thread.currentThread());
		return 110;
	}

}
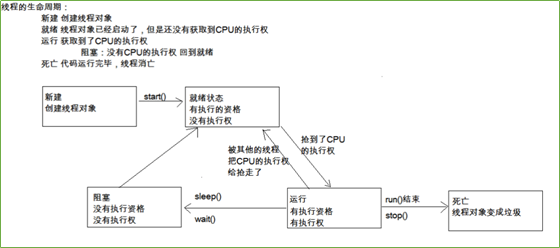
14.线程的五种状态
新建,就绪,运行,阻塞,死亡
练习题
1.卖火车票
需求,有A\B\C\D4个窗口同时买票,只有100张票可买
多线程会有安全问题熟记
public class Demo01 {
public static void main(String[] args) {
//同步代码块和同步方法
//火车站卖票【问题】
/**
* 湖南到广州火车票:今天13:00 ,100张
* 火车站有4个窗口在同时卖票,要保证一张票只能被卖一次
*
* 搞4个线程表示4个窗口
*
* 通过加锁可以解决被多次卖同一张票的问题
*
* 使用同步代码块
*/
//创建卖票的任务
TicketTask task = new TicketTask();
//A窗口
Thread t1 = new Thread(task);
t1.setName("窗口A");
//B窗口
Thread t2 = new Thread(task);
t2.setName("窗口B");
//C窗口
Thread t3 = new Thread(task);
t3.setName("窗口C");
//D窗口
Thread t4 = new Thread(task);
t4.setName("窗口D");
//开启线程
t1.start();
t2.start();
t3.start();
t4.start();
}
}
class TicketTask implements Runnable{
//只有100张票
int ticket = 100;
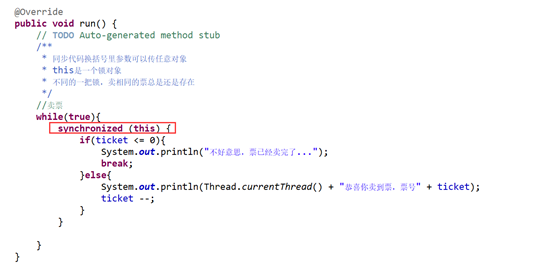
@Override
public void run() {
// TODO Auto-generated method stub
/**
* 同步代码换括号里参数可以传任意对象
* this是一个锁对象
* 不同的一把锁,卖相同的票总是还是存在
*/
//卖票
while(true){
synchronized (this) {
if(ticket <= 0){
System.out.println("不好意思,票已经卖完了...");
break;
}else{
System.out.println(Thread.currentThread() + "恭喜你卖到票,票号" + ticket);
ticket --;
}
}
}
}
/*@Override
public void run() {
// TODO Auto-generated method stub
*//**
* 同步代码换括号里参数可以传任意对象
*//*
synchronized (this) {
//卖票
while(true){
if(ticket <= 0){
System.out.println("不好意思,票已经卖完了...");
break;
}else{
System.out.println(Thread.currentThread() + "恭喜你卖到票,票号" + ticket);
ticket --;
}
}
}
}*/
}
2.两个线程间的通讯
public class Demo01 {
	public static void main(String[] args) {
		//1.创建任务对象
		MyTask task = new MyTask();

		//2.开启两个线程执行2个任务
		new Thread(){
			public void run() {
				while(true){
					try {
						task.task1();
					} catch (InterruptedException e1) {
						// TODO Auto-generated catch block
						e1.printStackTrace();
					}

					try {
						Thread.sleep(10);
					} catch (InterruptedException e) {
						// TODO Auto-generated catch block
						e.printStackTrace();
					}
				}
			};
		}.start();

		new Thread(){
			public void run() {
				while(true){
					try {
						task.task2();
					} catch (InterruptedException e1) {
						// TODO Auto-generated catch block
						e1.printStackTrace();
					}
					try {
						Thread.sleep(10);
					} catch (InterruptedException e) {
						// TODO Auto-generated catch block
						e.printStackTrace();
					}
				}
			};
		}.start();
	}
}

class MyTask{

	//标识 1:可以执行任务1,2:可以执行任务2
	int flag = 1;

	public synchronized void task1() throws InterruptedException{
		if(flag != 1){
			this.wait();//当前线程等待
		}

		System.out.println("1.银行信用卡自动还款任务...");
		flag = 2;
		this.notify();//唤醒其它线程

	}

	public synchronized void task2() throws InterruptedException{

		if(flag != 2){
			this.wait();//线程等待
		}

		System.out.println("2.银行储蓄卡自动结算利息任务...");
		flag = 1;
		this.notify();//唤醒其它线程
	}
}
3.三个线程间的通讯(同步锁实现有问题,少数没按顺序)
public class Demo01 {
	public static void main(String[] args) {
		//三个线程间的通讯
		MyTask task = new MyTask();
		new Thread(){
			public void run() {
				while(true){
					try {
						task.task1();
					} catch (InterruptedException e1) {
						// TODO Auto-generated catch block
						e1.printStackTrace();
					}
					try {
						Thread.sleep(10);
					} catch (InterruptedException e) {
						// TODO Auto-generated catch block
						e.printStackTrace();
					}
				}
			};
		}.start();
		new Thread(){
			public void run() {
				while(true){
					try {
						task.task2();
					} catch (InterruptedException e1) {
						// TODO Auto-generated catch block
						e1.printStackTrace();
					}
					try {
						Thread.sleep(10);
					} catch (InterruptedException e) {
						// TODO Auto-generated catch block
						e.printStackTrace();
					}
				}
			};
		}.start();
		new Thread(){
			public void run() {
				while(true){
					try {
						task.task3();
					} catch (InterruptedException e1) {
						// TODO Auto-generated catch block
						e1.printStackTrace();
					}
					try {
						Thread.sleep(10);
					} catch (InterruptedException e) {
						// TODO Auto-generated catch block
						e.printStackTrace();
					}
				}
			};
		}.start();
	}
}

class MyTask{

	//标识 1:可以执行任务1,2:可以执行任务2, 3:可以执行任务3
	int flag = 1;

	public synchronized void task1() throws InterruptedException{
		if(flag != 1){
			this.wait();//当前线程等待
			//this.wait(timeout);
		}

		System.out.println("1.银行信用卡自动还款任务...");
		flag = 2;
		//this.notify();//唤醒随机线程
		this.notifyAll();//唤醒所有等待线程

	}

	public synchronized void task2() throws InterruptedException{

		if(flag != 2){
			this.wait();//线程等待
		}

		System.out.println("2.银行储蓄卡自动结算利息任务...");
		flag = 3;
		//this.notify();//唤醒其它线程
		this.notifyAll();
		//Thread.sleep(millis);
	}

	public synchronized void task3() throws InterruptedException{
			if(flag != 3){
				this.wait();//线程等待
			}

			System.out.println("3.银行短信提醒任务...");
			flag = 1;
			//this.notify();//唤醒其它线程
			this.notifyAll();
	}
}
4.三个线程间的通讯(使用互斥锁,解决同步锁少数没按顺序的问题)
/**
 * 互斥锁的使用步骤
 * 1.创建互斥锁对象
 * 2.创建3个Condition
 * 3.加锁、解锁
 * 4.线程等待-Condition的await方法
 * 5.线程唤醒-Condition的signal方法
 * @author gyf
 *
 */
class MyTask{
	//创建互斥锁对象
	ReentrantLock rl = new ReentrantLock();
	//创建3个Condition
	Condition c1 = rl.newCondition();
	Condition c2 = rl.newCondition();
	Condition c3 = rl.newCondition();

	//标识 1:可以执行任务1,2:可以执行任务2, 3:可以执行任务3
	int flag = 1;

	public void task1() throws InterruptedException{
	 rl.lock();//加锁
			if(flag != 1){
				c1.await();//当前线程等待
			}

			System.out.println("1.银行信用卡自动还款任务...");
			flag = 2;

			//指定唤醒线程2
			c2.signal();
	 rl.unlock();//解锁
	}

	public void task2() throws InterruptedException{
	  rl.lock();
			if(flag != 2){
				c2.await();//线程等待
			}

			System.out.println("2.银行储蓄卡自动结算利息任务...");
			flag = 3;

			//唤醒线程3
			c3.signal();
	  rl.unlock();
	}

	public void task3() throws InterruptedException{
	 rl.lock();
			if(flag != 3){
				c3.await();//线程等待
			}

			System.out.println("3.银行短信提醒任务...");
			flag = 1;

			//唤醒线程1
			c1.signal();
	 rl.unlock();
	}
}
总结
通过线程一天的学习,会使用了两种创建线程的方法,一种是继承Thread类,另一种是实现Runnable接口(两种方法都可以使用匿名内部类直接创建)。然后就是线程的其他方法,例如休眠、守护、加入等。掌握了同步代码块、同步方法关键字synchronized,在使用同步做案例:三个线程任务时,发现顺序会出问题,于是学习了互斥锁ReentrantLock,有效的实现了多线程调度的有序性。后面对线程池有了了解。记住,多线程会有安全问题。
