准备依赖包:
yum -y install zlib-devel pcre-devel openssl-devel
准备nginx用户: 创建ngin的守护者
useradd -M -s /sbin/nologin nginx
解压上传的nginx源码包
tar xzf nginx-1.17.5.tar.gz
源码编译与安装:
./configure --prefix=/usr/local/nginx --with-http_stub_status_module --with-http_ssl_module --with-http_random_index_module --with-http_sub_module
如果编译报错是因为缺少gcc

yum -y install gcc
编译与安装
make
make install
查看nginx用户是否存在
id nginx
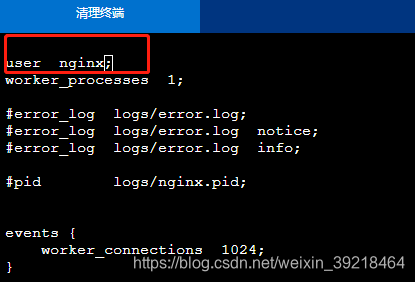
设置守护进程用户配置文件: 在nginx.conf文件加入 user nginx
vi  /usr/local/nginx/conf/nginx.conf
user  nginx;
主配置文件目录
/usr/local/nginx/conf/nginx.conf
放网站位置
/usr/local/nginx/html/
服务管理:
1.检测配置语法是否有问题,看到 is OK和is successful表示成功
/usr/local/nginx/sbin/nginx -t

2.启动服务
/usr/local/nginx/sbin/nginx
查看nginx进程是否启动
pstree |grep nginx
查看nginx端口是否开启 80端口
netstat -tunpl |grep nginx
这时候就可以访问服务器啦
访问地址 111.231.66.101
查看nginx进程守护者
pstree -u |grep nginx
3.重载服务
/usr/local/nginx/sbin/nginx -s reload
pkill -HUP nginx
4.关闭服务
/usr/local/nginx/sbin/nginx -s stop
pkill nginx
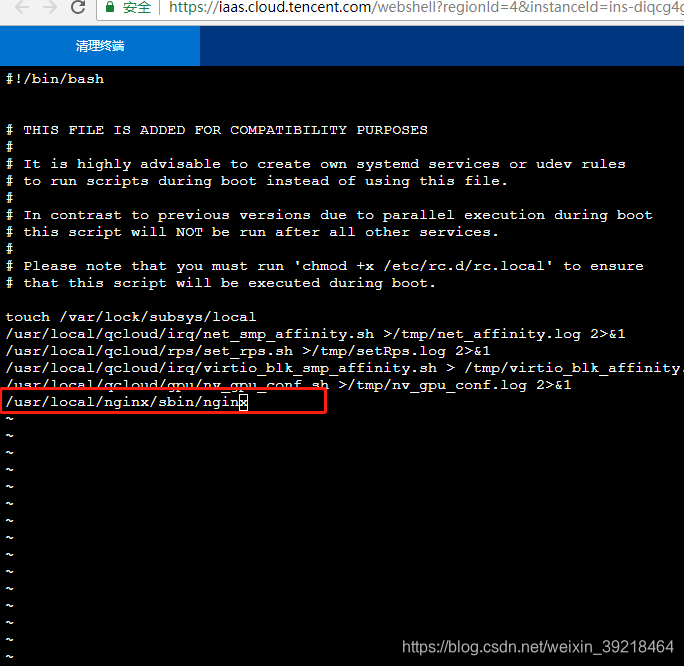
5.开机启动
vi /etc/rc.local
/usr/local/nginx/sbin/nginx
进程管理:
pstree |grep nginx
ps -ef |grep nginx
ps aux |grep nginx
端口管理:
netstat -tunpl |grep nginx
客户端测试:
http://111.231.66.101
