前言
在Spring4+SpringMVC+mybatis整合中,我们已经实现了ssm的整合以及显示商品列表信息,接下来让我们来添加商品修改功能。
编写Service接口
我们要根据定义根据id找到商品信息的接口,和修改商品信息同步更新到数据库的接口
在Service包下为itemsService新增两个接口
package service;

import po.ItemCustom;
import po.ItemsQueryVo;

import java.util.List;

//定义service接口
public interface ItemsService {
    // 商品查询列表
    public List<ItemCustom> findItemsList(ItemsQueryVo itemsQueryVo) throws Exception;

    //根据id查询商品
    //使用Integer类型可以判断id是否为空
    public ItemCustom findItemsById(Integer id) throws Exception;

    //修改商品信息

    /**
     *
     * @param id   (传入需要修改商品的id)
     * @param itemCustom  (需要修改的商品信息)
     * @throws Exception
     */
    public void updateItems(Integer id,ItemCustom itemCustom) throws Exception;
}
管理Service接口
在service/impl目录下编写ItemsServiceImpl来继承Service新增的接口
package service.impl;

import java.util.List;

import org.springframework.beans.BeanUtils;
import org.springframework.beans.factory.annotation.Autowired;
import org.springframework.stereotype.Service;
import mapper.ItemsCustomMapper;
import mapper.ItemsMapper;
import po.ItemCustom;
import po.Items;
import po.ItemsQueryVo;
import service.ItemsService;

/**
 * 继承ItemsService接口
 *
 * 将Service对象注入到spring的IOC容器中的两种方法:
 * 1.通过@Service方式(即在ItemsServiceImpl上标注@Service)
 * 2.通过bean标签方式
 *     在applicationContext-service.xml文件中添加如下bean语句配置
 *     <bean id="itemsService" class="service.impl.ItemsServiceImp1"/>
 *
 * 两种方式可以并存
 */

@Service
public class ItemsServiceImpl implements ItemsService{
    //注入mapper,之前已经在applicationContext-dao中使用扫描器扫描mapper包,可以直接注入
    @Autowired
    private ItemsCustomMapper itemsCustomMapper;

    @Autowired
    private ItemsMapper itemsMapper;    //需要用到逆向工程生成的ItemsMapper中的方法

    //商品查询列表(重写ItemsService接口中的findItemsList方法)
    @Override
    public List<ItemCustom> findItemsList(ItemsQueryVo itemsQueryVo) throws Exception{
        return itemsCustomMapper.findItemsList(itemsQueryVo);
    }

    @Override
    public ItemCustom findItemsById(Integer id) throws Exception{
        //通过mapper包下itemsMapper中的selectByPrimaryKey方法找到相应的item
        Items items=itemsMapper.selectByPrimaryKey(id);

        //考虑到可能扩展另外的属性,这里使用继承了Items类的ItemCustom类
        ItemCustom itemCustom=new ItemCustom();

        //通过spring提供的BeanUtils.copyProperties方法将items的属性拷贝到itemCustom中
        BeanUtils.copyProperties(items,itemCustom);
        return itemCustom;
    }

    @Override
    public void updateItems(Integer id,ItemCustom itemCustom) throws Exception{
        //传入id
        itemCustom.setId(id);
        /**
         * ItemsMapper中关于更新的有两个方法
         * updateByPrimaryKeySelective和updateByPrimaryKey
         * 第一个只是更新新的model中不为空的字段
         * 第二个会将为空的字段在数据库中置为NULL
         * 这里选择第二个
         */
        itemsMapper.updateByPrimaryKey(itemCustom);

    }
}
编写controller
前面已经将配置文件配置好了,这里直接编写controller包下的ItemsController
package controller;

import java.util.List;

import com.sun.org.apache.xpath.internal.operations.Mod;
import org.junit.Test;
import org.springframework.beans.factory.annotation.Autowired;
import org.springframework.http.HttpRequest;
import org.springframework.stereotype.Controller;
import org.springframework.ui.Model;
import org.springframework.web.bind.annotation.RequestMapping;
import org.springframework.web.bind.annotation.RequestMethod;
import org.springframework.web.bind.annotation.RequestParam;
import org.springframework.web.servlet.ModelAndView;
//import org.springframework.web.portlet.ModelAndView; 之前引用成这个包了(找了半天错误..)
import po.ItemCustom;
import service.ItemsService;

import javax.servlet.http.HttpServletRequest;
import javax.servlet.http.HttpServletResponse;

@Controller
//为了便于管理,添加根路径为/items
@RequestMapping("/items")
public class ItemsController {
    //注入service(通过service来调用数据库的数据)
    @Autowired
    private ItemsService itemsService;

    @RequestMapping("/queryItems")
    public ModelAndView queryItems() throws Exception{
        //调用service来显示商品列表
        List<ItemCustom> itemsList=itemsService.findItemsList(null);

        ModelAndView modelAndView=new ModelAndView();   //创建视图对象
        modelAndView.addObject("itemsList",itemsList);
        modelAndView.setViewName("itemsList");  //指定用户访问的jsp页面地址,前缀和后缀已在前端控制器中配好
        return modelAndView;
    }

    @RequestMapping(value="/editItems",method = {RequestMethod.POST,RequestMethod.GET})
    public String editItems(Model model, Integer id) throws Exception{
        // 调用service通过id查找相应的商品信息
        // 这里需要进行绑定参数的设置
        ItemCustom itemCustom=itemsService.findItemsById(id);
        model.addAttribute("itemCustom",itemCustom);
        return "editItems";

    }

    @RequestMapping("/editItemsSubmit")
    public String editItemsSubmit(HttpServletRequest request,Integer id,ItemCustom itemCustom) throws Exception{
        //通过service返回修改后的页面
        //形参中传递了pojo类型参数(即itemCustom)
        itemsService.updateItems(id,itemCustom);

        //重定向到商品查询列表
        return "forward:queryItems.action";
    }
}
日期类型转换问题
由于我们提交的表单中含有日期类型的字符串,而spring mvc不能自动将日期类型字符串
转换为pojo类中的Date类型,因此,我们需要编写日期类型转换器
1.springmvc.xml添加日期转换器配置
在springmvc.xml中配置日期转换器
   <!-- 这里的conversion-service表示转换器,在下边使用bean配置转换器 -->
<!-- 这句注释掉 -->
<!-- <mvc:annotation-driven></mvc:annotation-driven> -->
   <mvc:annotation-driven conversion-service="conversionService"></mvc:annotation-driven>

    <!-- 自定义参数绑定 -->
   <bean id="conversionService" class="org.springframework.format.support.FormattingConversionServiceFactoryBean">
       <property name="converters">
           <list>
               <!-- 日期类型转换器 -->
               <bean class="controller.converter.DateConverter"/>
           </list>
       </property>
   </bean>
2.编写日期转换器
根据配置,我们要在controller/converter包下编写DateConverter日期转换器
package controller.converter;

import org.springframework.core.convert.converter.Converter;

import java.text.SimpleDateFormat;
import java.util.Date;

public class DateConverter implements Converter<String,Date>{
    @Override
    public Date convert(String source){
        // 转换 "yyyy-MM-dd HH:mm:ss"日期字符串为Date格式
        try{
            //参数绑定成功则返回转换后的日期
            return new SimpleDateFormat("yyyy-MM-dd HH:mm:ss").parse(source);
        }catch(Exception e){
            e.printStackTrace();
        }
        //否则返回空
        return null;
    }
}
去除传回的字符串前后空格
从前端传回的字符串中,可能在字符串前面或者后面多输入了空格。
为了去除这些不必要的空格,我们需要编写去除前后空格的转换器TrimStringConverter
在controller/converter下编写TrimStringConverter
package controller.converter;

import org.springframework.core.convert.converter.Converter;

public class TrimStringConverter implements Converter<String,String>{
    // 编写去除前后空格的转换器
    // 若去除空格后字符串为空,则返回null,否则返回去空格后的字符串
    @Override
    public String convert(String source){
        try{
            if(source != null){
                source=source.trim();
                if(source == ""){
                    return null;
                }
            }
        }catch(Exception e){
            e.printStackTrace();
        }
        return source;
    }
}
同时,在刚才xml配置日期转换器下边再配上去除字符串两边空格的转换器
 <!-- 自定义参数绑定 -->
<bean id="conversionService" class="org.springframework.format.support.FormattingConversionServiceFactoryBean">
    <property name="converters">
        <list>
            <!-- 日期类型转换器 -->
            <bean class="controller.converter.DateConverter"/>
<!-- 在这下边配上去除字符串两边空格的转换器 -->
<!-- 去除字符串两边空格的转换器 -->
<bean class="controller.converter.TrimStringConverter"/>
        </list>
    </property>
</bean>
编写jsp文件
在商品查询列表中有修改按钮,点击会跳到相应的修改页面
在WEB-INF/jsp目录下创建editItems.jsp文件
<%--
  Created by IntelliJ IDEA.
  User: 光玉
  Date: 2018/4/7
  Time: 19:12
  To change this template use File | Settings | File Templates.
--%>
<%@ page contentType="text/html;charset=UTF-8" language="java" pageEncoding="utf-8" %>
<%@ taglib prefix="c" uri="http://java.sun.com/jsp/jstl/core" %>
<%@ taglib prefix="fmt" uri="http://java.sun.com/jsp/jstl/fmt" %>

<html>
<head>
    <title>修改商品信息</title>
    <script type="text/javascript" src="<%= request.getContextPath()%>/plugin/layui/layui.all.js"></script>
    <link rel="stylesheet" href="<%= request.getContextPath()%>/plugin/layui/css/layui.css">
</head>

<body>
<form class="layui-form" action="${pageContext.request.contextPath}/items/editItemsSubmit.action" method="post">
    <input type="hidden" name="id" value="${itemCustom.id}">
    <div class="layui-form-item">
        <label class="layui-form-label">商品名称</label>
        <div class="layui-input-inline">
            <input class="layui-input" type="text" name="name" value="${itemCustom.name}"/>
        </div>
    </div>

    <div class="layui-form-item">
        <label class="layui-form-label">商品价格</label>
        <div class="layui-input-inline">
           <input class="layui-input" type="text" name="price" value="${itemCustom.price}"/>
        </div>
    </div>

    <%--<div class="layui-form-item">
        <label class="layui-form-label">商品图片</label>
        <div class="layui-input-inline">
            <input class="layui-input" type="text" name="pic" value="${itemCustom.pic}"/>
        </div>
    </div>--%>

    <div class="layui-form-item">
        <label class="layui-form-label">生产日期</label>
        <div class="layui-input-inline">
            <input class="layui-input" type="text" name="createtime" value="<fmt:formatDate value="${itemCustom.createtime}" pattern="yyyy-MM-dd HH:mm:ss"/>" />
        </div>
    </div>

    <div class="layui-form-item layui-form-text">
        <label class="layui-form-label">商品详情</label>
        <div class="layui-input-block">
            <textarea class="layui-textarea" name="detail">${itemCustom.detail}</textarea>
        </div>
    </div>

    <div class="layui-form-item">
        <div class="layui-input-block">
            <button class="layui-btn" type="submit">提交</button>
            <button type="reset" class="layui-btn layui-btn-primary">重置</button>
        </div>
    </div>
</form>

<script>
    layui.use('form', function () {
        var form = layui.form;
        form.render();
    });
</script>

</body>
</html>
运行结果
修改前

点击“南非钻石”修改按钮
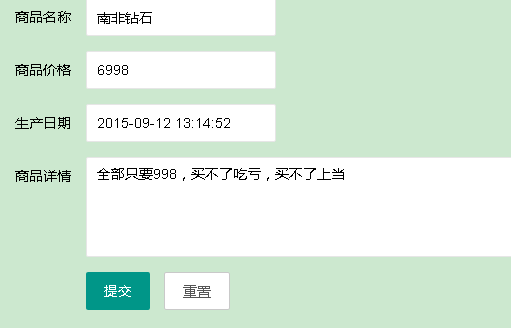
修改南非钻石的价格为6998,点击提交

项目源码请到 我的github项目 下载