文章目录
Docker Swarm概述
1.将多台安装docker的机器组成一个集群,共同对外提供服务,对集群中的docker容器进行管理;
2.docker-compose:更多是单机(同一台机器)环境下管理多个docker容器;
Docker Swarm 架构
架构流程图
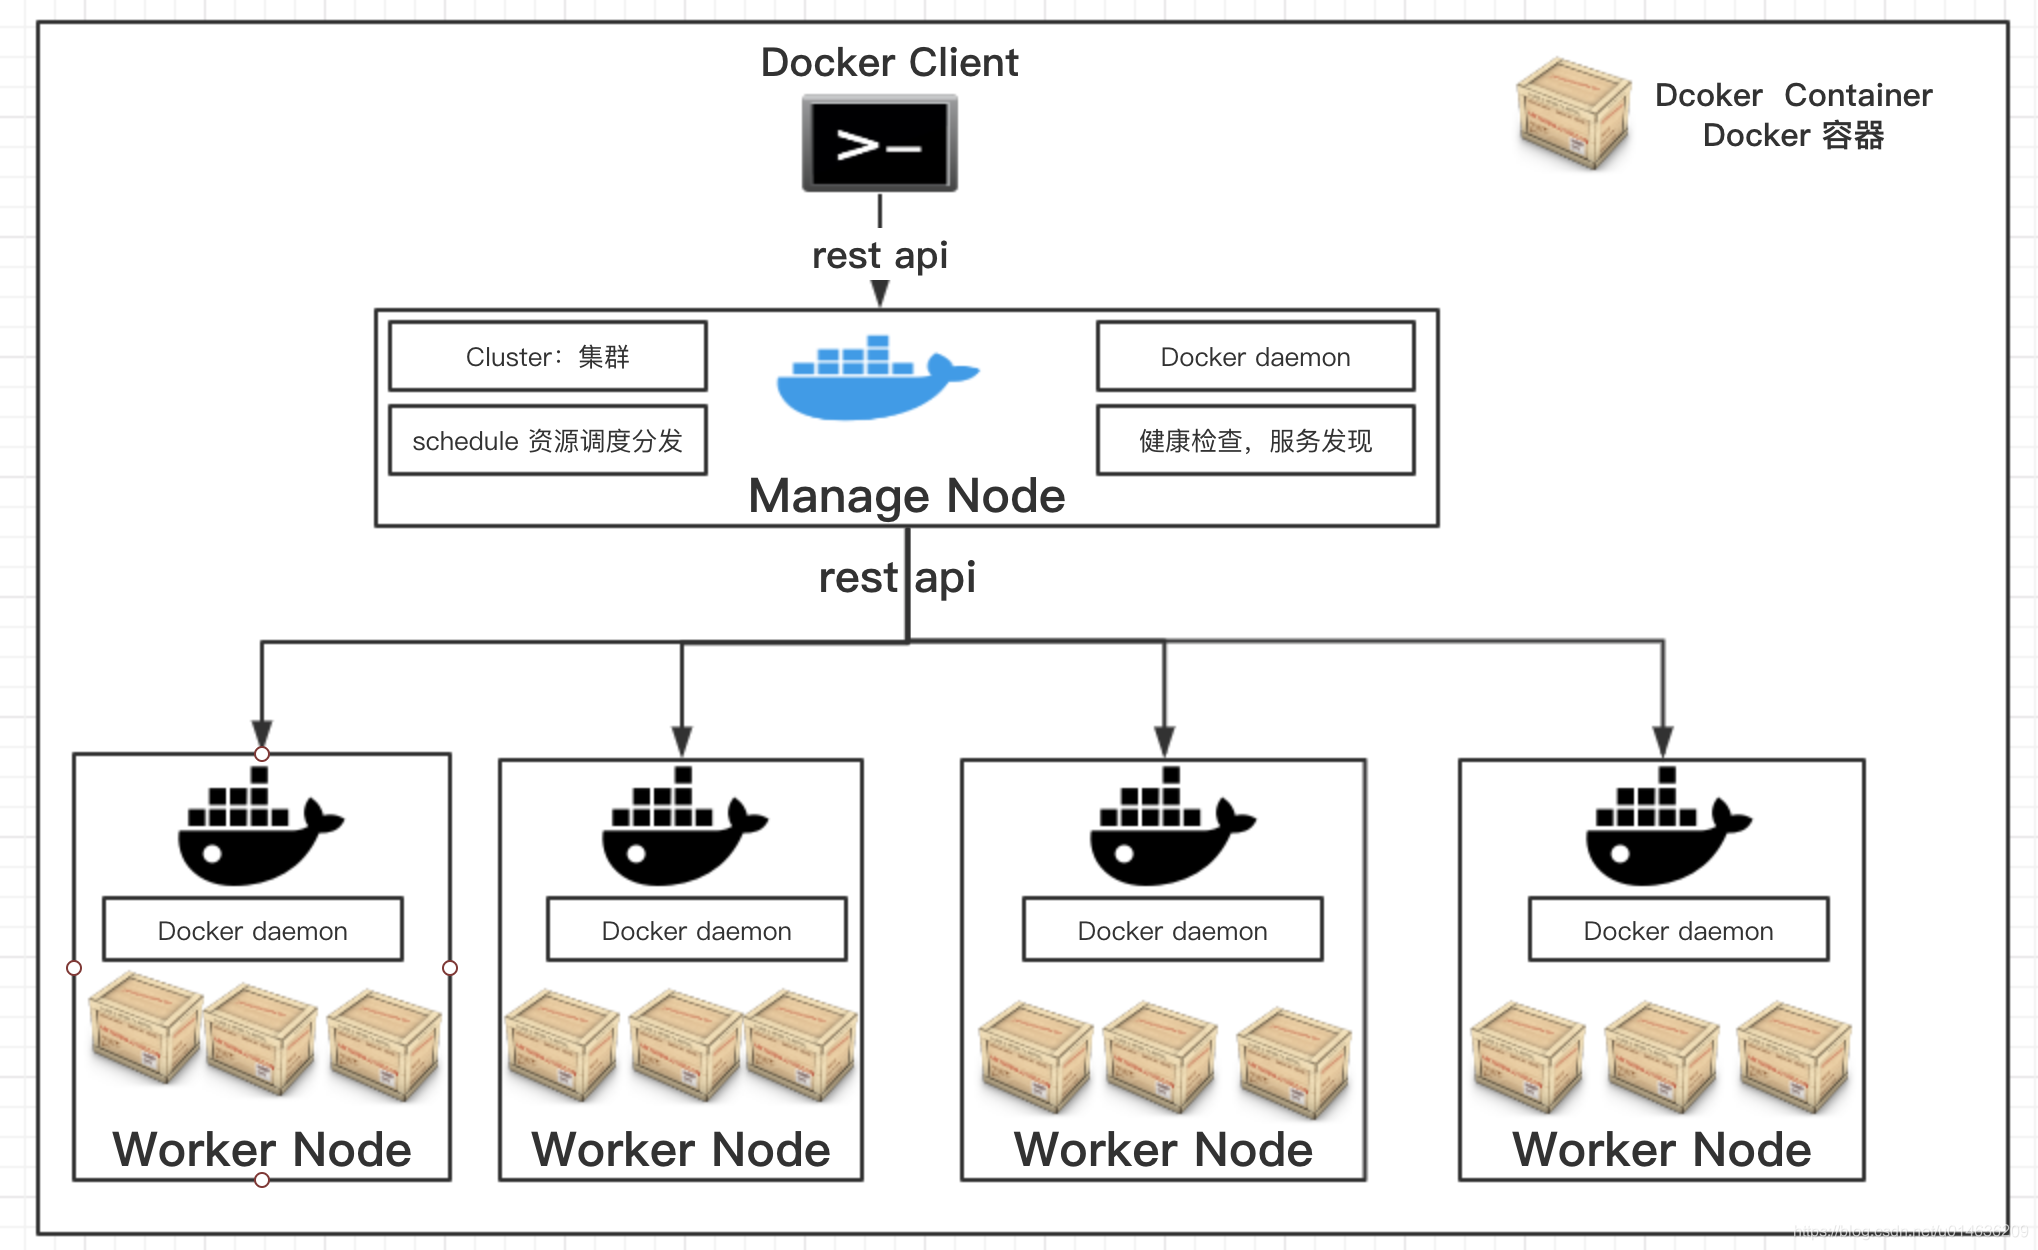
1.Docker Swarm 将多台机器组成集群(Cluster),其中包含主节点(Manager Node)和子节点(Worker Node);
2.客户端(Docker Client)通过Rest API去调用请求到主节点;
	主节点会做相关的健康检查,服务发现,以及通过相关的策略去进行分发到集群中的机器;
3.同样对于集群中的节点,如果主节点(Manage Node)挂掉,其他的节点通过投票的形式(Raft协议)进行选举新的主节点;
Docker Swarm 搭建案例
案例概述
1.我们在这里通过vagrant+virtualbox同时创建三台centos的虚拟机机器
  其中Manager Node模拟docker swarm中的主节点(Manager Node)
  	 Workdor01-Node和Workor02-Node模拟docker swarm的子节点;
2.通过我们虚拟出来的三台机器,我们进行Docker Swarm的讲解说明;
Vagrant 和VirtualBox 安装
1.之前已经有讲解过,这里我们不再进行赘述,可以参考下面的地址
https://blog.csdn.net/u014636209/article/details/103052261
创建Vagrantfile文件
boxes = [
    {
        :name => "manager-node",
        :eth1 => "192.168.8.11",
        :mem => "1024",
        :cpu => "1"
    },
    {
        :name => "worker01-node",
        :eth1 => "192.168.8.12",
        :mem => "1024",
        :cpu => "1"
    },
    {
        :name => "worker02-node",
        :eth1 => "192.168.8.13",
        :mem => "1024",
        :cpu => "1"
    }
]

Vagrant.configure(2) do |config|

  config.vm.box = "centos/7"

   boxes.each do |opts|
      config.vm.define opts[:name] do |config|
        config.vm.hostname = opts[:name]
        config.vm.provider "vmware_fusion" do |v|
          v.vmx["memsize"] = opts[:mem]
          v.vmx["numvcpus"] = opts[:cpu]
        end

        config.vm.provider "virtualbox" do |v|
          v.customize ["modifyvm", :id, "--memory", opts[:mem]]
		  v.customize ["modifyvm", :id, "--cpus", opts[:cpu]]
		  v.customize ["modifyvm", :id, "--name", opts[:name]]
        end

        config.vm.network :public_network, ip: opts[:eth1]
      end
  end

end
 :mem => "1024",   1G的内存
 :cpu => "1"			 1核的CPU
启动三台服务器
备注
1.将上面的Vagrantfile放到我自己自定义的用于测试Docker Swarm的文件夹
  /Users/gaoxinfu/docker/docker-swarm 下
localhost:docker-swarm gaoxinfu$ pwd
/Users/gaoxinfu/docker/docker-swarm
localhost:docker-swarm gaoxinfu$ ls -la
total 8
drwxr-xr-x  4 gaoxinfu  staff   128 12 21 14:32 .
drwxr-xr-x  6 gaoxinfu  staff   192 12 20 11:42 ..
-rw-r--r--@ 1 gaoxinfu  staff  1064 11 27 07:50 Vagrantfile
localhost:docker-swarm gaoxinfu$
查看当前的Vagrantfile的状态
localhost:docker-swarm gaoxinfu$ vagrant status
Current machine states:

manager-node              not created (virtualbox)
worker01-node             not created (virtualbox)
worker02-node             not created (virtualbox)

This environment represents multiple VMs. The VMs are all listed
above with their current state. For more information about a specific
VM, run `vagrant status NAME`.
启动
localhost:docker-swarm gaoxinfu$ vagrant up
Bringing machine 'manager-node' up with 'virtualbox' provider...
Bringing machine 'worker01-node' up with 'virtualbox' provider...
Bringing machine 'worker02-node' up with 'virtualbox' provider...
==> manager-node: Importing base box 'centos/7'...
==> manager-node: Matching MAC address for NAT networking...
==> manager-node: Setting the name of the VM: docker-swarm_manager-node_1576909998395_66790
==> manager-node: Clearing any previously set network interfaces...
==> manager-node: Available bridged network interfaces:
1) en0: Wi-Fi (AirPort)
2) en1: 雷雳1
3) en2: 雷雳2
4) bridge0
5) p2p0
6) awdl0
7) llw0
8) en5: AX88179 USB 3.0 to Gigabit Ethernet
==> manager-node: When choosing an interface, it is usually the one that is
==> manager-node: being used to connect to the internet.
    manager-node: Which interface should the network bridge to? 1
==> manager-node: Preparing network interfaces based on configuration...
    manager-node: Adapter 1: nat
    manager-node: Adapter 2: bridged
==> manager-node: Forwarding ports...
    manager-node: 22 (guest) => 2222 (host) (adapter 1)
==> manager-node: Running 'pre-boot' VM customizations...
==> manager-node: Booting VM...
==> manager-node: Waiting for machine to boot. This may take a few minutes...
    manager-node: SSH address: 127.0.0.1:2222
    manager-node: SSH username: vagrant
    manager-node: SSH auth method: private key
    manager-node:
    manager-node: Vagrant insecure key detected. Vagrant will automatically replace
    manager-node: this with a newly generated keypair for better security.
    manager-node:
    manager-node: Inserting generated public key within guest...
    manager-node: Removing insecure key from the guest if it's present...
    manager-node: Key inserted! Disconnecting and reconnecting using new SSH key...
==> manager-node: Machine booted and ready!
==> manager-node: Checking for guest additions in VM...
    manager-node: No guest additions were detected on the base box for this VM! Guest
    manager-node: additions are required for forwarded ports, shared folders, host only
    manager-node: networking, and more. If SSH fails on this machine, please install
    manager-node: the guest additions and repackage the box to continue.
    manager-node:
    manager-node: This is not an error message; everything may continue to work properly,
    manager-node: in which case you may ignore this message.
==> manager-node: Setting hostname...
==> manager-node: Configuring and enabling network interfaces...
==> manager-node: Rsyncing folder: /Users/gaoxinfu/docker/docker-swarm/ => /vagrant
==> worker01-node: Importing base box 'centos/7'...
==> worker01-node: Matching MAC address for NAT networking...
==> worker01-node: Setting the name of the VM: docker-swarm_worker01-node_1576910043338_99726
==> worker01-node: Fixed port collision for 22 => 2222. Now on port 2200.
==> worker01-node: Clearing any previously set network interfaces...
==> worker01-node: Available bridged network interfaces:
1) en0: Wi-Fi (AirPort)
2) en1: 雷雳1
3) en2: 雷雳2
4) bridge0
5) p2p0
6) awdl0
7) llw0
8) en5: AX88179 USB 3.0 to Gigabit Ethernet
==> worker01-node: When choosing an interface, it is usually the one that is
==> worker01-node: being used to connect to the internet.
    worker01-node: Which interface should the network bridge to? 1
==> worker01-node: Preparing network interfaces based on configuration...
    worker01-node: Adapter 1: nat
    worker01-node: Adapter 2: bridged
==> worker01-node: Forwarding ports...
    worker01-node: 22 (guest) => 2200 (host) (adapter 1)
==> worker01-node: Running 'pre-boot' VM customizations...
==> worker01-node: Booting VM...
==> worker01-node: Waiting for machine to boot. This may take a few minutes...
    worker01-node: SSH address: 127.0.0.1:2200
    worker01-node: SSH username: vagrant
    worker01-node: SSH auth method: private key
    worker01-node:
    worker01-node: Vagrant insecure key detected. Vagrant will automatically replace
    worker01-node: this with a newly generated keypair for better security.
    worker01-node:
    worker01-node: Inserting generated public key within guest...
    worker01-node: Removing insecure key from the guest if it's present...
    worker01-node: Key inserted! Disconnecting and reconnecting using new SSH key...
==> worker01-node: Machine booted and ready!
==> worker01-node: Checking for guest additions in VM...
    worker01-node: No guest additions were detected on the base box for this VM! Guest
    worker01-node: additions are required for forwarded ports, shared folders, host only
    worker01-node: networking, and more. If SSH fails on this machine, please install
    worker01-node: the guest additions and repackage the box to continue.
    worker01-node:
    worker01-node: This is not an error message; everything may continue to work properly,
    worker01-node: in which case you may ignore this message.
==> worker01-node: Setting hostname...
==> worker01-node: Configuring and enabling network interfaces...
==> worker01-node: Rsyncing folder: /Users/gaoxinfu/docker/docker-swarm/ => /vagrant
==> worker02-node: Importing base box 'centos/7'...
==> worker02-node: Matching MAC address for NAT networking...
==> worker02-node: Setting the name of the VM: docker-swarm_worker02-node_1576910281058_54747
==> worker02-node: Fixed port collision for 22 => 2222. Now on port 2201.
==> worker02-node: Clearing any previously set network interfaces...
==> worker02-node: Available bridged network interfaces:
1) en0: Wi-Fi (AirPort)
2) en1: 雷雳1
3) en2: 雷雳2
4) bridge0
5) p2p0
6) awdl0
7) llw0
8) en5: AX88179 USB 3.0 to Gigabit Ethernet
==> worker02-node: When choosing an interface, it is usually the one that is
==> worker02-node: being used to connect to the internet.
    worker02-node: Which interface should the network bridge to? 1
==> worker02-node: Preparing network interfaces based on configuration...
    worker02-node: Adapter 1: nat
    worker02-node: Adapter 2: bridged
==> worker02-node: Forwarding ports...
    worker02-node: 22 (guest) => 2201 (host) (adapter 1)
==> worker02-node: Running 'pre-boot' VM customizations...
==> worker02-node: Booting VM...
==> worker02-node: Waiting for machine to boot. This may take a few minutes...
    worker02-node: SSH address: 127.0.0.1:2201
    worker02-node: SSH username: vagrant
    worker02-node: SSH auth method: private key
    worker02-node:
    worker02-node: Vagrant insecure key detected. Vagrant will automatically replace
    worker02-node: this with a newly generated keypair for better security.
    worker02-node:
    worker02-node: Inserting generated public key within guest...
    worker02-node: Removing insecure key from the guest if it's present...
    worker02-node: Key inserted! Disconnecting and reconnecting using new SSH key...
==> worker02-node: Machine booted and ready!
==> worker02-node: Checking for guest additions in VM...
    worker02-node: No guest additions were detected on the base box for this VM! Guest
    worker02-node: additions are required for forwarded ports, shared folders, host only
    worker02-node: networking, and more. If SSH fails on this machine, please install
    worker02-node: the guest additions and repackage the box to continue.
    worker02-node:
    worker02-node: This is not an error message; everything may continue to work properly,
    worker02-node: in which case you may ignore this message.
==> worker02-node: Setting hostname...
==> worker02-node: Configuring and enabling network interfaces...
==> worker02-node: Rsyncing folder: /Users/gaoxinfu/docker/docker-swarm/ => /vagrant
查看三台服务器的配置
连接三台服务器
localhost:docker-swarm gaoxinfu$ vagrant ssh manager-node
[vagrant@manager-node ~]$ ip a
1: lo: <LOOPBACK,UP,LOWER_UP> mtu 65536 qdisc noqueue state UNKNOWN group default qlen 1000
    link/loopback 00:00:00:00:00:00 brd 00:00:00:00:00:00
    inet 127.0.0.1/8 scope host lo
       valid_lft forever preferred_lft forever
    inet6 ::1/128 scope host
       valid_lft forever preferred_lft forever
2: eth0: <BROADCAST,MULTICAST,UP,LOWER_UP> mtu 1500 qdisc pfifo_fast state UP group default qlen 1000
    link/ether 52:54:00:8a:fe:e6 brd ff:ff:ff:ff:ff:ff
    inet 10.0.2.15/24 brd 10.0.2.255 scope global noprefixroute dynamic eth0
       valid_lft 85006sec preferred_lft 85006sec
    inet6 fe80::5054:ff:fe8a:fee6/64 scope link
       valid_lft forever preferred_lft forever
3: eth1: <BROADCAST,MULTICAST,UP,LOWER_UP> mtu 1500 qdisc pfifo_fast state UP group default qlen 1000
    link/ether 08:00:27:58:39:a8 brd ff:ff:ff:ff:ff:ff
    inet 192.168.8.11/24 brd 192.168.8.255 scope global noprefixroute eth1
       valid_lft forever preferred_lft forever
    inet6 fe80::a00:27ff:fe58:39a8/64 scope link
       valid_lft forever preferred_lft forever
[vagrant@manager-node ~]$ sudo -i
[root@manager-node ~]# vi /etc/ssh/ssh_config

#       $OpenBSD: ssh_config,v 1.30 2016/02/20 23:06:23 sobrado Exp $

# This is the ssh client system-wide configuration file.  See
# ssh_config(5) for more information.  This file provides defaults for
# users, and the values can be changed in per-user configuration files
# or on the command line.

# Configuration data is parsed as follows:
#  1. command line options
#  2. user-specific file
#  3. system-wide file
# Any configuration value is only changed the first time it is set.
# Thus, host-specific definitions should be at the beginning of the
# configuration file, and defaults at the end.

# Site-wide defaults for some commonly used options.  For a comprehensive
# list of available options, their meanings and defaults, please see the
# ssh_config(5) man page.

# Host *
#   ForwardAgent no
#   ForwardX11 no
#   RhostsRSAAuthentication no
#   RSAAuthentication yes
#   PasswordAuthentication yes
#   HostbasedAuthentication no
#   GSSAPIAuthentication no
#   GSSAPIDelegateCredentials no
#   GSSAPIKeyExchange no
#   GSSAPITrustDNS no
#   BatchMode no
#   CheckHostIP yes
#   AddressFamily any
#   ConnectTimeout 0
#   StrictHostKeyChecking ask
#   IdentityFile ~/.ssh/identity
#   IdentityFile ~/.ssh/id_rsa
#   IdentityFile ~/.ssh/id_dsa
#   IdentityFile ~/.ssh/id_ecdsa
#   IdentityFile ~/.ssh/id_ed25519
#   Port 22
#   Protocol 2
#   Cipher 3des
#   Ciphers aes128-ctr,aes192-ctr,aes256-ctr,arcfour256,arcfour128,aes128-cbc,3des-cbc
#   MACs hmac-md5,hmac-sha1,umac-64@openssh.com,hmac-ripemd160
#   EscapeChar ~
#   Tunnel no
#   TunnelDevice any:any
#   PermitLocalCommand no
#   VisualHostKey no
#   ProxyCommand ssh -q -W %h:%p gateway.example.com
#   RekeyLimit 1G 1h
#
# Uncomment this if you want to use .local domain
# Host *.local
#   CheckHostIP no


Host *
        GSSAPIAuthentication yes
# If this option is set to yes then remote X11 clients will have full access
# to the original X11 display. As virtually no X11 client supports the untrusted
# mode correctly we set this to yes.
        ForwardX11Trusted yes
# Send locale-related environment variables
        SendEnv LANG LC_CTYPE LC_NUMERIC LC_TIME LC_COLLATE LC_MONETARY LC_MESSAGES
        SendEnv LC_PAPER LC_NAME LC_ADDRESS LC_TELEPHONE LC_MEASUREMENT
        SendEnv LC_IDENTIFICATION LC_ALL LANGUAGE
        SendEnv XMODIFIERS
允许通过密码可以进行SFTP连接
1.将上面的配置项目
  #   PasswordAuthentication yes
  改为如下:
  PasswordAuthentication yes
执行下面的命令上面修改的配置生效
[root@manager-node ~]# systemctl restart sshd
[root@manager-node ~]#
修改root用户名的密码
[root@localhost ~]# passwd
Changing password for user root.
New password:
BAD PASSWORD: The password is shorter than 8 characters
Retype new password:
passwd: all authentication tokens updated successfully.
1.这里,我将root的密码修改为了root
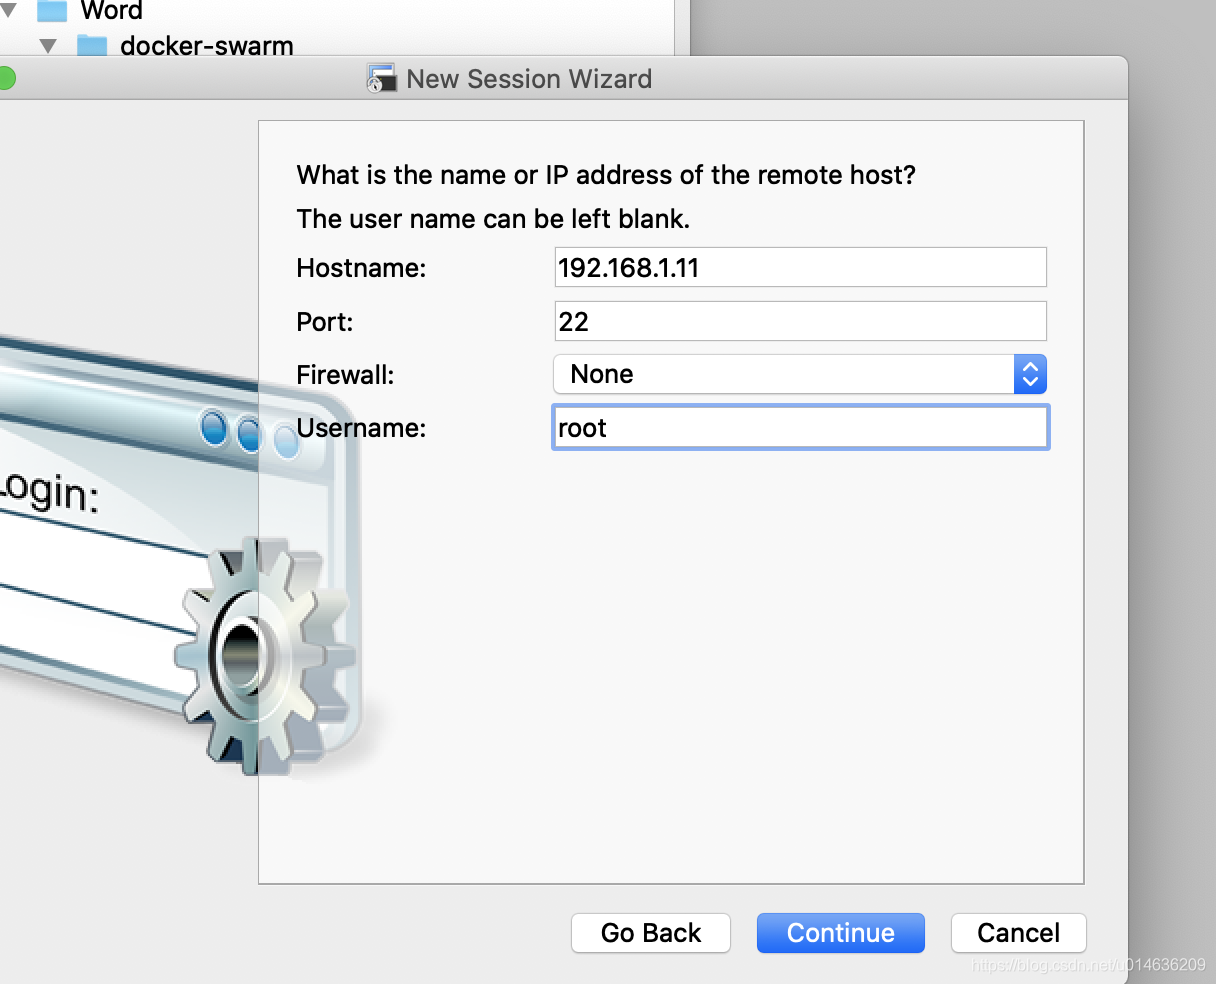
开始连接—>问题:TODO

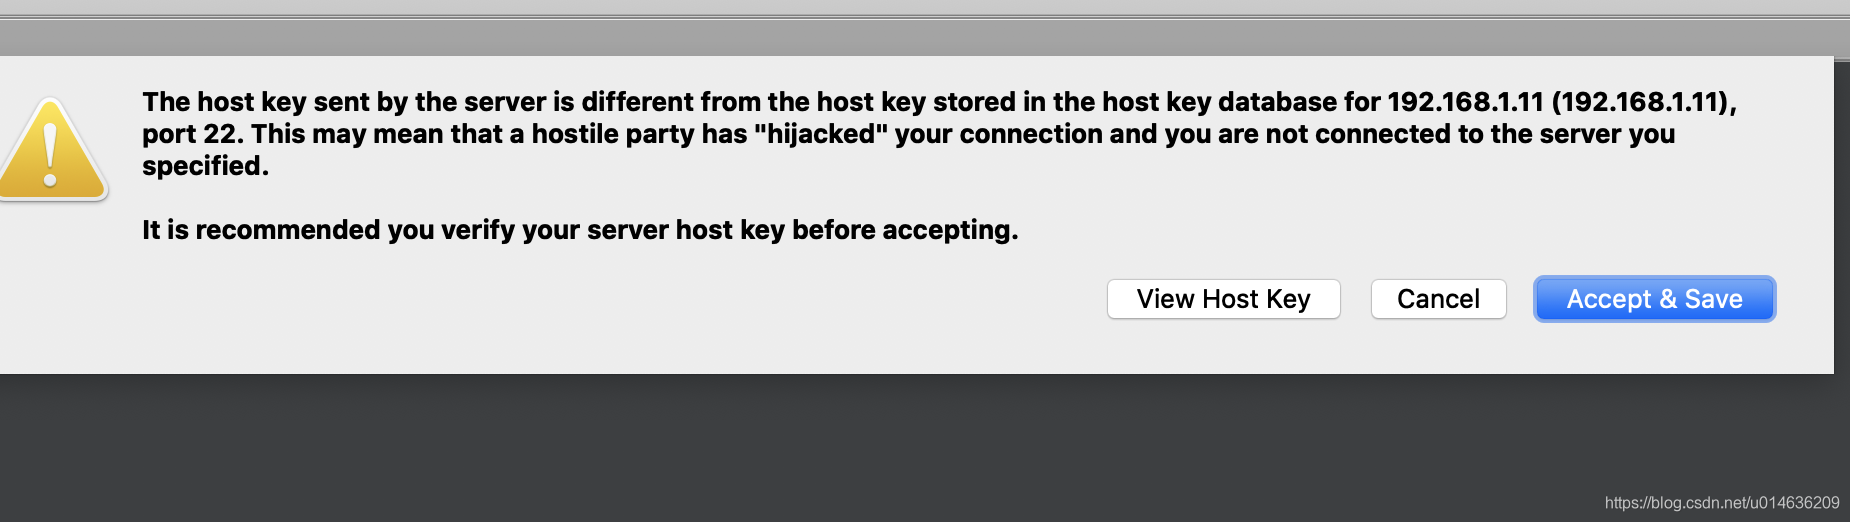

The client has disconnected from the server.  Reason:
Unable to authenticate using any of the configured authentication methods.
