Window下编译Hadoop
hadoop原码下载及解压
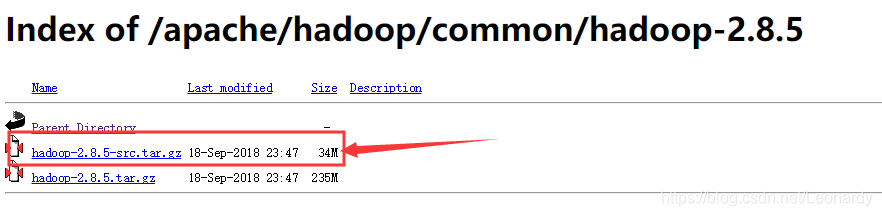
由于一直都在用2.8.5,所以这里以此版本为例,下载地址:
http://mirror.bit.edu.cn/apache/hadoop/common/hadoop-2.8.5/
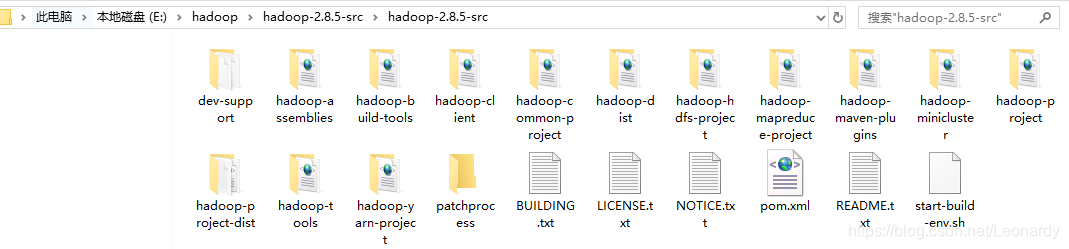
将下载后的原码解压至一个比较简洁的路径.如E:\hadoop\hdc
解压后我们手动将目录改个简短名字我这里叫hdc如下:
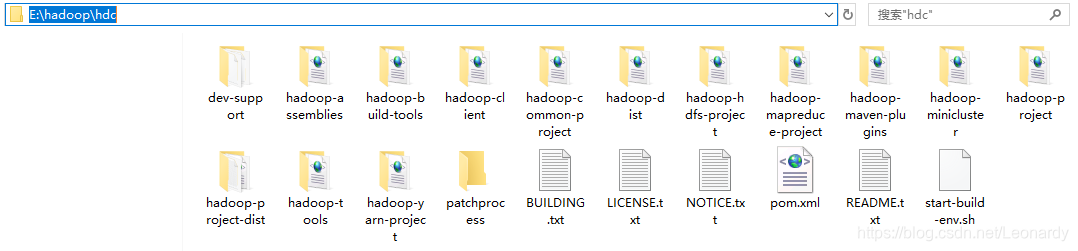
然后打开BUILDING.txt文件,上面有具体编译的流程,下面附上一部分.
Building on Windows

----------------------------------------------------------------------------------
Requirements:

* Windows System
* JDK 1.7+
* Maven 3.0 or later
* Findbugs 1.3.9 (if running findbugs)
* ProtocolBuffer 2.5.0
* CMake 2.6 or newer
* Windows SDK 7.1 or Visual Studio 2010 Professional
* Windows SDK 8.1 (if building CPU rate control for the container executor)
* zlib headers (if building native code bindings for zlib)
* Internet connection for first build (to fetch all Maven and Hadoop dependencies)
* Unix command-line tools from GnuWin32: sh, mkdir, rm, cp, tar, gzip. These
  tools must be present on your PATH.
* Python ( for generation of docs using 'mvn site')

Unix command-line tools are also included with the Windows Git package which
can be downloaded from http://git-scm.com/downloads

If using Visual Studio, it must be Visual Studio 2010 Professional (not 2012).
Do not use Visual Studio Express.  It does not support compiling for 64-bit,
which is problematic if running a 64-bit system.  The Windows SDK 7.1 is free to
download here:

http://www.microsoft.com/en-us/download/details.aspx?id=8279

The Windows SDK 8.1 is available to download at:

http://msdn.microsoft.com/en-us/windows/bg162891.aspx

Cygwin is neither required nor supported.
值得注意的是,编译时Cygwin已经不再被需要,也不再被支持了.
根据文档,下载并配置需要的内容:
1.JDK
https://www.oracle.com/technetwork/java/javase/downloads/jdk8-downloads-2133151.html
下载后安装到默认目录即可,或者安装到自己喜欢的位置.
接下来,设置系统环境变量
# 以管理员权限运行cmd,然后执行下面的命令
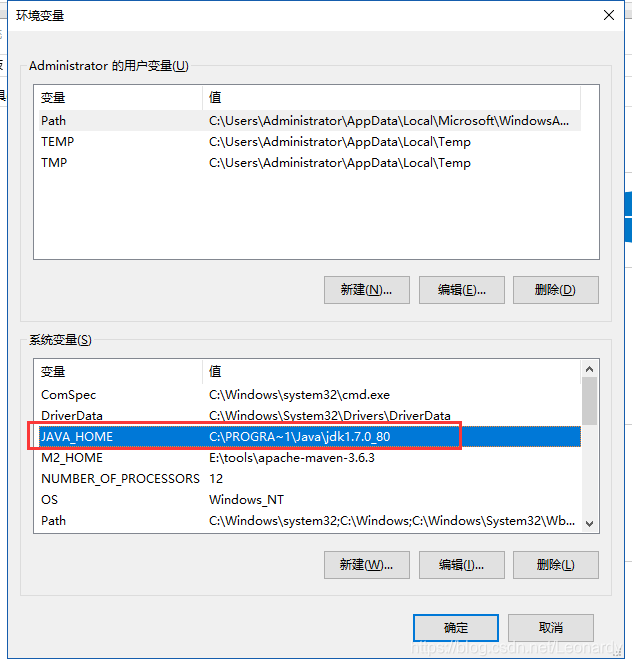
jdk默认的安装路径是,C:\Program Files\Java\jdk1.8.0_231,但是文档中要求,JAVA_HOME目录不能有空格,
所以可以使用C:\PROGRA~1来代替C:\Program Files
JAVA_HOME must be set, and the path must not contain spaces. If the full path would contain spaces, then use the Windows short path instead.
setx /M JAVA_HOME "C:\PROGRA~1\Java\jdk1.8.0_231"
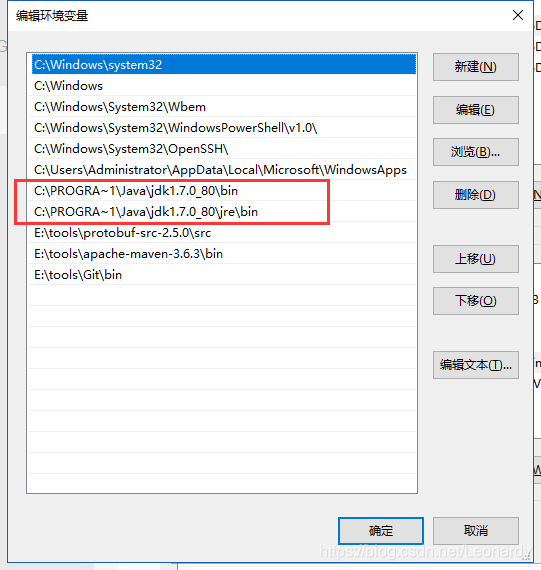
setx /M Path "%Path%;%JAVA_HOME%\bin;%JAVA_HOME%\jre\bin"
2.Maven
http://maven.apache.org/download.cgi
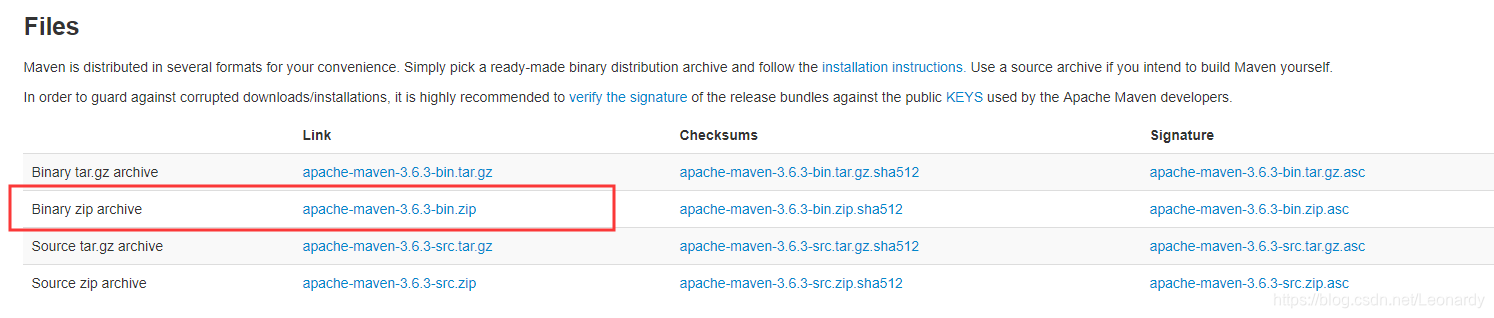
解压后配置系统环境变量
setx /M M2_HOME "E:\tools\apache-maven-3.6.3"
setx /M Path "%Path%;%M2_HOME%\bin"
再%M2_HOME%/conf/settings.xml中,配置仓库信息,国内共官方下载速度实在感人.
<!-- 配置本地仓库路径 -->
<localRepository>E:\tools\m2_repo</localRepository>
<mirrors>
	<mirror>
	    <id>nexus-aliyun</id>
	    <mirrorOf>central</mirrorOf>
	    <name>Nexus aliyun</name>
	    <url>http://maven.aliyun.com/nexus/content/groups/public</url>
	</mirror>
	<!-- 由于最后编译时用到了apache的snapshots,所以这个也需要配置一下,除非你有VPN -->
	<mirror>
    	<id>apache.snapshots.https</id>
    	<mirrorOf>apache.snapshots.https</mirrorOf>
    	<name>Nexus aliyun</name>
    	<url>https://maven.aliyun.com/repository/apache-snapshots</url>
</mirror>
</mirrors>

3.Studio 2010 Professional
需要微软账号,然后要join Visual Studio Dev Essentials才可以搜索到下载链接
https://my.visualstudio.com/Downloads
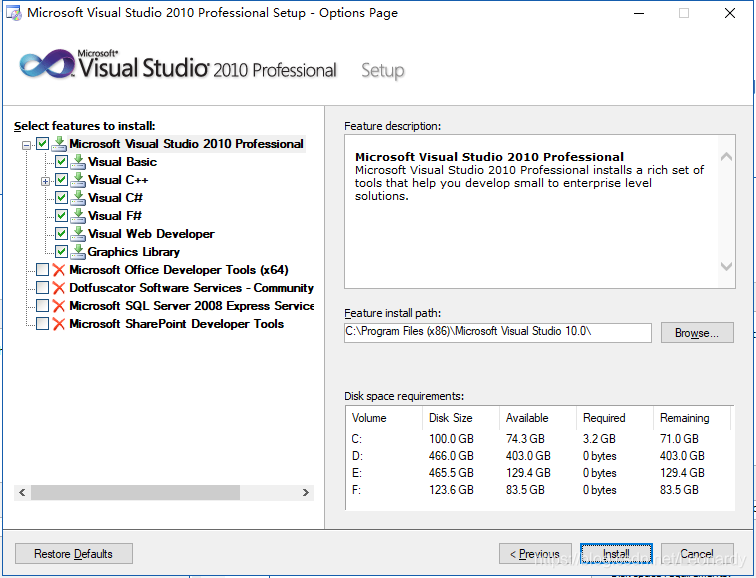
Custom > 然后勾选关键的组件即可.
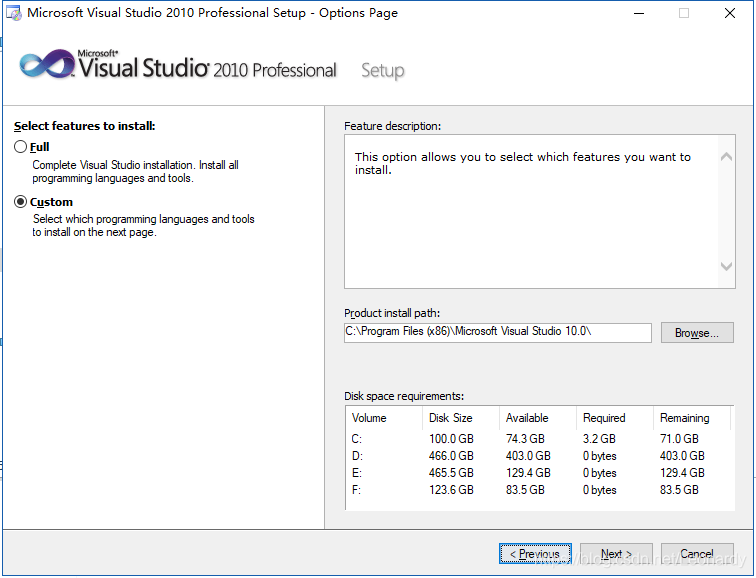
注意:最开始我改了默认的安装路径,并且路径中有特殊字符"&"所以,启动Visual Studio x64 Win64 Command Prompt(2010)时会显示,设置环境变量失败.卸载后重装至默认路径成功.

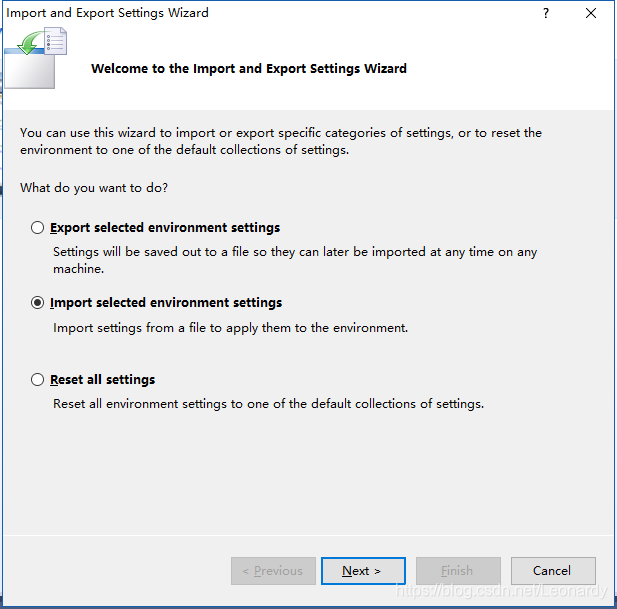
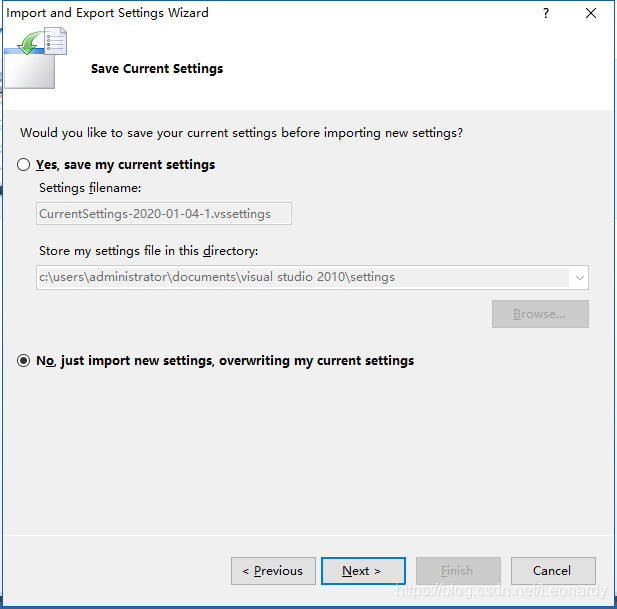
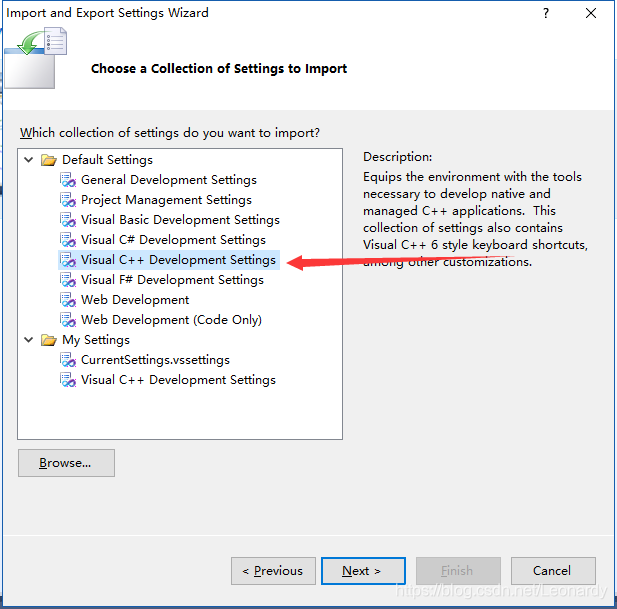
这里忘记截图了,安装后,启动时要选C++项目,如果选错了可以在
tools > Import and Export Settings Wizard中修改
4.ProtocolBuffer 2.5.0
https://github.com/protocolbuffers/protobuf/releases/tag/v2.5.0
这个 有点麻烦,首先下载protobuf-2.5.0.zip文件很慢,而且容易404,狂刷新知道成功.
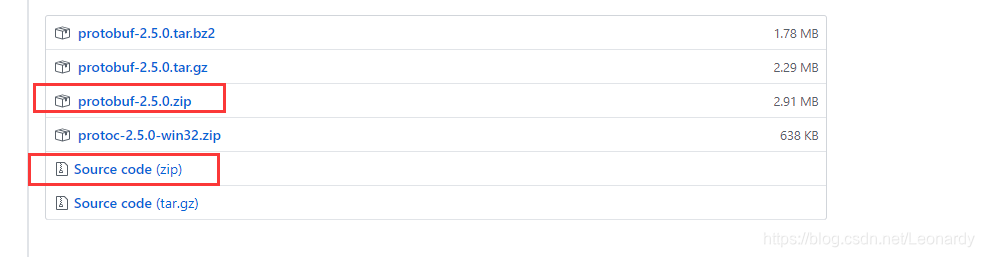
这两个都需要下载,上面的protobuf-2.5.0.zip是用来编译并生成protoc.exe的,下面的Source code是原码.分别解压到喜欢的路径.
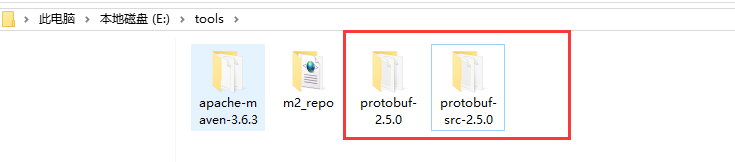
如:我这里分别指定为protobuf-2.5.0和protobuf-src-2.5.0
解压后,进入protobuf-2.5.0(非源码)打开README.txt文件,里面找到对应的信息,篇幅太长,这里就不贴出来了,里面介绍了java的相关方法,告诉详细安装方法参照java目录下README.txt,这里重点提出了,java和python的安装需要protoc
Note that both of them require you to first install the Protocol
Buffer compiler (protoc), which is part of the C++ package.
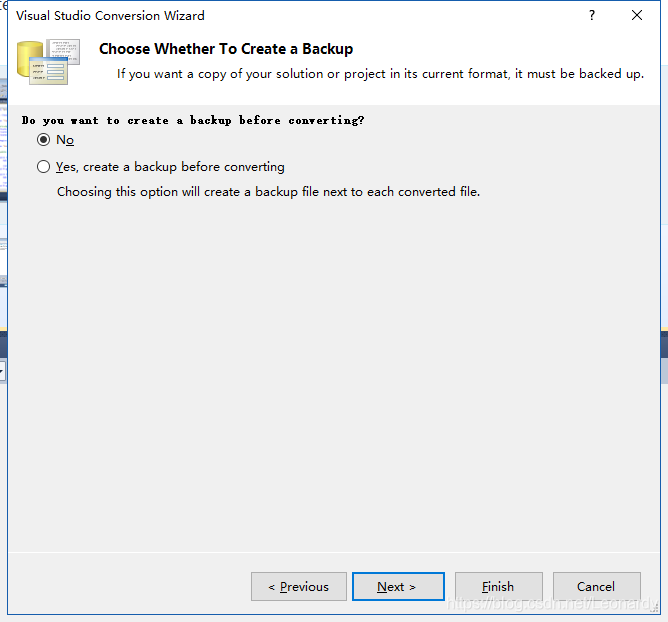
我们用上一步安装过的Studio 2010 Professional打开vsprojects目录下的protobuf.sln工程.
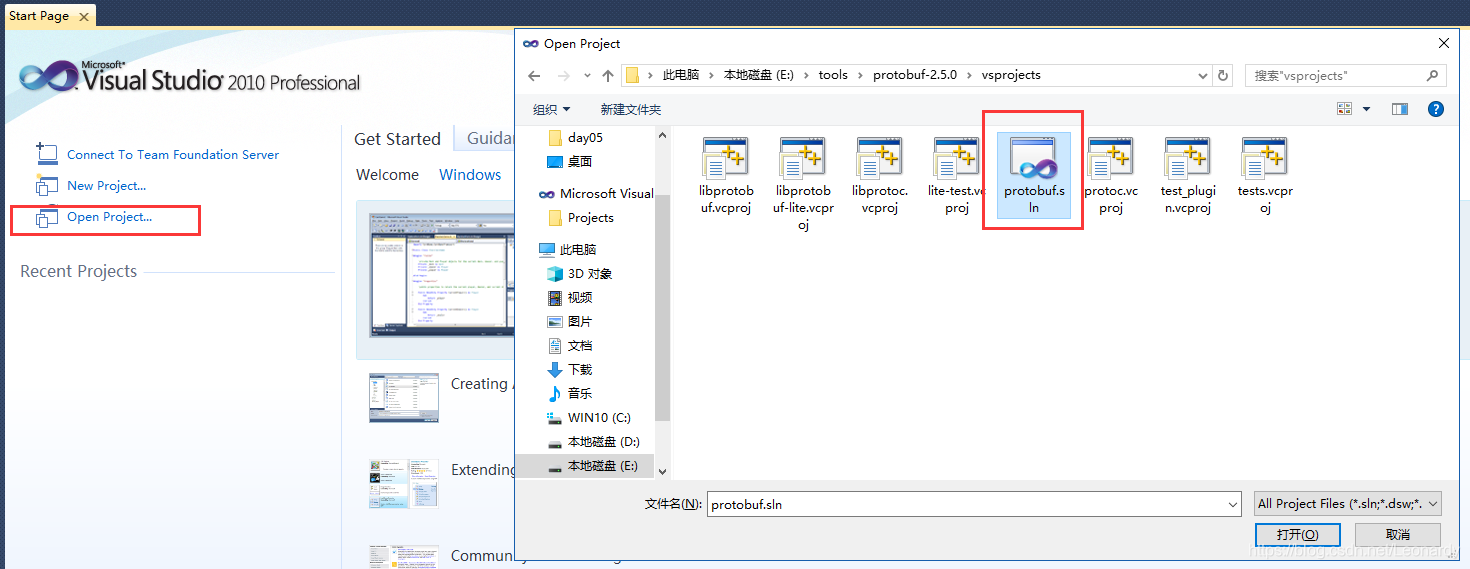
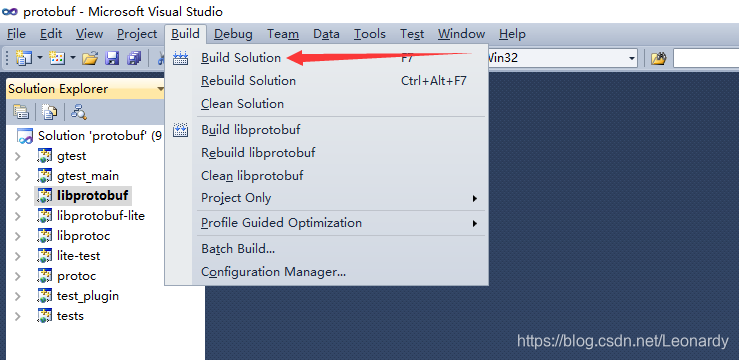
打开后会提示转换,选择不备份,转换完毕后Build > Build Solution
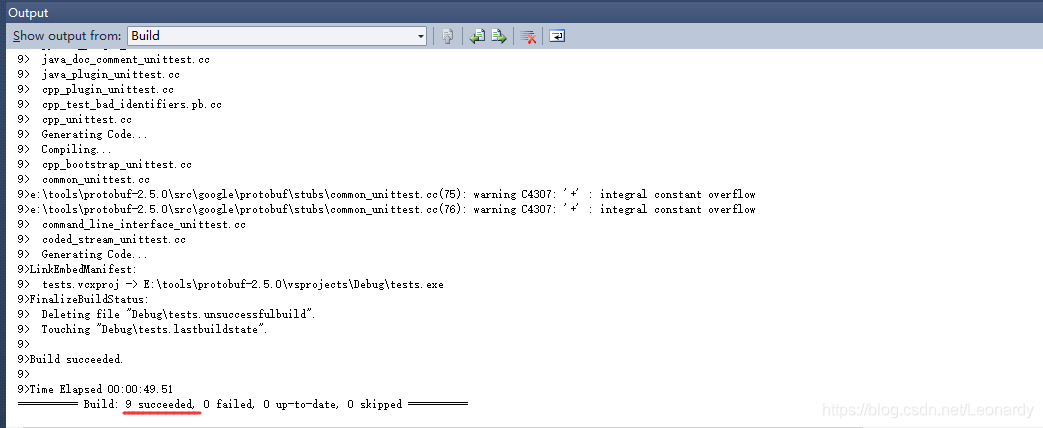
控制台可以看到编译输出信息,显示9个成功,没有失败.
打开Windows PowerShell,切换到E:\tools\protobuf-2.5.0\vsprojects\Debug目录运行tests.exe和lite-test.exe来检查是否所有测试都能通过.


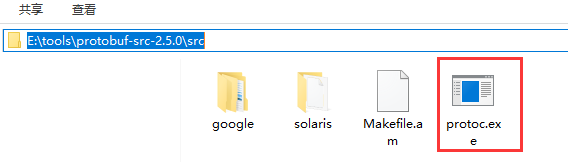
将E:\tools\protobuf-2.5.0\vsprojects\Debug目录下的protoc.exe放到源码的src目录.
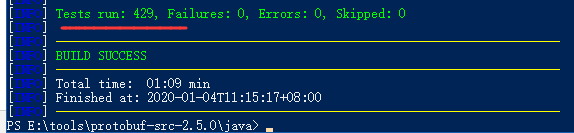
PowerShell切换到E:\tools\protobuf-src-2.5.0\java目录,执行mvn test,过程会比较耗时,耐心等待.
mvn test
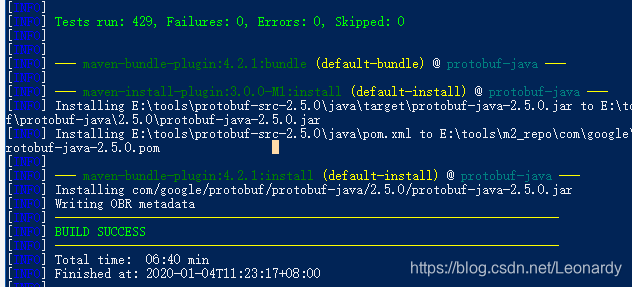
# 安装protobuf
mvn install
# 将protoc.exe放到
C:\Windows\System32目录下
# 设置环境变量
# 以管理员身份打开cmd
setx /M Path "%Path%;E:\tools\protobuf-src-2.5.0\src"
# 打印版本,查看是否成功
protoc --version

5.cmake
https://cmake.org/download/

下载到99.89卡主不动了,我又选了下面的地址下来稍微老点儿的3.14.7版

# 设置系统环境变量(编译时需要)
setx /M Path "%Path%;E:\tools\cmake-3.14.7-win64-x64\bin"
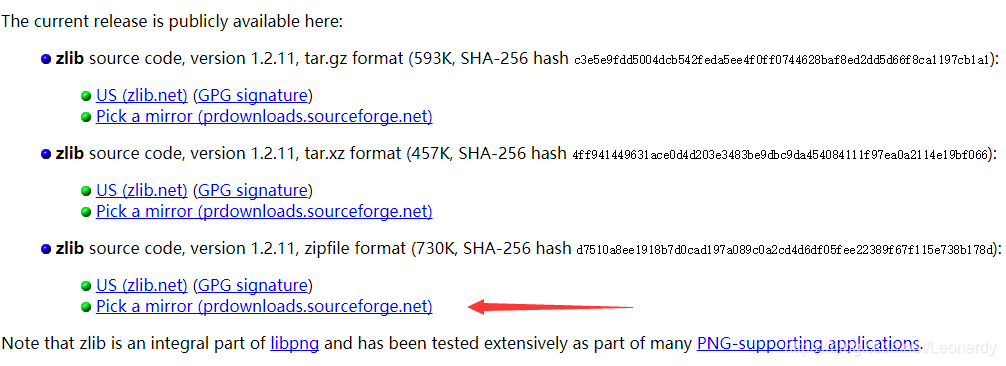
6.Zlib
http://www.zlib.net/
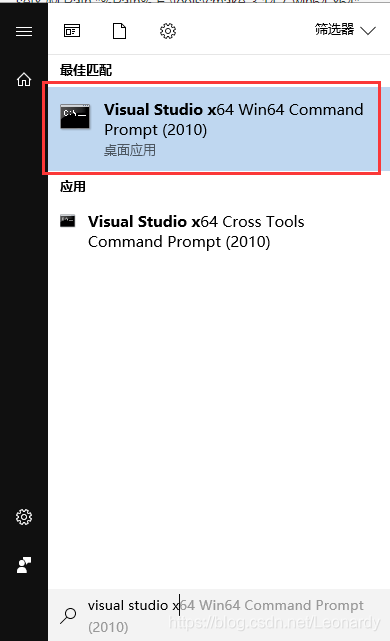
以管理员身份打开 Visual Studio x64 Win64 Command Prompt(2010)
切换到zlib目录`E:\tools\zlib-1.2.11`
# 执行下面命令
nmake -f win32/Makefile.msc
# s设置系统环境变量
setx /M ZLIB_HOME "E:\tools\zlib-1.2.11"
7.Git
https://git-scm.com/download/win

# 管理员打开cmd窗口,由于编译时需要用到bash,所以需要配置git环境变量
# 设置系统环境变量
setx /M Path "%Path%;E:\tools\Git\bin"
编译
# 设置Platform,注意,大小写严格P要大写
setx /M Platform "x64"
# 管理员方式打开vs的command窗口
# 切换到hadoop源码路径
E:\hadoop\hdc
# 执行编译命令
mvn package -Pdist,native-win -DskipTests -Dtar
如果,提示JAVA_HOME路径没有正确配置.但是java -version却可以正常执行,并且你确定环境变量正确配置则可能是jdk和maven的兼容问题

于是在网上搜索资料,发现可能是版本不兼容的问题,下面是maven和jdk的版本对应
http://maven.apache.org/docs/history.html
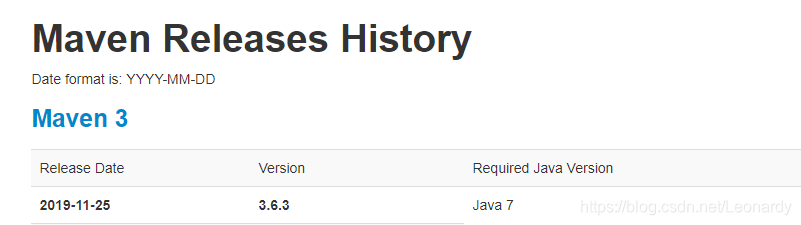
发现需要1.7,我按的是1.8,这里换个版本试试
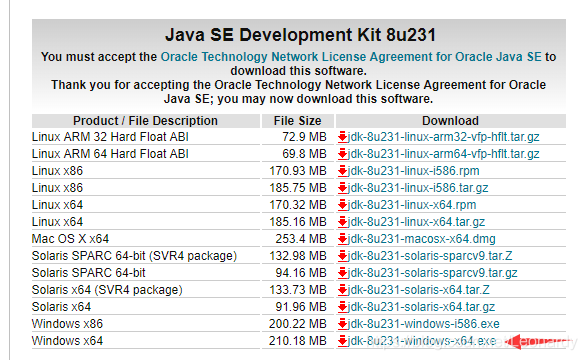
jdk7下载地址
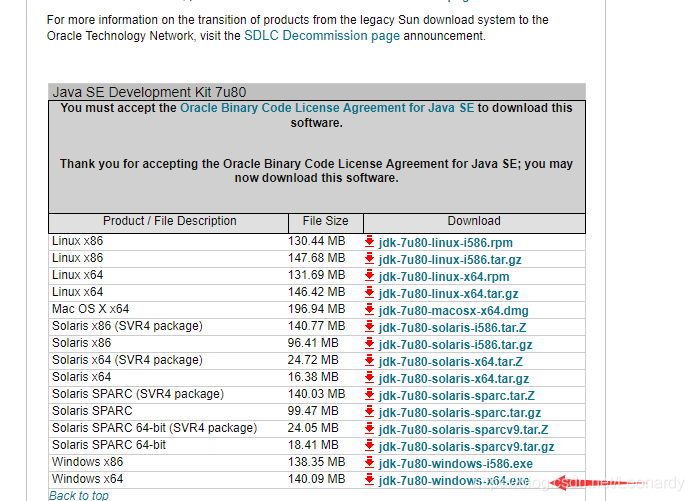
把之前的JAVA_HOME和Path中带JAVA_HOME的删除,重新来过
setx /M JAVA_HOME "C:\PROGRA~1\Java\jdk1.7.0_80"
setx /M Path "%Path%;%JAVA_HOME%\bin;%JAVA_HOME%\jre\bin"
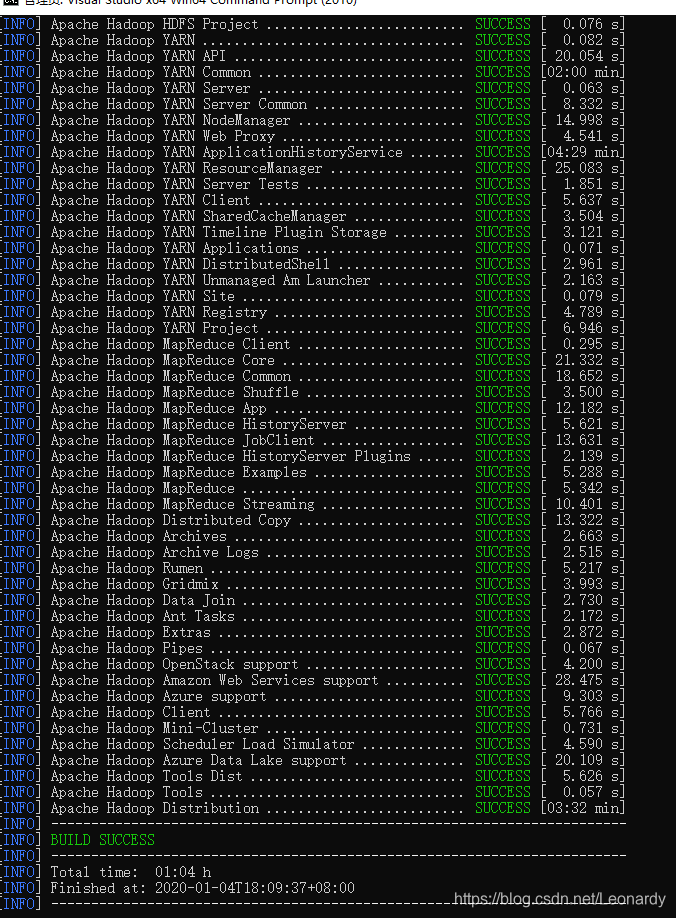
编译过程很漫长,需要耐心等待.
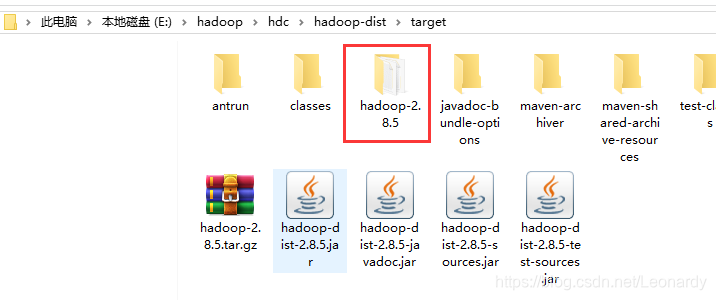
编译成功后,tar包在E:\hadoop\hdc\hadoop-dist\target目录下,
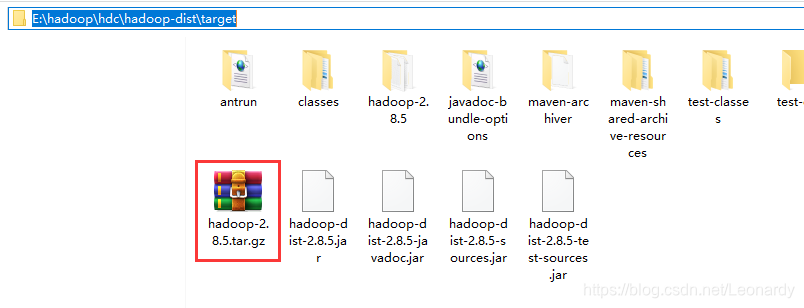
或者可以直接使用hadoop-2.8.5目录