环境准备:
下载zip包:https://spring.io/tools3/sts/all/ 如下zip包下载下来
安装插件 Help ==>Install New SoftWare
如下点击Archive选择下载好后的zip包

如下选择即可

然后后面的同意协议什么的一路next最后finish即可
然后在窗口右下角有进度条进行安装插件,等待弹窗。最后会要求你重启eclipse。重启即可。
window==>preference可以看到已经安装好了如下图

Spring 的Hello World案例:
需要的5个jar包:
- commons-logging
- spring-beans
- spring-context
- spring-core
- spring-expresso

- 下载spring需要用的zip包:https://repo.spring.io/release/org/springframework/spring/
里面包含了spring-beans、spring-context、spring-core、spring-expresso四个jar包
- commons-logging:下载地址
然后复制到项目src/lib下并且Build Path添加到项目jar库
如下是添加好后的项目

- 创建HelloWorld对象
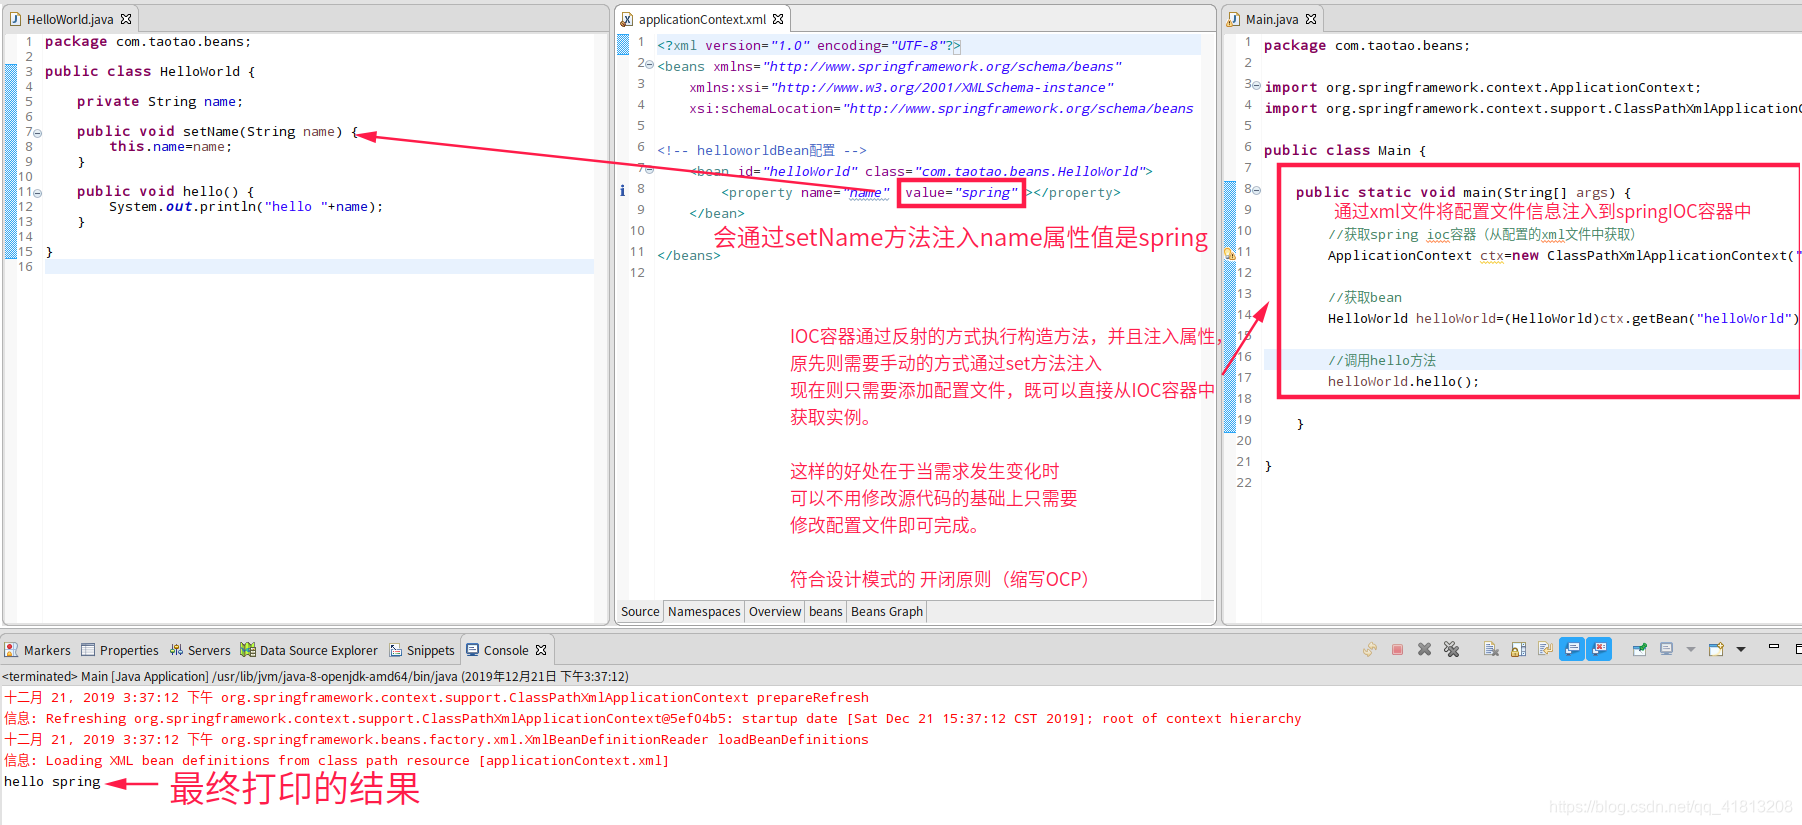
HelloWorld.java
public class HelloWorld { private String name; public void setName(String name) { this.name=name; } public void hello() { System.out.println("hello "+name); } } - 在src下 创建springIOC容器的配置文件applicationContext.xml

在<beans></beans>标签中添加<bean></bean>如下标签<!-- helloworldBean配置 --> <bean id="helloWorld" class="com.taotao.beans.HelloWorld"> <property name="name" value="spring" ></property> </bean> - Main函数调用三步:
		//获取spring ioc容器(从配置的xml文件中获取)
		ApplicationContext ctx=new ClassPathXmlApplicationContext("applicationContext.xml");

		//获取bean
		HelloWorld helloWorld=(HelloWorld)ctx.getBean("helloWorld");

		//调用hello方法
		helloWorld.hello();
执行一下main方法即可
截图分析代码:(放大查看)