前言:该demo使用eclipse开发,使用其它开发工具起始大同小异。比如使用idea的时候可以创建一个maven工程爱引入所有的jar包。而其它的操作则是一样。在看这篇文章前,我想你应该要了解部分spring的IOC知识,因为用spring的方式使我们可以不用new来创建对象以及注入bean的各种属性,你可以看我的文章
【https://blog.csdn.net/qq_38261445/article/details/90142455】
或者也可以搜一下如何创建spring项目会有一大堆教程。
一、准备工作
如果你看了我的博客,配置spring基本的jar包应该都有了,但是额外我们还需要一些jar包来支持事务
spring-tx-4.3.9.RELEASE.jar(tx,与事务管理相关的包)
commons-dbcp2-2.1.1.jar(数据源,)
commons-pool-1.6.jar(连接池)
aopalliance-1.0.jar(aop声明式事务!!)
(注意这些是在原有是spring的基础上加的包哈,当然还有连接数据库,aop等核心包在我给出的博客中,这里就不一一说明了)
将上面的包添加到内路径
二、创建dao层接口和实现类
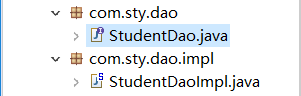
StudentDao.java
public interface StudentDao {
	public void addStudent(Student stu);
}
StudentDaoImpl.java
public class StudentDaoImpl implements StudentDao {

	@Override
	public void addStudent(Student stu) {
		// TODO Auto-generated method stub
		System.out.println("添加学生");
	}

}
通过上面你也许能看出现在并不是真正去实现对数据库的操作,我想表达的只是模拟声明式事务怎么配置,后面会持续跟新是spring整合mybatis的项目,到时候就能看到具体的效果了。
三、创建service接口和实现类
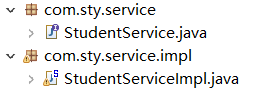
StudentService.java
public interface StudentService {
	public void addStudent(Student stu);
}
StudentServiceImpl.java
public class StudentServiceImpl implements StudentService{
	StudentDao stuDao = new StudentDaoImpl();
	@Override
	public void addStudent(Student student) {
		// TODO Auto-generated method stub
		studentDao.addStudent(student);
		//CRUD
		//增删改查
	}
}
以前我们可能会像上面这样做,通过StudentDao stuDao = new StudentDaoImpl();来调用addStudent逻辑实现对学生的增加,这样会造成类之间的依赖增强,而使用Spring的目的就是方便我们解耦,因此我们在配置文件中对属性进行注入


	<bean id="studentDao" class="com.sty.dao.impl.StudentDaoImpl">
	//没有属性就可以不写
	</bean>

	<!-- 注入StudentServiceImpl类,但是由于其中添加了StudentDao stuDao = new StudentDaoImpl();即对StudentDaoImpl的依赖,因此在前面对该类也进行注入 -->
	<bean id="studentService" class="com.sty.service.impl.StudentServiceImpl">
		<property name="studentDao" ref="studentDao"></property>
	</bean>
四、声明事务管理以及配置数据库相关的东西
<?xml version="1.0" encoding="UTF-8"?>
<beans xmlns="http://www.springframework.org/schema/beans"
	xmlns:xsi="http://www.w3.org/2001/XMLSchema-instance"
	xmlns:p="http://www.springframework.org/schema/p"
	xmlns:tx="http://www.springframework.org/schema/tx"
	xsi:schemaLocation="http://www.springframework.org/schema/beans http://www.springframework.org/schema/beans/spring-beans.xsd
		http://www.springframework.org/schema/tx http://www.springframework.org/schema/tx/spring-tx-4.3.xsd">

<!-- 配置数据库相关 -->
	<bean id="dataSource" class="org.apache.commons.dbcp2.BasicDataSource">
		<property name="driverClassName" value="com.mysql.jdbc.Driver"></property>
		<property name="url" value="127.0.0.1:3306:schooltao"></property>
		<property name="username" value="xxx"></property>
		<property name="password" value="xxx"></property>
		<property name="maxIdle" value="6"></property>
	</bean>


<!-- 配置-事务-管理器 -->
	<bean id="txManager" class="org.springframework.jdbc.datasource.DataSourceTransactionManager">
		<property name="dataSource" ref="dataSource"></property>
	</bean>

<!-- 增加对事务的支持 -->
	<tx:annotation-driven transaction-manager="txManager"/>

	<bean id="studentDao" class="com.sty.dao.impl.StudentDaoImpl">

	</bean>

	<bean id="studentService" class="com.sty.service.impl.StudentServiceImpl">
		<property name="studentDao" ref="studentDao"></property>
	</bean>
</beans>
五、在所有准备都完成后就可以使用声明式事务进行注解了
在StudentServiceImpl.java的方法addStudent(Student student)上添加以下东西
@Transactional(readOnly = false,
			propagation = Propagation.REQUIRED,
			rollbackFor = {SQLClientInfoException.class,ArithmeticException.class})//只读、回滚机制、、、、里面更多的属性可以多查阅资料
	@Override
	public void addStudent(Student student) {
		// TODO Auto-generated method stub
		studentDao.addStudent(student);
		//CRUD
		//增删改查
	}
配置好后在你调用这个方法时,如果方法中出现异常或者多个数据库操作只操作了一半等错误时,那么数据库便会进行回滚,回到事务最开始的状态
上一篇:Spring——控制反转IOC(依赖注入DI)案例详解
下一篇:AOP实现前,后,环绕,异常通知(持续更新中)
