1.在pom.xml中添加SpringBoot相关依赖,如果原来已经是spring项目的话那么需要删除之前所有的org.springframework相关依赖,防止jar包冲突
<properties>
        <springboot.version>2.0.7.RELEASE</springboot.version>
    </properties>
    <dependencies>
        <dependency>
            <groupId>org.springframework.boot</groupId>
            <artifactId>spring-boot-starter-web</artifactId>
            <version>${springboot.version}</version>
        </dependency>
        <!-- https://mvnrepository.com/artifact/org.springframework.boot/spring-boot-starter-velocity -->
        <dependency>
            <groupId>org.springframework.boot</groupId>
            <artifactId>spring-boot-starter-velocity</artifactId>
            <version>1.4.7.RELEASE</version>
        </dependency>
2.写一个测试类
import org.springframework.boot.SpringApplication;
import org.springframework.boot.autoconfigure.SpringBootApplication;
import org.springframework.web.bind.annotation.RequestMapping;
import org.springframework.web.bind.annotation.RestController;

@RestController  //  该注解等同于  @ResponseBody + @Controller
@SpringBootApplication  // 相当于@SpringBootConfiguration、@EnableAutoConfiguration和@ComponentScan三个注解  目的是开启自动配
public class Test {
    public static void main(String[] args) {
        SpringApplication.run(Test.class, args);
    }

    @RequestMapping("/hello")
    public String test() {
        return "Hello SpringBoot";
    }

}
3.这一点需要注意了,如果是按照我上一篇文章创建的maven项目的话需要删除tomcat依赖,否则会导致jar包冲突
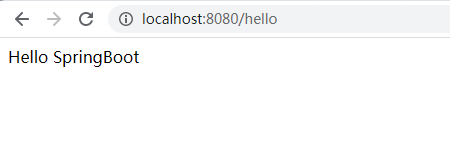
4.启动main方法访问接口测试
5.配置数据库访问
pom中添加依赖 查漏补缺,主要为了省事直接拷过去就行
<properties>
        <springboot.version>2.0.7.RELEASE</springboot.version>
    </properties>
    <dependencies>
        <dependency>
            <groupId>org.springframework.boot</groupId>
            <artifactId>spring-boot-starter-web</artifactId>
            <version>${springboot.version}</version>
        </dependency>
        <!-- https://mvnrepository.com/artifact/org.springframework.boot/spring-boot-starter-velocity -->
        <dependency>
            <groupId>org.springframework.boot</groupId>
            <artifactId>spring-boot-starter-velocity</artifactId>
            <version>1.4.7.RELEASE</version>
        </dependency>
        <!-- 打war包时加入此项, 告诉spring-boot tomcat相关jar包用外部的,不要打进去 -->
        <dependency>
            <groupId>org.springframework.boot</groupId>
            <artifactId>spring-boot-starter-tomcat</artifactId>
            <version>${springboot.version}</version>
            <scope>provided</scope>
        </dependency>
        <!-- myBatis -->
        <dependency>
            <groupId>org.mybatis.spring.boot</groupId>
            <artifactId>mybatis-spring-boot-starter</artifactId>
            <version>2.0.1</version>
        </dependency>
        <!-- mySql -->
        <dependency>
            <groupId>mysql</groupId>
            <artifactId>mysql-connector-java</artifactId>
            <version>5.1.42</version>
        </dependency>
        <!-- 数据库连接池 -->
        <dependency>
            <groupId>com.alibaba</groupId>
            <artifactId>druid</artifactId>
            <version>1.1.0</version>
        </dependency>
6.在resources下创建一个application.yml文件
server:
  port: <!-- 这里填上本地服务器端口号  例:8080 -->

spring:
  datasource:
    username: <!-- 数据库链接用户名  例:root-->
    password: <!-- 数据库链接密码  例:root-->
    url: <!-- 数据库链接地址  例:jdbc:mysql://localhost:3306/cdc_data00_2?useUnicode=true&characterEncoding=utf8&zeroDateTimeBehavior=convertToNull-->
    driver-class-name: com.mysql.jdbc.Driver
    type: com.alibaba.druid.pool.DruidDataSource
  application:
    name: <!-- 访问数据库的用户名随意写  例:wangyongqi -->
  http:
    encoding:
      charset: UTF-8
      force: true
  jackson:
    default-property-inclusion: non_null

mybatis:
  mapper-locations: classpath:mapper/*Mapper.xml  <!-- mapper文件位置-->
  type-aliases-package: com.xxx.entity            <!-- 实体类位置-->
7.先写一个启动类
package com.xxx.controller;

import org.mybatis.spring.annotation.MapperScan;
import org.springframework.boot.SpringApplication;
import org.springframework.boot.autoconfigure.SpringBootApplication;
import org.springframework.boot.builder.SpringApplicationBuilder;
import org.springframework.boot.web.servlet.support.SpringBootServletInitializer;
import org.springframework.web.bind.annotation.RestController;

@RestController
@MapperScan("com.xxx.dao")  // MyBatis接口类所在位置
@SpringBootApplication(scanBasePackages={"com.xxx"}) //交给spring管理的bean包名
public class SpringBootApplicationController extends SpringBootServletInitializer {

    public static void main(String[] args) {
        SpringApplication.run(SpringBootApplicationController.class, args);
    }

    @Override
    protected SpringApplicationBuilder configure(SpringApplicationBuilder application) {
        return application.sources(SpringBootApplicationController.class);
    }
}
8.在写一个接口类
package com.xxx.controller;

import com.xxx.service.InfoService;
import org.springframework.beans.factory.annotation.Autowired;
import org.springframework.web.bind.annotation.RequestMapping;
import org.springframework.web.bind.annotation.RestController;

@RestController  //  该注解等同于  @ResponseBody + @Controller
public class Test{

    @Autowired
    private InfoService infoService;

    @RequestMapping("/hello")
    public String test() {
        return "Hello SpringBoot";
    }

    @RequestMapping(value = "/queryInfo")
    public Object queryInfo(Long id){
        return infoService.queryInfo(id);
    }

}
9.service
package com.xxx.service;

import com.xxx.entity.Info;

public interface InfoService {

    CustTaskInfo queryInfo(Long id);
}
package com.xxx.service.impl;

import com.xxx.dao.InfoDAO;
import com.xxx.entity.Info;
import com.xxx.service.InfoService;
import org.springframework.stereotype.Service;

import javax.annotation.Resource;

@Service
public class InfoServiceImpl implements InfoService {

    @Resource
    private InfoDAO InfoDAO;

    @Override
    public Info queryInfo(Long id) {
        return infoDAO.selectInfoById(id);
    }
}
10.mapper文件
可以访问 http://www.bejson.com/devtools/sql2pojo/ 使用建表sql生成实体类和mapper文件相关内容
此时启动main方法运行就可以正常使用了
