虽然明天面临着专业课的期中考试,但还是忍不住来写一篇文章,换一换口味!第二篇关于Mybatiis的增删改查可能写的过于长了,阅读时间已经达到24分钟了,很遗憾没能就很好的控制篇幅,还希望您多包涵!!!
好吧!步入正题,今天我们来熟悉Mybatis的注解方式而定用法,很是非常轻松的!所谓的注解方式就是把SQL语句写在接口里,而不是第二话那样放在xml文件里。这种方式,我在我们的项目里并没有用到,主要是因为把SQL和代码融合在一起,会使代码的维护性更差。我们一般在大的项目里面都是代码和SQL分离写,也就是我们之前把SQL写进XML文件的形式。但是,使用SQL注释的用法并不是一无是处,它也有自己的优点,就是对于一些简单的系统相对效率高,书写简单!
一、@Select注解
注释的字段映射如何实现的呢?有两种常见的方式,我们一个个介绍:
1.通过SQL语句别名来实现
在 com.mybatis.api.mapper.RoleMapper下添加代码:
public interface RoleMapper {
    @Select({"select * form tbl_role where id=#{id}"})
    Role selectById(Long id);
}
2.使用reultMap方式
    @Results({
            @Result(property = "id" , column = "id" ,id =true),
            @Result(property = "roleName" , column = "role_name"),
            @Result(property = "enabled" , column = "enabled" ),
            @Result(property = "createBy" , column = "create_by" ),
            @Result(property = "createTime" , column = "create_time" )
    })
    @Select({"select * form tbl_role where id=#{id}"})
    Role selectById2(Long id);
对于这种方法而言,是不是每一次写方法都要列写这些配置属性啊?这也太麻烦了吧......
但是自从MyBatis3.1.1版本开始,@Result增加了一个id属性,设置了属性就可以引用同一个@Results配置了,是不是很舒服哇
举例说明如下:
    @Results(id ="roleResultMap", value = {
            @Result(property = "id" , column = "id" ,id =true),
            @Result(property = "roleName" , column = "role_name"),
            @Result(property = "enabled" , column = "enabled" ),
            @Result(property = "createBy" , column = "create_by" ),
            @Result(property = "createTime" , column = "create_time" )
    })
    //引用该@Result配置
    @ResultMap("roleResultMap")
    @Select("select * form tbl_role")
List<Role> selectAll;但是值得注意的是,这时你的roleResultMap必须有对应的配置文件不然还是会报错,我们需要在RoleMapper.xml配置如下
<?xml version="1.0" encoding="UTF-8" ?>
<!DOCTYPE mapper
        PUBLIC "-//mybatis.org//DTD Mapper 3.0//EN"
        "http://mybatis.org/dtd/mybatis-3-mapper.dtd">
<!--   namespace定义了当前XML的命名空间 MyBatis就是根据这个值将接口和Url联系起来的-->
<mapper namespace="com.mybatis.api.mapper.RoleMapper">
    <resultMap id="roleResultMap" type="com.mybatis.api.model.Role">
        <id property="id" column="id"/>
        <result property="roleName" column="role_name"/>
        <result property="enabled" column="enabled"/>
        <result property="createBy" column="createBy"/>
        <result property="createTime" column="create_time"
                jdbcType="TIMESTAMP"/>
    </resultMap>
</mapper>
=======================================================================================
但是,其实我说我是报错的,因为我的mybatis版本是3.3.0,卧槽!无情!
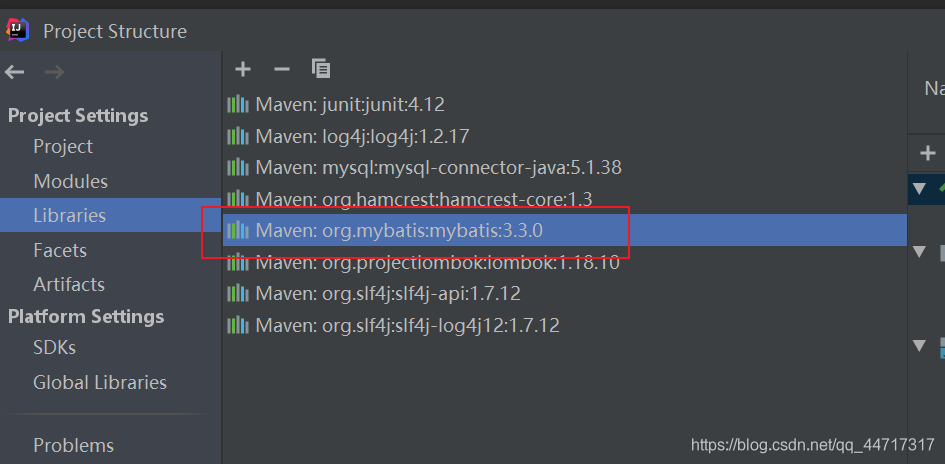
那我们就在pom文件里的myBatis依赖的地方修改下它的版本,将3.3.0改为3.3.1,然后等待下载即可

==============================================================================================
好了 回到本话题,方法我们写好了,接下来我们应该是要编写测试方法了,写在RoleMapperTest类下,我们分别写下对应的三个测试方法:
测试:selectById
    @Test
    public void testSelectById(){
        //获取sqlSession
        SqlSession sqlSession = getSqlSession();
        try{
            //获取RoleMapper接口
            RoleMapper roleMapper = sqlSession.getMapper(RoleMapper.class);
            //调用selectById方法,查询id为1的管理员
            Role role = roleMapper.selectById(1l);
            Assert.assertNotNull(role);
            Assert.assertEquals("管理员",role.getRoleName());
        }finally {
            sqlSession.close();
        }
    }
测试结果:
DEBUG [main] = ==>  Preparing: select id,role_name roleName,enabled,create_by createBy,create_time createTime from tbl_role where id=?
DEBUG [main] = ==> Parameters: 1(Long)
TRACE [main] = <==    Columns: id, roleName, enabled, createBy, createTime
TRACE [main] = <==        Row: 1, 管理员, 1, 1, 2019-11-07 20:13:26.0
DEBUG [main] = <==      Total: 1
测试:selectById2
    @Test
    public void testSelectById2(){
        SqlSession sqlSession = getSqlSession();
        try{
            RoleMapper roleMapper = sqlSession.getMapper(RoleMapper.class);
            Role role = roleMapper.selectById2(1l);
            Assert.assertNotNull(role);
            Assert.assertEquals("管理员",role.getRoleName());
        }finally {
            sqlSession.close();
        }
    }
测试结果:
DEBUG [main] = ==>  Preparing: select * from tbl_role where id=?
DEBUG [main] = ==> Parameters: 1(Long)
TRACE [main] = <==    Columns: id, role_name, enabled, create_by, create_time
TRACE [main] = <==        Row: 1, 管理员, 1, 1, 2019-11-07 20:13:26.0
DEBUG [main] = <==      Total: 1
测试:selectAll
    @Test
    public void testSelectAll(){
        SqlSession sqlSession = getSqlSession();
        try{
            RoleMapper roleMapper = sqlSession.getMapper(RoleMapper.class);
            List<Role> roles = roleMapper.selectAll();
            //结果不能为空
            Assert.assertNotNull(roles);
            //角色数量大于0
            Assert.assertTrue(roles.size()>0);
            //验证下划线子段是否映射成功
            Assert.assertNotNull(roles.get(0).getRoleName());
        }finally {
            sqlSession.close();
        }
    }
测试结果:
DEBUG [main] = ==>  Preparing: select * from tbl_role
DEBUG [main] = ==> Parameters:
TRACE [main] = <==    Columns: id, role_name, enabled, create_by, create_time
TRACE [main] = <==        Row: 1, 管理员, 1, 1, 2019-11-07 20:13:26.0
TRACE [main] = <==        Row: 2, 普通用户A, 1, 2, 2019-11-07 20:18:12.0
TRACE [main] = <==        Row: 3, 普通用户B, 1, 2, 2019-11-08 11:34:40.0
DEBUG [main] = <==      Total: 3
通过select我们就可可以发现,这样写sql语句每次编写sql都需要重新编译,非常不方便,因此在实际应用中不推荐应用!下面关于insert delete update就一笔带过了。嘻嘻嘻嘻 偷个懒
二、Provider注解
provider注解包括:selectProvider、insertProvider、deleteProvider、updateProvider四种Provider注解
这里还是以@selectProvider来了解Provider注解
(1)我们在 PrivilegeMapper类下写如下接口:
public interface PrivilegeMapper {
    @SelectProvider(type = PrivilegeProvider.class,method = "selectById")
    Privilege selectById(Long id);
     class PrivilegeProvider{
        public String selectById(final Long id){
            return new SQL(){
                {
                    SELECT("id,privilege_name,privilege_url");
                    FROM("tbl_privilege");
                    WHERE("id=#{id}");
                }
            }.toString();
        }
    }
}
(2)新建PrivilegeMapperTest类,并编写测试方法:
public class PrivilegeMapperTest extends BaseMapperTest{
    @Test
    public void testSelectById(){
        SqlSession sqlSession = getSqlSession();
        try{
            PrivilegeMapper privilegeMapper = sqlSession.getMapper(PrivilegeMapper.class);
            Privilege privilege = privilegeMapper.selectById(1l);
            Assert.assertNotNull(privilege);
            Assert.assertEquals("用户管理",privilege.getPrivilegeName());
        }finally {
            sqlSession.close();
        }
    }
}
DEBUG [main] = ==> Preparing: SELECT id,privilege_name,privilege_url FROM tbl_privilege WHERE (id=?)
DEBUG [main] = ==> Parameters: 1(Long)
TRACE [main] = <== Columns: id, privilege_name, privilege_url
TRACE [main] = <== Row: 1, 用户管理, /users
DEBUG [main] = <== Total: 1其实很大程度上对于0基础的来说,熟悉熟悉是蛮好了,虽然以后的项目中都不会怎么去使用它!也希望初学者不要过于纠结代码的实现,你只要清楚有这么一回事就可以了,会用就行了!
