现在,一到周六,想想还要继续上班,瞬间千万个不爽席卷而来,XXOO此处省略n字。。。
休息一天的好处在于,让你感觉一天休息时间格外珍贵,而坏处在于,劳资TMD还没休息过来,结果第二天又开始上班了,而且一连6天~!
神呐,Help me~!

本章目标
- 了解findViewById变迁之路,希望能给你的项目中带来变化;
前言
今天我们一块来聊聊项目常用的findViewById,这个东西可以简单理解为:
初始化控件,实例化控件,方便进行其他操作
一般来说,我们通常这么写:
    private void initView() {
        TextView tvTest = (TextView) findViewById(R.id.id_test);
    }
上面的例子很简单,只是初始化一个TextView,但是在实际项目中,每个Activity,Fragment或者Adapter中有n个控件,每个控件都需要我们实例化控件,才能对其进行操作,一次次的findViewById,感觉好烦呐~!
有没有好办法呢?当然有很多种方式,但是我们要找适合自己项目的,下面将会为大家依次举例说明~
变迁路 漫漫其修远兮
通过注解方式简化findViewById
在前几年,Xutils比较火爆,火爆的原因有很多,简单列举下,LZ更看好Xutils使用方便,至少为我们封装了很多常用的工具,就好比常用的恶心的图片处理,Xutils有很好的支持,同样,Xutils也支持注解方式去简化findViewById,简单举例如下:
// xUtils的view注解要求必须提供id,以使代码混淆不受影响。
@ViewInject(R.id.id_test)
TextView tvTest ;
比较出名的ButterKnife,之前LZ也对此专门学习了下,相关文章地址如下:
http://blog.csdn.net/u012400885/article/details/73729484
同理简单举例如下:
@BindView(R.id.id_test)
TextView tvTest;
以上简单为大家列举俩种,至少是LZ用到过的,当让有关支持注解方式的好用的还有很多,欢迎大家交流,一起学习~
个人封装findViewById
刚刚在网上搜索,突然看到有一哥儿们经过其老师启发,个人封装了一个,LZ看到感觉不错,先试试看看好不好用。
简单修改之后,通过测试,感觉还不错,下面为大家附上源码:
package cn.hlq.test;

import android.app.Activity;
import android.view.View;
import android.widget.ImageView;
import android.widget.TextView;

/**
 * Created by HLQ on 2017/6/25 0025.
 */
public class FindView {

    private static Activity activity;

    // 运用了单例模式中的饿汉式
    private static final FindView findView = new FindView();

    /**
     * 获取Activity实例
     *
     * @param activity
     */
    private static void setActivity(Activity activity) {
        FindView.activity = activity;
    }

    /**
     * 初始化FindView
     *
     * @param activitys
     * @return
     */
    public static FindView with(Activity activitys) {
        setActivity(activitys);
        return findView;
    }

    /**
     * 根据Id获取View实例
     *
     * @param id
     * @param <T>
     * @return
     */
    public <T extends View> T getView(int id) {
        View view = activity.findViewById(id);
        return (T) view;
    }

    /**
     * 设置TextView内容
     *
     * @param id
     * @param content
     * @return
     */
    public FindView setTextContent(int id, String content) {
        TextView textView = getView(id);
        textView.setText(content);
        return this;
    }

    /**
     * 设置ImageView 资源
     *
     * @param id
     * @param imgResource
     * @return
     */
    public FindView setImageResource(int id, int imgResource) {
        ImageView iv = getView(id);
        iv.setImageResource(imgResource);
        return this;
    }

}
那么我们该如何使用呢?简单说下,调用有如下俩种方式:
- 通过链式调用,你可以直接调用封装好的setText or setImgResource进行直接赋值;
- 通过链式调用getView获取控件实例,然后进行相应操作即可。
还有一点,大家可自行根据项目进行拓展封装类。
下面为大家附上具体俩种方式调用以及运行结果:
方式一 调用方式:
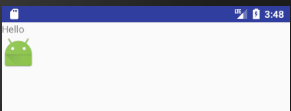
FindView.with(this).setTextContent(R.id.id_test, "Hello").setImageResource(R.id.iv_test,R.mipmap.ic_launcher);
运行结果:
方式二 调用方式:
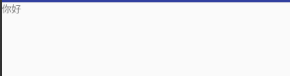
        TextView textView= FindView.with(this).getView(R.id.id_test);
        textView.setText("你好");
运行结果:
通过泛型来简化findViewById
一般来说我们会在BaseActivity中定义一个泛型获取View实例方法,如下:
    public final <E extends View> E getView(int id) {
        try {
            return (E) findViewById(id);
        } catch (ClassCastException ex) {
            Log.e("HLQ_Struggle", "Could not cast View to concrete class." + ex);
            throw ex;
        }
    }
调用很简单,如下:
        TextView textView = getView(R.id.id_test);
        textView.setText("你在干嘛");
这个结果就不必说了吧?
抽取泛型方法为公共类
这里和上一个方法类型,但是上一个方法或有一些缺陷就是,我在非Activtiy中调用怎么办呢?难不成要在各个Base中都要Copy一次?个人感觉不是很如意。
    /**
     * 获取控件实例
     * @param view
     * @param viewId
     * @param <T>
     * @return View
     */
    public static <T extends View> T viewById(View view, int viewId) {
        return (T) view.findViewById(viewId);
    }
这样一来,调用就有点恶心了,如下:
在Activitiy中调用方式如下:
TextView textView = UIHelper.viewById(selfActivity.getWindow().getDecorView(), R.id.id_test);
Fragment中调用如下:
TextView textView= UIHelper.viewById(getActivity().getWindow().getDecorView(), R.id.id_test);
如果喜欢来来回回Copy的同志,这也不妨是一种办法。
前方高能~
谷歌爸爸的DataBinding
话说这玩意LZ也是前几天才知道,之前从未关注过,不过简单了解后,发现确实很666,想必反射或者注解方式,性能上非常666;
下面引入目前来说比较6的说法:
DataBinding完全超越了findViewById!findViewById本质上是一次对view树的遍历查找,每次调用控件都会查找一次,虽然是O(n)的性能,但多次调用就变成了O(n)x m。但DataBinding则不然,通过一次遍历把所有的控件查找出来,然后赋值给对应的变量,完全不依赖findViewById,在任何情况下,复杂度都是O(n)。同样的是生成代码,但数据绑定框架提供了更多的功能,提高工作效率,编写更安全可靠的代码。
So,我们还有什么理由拒绝呢?
简单了解下吧,不然糊里糊涂的。
DataBinding简介
DataBinding,2015年IO大会介绍的一个框架,字面理解即为数据绑定。由于一般的开发过程中,Activity既需要做实现网络请求,又需要实现界面的渲染/用户之间的交互,如果一个页面的功能更为复杂,对后期的项目维护更加艰难。因此,推出该框架有利于简化功能模块,尽量将界面的渲染/用户交互的功能分化在单独的模块中。
感受DataBinding魅力
说啥也不如直接撸码来的实际,方便,快捷。下面通过一个简单的小例子,开启DataBinding Study。
1.build中配置开启DataBinding
    dataBinding {
        enabled = true
    }
2.编写我们的布局文件,在这里大家要记住以下几点:
- 布局文件根使用< layout >< /layout >包裹;
- < layout >下只能有一个节点,这点和ScrollView一样
基于以上俩点,编写实现我们的布局文件:
<?xml version="1.0" encoding="utf-8"?>
<layout xmlns:android="http://schemas.android.com/apk/res/android">

    <LinearLayout
        android:layout_width="match_parent"
        android:layout_height="match_parent"
        android:orientation="vertical">

        <TextView
            android:id="@+id/id_test"
            android:layout_width="wrap_content"
            android:layout_height="wrap_content"/>

        <ImageView
            android:id="@+id/iv_test"
            android:layout_width="wrap_content"
            android:layout_height="wrap_content"/>
    </LinearLayout>
</layout>
布局文件ok了之后,我们紧接着实现我们的Activity,话说怎么调用呢?瞧好吧您呐~
3.Activity中调用
Build一下项目,之后按照如下方式调用:
        ActivityMainBinding binding = DataBindingUtil.setContentView(this, R.layout.activity_main);
        binding.idTest.setText("Hi DataBinding~");
        binding.idTest.setOnClickListener(new View.OnClickListener() {
            @Override
            public void onClick(View view) {
                Toast.makeText(MainActivity.this, "响应点击事件~", Toast.LENGTH_SHORT).show();
            }
        });
关于以上内容,我们还可以这样写,假设,我们要显示学生姓名,那么接下来进行三步走。
一步走:定义简单实体类
package cn.hlq.test;

/**
 * Created by HLQ on 2017/6/26 0026.
 */

public class Student {

    public Student(String stuName) {
        this.stuName = stuName;
    }

    private String stuName;

    public String getStuName() {
        return stuName;
    }

    public void setStuName(String stuName) {
        this.stuName = stuName;
    }
}
二步走,修改layout文件:
<?xml version="1.0" encoding="utf-8"?>
<layout xmlns:android="http://schemas.android.com/apk/res/android">
    <data>
        <variable
            name="stu"
            type="cn.hlq.test.Student" />
    </data>
    <LinearLayout
        android:layout_width="match_parent"
        android:layout_height="match_parent"
        android:orientation="vertical">

        <TextView
            android:layout_width="wrap_content"
            android:layout_height="wrap_content"
            android:text="@{stu.stuName}"/>

        <ImageView
            android:id="@+id/iv_test"
            android:layout_width="wrap_content"
            android:layout_height="wrap_content"/>
    </LinearLayout>
</layout>
在此为大家简单说明下:
- < data >< /data >:绑定数据源 也就是你的实体类
- < variable >:基本参数配置
- name:别名 方便直接在控件中赋值
- type:指向实体类地址
三步走,Activity改怎么玩呢?
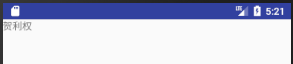
        ActivityMainBinding binding = DataBindingUtil.setContentView(this, R.layout.activity_main);
        binding.setStu(new Student("贺利权"));
瞧瞧运行结果,实践是检验真理的唯一标准
以上为大家简单举例了俩种实现方式。其他使用技能就需要大家自己get了。在此为大家提供官方api地址:
https://developer.android.google.cn/reference/android/databinding/package-summary.html
源码简单分析
在此,为大家说明下以上Activity调用内容。
Build后会为我们生成layout名称+Binding的一个文件,我们主要操作就是通过他去实现,我们一起相关调用类中是如何操作的。
首先要知道DataBinding是基于MVVM思想实现数据和UI绑定的框架,那么什么事MVVM,这里简单了解下即可:
MVVM是Model-View-ViewModel的简写,也可以简单理解为MVC升级,不过没用过,不知道有什么优势。估摸也是什么解耦和,可拓展吧。
基于之前说过的DataBinding通过一次遍历把所有的控件查找出来,然后赋值给对应的变量,那我们一起去看看DataBindingUtil里面是如何操作的。
1.点进去我们可以清楚的看到它调用了一个泛型setContentView方法,简单的翻译了下。
    /**
     * 设置Activity的内容视图为给定的布局并返回相关的绑定。
     * 给定的布局资源不能包含合并的布局。
     *
     * @param activity Activity视图应该改变活动的内容。
     * @param layoutId 布局的资源ID是引入,绑定,并设置为Activity的内容。

     * @return 绑定与膨胀的内容相关联的视图。
     */
    public static <T extends ViewDataBinding> T setContentView(Activity activity, int layoutId) {
        return setContentView(activity, layoutId, sDefaultComponent);
    }
2.继续往下看,通过设置layout,获取View实例以及查找要进行绑定改内容,之后通过bindToAddedViews方法返回。
    /**
     * Set the Activity's content view to the given layout and return the associated binding.
     * The given layout resource must not be a merge layout.
     *
     * @param bindingComponent The DataBindingComponent to use in data binding.
     * @param activity The Activity whose content View should change.
     * @param layoutId The resource ID of the layout to be inflated, bound, and set as the
     *                 Activity's content.
     * @return The binding associated with the inflated content view.
     */
    public static <T extends ViewDataBinding> T setContentView(Activity activity, int layoutId,
            DataBindingComponent bindingComponent) {
		// 设置ContentView
        activity.setContentView(layoutId);
		// 获取View实例
        View decorView = activity.getWindow().getDecorView();
		// 查找内容
        ViewGroup contentView = (ViewGroup) decorView.findViewById(android.R.id.content);
		// 返回绑定后添加的View
        return bindToAddedViews(bindingComponent, contentView, 0, layoutId);
    }
3.最后我们会发现他通过校验节点数量去绑定并添加View返回
    // 方法名键明其意 绑定并添加到View
	private static <T extends ViewDataBinding> T bindToAddedViews(DataBindingComponent component,
            ViewGroup parent, int startChildren, int layoutId) {
	    // 获取到parent下子节点数量
        final int endChildren = parent.getChildCount();
		// 校验其下节点数量
        final int childrenAdded = endChildren - startChildren;
        if (childrenAdded == 1) { // 如果只有一个节点,获取实例并添加绑定返回即可
            final View childView = parent.getChildAt(endChildren - 1);
            return bind(component, childView, layoutId);
        } else { // 如果不止一个节点,需要循环遍历添加
            final View[] children = new View[childrenAdded];
            for (int i = 0; i < childrenAdded; i++) {
                children[i] = parent.getChildAt(i + startChildren);
            }
            return bind(component, children, layoutId);
        }
    }
4.不知道大家有没有注意到DataBindingUtil有一个静态常量:
private static DataBinderMapper sMapper = new DataBinderMapper();
看名字,猜测应该是Map类型,具有key value,无可置疑。
点击去继续瞅瞅
package android.databinding;
import cn.hlq.test.BR;
class DataBinderMapper  {
    final static int TARGET_MIN_SDK = 24;
    public DataBinderMapper() {
    }
    public android.databinding.ViewDataBinding getDataBinder(android.databinding.DataBindingComponent bindingComponent, android.view.View view, int layoutId) {
        switch(layoutId) {
                case cn.hlq.test.R.layout.activity_main:
                    return cn.hlq.test.databinding.ActivityMainBinding.bind(view, bindingComponent);
        }
        return null;
    }
    android.databinding.ViewDataBinding getDataBinder(android.databinding.DataBindingComponent bindingComponent, android.view.View[] views, int layoutId) {
        switch(layoutId) {
        }
        return null;
    }
    int getLayoutId(String tag) {
        if (tag == null) {
            return 0;
        }
        final int code = tag.hashCode();
        switch(code) {
            case 423753077: {
                if(tag.equals("layout/activity_main_0")) {
                    return cn.hlq.test.R.layout.activity_main;
                }
                break;
            }
        }
        return 0;
    }
    String convertBrIdToString(int id) {
        if (id < 0 || id >= InnerBrLookup.sKeys.length) {
            return null;
        }
        return InnerBrLookup.sKeys[id];
    }
    private static class InnerBrLookup {
        static String[] sKeys = new String[]{
            "_all"};
    }
}
5.乱七八糟一堆,但是这里面大家有没有发现
switch(layoutId) {
                case cn.hlq.test.R.layout.activity_main:
                    return cn.hlq.test.databinding.ActivityMainBinding.bind(view, bindingComponent);
        }
多么熟悉的内容,这个不就是我们的layout吗!通过判断是哪儿个layout,从而进行绑定相应的源。
6.继续点击进去,我们会发现,首先会去view去校验是否添加了当前layout的tag,如果添加则会直接return为我们生成的ActivityMainBinding类中。
    public static ActivityMainBinding bind(android.view.View view, android.databinding.DataBindingComponent bindingComponent) {
        if (!"layout/activity_main_0".equals(view.getTag())) {
            throw new RuntimeException("view tag isn't correct on view:" + view.getTag());
        }
        return new ActivityMainBinding(bindingComponent, view);
    }
7.查看为我们生成ActivityMainBinding构造方法
    public ActivityMainBinding(android.databinding.DataBindingComponent bindingComponent, View root) {
        super(bindingComponent, root, 0);
		// 获取return的绑定View实例
        final Object[] bindings = mapBindings(bindingComponent, root, 3, sIncludes, sViewsWithIds);
		// 这个就不必说了吧
        this.idTest = (android.widget.TextView) bindings[1];
        this.ivTest = (android.widget.ImageView) bindings[2];
        this.mboundView0 = (android.widget.LinearLayout) bindings[0];
        this.mboundView0.setTag(null);
        setRootTag(root);
        // 设置相关监听 也可理解请求相关监听
        invalidateAll();
    }
简单的分析到这,不正之处欢迎大家指正一起进步
结束语
get技能 运用技能 发现问题 解决问题 记录问题
超神之路 挖坑不止 填坑不止
大家加油·
参考文献
- http://blog.csdn.net/arryluo123/article/details/51560181;
- http://www.jcodecraeer.com/a/anzhuokaifa/androidkaifa/2015/0212/2470.html;
- http://www.sohu.com/a/125595511_473801;
- https://developer.android.google.cn/reference/android/databinding/package-summary.html
