加载 yaml 配置文件
目前主要有3种方案
- @Value
- 适用于简单类型的注入(不支持复杂类型封装注解)
- 只能一个个指定
- 支持 SpringEl 语法
- @ConfigurationProperties(prefix = “A.B.C”)
- 可以根据变量名批量注入
- 且只需要指定一个前缀,就能绑定有这个前缀的所有属性值
- 不支持 SpringEl 语法
- 支持JSR303进行配置文件值及校验
- Environment
- 仅支持 boolean、int、string 和 list 的行内写法,功能比 @Value 还弱
指定配置文件路径
PropertySource 指定路径,对于当前 Spring Boot 2.X 版本而言,默认仅能支持 *.properties,还不支持 *.yml 文件,因此我们需要修改默认的构造工厂,那么先来看看默认的构造工厂是怎么实现的。
源码解读
PropertySource
public @interface PropertySource {
    /**
	 * 加载资源的别名,如果不设置的话会从资源路径中提取文件名
	 */
    String name() default "";

    /**
     * 加载资源的路径,可使用classpath,如: "classpath:/config/test.yml"
     * 如果有多个文件路径放在{}中,使用','号隔开,如:{"classpath:/config/test1.yml","classpath:/config/test2.yml"}
     * 除使用classpath外,还可使用文件的地址,如:"file:/rest/application.properties"
	 * 当然不加前缀也是可以的
     */
    String[] value();
    /**
	 * 资源路径找不到文件后是否报错
	 */
    boolean ignoreResourceNotFound() default false;

    /**
	 * 配置文件编码,一般设为 utf-8
	 */
    String encoding() default "";

    /**
     * 读取资源文件的工厂类
     */
    Class<? extends PropertySourceFactory> factory() default PropertySourceFactory.class;
}
DefaultPropertySourceFactory
public class DefaultPropertySourceFactory implements PropertySourceFactory {
    public DefaultPropertySourceFactory() {
    }
	/*
	* 如果显示指定了name,则用该名字创建 ResourcePropertySource,否则不用
	* EncodedResource是对Resource的简单包装,增加了具体编码的属性
	*/
    public PropertySource<?> createPropertySource(@Nullable String name, EncodedResource resource) throws IOException {
        return name != null ? new ResourcePropertySource(name, resource) : new ResourcePropertySource(resource);
    }
}
ResourcePropertySource
public class ResourcePropertySource extends PropertiesPropertySource {
	/*
	* 资源的原始名字(父类中的name,表示资源的别名)
	*/
	private final String resourceName;
	……
	/**
	* 当有指定别名的时候,需要记录原始名
	*/
	public ResourcePropertySource(String name, EncodedResource resource) throws IOException {
		super(name, PropertiesLoaderUtils.loadProperties(resource));
		this.resourceName = getNameForResource(resource.getResource());
	}

	/**
	* 如果资源没有别名,则不用另外记录
	*/
	public ResourcePropertySource(EncodedResource resource) throws IOException {
		super(getNameForResource(resource.getResource()), PropertiesLoaderUtils.loadProperties(resource));
		this.resourceName = null;
	}

	/**
	* 获取资源时,同时查询原始名和别名
	*/
	public ResourcePropertySource withName(String name) {
		if (this.name.equals(name)) {
			return this;
		}
		// Store the original resource name if necessary...
		if (this.resourceName != null) {
			if (this.resourceName.equals(name)) {
				return new ResourcePropertySource(this.resourceName, null, this.source);
			}
			else {
				return new ResourcePropertySource(name, this.resourceName, this.source);
			}
		}
		else {
			// Current name is resource name -> preserve it in the extra field...
			return new ResourcePropertySource(name, this.name, this.source);
		}
	}
	……
}
Yaml 构造工厂
由于默认的 DefaultPropertySourceFactory 仅支持 *.properties 后缀的文件,因此需要对 Yaml 自定义一个构造工厂,继承于默认的属性构造工厂(DefaultPropertySourceFactory )。
有两种方式可以通过 EncodedResource 资源加载 yaml
- YamlPropertySourceLoader
private PropertySource<?> loadYaml(String name, EncodedResource resource) throws IOException {
	Resource res = resource.getResource();
	String sourceName = name != null ? name : res.getFilename();
	//注意这里的name不能为空,因为其中的源码包含了,Assert.hasText(name, "Property source name must contain at least one character");
	List<PropertySource<?>> sources = new YamlPropertySourceLoader().load(res.getFilename(), res);
	return sources.get(0);
}
- YamlPropertiesFactoryBean
private PropertySource<?> loadYaml(String name, EncodedResource resource) {
	YamlPropertiesFactoryBean factory = new YamlPropertiesFactoryBean();
	factory.setResources(resource.getResource());
	factory.afterPropertiesSet();
	Properties properties = factory.getObject();
	String sourceName = name != null ? name : resource.getResource().getFilename();
	//注意这里的name不能为空,因为其中的源码包含了,Assert.hasText(name, "Property source name must contain at least one character");
	return new PropertiesPropertySource(sourceName, properties);
}
同时支持 properties 和 yaml 的混合工厂
通过判断后缀,如果是 *.yaml 或者 *.yml 则通过上面方案构造,否则通过默认的工厂构造
public class MixPropertySourceFactory extends DefaultPropertySourceFactory {

	@Override
	public PropertySource<?> createPropertySource(String name, EncodedResource resource) throws IOException {
		if(resource == null) return super.createPropertySource(name, resource);
		Resource res = resource.getResource();
		String sourceName = name != null ? name : res.getFilename();
		if (!resource.getResource().exists()) {
			return new PropertiesPropertySource(null, new Properties());
	    } else if(sourceName.endsWith(".yml") || sourceName.endsWith(".yaml")) {
	    	return loadYaml_1(name, resource);
	    	//return loadYaml_2(name, resource);
		} else {
			return super.createPropertySource(name, resource);
		}
	}

	private PropertySource<?> loadYaml_1(String name, EncodedResource resource) throws IOException {
		Resource res = resource.getResource();
		String sourceName = name != null ? name : res.getFilename();
		//注意这里的name不能为空,因为其中的源码包含了,Assert.hasText(name, "Property source name must contain at least one character");
		List<PropertySource<?>> sources = new YamlPropertySourceLoader().load(res.getFilename(), res);
		return sources.get(0);
	}

	private PropertySource<?> loadYaml_2(String name, EncodedResource resource) {
		YamlPropertiesFactoryBean factory = new YamlPropertiesFactoryBean();
		factory.setResources(resource.getResource());
		factory.afterPropertiesSet();
		Properties properties = factory.getObject();
		String sourceName = name != null ? name : resource.getResource().getFilename();
		//注意这里的name不能为空,因为其中的源码包含了,Assert.hasText(name, "Property source name must contain at least one character");
		return new PropertiesPropertySource(sourceName, properties);
	}
}
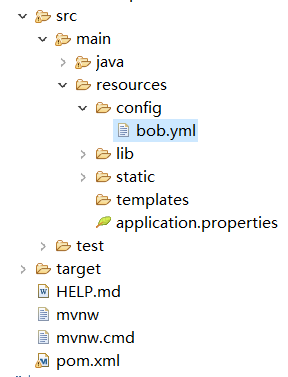
创建测试用的 yaml 文件
在 resources 目录下,创建 config 文件夹,然后新建一个 bob.yml 文件,添加上如下测试文本。
井号( # )表示单行注释
接下来,我们要对如下类型分别进行测试
intbooleanStringString[]List<String>Set<String>Map<String, String>List<Map<String, String>>
引号的区别
- 不加引号,等同于单引号。
- 单引号,会对转义字符进行转义,从而使得转义字符失去转义效果,字符串原样输出。
- 双引号,转义字符会被解释为其应有的含义。
大小写、横杠、下划线
yaml 文件对大小写不敏感,在 java 注解中横杠和下划线写不写都可以读出数据
person:
 bob:
  age: 26
  male: true
  company: tencentQQ

  pet1:  #array
   - rabbit
   - tortoise
   - carp
   - tortoise
  pet2:  #list
   - rabbit
   - tortoise
   - carp
   - tortoise
  pet3:  #set
   - rabbit
   - tortoise
   - carp
   - tortoise
  plant: rose,lily,sunflower,pear,lily #list 行内写法
  languageEL: #使用StringEL表达式将字符串切分成数组
   "java,C#,python"

  friend: {teacher: 'Jane', musician: 'F.I.R', scientist: 'Einstein'}
  friendEL:  #使用StringEL表达式获取map
   "{teacher: 'Jane', musician: 'F.I.R', scientist: 'Einstein'}"
  family: #map
   father: Trump
   mother: Tina
   brother: Tom

  play-game:  #list<map>
    - name: GBA
      years: 5
    - name: Srike of Kings
      years: 3
    - name: Dragon Nest
      years: 2

  quote-1: 'a<br>man\tof\nmany\ntalents, his age is ${age} and his company is ${person.bob.company}'
  quote-2: "a<br>tman\tof\nmany\ntalents, his age is ${age} and his company is ${person.bob.company}"
使用 @Value 逐个注入属性
创建一个控制类,当访问指定网页时,将变量打印出来。
访问时注意大小写,且不能加后缀。比如,这里配置的 @GetMapping("/testValue"),那么就只能通过 localhost:8080/testValue 来访问
@Value 注解不用指定配置文件位置,就可以自动装配。
代码
@RestController
public class TestController {

	@Value("${person.bob.age}")
	private int age;
	@Value("${person.bob.male}")
	private boolean male;
	@Value("${person.bob.company}")
	private String company;

//	@Value("${person.bob.pet1}")
	private String[] pet1;
//	@Value("${person.bob.pet2}")
	private List<String> pet2;
//	@Value("${person.bob.pet3}")
	private Set<String> pet3;
	@Value("${person.bob.plant}")
	private List<String> plant;
	@Value("#{'${person.bob.languageEL}'.split(',')}")
	private List<String> languageEL;

//	@Value("${person.bob.friend}")
	private Map<String, String> friend;
	@Value("#{${person.bob.friendEL}}")
	private Map<String, String> friendEL;
//	@Value("#{${person.bob.family}}")
	private Map<String, String> family;
//	@Value("#{${person.bob.play-game}}")
	public List<Map<String, String>> playgame;

	@Value("${person.bob.quote-0}")
	private String quote0;
	@Value("${person.bob.quote-1}")
	private String quote1;
	@Value("${person.bob.quote-2}")
	private String quote2;

	@GetMapping("/testValue")
	public YamlConfig testValue() {
		YamlConfig config = new YamlConfig(age, male, company, pet1, pet2, pet3, plant, languageEL, friend, friendEL, family, playgame, quote0, quote1, quote2);
		System.out.println(config);
		return config;
	}
}
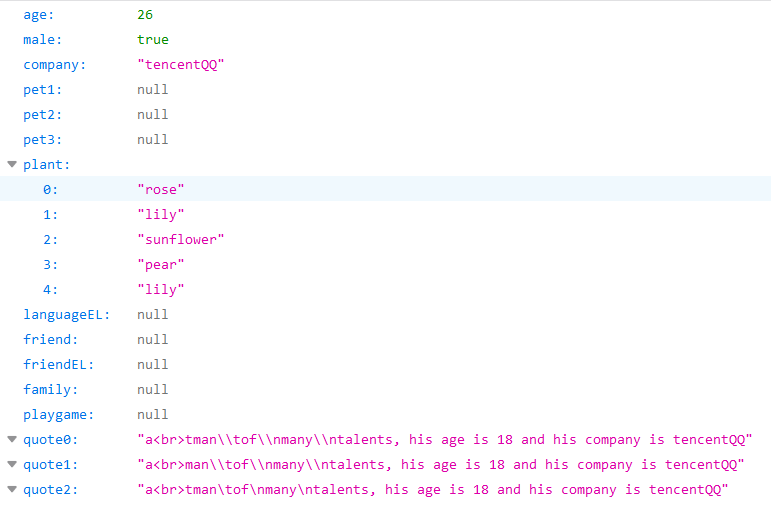
输出结果
YamlConfig(age=26, male=true, company=tencentQQ, pet1=null, pet2=null, pet3=null, plant=[rose, lily, sunflower, pear, lily], languageEL=[java, C#, python], friend=null, friendEL={teacher=Jane, musician=F.I.R, scientist=Einstein}, family=null, playgame=null, quote0=a<br>tman\tof\nmany\ntalents, his age is 18 and his company is tencentQQ, quote1=a<br>man\tof\nmany\ntalents, his age is 18 and his company is tencentQQ, quote2=a<br>tman	of
many
talents, his age is 18 and his company is tencentQQ)
总结
@Value 只适用于简单类型,如 String、int、Boolean。对于 List 和 Map 这种复杂类型,则需要借助 SpringEL 表达式来实现。因此它仅适合于获取少量且简单的属性。
使用 @ConfigurationProperties 批量自动装配
这里用到了 lombok,需要使用安装 lombok 插件,并在pom.xml 中添加 lombok 依赖
<dependency>
    <groupId>org.projectlombok</groupId>
    <artifactId>lombok</artifactId>
    <version>1.18.8</version>
    <scope>provided</scope>
</dependency>
<dependency>
	<groupId>org.springframework.boot</groupId>
	<artifactId>spring-boot-configuration-processor</artifactId>
	<optional>true</optional>
</dependency>
源代码
YamlConfig.java
@NoArgsConstructor
@AllArgsConstructor
@Data
@Validated //JSR303校验,例如@NotNull

@Component
//可以引用多个配置文件,中间用逗号隔开,配置文件可以以"classpath:"、或"file:"打头
@PropertySource(value= "config/bob.yml", encoding = "utf-8", factory = MixPropertySourceFactory.class)
@ConfigurationProperties(prefix = "person.bob", ignoreInvalidFields = true, ignoreUnknownFields = true)
public class YamlConfig {
	@NotNull
	private int age;
	private boolean male;
	private String company;
	private String[] pet1;
	private List<String> pet2;
	private Set<String> pet3;

	private List<String> plant;
	private List<String> languageEL;

	private Map<String, String> friend;
	@Value("#{${person.bob.friendEL}}")
	private Map<String, String> friendEL;
	private Map<String, String> family;

	private List<Map<String, String>> playgame;

	private String quote0;
	private String quote1;
	private String quote2;

}
TestController.java
@RestController
public class TestController {
    @Autowired
    private YamlConfig config;

	@GetMapping("/testConf")
	public YamlConfig testConf() {
		System.out.println(config);
		return config;
	}
}
输出结果
YamlConfig(age=26, male=true, company=tencentQQ, pet1=[rabbit, tortoise, carp, tortoise], pet2=[rabbit, tortoise, carp, tortoise], pet3=[rabbit, tortoise, carp], plant=[rose, lily, sunflower, pear, lily], languageEL=[java, C#, python], friend={teacher=Jane, musician=F.I.R, scientist=Einstein}, friendEL={teacher=Jane, musician=F.I.R, scientist=Einstein}, family={father=Trump, mother=Tina, brother=Tom}, playgame=[{name=GBA, years=5}, {name=Srike of Kings, years=3}, {name=Dragon Nest, years=2}], quote0=a<br>tman\tof\nmany\ntalents, his age is 18 and his company is tencentQQ, quote1=a<br>man\tof\nmany\ntalents, his age is 18 and his company is tencentQQ, quote2=a<br>tman	of
many
talents, his age is 18 and his company is tencentQQ)
总结
该方案可以自动装配上面列举的所有类型。如果yaml里面的是StringEL的字符串,可以配合上@Value 注解进行解析。
使用环境变量 Environment 装配
源代码
@RestController
//首先要声明配置文件的位置
@PropertySource(value= "config/bob.yml", encoding = "utf-8", factory = MixPropertySourceFactory.class)
public class TestController {
	@Autowired
	private Environment env;

	@GetMapping("/testEnv")
	public YamlConfig testEnv() {
		int age = env.getProperty("person.bob.age", Integer.class);
		boolean male = env.getProperty("person.bob.male", Boolean.class);
		String company = env.getProperty("person.bob.company");

		String[] pet1 = env.getProperty("person.bob.pet1", String[].class);
		List<String> pet2 = env.getProperty("person.bob.pet2", List.class);
		Set<String> pet3 = env.getProperty("person.bob.pet3", Set.class);
		List<String> plant = env.getProperty("person.bob.plant", List.class);
		List<String> languageEL = env.getProperty("#{'${person.bob.languageEL}'.split(',')}", List.class);

		Map<String, String> friend = env.getProperty("person.bob.friend", Map.class);
		Map<String, String> friendEL = env.getProperty("#{${person.bob.friendEL}}", Map.class);
		Map<String, String> family = env.getProperty("person.bob.family", Map.class);
		List<Map<String, String>> playgame = env.getProperty("person.bob.play-game", List.class);

		String quote0 = env.getProperty("person.bob.quote-0");
		String quote1 = env.getProperty("person.bob.quote-1");
		String quote2 = env.getProperty("person.bob.quote-2");

		YamlConfig config = new YamlConfig(age, male, company, pet1, pet2, pet3, plant, languageEL, friend, friendEL,
				family, playgame, quote0, quote1, quote2);
		System.out.println(config);
		return config;
	}
}
输出结果
总结
Environment 仅支持 boolean、int、string 和 list 的行内写法,功能比 @Value 还弱
