之前一段时间学习了swift,基本的使用已经掌握,所以现在想练习一下,看到网上一个加载动画,所以跟着做了一下,效果图如下:

可以看到的是三个圆进行交替运动,以及圆的颜色也有渐变的效果,挺好看的,嘿嘿。
下面说一下原理以及部分代码:
1.首先就是圆的位置,三个圆大小相同并且圆心距相同,所以我自己在本上画了大致的方位图(跟iOS的屏幕坐标系不同现在只是说一个例子,请自行忽略坐标系)
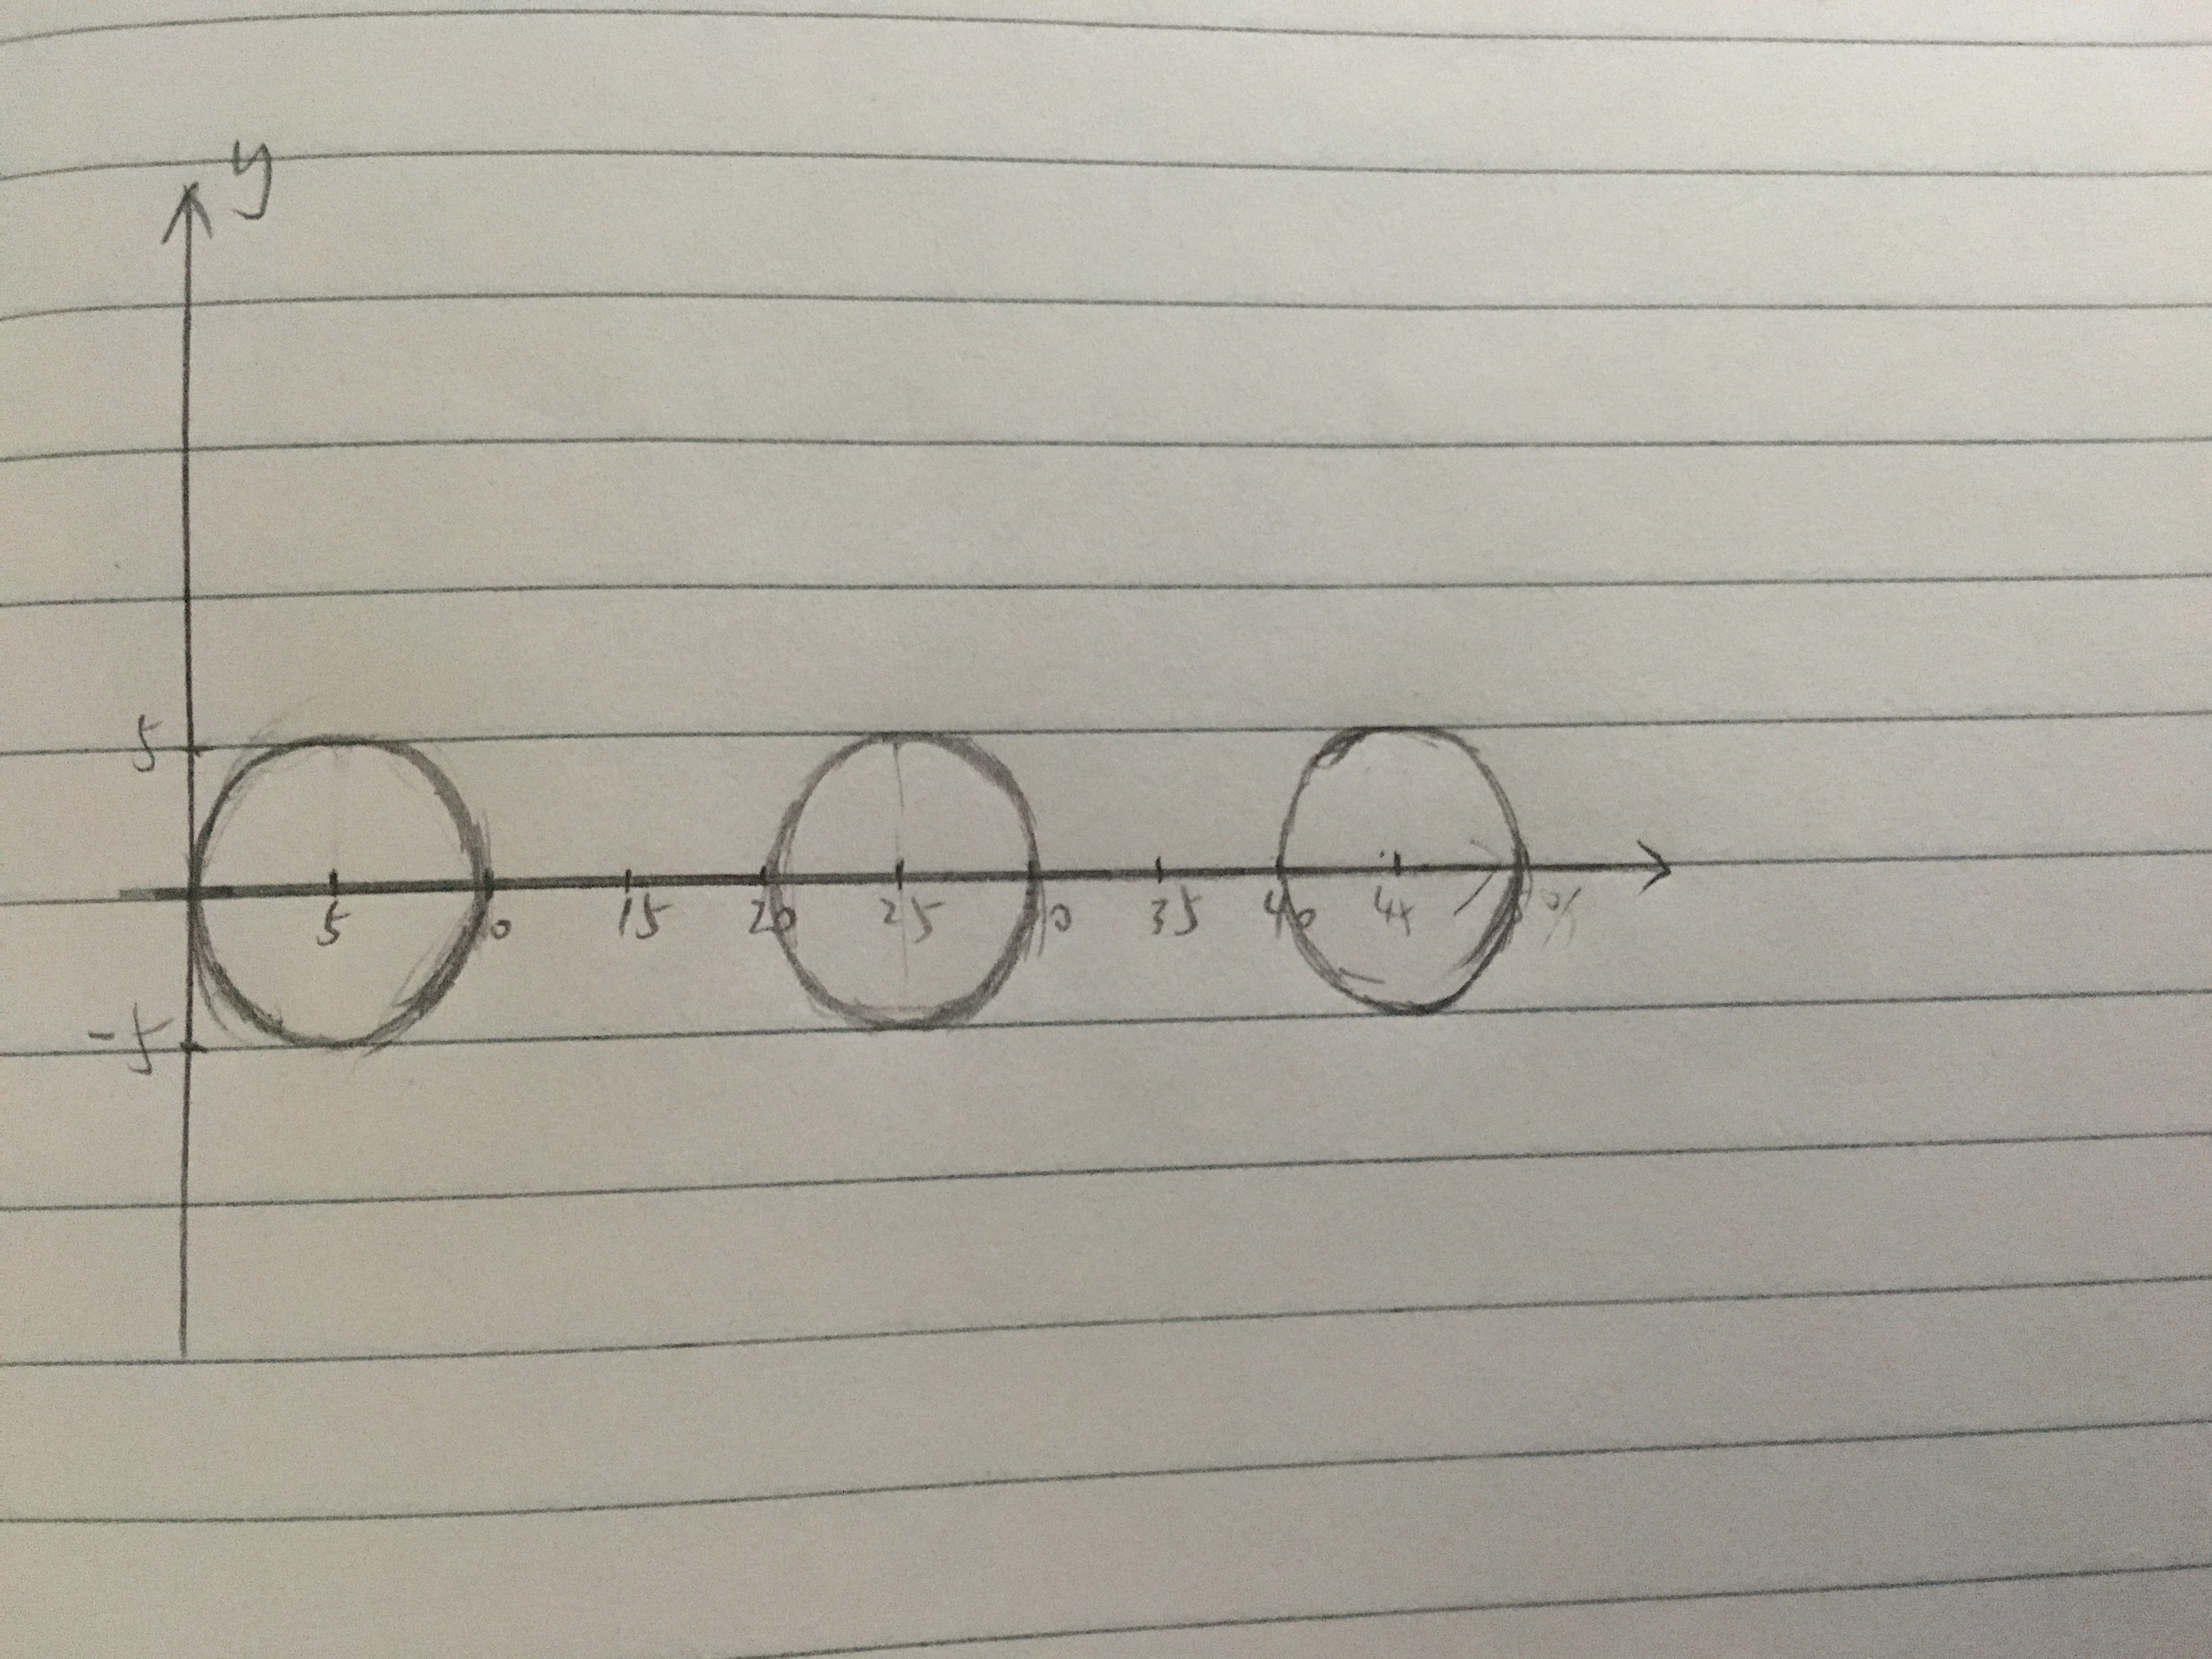
三个圆心的坐标分别为(5,0)(25,0)(45,0),圆的半径为5
2.首先是第一个圆的运动轨迹:
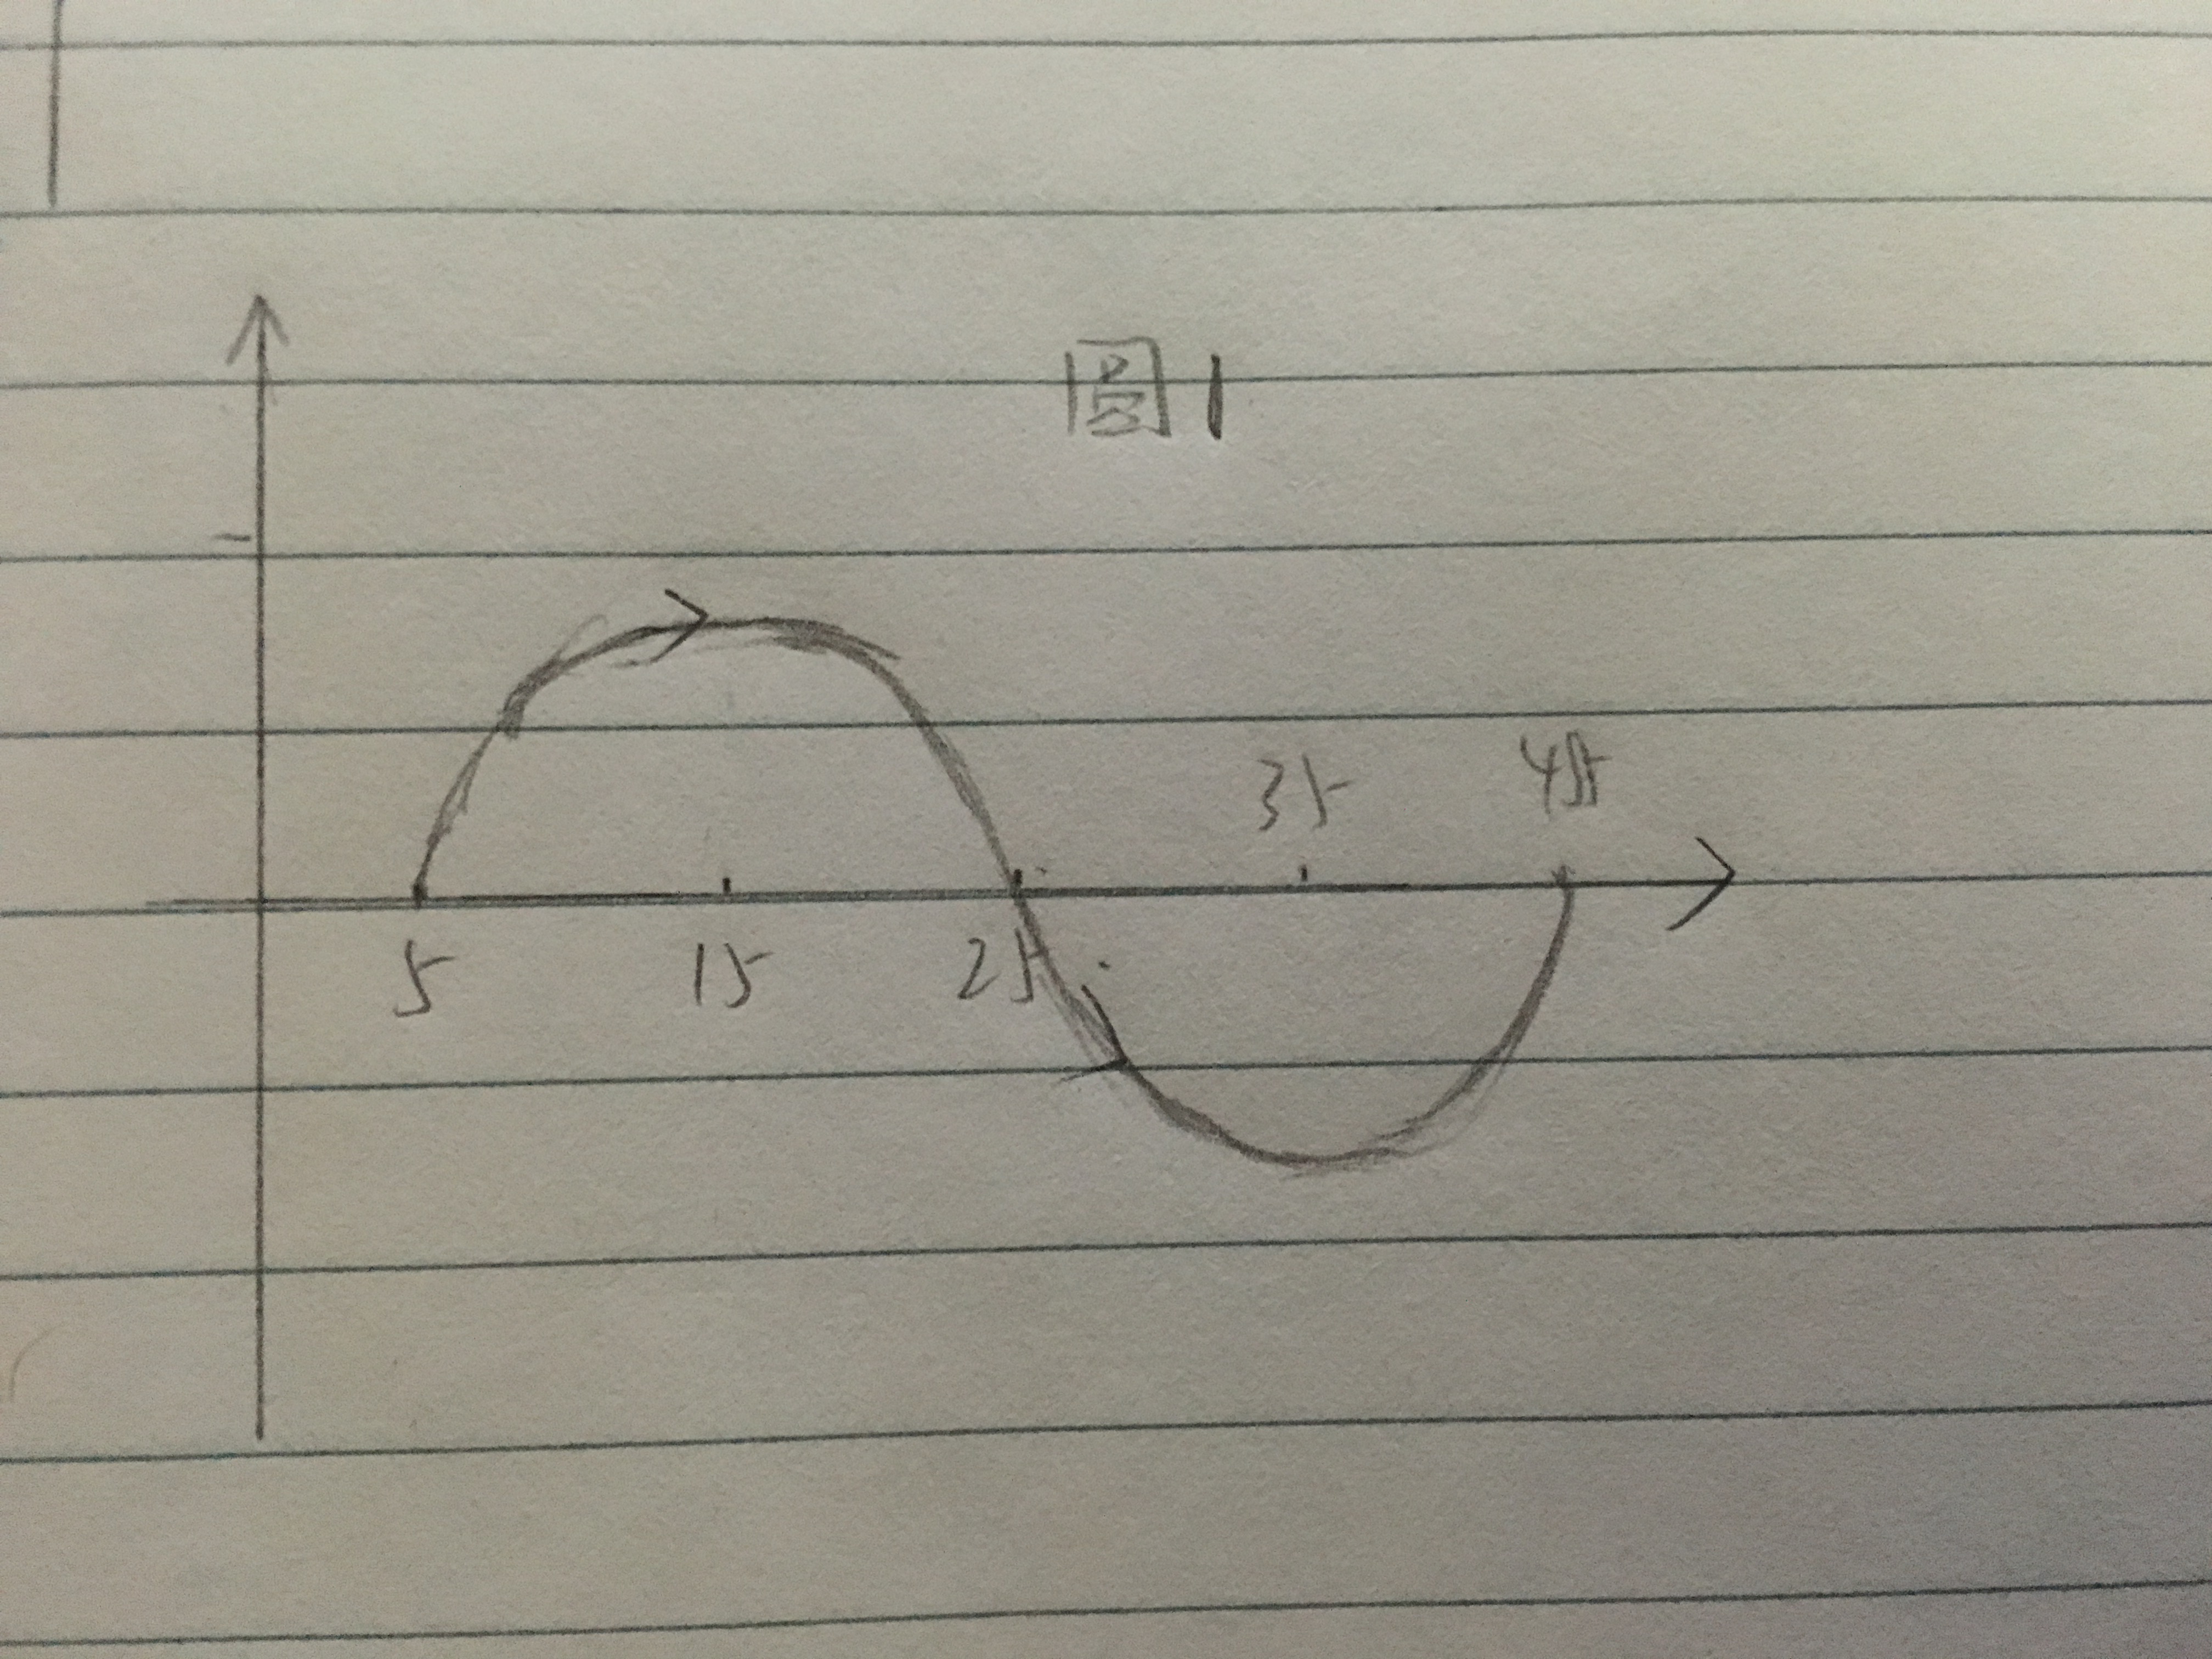
圆1的运动轨迹就是由两个半圆组成的,两个半圆的圆心分别是(15,0)(35,0),直径是圆1的圆心到圆2的圆心的距离20。知道轨迹的组成就是用贝塞尔曲线进行绘制:
        //第一个圆的运行轨迹
        let path1 = UIBezierPath.init()
        //指定圆形的圆心和开始的结束的角度 clockwise:是否顺时针
        //前半段的轨迹
        path1.addArc(withCenter: otherRoundCenter1, radius: 10, startAngle: -CGFloat(M_PI), endAngle: 0, clockwise: true)
        //后半段的轨迹
        let path1_1 = UIBezierPath.init()
        path1_1.addArc(withCenter: otherRoundCenter2, radius: 10, startAngle: -CGFloat(M_PI), endAngle: 0, clockwise: false)
        //将两个轨迹合并
        path1.append(path1_1)
同理,第二个和第三个圆的轨迹如图:
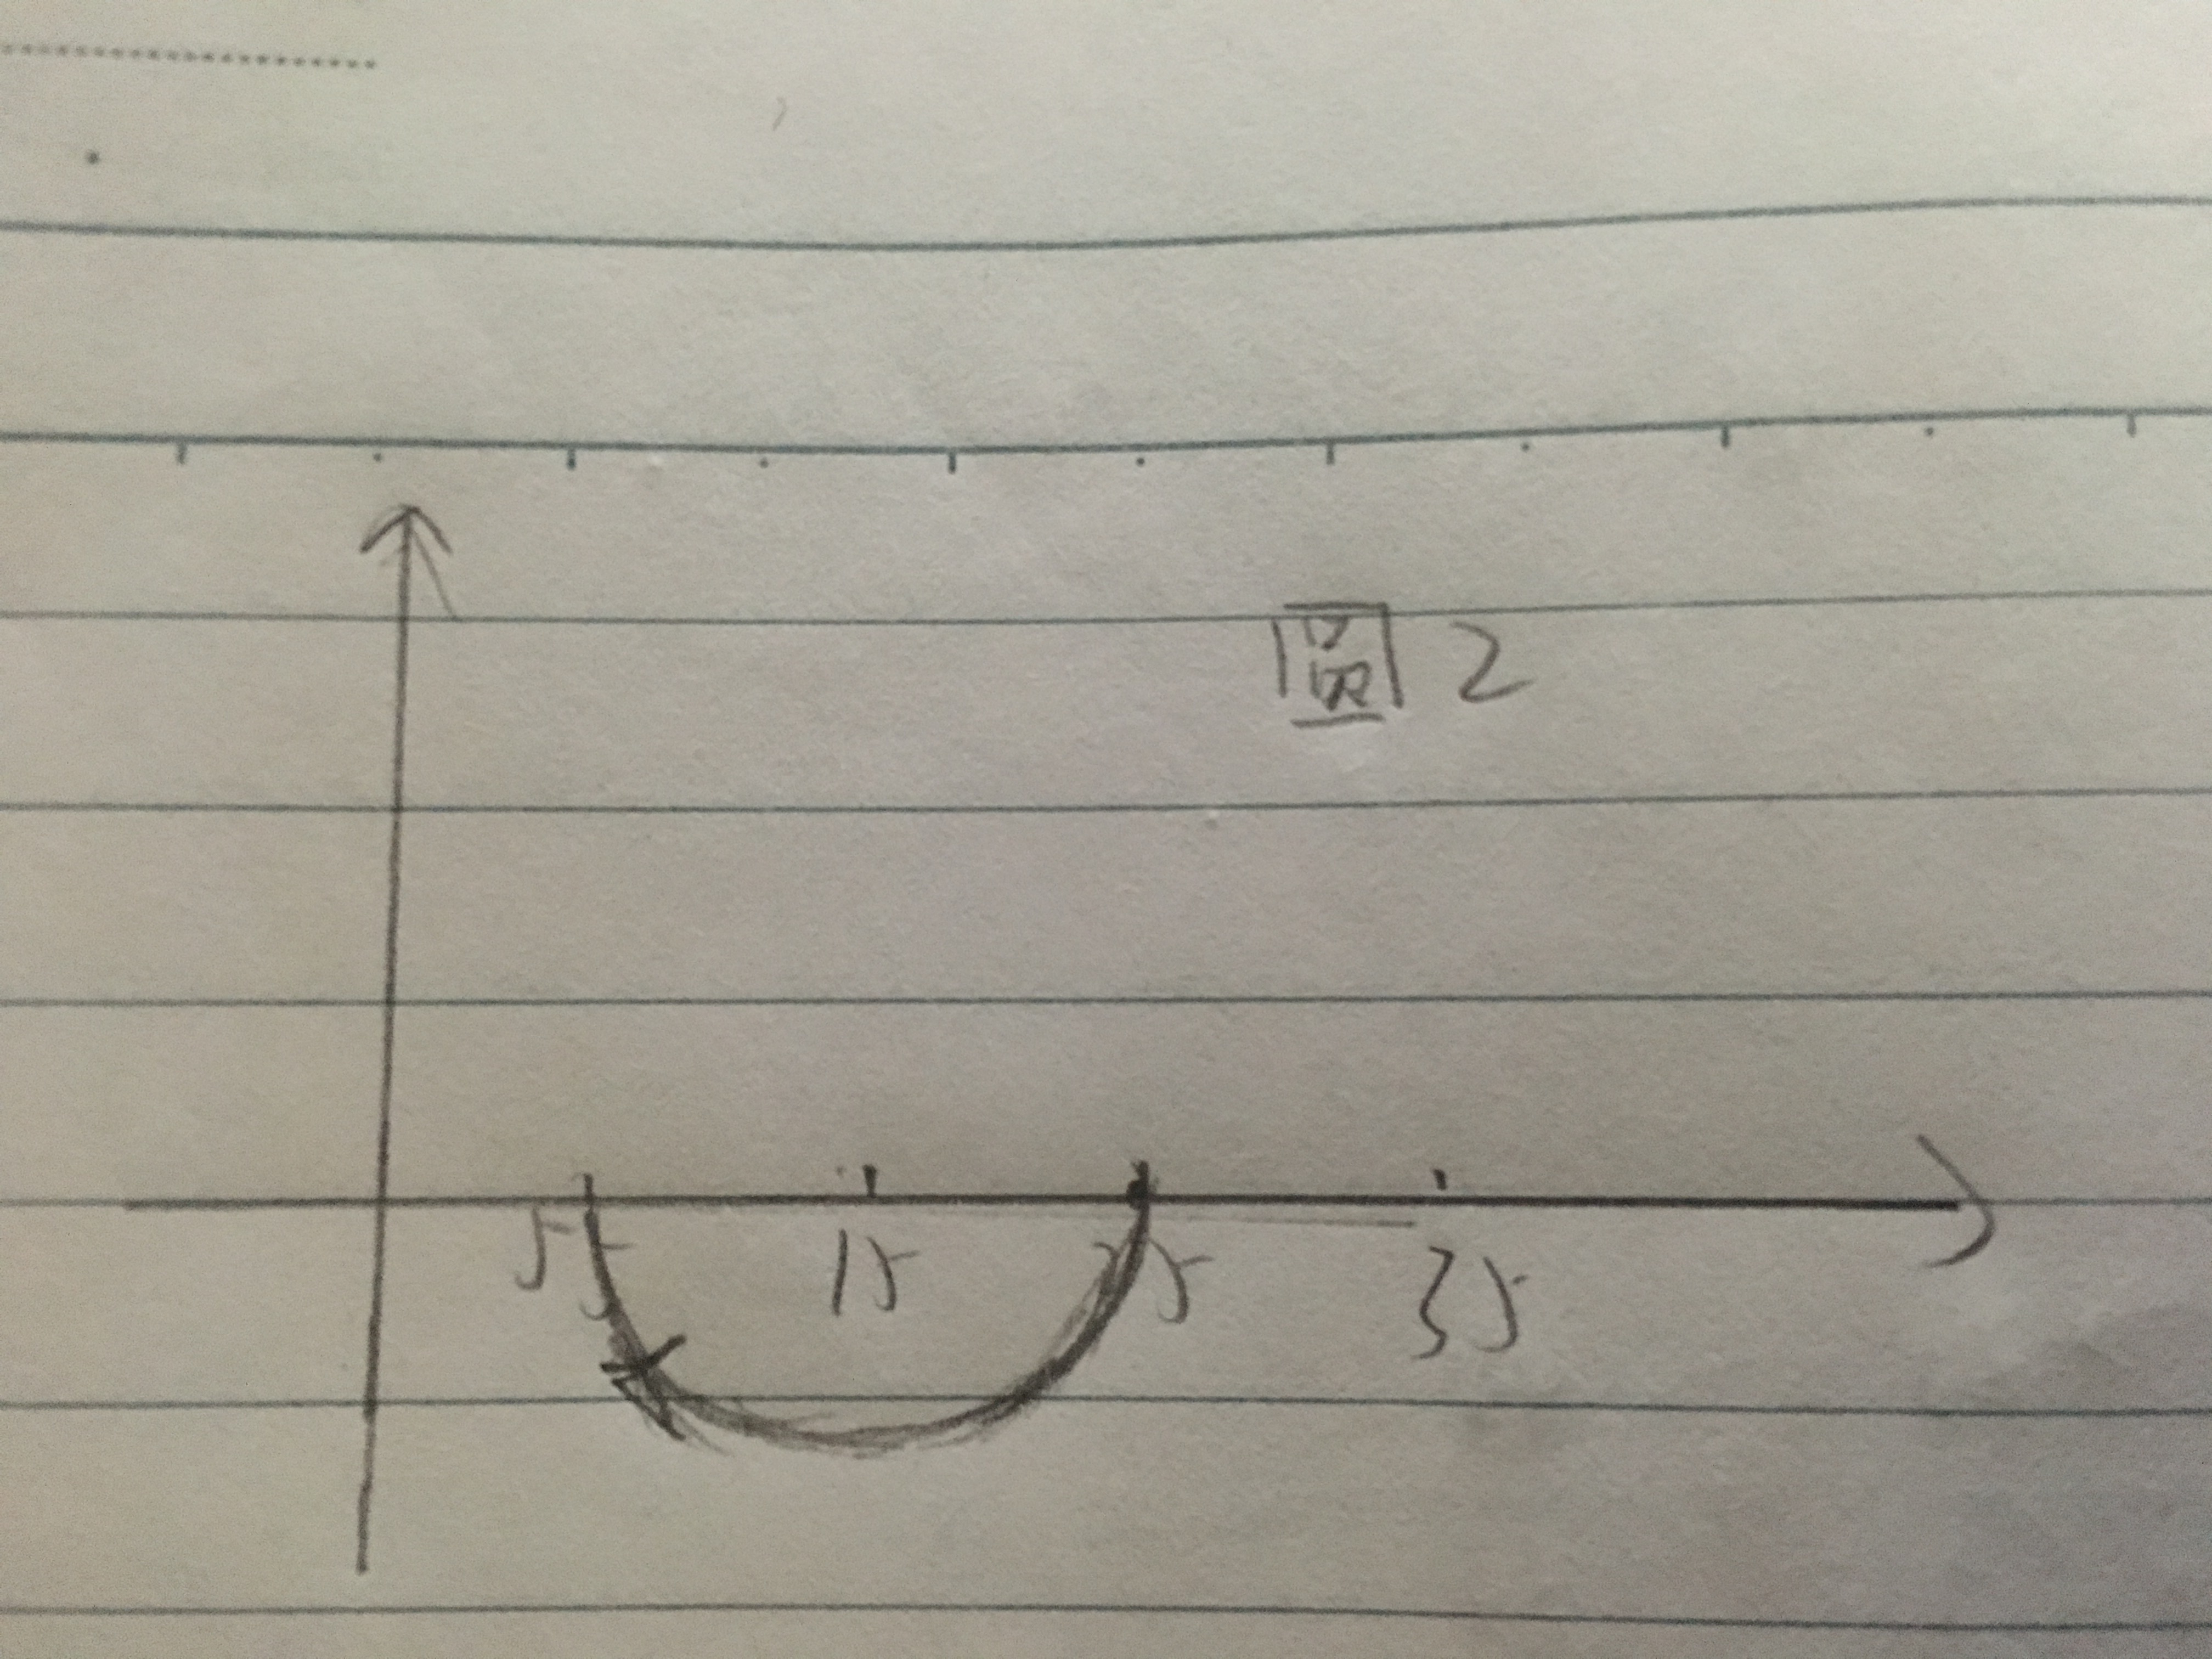
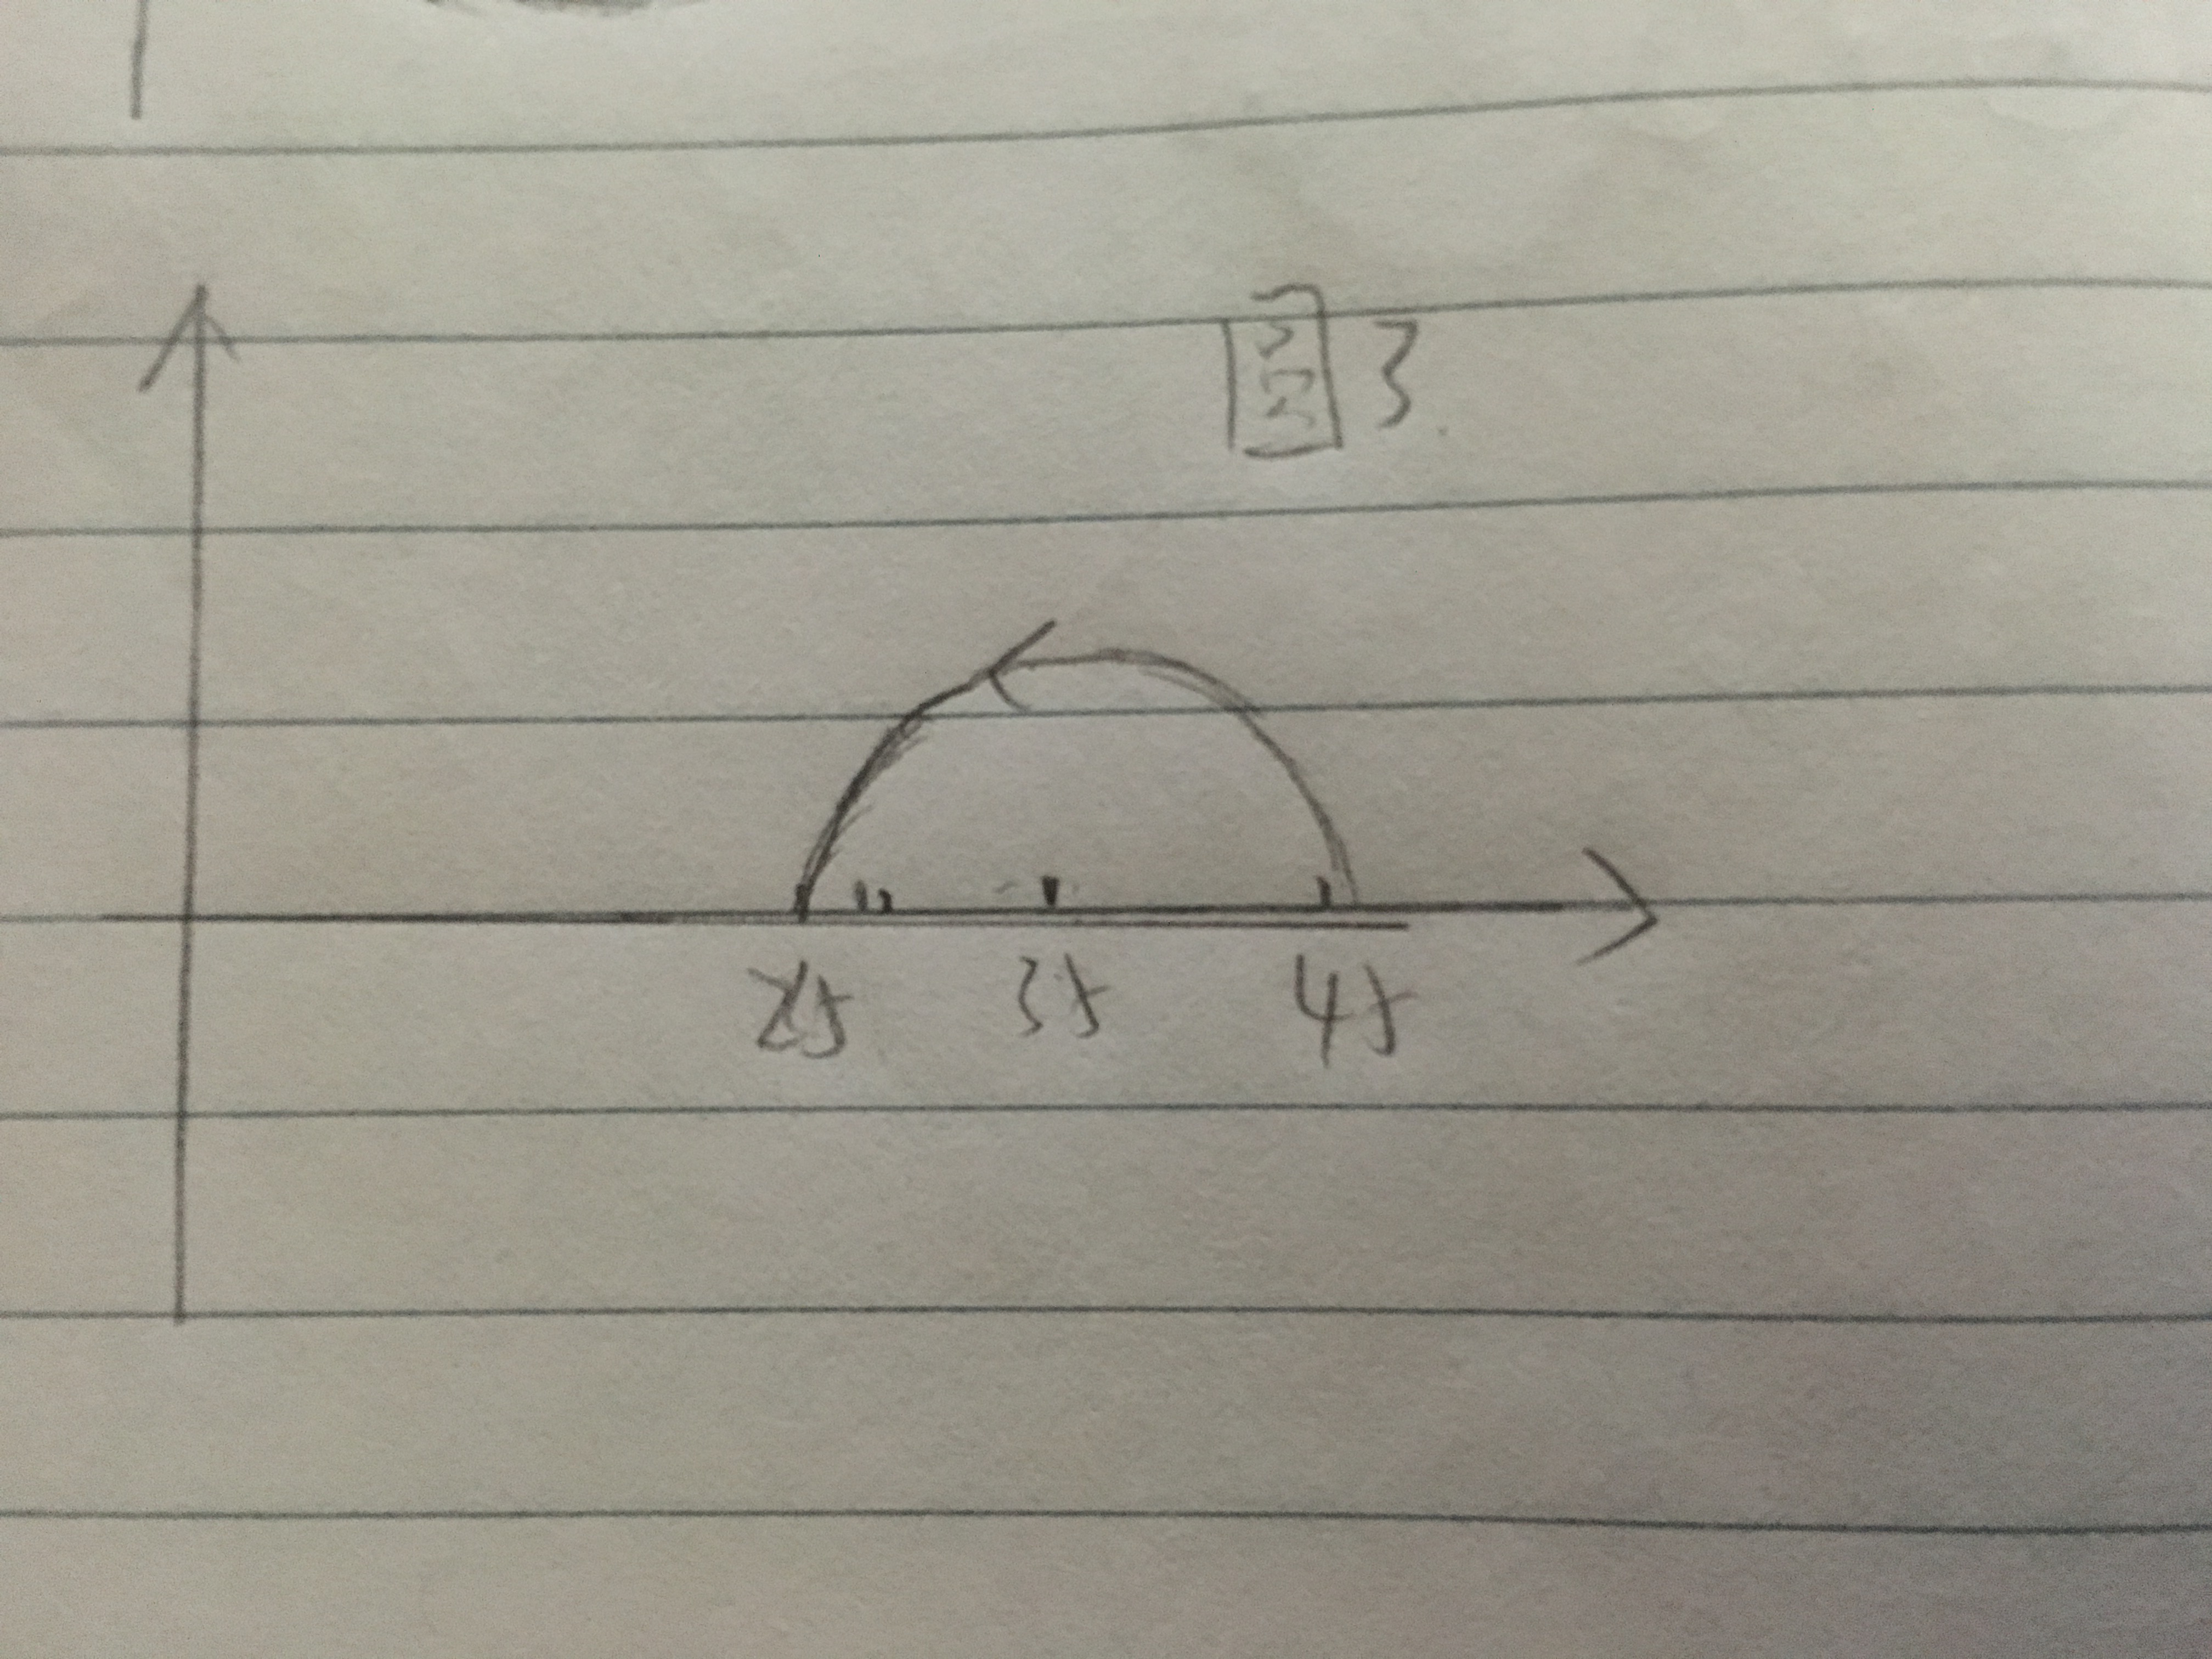
圆2和圆3都是两个半圆,只不过两个运动方向不一样,所以贝塞尔曲线如下:
 //第二个圆的运行轨迹
        let path2 = UIBezierPath.init()
        path2.addArc(withCenter: center1, radius: 10, startAngle: 0, endAngle: CGFloat(M_PI), clockwise: true)
 //第三个圆的轨迹
        let path3 = UIBezierPath.init()
        path3.addArc(withCenter: center2, radius: 10, startAngle: 0, endAngle: CGFloat(M_PI), clockwise: false)
3.路线规划好了以后就是添加动画效果,这里小球移动使用CAKeyframAnimation,而小球颜色的改变就使用CABasicAnimation就可以了。
小球移动的代码
        //使用帧动画
        //需要改变的是坐标
        let anim = CAKeyframeAnimation.init(keyPath: "position")
        //转换成cgpath
        anim.path = path.cgPath
        //完成后不移除
        anim.isRemovedOnCompletion = false
        //设置结束状态
        anim.fillMode = kCAFillModeForwards
        //让动画变得均匀
        anim.calculationMode = kCAAnimationCubic
        //不回放
        anim.autoreverses = false

        //重复的次数
        anim.repeatCount = animRepeatTime
        //持续时间
        anim.duration = animaTime
        //        anim.delegate = self

        //动画快慢
        anim.timingFunction = CAMediaTimingFunction.init(name: kCAMediaTimingFunctionEaseIn)
        //添加到圆上
        view.layer.add(anim, forKey: "animation")
小球颜色变化效果的代码:
    //设置颜色渐变动画
    private func viewColorAnimation(view:UIView, fromColor: UIColor, toColor: UIColor, time:Double) -> () {
        let colorAnim = CABasicAnimation.init(keyPath: "backgroundColor")
        colorAnim.toValue = toColor.cgColor
        colorAnim.fromValue = fromColor.cgColor
        colorAnim.duration = time
        colorAnim.autoreverses = false
        colorAnim.fillMode = kCAFillModeForwards
        colorAnim.isRemovedOnCompletion = false
        colorAnim.repeatCount = animRepeatTime

        view.layer.add(colorAnim, forKey: "backgroundColor")
    }
4.最后就是将其进行封装就可以了,个人觉得比较花时间的就是分析轨迹这个步骤,其他的还可以了。demo可以在我的github上面,这个demo用的是swift写的,也算是练习了一下把。github地址:加载动画
