docker安装mysql很方便快捷,但是容易遇到一些问题 以及 有些细节需要注意 不然容易造成数据丢失。
本篇文章记录 docker安装mysql的过程和遇到的问题 以及注意事项。
系统环境 centos
搜索MySQL镜像
$ docker search mysql
INDEX       NAME                              DESCRIPTION                                     STARS     OFFICIAL   AUTOMATED
docker.io   docker.io/mysql                   MySQL is a widely used, open-source relati...   8293      [OK]
docker.io   docker.io/mariadb                 MariaDB is a community-developed fork of M...   1920      [OK]
docker.io   docker.io/mysql/mysql-server      Optimized MySQL Server Docker images. Crea...   632                  [OK]
备注:STARS数最多,OFFICIAL是[OK]的这个就是官方的centos镜像。
下载MySQL镜像
$ docker pull docker.io/mysql
$ docker images
REPOSITORY                       TAG                 IMAGE ID            CREATED             SIZE
docker.io/mysql                  latest              5195076672a7        4 weeks ago         371.4 MB
持久化存储数据目录创建
$ mkdir -p /data/mysql
运行容器
$ docker run -d -v /data/mysql/:/var/lib/mysql -p 3306:3306 --name dapao-mysql -e MYSQL_ROOT_PASSWORD=dapao12345 mysql/mysql-server
-p 3306:3306->把容器的mysql端口3306映射到宿主机的3306端口,这样想访问mysql就可以直接访问宿主机的3306端口。
-v /data/mysql:/var/lib/mysql->把宿主机/data/mysql/目录映射到容器的/var/lib/mysql目录
注意事项
如果不作宿主机目录映射,不使用 -v /data/mysql:/var/lib/mysql 则 容器销毁后 数据丢失。
在使用-v选项映射目录时,宿主机需关闭SElinux:
$ setenforce 0
否则会报错:/var/lib/mysql/: Permission denied
辅助检查命令
$ docker logs dapao-mysql ##查看日志
$ docker ps #查看容器

c、查看端口
$ lsof -i:3306

d、查看宿主机上保存的mysql数据

复制代码
$ cd /data/mysql
$ ll
在容器内部连接mysql
$ docker exec -it dapao-mysql /bin/bash ##进入容器

或者 找到id

[root@VM_4_12_centos ~]# docker ps
CONTAINER ID        IMAGE                COMMAND                  CREATED             STATUS                  PORTS

NAMES
d78b5a090187        mysql/mysql-server   "/entrypoint.sh mysq…"   3 hours ago         Up 3 hours (healthy)    0.0.0.0:3306->3306/tcp, 33060/tcp

dapao-mysql
[root@VM_4_12_centos ~]# docker exec -ti d78b5a090187 /bin/bash
进入mysql
在容器内使用命令
mysql -u root -p mysql
手动输入密码
[root@VM_4_12_centos ~]# mysql   -u root -p mysql
Enter password:
Reading table information for completion of table and column names
You can turn off this feature to get a quicker startup with -A

Welcome to the MySQL monitor.  Commands end with ; or \g.
Your MySQL connection id is 486
Server version: 8.0.18 MySQL Community Server - GPL

Copyright (c) 2000, 2019, Oracle and/or its affiliates. All rights reserved.

Oracle is a registered trademark of Oracle Corporation and/or its
affiliates. Other names may be trademarks of their respective
owners.

Type 'help;' or '\h' for help. Type '\c' to clear the current input statement.

mysql>
注意事项–设置权限
默认 mysql 是不允许其他ip访问 和 root帐号是不允许远程连接的。
所以我们需要进行授权
在容器内 进入mysql 命令行后 运行以下命令
注意版本
如果版本命令不对应会报错
server version for the right syntax to use near 'IDENTIFIED BY

或者

You are not allowed to create a user with GRANT
详情参考
新版SQL授权用户时报错 near ‘IDENTIFIED BY ‘密码’ with grant option’ at line 1
mysql8.0无法给用户授权或提示You are not allowed to create a user with GRANT的问题
老版本的mysql使用命令
GRANT ALL PRIVILEGES ON *.* TO root@"%" IDENTIFIED BY "dapao12345";
新版本的mysql使用命令
CREATE USER 'root'@'%' IDENTIFIED BY 'dapao12345';

GRANT ALL PRIVILEGES ON *.* TO root@"%";
另外,如果远程连接的时候报plugin caching_sha2_password could not be loaded这个错误,可以尝试修改密码加密插件:
alter user 'root'@'%' identified with mysql_native_password by 'dapao12345';
在容器外 宿主机访问 mysql
首先需要保证 宿主机有mysql的客户端,如果没有可按照以下命令行安装
(1)检查系统中是否已安装 MySQL。
rpm -qa | grep mysql
返回空值的话,就说明没有安装 MySQL 。
注意:在新版本的CentOS7中,默认的数据库已更新为了Mariadb,而非 MySQL,所以执行 yum install mysql 命令只是更新Mariadb数据库,并不会安装 MySQL 。
(2)查看已安装的 Mariadb 数据库版本。
rpm -qa|grep -i mariadb
(3)卸载已安装的 Mariadb 数据库。
rpm -qa|grep mariadb|xargs rpm -e --nodeps
(4)再次查看已安装的 Mariadb 数据库版本,确认是否卸载完成。
rpm -qa|grep -i mariadb
(5)下载安装包文件
wget http://repo.mysql.com/mysql-community-release-el7-5.noarch.rpm
(6)安装mysql-community-release-el7-5.noarch.rpm包
rpm -ivh mysql-community-release-el7-5.noarch.rpm
安装完成之后,会在 /etc/yum.repos.d/ 目录下新增 mysql-community.repo 、mysql-community-source.repo 两个 yum 源文件。
执行 yum repolist all | grep mysql 命令查看可用的 mysql 安装文件。
(7)安装mysql
yum install mysql-server
(8)检查mysql是否安装成功
rpm -qa | grep mysql
参考链接: CentOS7下使用YUM安装MySQL5.6
在容器外 宿主机 使用命令连接 mysql
mysql -h 127.0.0.1 -P 3306 -u root -p mysql
手动输入密码
[root@VM_4_12_centos ~]# mysql  -h 127.0.0.1 -P 3306 -u root -p mysql
Enter password:
Reading table information for completion of table and column names
You can turn off this feature to get a quicker startup with -A

Welcome to the MySQL monitor.  Commands end with ; or \g.
Your MySQL connection id is 486
Server version: 8.0.18 MySQL Community Server - GPL

Copyright (c) 2000, 2019, Oracle and/or its affiliates. All rights reserved.

Oracle is a registered trademark of Oracle Corporation and/or its
affiliates. Other names may be trademarks of their respective
owners.

Type 'help;' or '\h' for help. Type '\c' to clear the current input statement.

mysql>
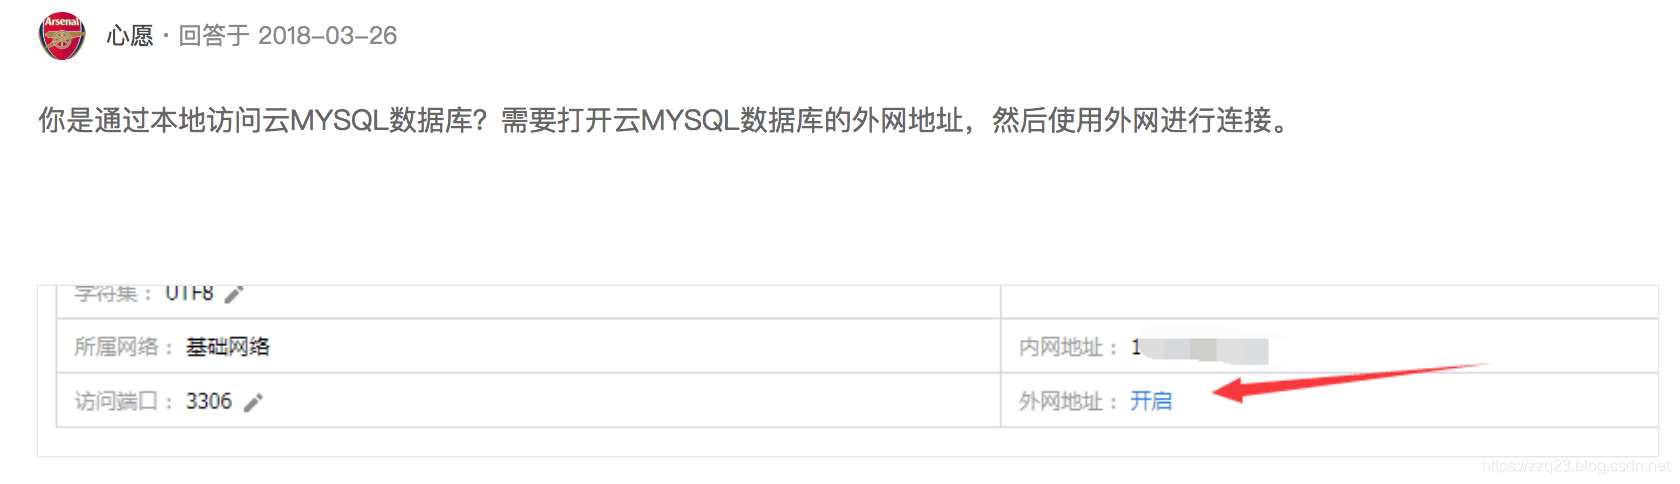
使用宿主机外部ip远程访问 mysql
比如在mysql-front中 需要远程连接这个mysql 。
只要保证 在宿主机中能够连接上,则权限设置没问题。
然后需要关注一下 防火墙 以及 腾讯云或者阿里云 aws等 额外的网关设置。
如图
可能遇到的问题–Access denied for user ‘root’@‘localhost’ (using password: YES)
如果权限设置没问题,需要检查输入的密码是否是错的,最好复制粘贴密码,不要手输,否则可能被输入法坑。
可能遇到的问题–ERROR 2002 (HY000): Can’t connect to local MySQL server through socket 解决办法
需要进入到容器中
mysql.sock位置查找与验证
# find / -name mysql.sock
/Data/mydata/mysql.sock
验证目录是否正确
#mysql -u root -p -S /Data/mydata/mysql.sock
备注:-S参数socket file文件验证
验证mysql.sock文件权限和用户是否正确
如果是权限问题,则先改变权限
#chown -R mysql:mysql /Data/mydata/mysql.sock
永久解决
修改/etc/my.cnf
添加以下内容到/etc/my.conf:
[client]
socket = /Data/mydata/mysql.sock
[mysqld]
socket = /Data/mydata/mysql.sock
参考链接:
ERROR 2002 (HY000): Can’t connect to local MySQL server through socket 解决办法
