这篇文章主要是介绍一下ribbon的用法,我们都知道ribbon是负载均衡,但是却不知道他是怎么样的负载均衡,怎么用,能干嘛?
● 其实,简单的说,Spring Cloud Ribbon是基于Netfilx Ribbon实现的一套客户端 负载均衡的工具
Ribbon是Netfilx发布的开源项目,主要功能是提供客户端的软件负载均衡算法,将Netfilx的中间层服务连接在一起,Ribbon客户端组件提供一系列完善的配置如连接超时,重试等,简单的说,就是在配置文件中列出Load Balander(简称LB)后面所有的机器,Ribbon会自动的帮助你基于某种规则(如简单轮询,随机连接等)去连接这些机器,我们也很容易使用Ribbon实现自定义的负载均衡算法
测试一下ribbon的用法,在网上找了好久,终于找到一个博主的架构流程图,我觉得还是比较符合ribbon实现的具体用法,简单易懂,一看就明白
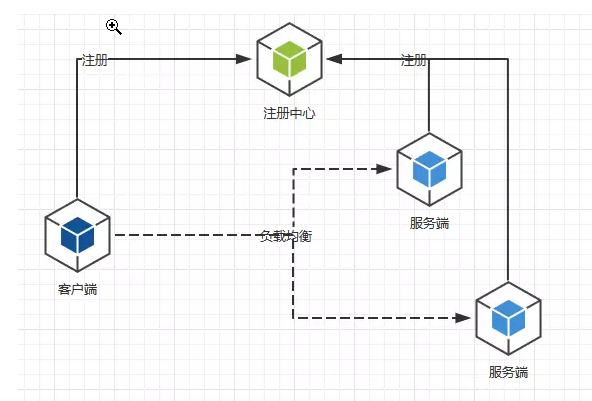
实现这个ribbon的测试必须得有两个服务端和一个客户端,这都看到了吧。所以接下来,要创建服务端了
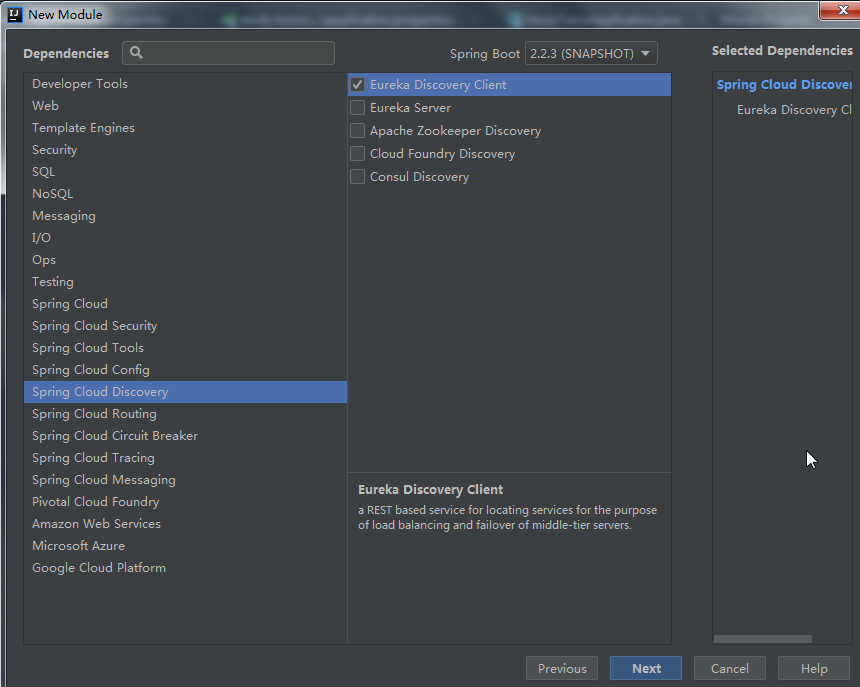
首先,这是在上篇文章的基础上实现的,eureka已经有了,直接创建服务一,命名为study-ms,一定要选中这个,别问为啥,自己百度,请耐心看下去
●添加配置文件,在application.properties里面,内容是:
server.port=8003
spring.application.name=study-ms
eureka.client.service-url.defaultZone=http://localhost:8001/eureka/
●添加pom.xml

    <parent>
        <groupId>com.study</groupId>
        <artifactId>study-cloud</artifactId>
        <version>1.0-SNAPSHOT</version>
        <relativePath>../study-cloud/pom.xml </relativePath><!-- lookup parent from repository -->
    </parent>

    <groupId>com.study</groupId>
    <artifactId>study-ms</artifactId>
    <version>0.0.1-SNAPSHOT</version>
    <packaging>jar</packaging>

    <name>study-ms</name>
    <description>Demo project for Spring Boot</description>

    <dependencies>
        <dependency>
            <groupId>com.study</groupId>
            <artifactId>study-entity</artifactId>
            <version>0.0.1-SNAPSHOT</version>
        </dependency>
        <dependency>
            <groupId>org.springframework.cloud</groupId>
            <artifactId>spring-cloud-starter-netflix-eureka-client</artifactId>
        </dependency>

        <!--配置中心jar包-->
        <dependency>
            <groupId>org.springframework.cloud</groupId>
            <artifactId>spring-cloud-config-server</artifactId>
        </dependency>

        <!--MyBatis-->
        <dependency>
            <groupId>org.mybatis.spring.boot</groupId>
            <artifactId>mybatis-spring-boot-starter</artifactId>
            <version>1.3.2</version>
        </dependency>

        <dependency>
            <groupId>org.springframework.boot</groupId>
            <artifactId>spring-boot-starter-test</artifactId>
            <scope>test</scope>
        </dependency>
        <!-- web模块 -->
        <dependency>
            <groupId>org.springframework.boot</groupId>
            <artifactId>spring-boot-starter-web</artifactId>
        </dependency>
</dependencies>
●在启动类上加@EnableEurekaClient,截图省略......
●添加一个controller实现类,加一个test测试方法
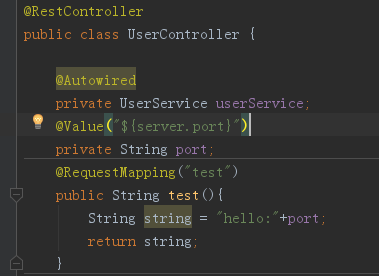
这个时候,服务一就创建好了
其次,服务二的创建方法同样,照着上面的整就行了,连controller都是写的一样的哦,这里命名为study-toms,唯一不同的是,服务端口不一样,配置文件如下:

△ 看清楚了,study-ms和study-toms这俩服务端,只有端口不一样,一个是8003,一个是8004,其他的都是一模一样的,
这里有个非常重要的点就是,这里服务的命名是一样的,为啥?往下看吧!
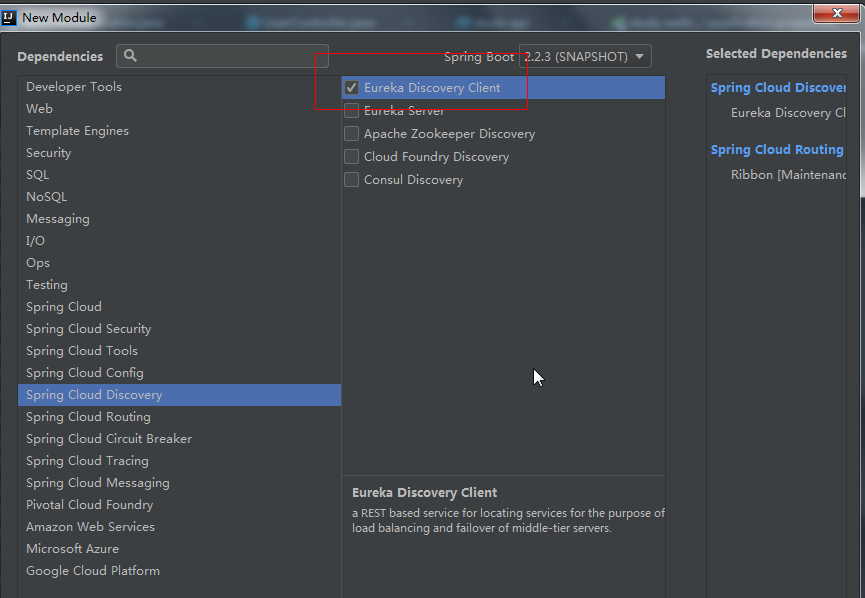
最后,俩服务端创建好了,接下来就是创建客户端了,命名为study-web
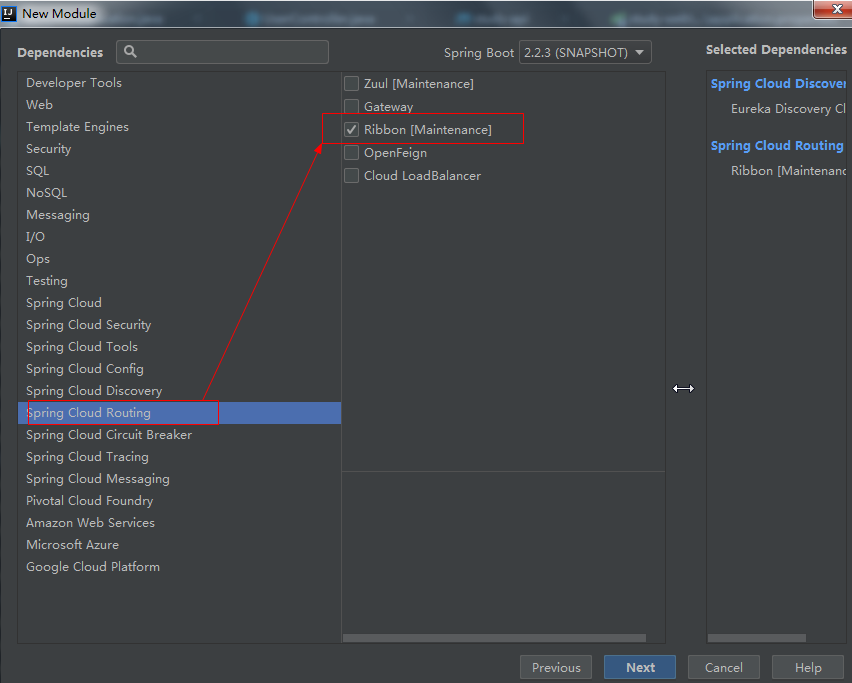
●application.properties 配置文件如下:

●pom.xml
 <parent>
        <groupId>com.study</groupId>
        <artifactId>study-cloud</artifactId>
        <version>1.0-SNAPSHOT</version>
        <relativePath>../study-cloud/pom.xml </relativePath><!-- lookup parent from repository -->
    </parent>
    <groupId>com.study</groupId>
    <artifactId>study-web</artifactId>
    <version>0.0.1-SNAPSHOT</version>
    <packaging>jar</packaging>

    <name>study-web</name>
    <description>Demo project for Spring Boot</description>

    <dependencies>
        <dependency>
            <groupId>com.study</groupId>
            <artifactId>study-entity</artifactId>
            <version>0.0.1-SNAPSHOT</version>
        </dependency>
        <dependency>
            <groupId>org.springframework.cloud</groupId>
            <artifactId>spring-cloud-starter-netflix-eureka-client</artifactId>
        </dependency>
        <dependency>
            <groupId>org.springframework.boot</groupId>
            <artifactId>spring-boot-starter</artifactId>
        </dependency>
        <!-- 单元测试 -->
        <dependency>
            <groupId>org.springframework.boot</groupId>
            <artifactId>spring-boot-starter-test</artifactId>
            <scope>test</scope>
        </dependency>
        <!-- web模块 -->
        <dependency>
            <groupId>org.springframework.boot</groupId>
            <artifactId>spring-boot-starter-web</artifactId>
        </dependency>
        <dependency>
            <groupId>org.springframework.cloud</groupId>
            <artifactId>spring-cloud-starter-netflix-ribbon</artifactId>
        </dependency>
    </dependencies>
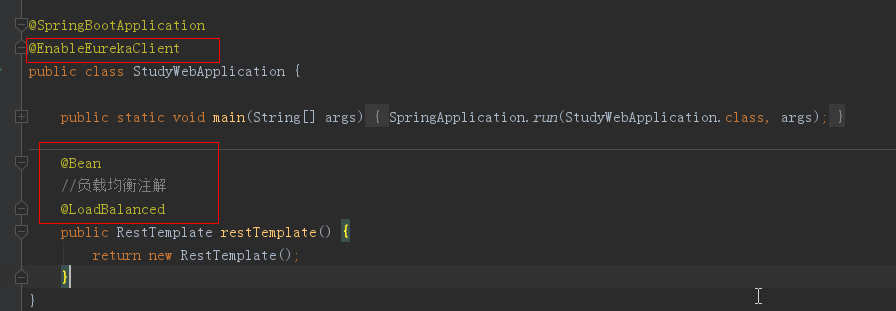
●启动类上添加注解和方法
●新增一个访问的controller类,添加一个test方法,注意这个访问路径,服务名字是study-ms

最最后,依次启动 注册中心study-eureka(8001)、服务端一 study-ms(8003)、服务端二 study-toms(8004)、客户端 study-web(8002)
这个时候会看到STUDY-MS是对应两个服务的,这就是上面为啥配置的时候把服务名字写的一样的原因了,因为这是本地测试,如果是不同服务器上启动同一个服务就会这样

继续,通过浏览器访问路径http://localhost:8002/test,多刷新几次你会发现结果:
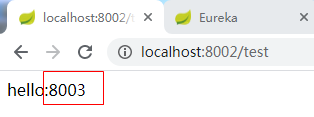

这就是客户端的负载均衡啦,理解可能不够完善,欢迎交流和指正