AndroidStudio+Tomcat进行学生登录并进行学生信息的管理——增删改查
本项目需要在androidStudio上面和eclisp上面分别创建相应的项目,所以这里给大家整体分为两个大步骤进行介绍,就让我们往下看吧,觉得可以的可以留言对林君进行支持,有不懂的可以进行留言,林君给你解答,有不同观点的也欢迎大家留言进行讨论哦!
一、AndroidStudio端的步骤如下所示:
首先我们需要的是在AndroidStudio端创建学生信息管理的项目studentSystemWeb,相信大家对于项目的创建知道怎么做,这里就不进行项目的创建的步骤
因为需要网络连接,所以我们首要的就是进行网络许可的配置,如下:
<uses-permission android:name="android.permission.INTERNET" />
在android项目中的配置文件“Androidmanifest.xml”中加入以上的入网许可!
1、既然是对学生进行管理,那么首先必要的步骤是创建一个Student学生的java类,这个是自己重新new一个java类的步骤哦_
import java.io.Serializable;
public class Student  implements Serializable {
    private String name;//姓名
    private String id;//学号
    private String major;//专业
    private String age;//年龄
    private String sex;//性别
    public String getId() {
        return id;
    }
    public void setId(String id) {
        this.id = id;
    }
    public Student(String id, String name, String sex, String age, String major) {
        this.id=id;
        this.name=name;
        this.sex=sex;
        this.age=age;
        this.major=major;
    }
    public Student(){
    }
    public String getAge() {
        return age;
    }

    public void setAge(String age) {
        this.age = age;
    }
    public String getSex() {
        return sex;
    }
    public void setSex(String sex) {
        this.sex = sex;
    }
    public String getName(){
        return name;
    }
    public String getMajor(){
        return major;
    }
    public void setName(String name){
        this.name=name;
    }
    public void setMajor(String major){
        this.major=major;
    }
}
2、接下来我们进行登录界面的设置,登录界面的设定通过自己的个人喜好进行设定,这里当然只献上林君自己的界面设计的XML代码啦,如下所示:
<?xml version="1.0" encoding="utf-8"?>
<LinearLayout xmlns:android="http://schemas.android.com/apk/res/android"
    xmlns:tools="http://schemas.android.com/tools"
    android:layout_width="match_parent"
    android:orientation="vertical"
    android:layout_height="match_parent"
    android:background="@drawable/back6"
    android:id="@+id/back3"
    tools:context=".MainActivity">
    <TextView
        android:layout_width="match_parent"
        android:layout_height="30dp"
        android:textSize="20dp"
        android:text="欢迎进入学生信息管理系统"
        android:gravity="center"
        android:textColor="#FFAB00"/>
    <RelativeLayout
        android:layout_width="match_parent"
        android:layout_height="235dp">
        <ImageView
            android:layout_width="match_parent"
            android:layout_height="wrap_content"
            android:id="@+id/back"
            android:src="@drawable/pto4" />
        <ImageView
            android:layout_width="130dp"
            android:layout_height="130dp"
            android:id="@+id/pto"
            android:layout_marginTop="70dp"
            android:layout_marginLeft="5dp"
            android:src="@drawable/pto"/>
        <EditText
            android:layout_width="match_parent"
            android:layout_height="wrap_content"
            android:id="@+id/userName"
            android:layout_marginTop="70dp"
            android:hint="@string/user"
            android:layout_marginLeft="5dp"
            android:inputType="text"
            android:layout_toRightOf="@id/pto"/>
        <EditText
            android:layout_width="match_parent"
            android:layout_height="wrap_content"
            android:id="@+id/password"
            android:hint="@string/passward"
            android:inputType="textPassword"
            android:layout_marginTop="120dp"
            android:layout_marginLeft="5dp"
            android:layout_toRightOf="@id/pto"/>
        <CheckBox
            android:layout_width="90dp"
            android:layout_height="wrap_content"
            android:id="@+id/remember"
            android:layout_toRightOf="@id/pto"
            android:layout_marginLeft="5dp"
            android:text="记住密码"
            android:layout_below="@+id/password"/>
        <CheckBox
            android:layout_width="90dp"
            android:layout_height="wrap_content"
            android:layout_below="@+id/password"
            android:id="@+id/right1"
            android:layout_toRightOf="@+id/remember"
            android:text="自动登录"
            />
    </RelativeLayout>
    <Button
        android:layout_width="match_parent"
        android:layout_height="wrap_content"
        android:text="登录"
        android:id="@+id/login"/>
    <LinearLayout
        android:layout_width="match_parent"
        android:layout_height="wrap_content"
        android:orientation="horizontal">
        <TextView
            android:layout_width="match_parent"
            android:layout_weight="1"
            android:layout_height="wrap_content"
            android:textColor="#FF4081"
            android:text="忘记密码?"/>
        <TextView
            android:layout_width="match_parent"
            android:layout_weight="1"
            android:layout_height="wrap_content"
            android:textColor="#FF4081"
            android:gravity="right"
            android:text="注册账号"/>
    </LinearLayout>
</LinearLayout>
我们可以知道上面有很多隐藏的string,下面图片中将进行给出,也就是hint或者你给输入框设置的提示语言的东西,通过如下的方式,可以简化以后修改的时间,以后修改通过在这里修改就ok了,不必在代码中寻找然后修改。
以下就是我自己的界面设计的图像所示

3、有了登录界面设计的设计,那么肯定会有相应的实现我们界面设计的java代码,登录界面的java代码如下所示:
3-1、既然是通过Tomcat服务器进行数据的获取,那么我们需要建立一个连接Tomcat服务器的java类–新建一个java类名字为HttpUtilsHttpURLConnection,代码如下
import java.io.BufferedReader;
import java.io.BufferedWriter;
import java.io.IOException;
import java.io.InputStreamReader;
import java.io.OutputStream;
import java.io.OutputStreamWriter;
import java.io.UnsupportedEncodingException;
import java.net.HttpURLConnection;
import java.net.MalformedURLException;
import java.net.URL;
import java.net.URLEncoder;
import java.util.Map;
/**
 * Created by cool on 2019/12/8.
 */
public class HttpUtilsHttpURLConnection {
    public static String BASE_URL= "http://192.168.43.128:8080/JSPStudy";//这里的ip地址,设置为自己网络的ip地址,这里注意,eclisp也就是电脑上面的网络应该和手机连接的网处于同一个网络。JSPStudy是自己eclisp上面的学生信息管理的java项目
    /*
     * urlStr:网址
     * parms:提交数据
     * return:网页源码
     * */
    public static  String getContextByHttp(String urlStr,Map<String,String> parms){
        StringBuilder result = new StringBuilder();//StringBuilder用于单线程多字符串拼接
        try {
            URL url = new URL(urlStr);
            HttpURLConnection connection= (HttpURLConnection) url.openConnection();
            connection.setRequestMethod("POST");
            connection.setReadTimeout(10000);
            connection.setConnectTimeout(10000);
            connection.setDoInput(true);
            connection.setDoOutput(true);
            connection.setInstanceFollowRedirects(true);
            OutputStream outputStream = connection.getOutputStream();
            BufferedWriter writer = new BufferedWriter(new OutputStreamWriter(outputStream,"UTF-8"));
            writer.write(getStringFromOutput(parms));
            System.out.println(getStringFromOutput(parms));
            System.out.println(parms);
            writer.flush();
            writer.close();
            outputStream.close();
            if(connection.getResponseCode() == HttpURLConnection.HTTP_OK){
                BufferedReader reader = new BufferedReader(new InputStreamReader(connection.getInputStream()));
                String temp;
                while((temp = reader.readLine()) != null) {
                    result.append(temp);
                }
            }else{
                return "error:0";
            }
            connection.disconnect();
        } catch (MalformedURLException e) {
            e.printStackTrace();
        } catch (IOException e) {
            e.printStackTrace();
        }
        return result.toString();

    }
    /**
     * 将map转换成key1=value1&key2=value2的形式
     * @param map
     * @return
     * @throws UnsupportedEncodingException
     */
    private static String getStringFromOutput(Map<String,String> map) throws UnsupportedEncodingException {
        StringBuilder sb = new StringBuilder();//StringBuilder用于单线程多字符串拼接
        boolean isFirst = true;
        for(Map.Entry<String,String> entry:map.entrySet()){
            if(isFirst)
                isFirst = false;
            else
                sb.append("&");
            sb.append(URLEncoder.encode(entry.getKey(),"UTF-8"));
            sb.append("=");
            sb.append(URLEncoder.encode(entry.getValue(),"UTF-8"));
        }
        return sb.toString();
    }

    /**
     * 数据请求的方法
     */
}
3-2、实现登录界面设计的的java代码(mainActivity)如下所示:
import androidx.appcompat.app.AppCompatActivity;
import android.content.Intent;
import android.content.SharedPreferences;
import android.os.Bundle;
import android.os.Handler;
import android.os.Message;
import android.view.View;
import android.widget.Button;
import android.widget.CheckBox;
import android.widget.EditText;
import android.widget.Toast;
import org.json.JSONException;
import org.json.JSONObject;
import java.util.ArrayList;
import java.util.HashMap;
import java.util.Map;
public class MainActivity extends AppCompatActivity {
    private SharedPreferences loginPreference;
    private EditText userName1;
    private EditText password1;
    private CheckBox remember;
    private Button login;
    public static ArrayList<Student> students = new ArrayList<>();
    @Override
    protected void onCreate(Bundle savedInstanceState) {
        super.onCreate(savedInstanceState);
        setContentView(R.layout.activity_main);
        View v = findViewById(R.id.back3);
        v.getBackground().setAlpha(210);
        userName1 = (EditText) findViewById(R.id.userName);
        password1 = (EditText) findViewById(R.id.password);
        remember = (CheckBox) findViewById(R.id.remember);
        login = (Button) findViewById(R.id.login);
        loginPreference = getSharedPreferences("login", MODE_PRIVATE);
        ///要通过loginPreference去记录三个参数(checked,userName,password)
        boolean cheched = loginPreference.getBoolean("checked", false);
        if (cheched) {
            Map<String, Object> m = readLogin();
            if (m != null) {
                userName1.setText((CharSequence) m.get("userName"));
                password1.setText((CharSequence) m.get("password"));
                remember.setChecked(cheched);
            }
        }
        login.setOnClickListener(new View.OnClickListener() {
            @Override
            public void onClick(View view) {
                configLoginInfo(remember.isChecked());
                login();
            }
        });
    }
    public void configLoginInfo(boolean checked) {
        SharedPreferences.Editor editor = loginPreference.edit();
        editor.putBoolean("checked", remember.isChecked());
        if (checked) {
            editor.putString("userName", userName1.getText().toString());
            editor.putString("password", password1.getText().toString());
        } else {
            editor.remove("userName").remove("password");
        }
        editor.commit();
    }
    /**
     * 读登录信息
     *
     * @return
     */
    public Map<String, Object> readLogin() {
        Map<String, Object> m = new HashMap<>();
        String userName = loginPreference.getString("userName", "");
        String password = loginPreference.getString("password", "");
        m.put("userName", userName);
        m.put("password", password);
        return m;
    }
    private void login() {
        new Thread() {
            @Override
            public void run() {
                System.out.println("登录成功");
                Map<String, String> params = new HashMap<String, String>();
                String userName = userName1.getText().toString();
                String password = password1.getText().toString();
                String url = HttpUtilsHttpURLConnection.BASE_URL + "/login";
                params.put("password", password);
                params.put("userName", userName);
                String result = HttpUtilsHttpURLConnection.getContextByHttp(url,params);
                    ///返回JSON
                Message msg = new Message();
                msg.what = 0x11;
                Bundle data = new Bundle();
                data.putString("result", result);
                msg.setData(data);
                handler.sendMessage(msg);
            }
            Handler handler=new Handler() {
                @Override
                public void handleMessage(Message msg) {
                    if(msg.what==0x11){
                        Bundle data = msg.getData();
                        String key = data.getString("result");//得到json返回的json
                        System.out.println(key);
                        try {
                            JSONObject json= new JSONObject(key);
                            int code = Integer.parseInt(json.getString("code"));
                            System.out.println(code);
                            if (code==1) {
                                Toast.makeText(MainActivity.this, "登录成功!", Toast.LENGTH_LONG).show();
                                Intent intent=new Intent();
                                intent.setClass(MainActivity.this,studentList.class);
                                startActivity(intent);
                            } else {
                                Toast.makeText(MainActivity.this, "用户名或密码错误!", Toast.LENGTH_LONG).show();
                            }
                        } catch (JSONException e) {
                            e.printStackTrace();
                        }
                    }
                }
            };
        }.start();
    }

}
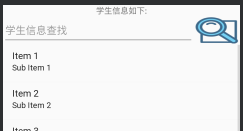
4、登录界面进入后,我们进入学生信息获取的界面,界面我们需要利用listView进行学生信息的展示,包括学生属性的所有,所以我们首先得自定义我们自己的适配器,界面设计的XML代码如下:
<?xml version="1.0" encoding="utf-8"?>
<LinearLayout xmlns:android="http://schemas.android.com/apk/res/android"
    xmlns:tools="http://schemas.android.com/tools"
    android:layout_width="match_parent"
    android:layout_height="match_parent"
    android:orientation="vertical"
    tools:context=".studentList">
    <TextView
        android:layout_width="match_parent"
        android:layout_height="wrap_content"
        android:gravity="center"
        android:text="学生信息如下:"/>
    <LinearLayout
        android:layout_width="match_parent"
        android:layout_height="wrap_content"
        android:orientation="horizontal">
        <EditText
            android:layout_width="300dp"
            android:layout_height="50dp"
            android:layout_weight="1"
            android:hint="学生信息查找"
            android:id="@+id/find"/>
        <ImageButton
            android:layout_width="50dp"
            android:layout_height="50dp"
            android:layout_weight="1"
            android:id="@+id/search"
            android:background="@drawable/find1"/>
    </LinearLayout>
    <ListView
        android:layout_width="match_parent"
        android:layout_height="wrap_content"
        android:id="@+id/listView"/>
    <Button
        android:layout_width="match_parent"
        android:layout_height="wrap_content"
        android:text="填加"
        android:id="@+id/addStudent"/>
</LinearLayout>
界面的设计效果:
4-1、同样,我们需要新建一个java类, StuAdapter,里面为我们自定义适配器的java代码,如下:
import android.content.Context;
import android.view.View;
import android.view.ViewGroup;
import android.widget.BaseAdapter;
import android.widget.ImageView;
import android.widget.TextView;
import java.util.List;
public class StuAdapter extends BaseAdapter implements View.OnClickListener {
    private List <Student>stuDates;
    private Context stuContext;
    private InnerItemOnClickListener myListener;
    public StuAdapter(Context context,List<Student>list){
        this.stuContext=context;
        this.stuDates=list;
    }
    @Override
    public int getCount() {
        return stuDates.size();
    }
    @Override
    public Object getItem(int position) {
        return stuDates.get(position);
    }
    @Override
    public long getItemId(int position) {
        Student student=(Student)stuDates.get(position);
        return position;
    }
    @Override
    public View getView(int i, View view, ViewGroup viewGroup) {
        View stuView=View.inflate(stuContext,R.layout.studentweb_item,null);
        TextView stuName=stuView.findViewById(R.id.student_name);
        TextView stuSex=stuView.findViewById(R.id.student_sex);
        TextView stuAge=stuView.findViewById(R.id.student_age);
        TextView stuId=stuView.findViewById(R.id.student_id);
        TextView stuMajor=stuView.findViewById(R.id.student_major);
        ImageView edit=stuView.findViewById(R.id.student_edit);
        ImageView delete=stuView.findViewById(R.id.student_delete);
        Student student=(Student)stuDates.get(i);
        stuName.setText(student.getName());
        stuSex.setText(student.getSex());
        stuAge.setText(student.getAge());
        stuId.setText(student.getId());
        stuMajor.setText(student.getMajor());
        edit.setImageResource(R.drawable.edit);
        delete.setImageResource(R.drawable.delete);
        edit.setOnClickListener(this);
        delete.setOnClickListener(this);
        edit.setTag(i);
        delete.setTag(i);
        return stuView;
    }
    interface InnerItemOnClickListener {
        abstract void itemClick(View view);
    }
    public void setOnInnerItemOnClickListener(InnerItemOnClickListener listener){
        this.myListener=listener;
    }
    @Override
    public void onClick(View view) {
        myListener.itemClick(view);
    }
}
4-2、有了自定义的适配器之后,我们就可以对学生信息列表进行实现了,对应就是信息列表界面的java代码,如下:
package com.cqjtu.studentsystemweb;
import androidx.appcompat.app.AlertDialog;
import androidx.appcompat.app.AppCompatActivity;
import android.content.DialogInterface;
import android.content.Intent;
import android.os.Bundle;
import android.os.Handler;
import android.os.Message;
import android.view.View;
import android.widget.AdapterView;
import android.widget.Button;
import android.widget.EditText;
import android.widget.ImageButton;
import android.widget.ListView;
import android.widget.Toast;
import org.json.JSONArray;
import org.json.JSONException;
import org.json.JSONObject;
import java.io.Serializable;
import java.util.ArrayList;
import java.util.HashMap;
import java.util.List;
import java.util.Map;
import static com.cqjtu.studentsystemweb.MainActivity.students;
public class studentList extends AppCompatActivity implements StuAdapter.InnerItemOnClickListener
        , AdapterView.OnItemClickListener, View.OnClickListener{
    private ListView listView;
    private Button add;
    public static StuAdapter adapter;
    private ImageButton search;
    private EditText find1;
    public static List<Student>find;
    private List<Student>show;
    @Override
    protected void onCreate(Bundle savedInstanceState) {
        super.onCreate(savedInstanceState);
        setContentView(R.layout.activity_student_list);
        listView = findViewById(R.id.listView);
        add = (Button) findViewById(R.id.addStudent);
        add.setOnClickListener(this);
        find1=(EditText)findViewById(R.id.find);
        search=(ImageButton)findViewById(R.id.search);
        search.setOnClickListener(this);
        students.clear();
        if (find!=null) {
            find.clear();
        }
        new Thread() {
            @Override
            public void run() {
                String url = HttpUtilsHttpURLConnection.BASE_URL + "/studentQuery";
                Map<String, String> params = new HashMap<String, String>();
                params.put("flag", "1");
                params.put("key", "");
                String result = HttpUtilsHttpURLConnection.getContextByHttp(url, params);
                ///返回JSON
                Message msg = new Message();
                msg.what = 0x11;
                Bundle data = new Bundle();
                data.putString("result", result);
                System.out.println(result);
                msg.setData(data);
                handler.sendMessage(msg);
            }
            Handler handler = new Handler() {
                @Override
                public void handleMessage(Message msg) {
                    if (msg.what == 0x11) {
                        Bundle data = msg.getData();
                        String key = data.getString("result");//得到json返回的json
                        try {
                            JSONObject json = new JSONObject(key);
                            JSONArray jsonArray = new JSONArray(json.get("students").toString());
                            for (int i = 0; i < jsonArray.length(); i++) {
                                JSONObject jsonObject = (JSONObject) jsonArray.get(i);
                                String id = jsonObject.get("no").toString();
                                String name = (String) jsonObject.get("name");
                                String sex = (String) jsonObject.get("sex");
                                String age = jsonObject.get("age").toString();
                                String major = (String) jsonObject.get("major");
                                Student s = new Student(id, name, sex, age, major);
                                students.add(s);
                            }
                            adapter = new StuAdapter(studentList.this, students);
                            listView.setAdapter(adapter);
                            adapter.setOnInnerItemOnClickListener(studentList.this);
                        } catch (JSONException e) {
                            e.printStackTrace();
                        }
                    }
                }
            };
        }.start();
        listView.setOnItemClickListener(this);
    }
    @Override
    public void onClick(View view) {
        Intent intent=new Intent();
        if (view.getId()==R.id.addStudent){
            intent.setClass(studentList.this,addStudent.class);
            startActivity(intent);
        }else if(view.getId()==R.id.search){
            final String key=find1.getText().toString();
            if (isEmpty(key)) {
                Toast.makeText(this,"查找条件不能为空",Toast.LENGTH_SHORT).show();
                return;
            }
            find=new ArrayList<Student>();
            new Thread() {
                @Override
                public void run() {
                    String url = HttpUtilsHttpURLConnection.BASE_URL + "/studentQuery";
                    Map<String, String> params = new HashMap<String, String>();
                    params.put("flag", "1");
                    params.put("key",key);
                    String result = HttpUtilsHttpURLConnection.getContextByHttp(url, params);
                    ///返回JSON
                    Message msg = new Message();
                    msg.what = 0x11;
                    Bundle data = new Bundle();
                    data.putString("result", result);
                    System.out.println(result);
                    msg.setData(data);
                    handler.sendMessage(msg);
                }
                Handler handler = new Handler() {
                    @Override
                    public void handleMessage(Message msg) {
                        if (msg.what == 0x11) {
                            Bundle data = msg.getData();
                            String key = data.getString("result");//得到json返回的json
                            try {
                                JSONObject json = new JSONObject(key);
                                JSONArray jsonArray = new JSONArray(json.get("students").toString());
                                for (int i = 0; i < jsonArray.length(); i++) {
                                    JSONObject jsonObject = (JSONObject) jsonArray.get(i);
                                    String id = jsonObject.get("no").toString();
                                    String name = (String) jsonObject.get("name");
                                    String sex = (String) jsonObject.get("sex");
                                    String age = jsonObject.get("age").toString();
                                    String major = (String) jsonObject.get("major");
                                    Student s = new Student(id, name, sex, age, major);
                                    find.add(s);
                                }
                            } catch (JSONException e) {
                                e.printStackTrace();
                            }
                        }
                    }
                };
            }.start();
            intent.setClass(studentList.this,searchlist.class);
            intent.putExtra("find",(Serializable)find);
            startActivity(intent);
        }
    }
    private boolean isEmpty(String str) {
        return str.length()==0||null==str;
    }
    @Override
    public void onItemClick(AdapterView<?> adapterView, View view, int i, long l) {
        show=new ArrayList<Student>();
        Intent intent=new Intent();
        String id=students.get(i).getId();
        String name=students.get(i).getName();
        String sex=students.get(i).getSex();
        String age=students.get(i).getAge();
        String major=students.get(i).getMajor();
        Student student=new Student(id,name,sex,age,major);
        show.add(student);
        intent.setClass(studentList.this,delite.class);
        intent.putExtra("show",(Serializable)show);
        startActivity(intent);
    }
    @Override
    public void itemClick(View view) {
        Intent intent=new Intent();
        switch (view.getId()){
            case R.id.student_edit:
                int p=(Integer) view.getTag();
                intent.setClass(this,edit.class);
                sentI(intent,p);
                startActivity(intent);
                break;
            case R.id.student_delete:
                final int k=(Integer)view.getTag();
                new AlertDialog.Builder( this )
                        .setIcon( R.drawable.student1)
                        .setTitle( "删除对话框" )
                        .setMessage( "确定删除学生:"+students.get(k).getName()+"?" )
                        .setNegativeButton( "取消",null )
                        .setPositiveButton( "确定", new DialogInterface.OnClickListener() {
                            @Override
                            public void onClick(DialogInterface dialog, int which) {
                                final String no=students.get(k).getId();
                                new Thread() {
                                    @Override
                                    public void run() {
                                        String url = HttpUtilsHttpURLConnection.BASE_URL + "/studentDelServlet";
                                        Map<String, String> params = new HashMap<String, String>();
                                        params.put("no", no);
                                        String result = HttpUtilsHttpURLConnection.getContextByHttp(url, params);
                                        System.out.println(result);
                                    }
                                }.start();
                                students.remove(k);
                                Toast.makeText(studentList.this,"删除成功",Toast.LENGTH_SHORT).show();
                                adapter.notifyDataSetChanged();
                            }
                        } ).show();
                break;
        }
    }
    public void sentI(Intent intent,int p){
        intent.putExtra("p",p);
    }
}
5、新创建一个activity页面,实现搜索功能,如下介绍
5-1、搜索界面的的界面设计的XML代码如下,将搜索到的学生信息展示到此页面上:
<?xml version="1.0" encoding="utf-8"?>
<LinearLayout xmlns:android="http://schemas.android.com/apk/res/android"
    xmlns:tools="http://schemas.android.com/tools"
    android:layout_width="match_parent"
    android:orientation="vertical"
    android:layout_height="match_parent"
    tools:context=".studentList">
    <TextView
        android:layout_width="match_parent"
        android:layout_height="wrap_content"
        android:text="您搜索的信息如下:"/>
    <ListView
        android:layout_width="match_parent"
        android:layout_height="wrap_content"
        android:descendantFocusability="blocksDescendants"
        android:id="@+id/studentList1"/>
    <Button
        android:layout_width="match_parent"
        android:layout_height="wrap_content"
        android:text="返回"
        android:id="@+id/back"/>
</LinearLayout>
5-2、实现搜索功能对应的java代码如下:
import androidx.appcompat.app.AppCompatActivity;
import android.content.Intent;
import android.os.Bundle;
import android.view.View;
import android.widget.AdapterView;
import android.widget.Button;
import android.widget.ListView;
import static com.cqjtu.studentsystemweb.studentList.find;
public class searchlist extends AppCompatActivity implements View.OnClickListener, AdapterView.OnItemClickListener,StuAdapter.InnerItemOnClickListener{
    private ListView list;
    public static StuAdapter stuAdapter1;
    private Button back;
    @Override
    protected void onCreate(Bundle savedInstanceState) {
        super.onCreate(savedInstanceState);
        setContentView(R.layout.activity_searchlist);
        list=(ListView)findViewById(R.id.studentList1);
        back=(Button)findViewById(R.id.back);
        Bundle bundle = getIntent().getExtras();
        stuAdapter1=new StuAdapter(searchlist.this,find);
        list.setAdapter(stuAdapter1);
        stuAdapter1.setOnInnerItemOnClickListener(this);
        list.setOnItemClickListener(searchlist.this);
        back.setOnClickListener(this);
    }
    @Override
    public void onClick(View view) {
        Intent intent=new Intent();
        if (view.getId()==R.id.back){
            finish();
        }
    }
    @Override
    public void onItemClick(AdapterView<?> adapterView, View view, int i, long l) {
    }
    @Override
    public void itemClick(View view) {

    }
}
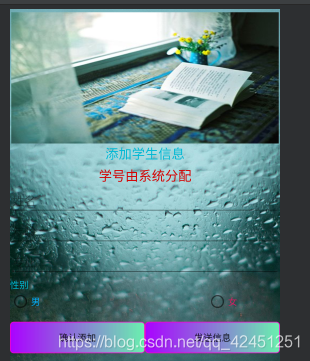
6、新创建一个activity页面,实现学生信息的添加功能
6-1、添加功能的XML界面设计代码如下:
<?xml version="1.0" encoding="utf-8"?>
<LinearLayout xmlns:android="http://schemas.android.com/apk/res/android"
    xmlns:tools="http://schemas.android.com/tools"
    android:layout_width="match_parent"
    android:orientation="vertical"
    android:layout_height="match_parent"
    android:background="@drawable/background2"
    android:id="@+id/back"
    tools:context=".addStudent">
    <ImageView
        android:layout_width="match_parent"
        android:layout_height="200dp"
        android:layout_marginTop="5dp"
        android:layout_marginLeft="2dp"
        android:layout_marginRight="2dp"
        android:background="@drawable/back4"/>
    <TextView
        android:layout_width="match_parent"
        android:layout_height="30dp"
        android:textSize="20dp"
        android:text="添加学生信息"
        android:gravity="center"
        android:textColor="#00B8D4"/>
    <TextView
        android:id="@+id/no"
        android:layout_marginTop="5dp"
        android:layout_width="match_parent"
        android:gravity="center"
        android:layout_height="25dp"
        android:inputType="text"
        android:textColor="#D50000"
        android:textSize="20dp"
        android:text="学号由系统分配" />
    <EditText
        android:id="@+id/name"
        android:layout_marginTop="5dp"
        android:layout_width="match_parent"
        android:layout_height="wrap_content"
        android:inputType="text"
        android:hint="@string/name" />
    <EditText
        android:id="@+id/age"
        android:layout_marginTop="2dp"
        android:layout_width="match_parent"
        android:layout_height="wrap_content"
        android:inputType="numberSigned"
        android:maxLength="3"
        android:hint="@string/age"/>
    <AutoCompleteTextView
        android:id="@+id/major"
        android:layout_width="match_parent"
        android:layout_height="wrap_content"
        android:layout_marginTop="2dp"
        android:inputType="text"
        android:hint="@string/major"/>
    <TextView
        android:layout_width="match_parent"
        android:layout_marginTop="2dp"
        android:layout_height="wrap_content"
        android:textColor="#00B8D4"
        android:text="性别"/>
    <RadioGroup
        android:layout_width="match_parent"
        android:layout_height="wrap_content"
        android:id="@+id/sex"
        android:orientation="horizontal">
        <RadioButton
            android:layout_width="600dp"
            android:layout_height="wrap_content"
            android:layout_weight="1"
            android:textColor="#00B0FF"
            android:text="男"/>
        <RadioButton
            android:layout_width="match_parent"
            android:layout_height="wrap_content"
            android:layout_weight="1"
            android:textColor="#D81B60"
            android:text="女"/>
    </RadioGroup>
    <LinearLayout
        android:layout_width="match_parent"
        android:layout_height="wrap_content"
        android:layout_marginTop="15dp"
        android:orientation="horizontal">
        <Button
            android:id="@+id/addname"
            android:layout_width="match_parent"
            android:layout_height="wrap_content"
            android:layout_weight="1"
            android:background="@drawable/button_shape1"
            android:text="确认添加" />
        <Button
            android:id="@+id/addmajor"
            android:layout_width="match_parent"
            android:layout_height="wrap_content"
            android:layout_weight="1"
            android:background="@drawable/button_shape1"
            android:text="发送信息" />
    </LinearLayout>
</LinearLayout>
界面设计的效果图如下:(其中的图片大家可以自己替换哦)
6-2、添加功能页面对应的java实现类代码如下:
package com.cqjtu.studentsystemweb;//这里是导入自己项目的全类名上面没有给出,这里给出,每一个java页面的代码就都要导入
import androidx.appcompat.app.AppCompatActivity;
import android.content.Intent;
import android.os.Bundle;
import android.view.View;
import android.widget.ArrayAdapter;
import android.widget.AutoCompleteTextView;
import android.widget.Button;
import android.widget.EditText;
import android.widget.RadioButton;
import android.widget.RadioGroup;
import android.widget.Toast;
import java.util.HashMap;
import java.util.Map;
import static com.cqjtu.studentsystemweb.MainActivity.students;
public class addStudent extends AppCompatActivity implements View.OnClickListener {
    private AutoCompleteTextView major1;
    public  EditText name1;
    private EditText age1;
    private Button addname1;
    private Button addmajor1;
    private RadioGroup sex1;
    @Override
    protected void onCreate(Bundle savedInstanceState) {
        super.onCreate(savedInstanceState);
        setContentView(R.layout.activity_add_student);
        name1=(EditText) findViewById(R.id.name);
        major1=(AutoCompleteTextView) findViewById(R.id.major);
        age1=(EditText)findViewById(R.id.age);
        sex1=(RadioGroup)findViewById(R.id.sex);
        addname1=(Button)findViewById(R.id.addname);
        addmajor1=(Button)findViewById(R.id.addmajor);
        addname1.setOnClickListener(this);
        addmajor1.setOnClickListener(this);
        String major[]={"计算机科学与技术","物联网工程","电子信息","电子通信","土木工程","工程造价","计算机软件","物联网系统"};
        ArrayAdapter<String> arrayAdapter=new ArrayAdapter(this,R.layout.textview,major);
        major1.setAdapter(arrayAdapter);
        View v = findViewById(R.id.back);
        v.getBackground().setAlpha(200);
    }
    private boolean isEmpty(String str) {
        return str.length()==0||null==str;
    }
    @Override
    public void onClick(View view) {
        Intent intent = new Intent();
        if (view.getId() == R.id.addname) {
            final String name22 = name1.getText().toString();
            final String sex22 = getRadio(sex1);
            final String age22 = age1.getText().toString();
            final String major22 = major1.getText().toString();
            if (isEmpty(name22)) {
                Toast.makeText(this, "姓名不能为空", Toast.LENGTH_SHORT).show();
                return;
            }
            if (isEmpty(age22)) {
                Toast.makeText(this, "年龄不能为空", Toast.LENGTH_SHORT).show();
                return;
            }
            if (isEmpty(sex22)) {
                Toast.makeText(this, "请选择性别", Toast.LENGTH_SHORT).show();
                return;
            }
            if (isEmpty(major22)) {
                Toast.makeText(this, "专业不能为空", Toast.LENGTH_SHORT).show();
                return;
            }
            new Thread() {
                @Override
                public void run() {
                    String url = HttpUtilsHttpURLConnection.BASE_URL + "/studentInsertServlet";
                    Map<String, String> params = new HashMap<String, String>();
                    params.put("name", name22);
                    params.put("age", age22);
                    params.put("major", major22);
                    params.put("sex", sex22);
                    String result = HttpUtilsHttpURLConnection.getContextByHttp(url, params);
                    System.out.println(result);
                }
            }.start();
            Toast.makeText(this, "已经添加" + students.size() + "条记录", Toast.LENGTH_SHORT).show();
            name1.setText("");
            sex1.clearCheck();
            age1.setText("");
            major1.setText("");
            name1.setFocusable(true);
            name1.setFocusableInTouchMode(true);
            name1.requestFocus();
        } else if (view.getId() == R.id.addmajor) {
            intent.setClass(this, studentList.class);
            startActivity(intent);
        }
    }
    public String getRadio(RadioGroup radioGroup){
        String info="";
        int num=radioGroup.getChildCount();
        for(int i=0;i<num;i++){
            RadioButton rd=(RadioButton)radioGroup.getChildAt(i);
            if(rd.isChecked()){
                info=rd.getText().toString();
                break;
            }
        }
        return info;
    }
}
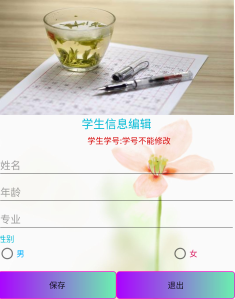
7、新建一个学生信息编辑的activity页面,实现对学生信息的编辑,修改
7-1、学生信息编辑界面的XML设计代码如下:
<?xml version="1.0" encoding="utf-8"?>
<LinearLayout xmlns:android="http://schemas.android.com/apk/res/android"
    xmlns:tools="http://schemas.android.com/tools"
    android:layout_width="match_parent"
    android:orientation="vertical"
    android:layout_height="match_parent"
    android:background="@drawable/background4"
    android:id="@+id/back1"
    tools:context=".edit">
    <ImageView
        android:layout_width="match_parent"
        android:layout_height="200dp"
        android:layout_marginTop="5dp"
        android:layout_marginLeft="2dp"
        android:layout_marginRight="2dp"
        android:background="@drawable/back5"/>
    <TextView
        android:layout_width="match_parent"
        android:layout_height="30dp"
        android:textSize="20dp"
        android:text="学生信息编辑"
        android:gravity="center"
        android:textColor="#00B8D4"/>
    <LinearLayout
        android:layout_width="match_parent"
        android:orientation="horizontal"
        android:layout_height="wrap_content">
        <TextView
            android:layout_marginTop="5dp"
            android:layout_width="430dp"
            android:gravity="right"
            android:layout_weight="1"
            android:layout_height="25dp"
            android:inputType="text"
            android:textColor="#D50000"
            android:text="学生学号:"/>
        <TextView
            android:id="@+id/no"
            android:layout_marginTop="5dp"
            android:layout_width="match_parent"
            android:gravity="left"
            android:layout_height="25dp"
            android:layout_weight="1"
            android:inputType="text"
            android:textColor="#D50000"
            android:text="学号不能修改"/>
    </LinearLayout>
    <EditText
        android:id="@+id/name1"
        android:layout_marginTop="5dp"
        android:layout_width="match_parent"
        android:layout_height="wrap_content"
        android:inputType="text"
        android:hint="@string/name" />
    <EditText
        android:id="@+id/age1"
        android:layout_marginTop="2dp"
        android:layout_width="match_parent"
        android:layout_height="wrap_content"
        android:inputType="numberSigned"
        android:maxLength="3"
        android:hint="@string/age"/>
    <AutoCompleteTextView
        android:id="@+id/major1"
        android:layout_width="match_parent"
        android:layout_height="wrap_content"
        android:layout_marginTop="2dp"
        android:inputType="text"
        android:hint="@string/major"/>
    <TextView
        android:layout_width="match_parent"
        android:layout_marginTop="2dp"
        android:layout_height="wrap_content"
        android:textColor="#00B8D4"
        android:text="性别"/>
    <RadioGroup
        android:layout_width="match_parent"
        android:layout_height="wrap_content"
        android:id="@+id/sex1"
        android:orientation="horizontal">
        <RadioButton
            android:layout_width="600dp"
            android:layout_height="wrap_content"
            android:layout_weight="1"
            android:textColor="#00B0FF"
            android:text="男"/>
        <RadioButton
            android:layout_width="match_parent"
            android:layout_height="wrap_content"
            android:layout_weight="1"
            android:textColor="#D81B60"
            android:text="女"/>
    </RadioGroup>
    <LinearLayout
        android:layout_width="match_parent"
        android:layout_height="wrap_content"
        android:layout_marginTop="15dp"
        android:orientation="horizontal">
        <Button
            android:id="@+id/save"
            android:layout_width="match_parent"
            android:layout_height="wrap_content"
            android:layout_weight="1"
            android:background="@drawable/button_shape1"
            android:text="保存" />
        <Button
            android:id="@+id/exit"
            android:layout_width="match_parent"
            android:layout_height="wrap_content"
            android:layout_weight="1"
            android:background="@drawable/button_shape1"
            android:text="退出" />
    </LinearLayout>
</LinearLayout>
学生信息编辑的界面如下:
7-2、学生编辑界面的实现类java代码如下:
package com.cqjtu.studentsystemweb;
import androidx.appcompat.app.AppCompatActivity;
import android.os.Bundle;
import android.view.View;
import android.widget.ArrayAdapter;
import android.widget.AutoCompleteTextView;
import android.widget.Button;
import android.widget.EditText;
import android.widget.RadioButton;
import android.widget.RadioGroup;
import android.widget.TextView;
import android.widget.Toast;
import java.util.HashMap;
import java.util.Map;
import static com.cqjtu.studentsystemweb.MainActivity.students;
import static com.cqjtu.studentsystemweb.studentList.adapter;
public class edit extends AppCompatActivity implements View.OnClickListener{
    private EditText name11;
    private AutoCompleteTextView major11;
    private TextView id11;
    private EditText age11;
    private RadioGroup sex11;
    private Button save;
    private Button quit;
    @Override
    protected void onCreate(Bundle savedInstanceState) {
        super.onCreate(savedInstanceState);
        setContentView(R.layout.activity_edit);
        View v = findViewById(R.id.back1);
        v.getBackground().setAlpha(230);
        id11=(TextView)findViewById(R.id.no);
        name11=(EditText) findViewById(R.id.name1);
        sex11=(RadioGroup) findViewById(R.id.sex1);
        age11=(EditText) findViewById(R.id.age1);
        major11=(AutoCompleteTextView)findViewById(R.id.major1);
        quit=(Button)findViewById(R.id.exit);
        save=(Button)findViewById(R.id.save);
        String id=(String) students.get(k()).getId();
        String name=(String) students.get(k()).getName();
        String sex=(String) students.get(k()).getSex();
        String age=(String) students.get(k()).getAge();
        String major=(String)students.get(k()).getMajor();
        id11.setText(id);
        name11.setText(name);
        showRadio(sex11,sex);
        age11.setText(age);
        major11.setText(major);
        String major1[]={"计算机科学与技术","物联网工程","电子信息","电子通信","土木工程","工程造价","计算机软件","物联网系统"};
        ArrayAdapter<String> arrayAdapter=new ArrayAdapter(this,R.layout.textview,major1);
        major11.setAdapter(arrayAdapter);
        quit.setOnClickListener(this);
        save.setOnClickListener(this);
    }
    @Override
    public void onClick(View view) {
        if(view.getId()==R.id.exit){
            finish();
        }else if (view.getId()==R.id.save){
            final String id=id11.getText().toString();
            students.get(k()).setId(id);
            final String name=name11.getText().toString();
            students.get(k()).setName(name);
            final String sex=getRadio(sex11);
            students.get(k()).setSex(sex);
            final String age=age11.getText().toString();
            students.get(k()).setAge(age);
            final String major=major11.getText().toString();
            students.get(k()).setMajor(major);
            new Thread() {
                @Override
                public void run() {
                    String url = HttpUtilsHttpURLConnection.BASE_URL + "/studentInsertServlet";
                    Map<String, String> params = new HashMap<String, String>();
                    params.put("no",id);
                    params.put("name", name);
                    params.put("age", age);
                    params.put("major", major);
                    params.put("sex", sex);
                    String result = HttpUtilsHttpURLConnection.getContextByHttp(url, params);
                    System.out.println(result);
                }
            }.start();
            Toast.makeText(this, "修改成功", Toast.LENGTH_SHORT).show();
            adapter.notifyDataSetChanged();
            finish();
        }
    }
    public void showRadio(RadioGroup radioGroup, String v){
        int num=radioGroup.getChildCount();
        for(int i=0;i<num;i++){
            RadioButton radioButton=(RadioButton)radioGroup.getChildAt(i);
            String info=radioButton.getText().toString();
            if(info.equals(v)){
                radioButton.setChecked(true);
                break;
            }
        }
    }
    public int k(){
        Bundle bundle1 = getIntent().getExtras();
        int k=bundle1.getInt("p");
        return k;
    }
    public String getRadio(RadioGroup radioGroup){
        String info="";
        int num=radioGroup.getChildCount();
        for(int i=0;i<num;i++){
            RadioButton rd=(RadioButton)radioGroup.getChildAt(i);
            if(rd.isChecked()){
                info=rd.getText().toString();
                break;
            }
        }
        return info;
    }
}
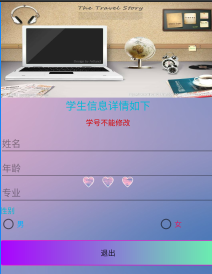
8、新建一个activity页面,当单击我们listView时候,我们可以跳转到这个页面,进行学生信息的详细情况查看
8-1、该页面的XML设计的代码如下所示:
<?xml version="1.0" encoding="utf-8"?>
<LinearLayout xmlns:android="http://schemas.android.com/apk/res/android"
    xmlns:tools="http://schemas.android.com/tools"
    android:layout_width="match_parent"
    android:orientation="vertical"
    android:layout_height="match_parent"
    android:background="@drawable/background3"
    android:id="@+id/back4"
    tools:context=".delite">
    <ImageView
        android:layout_width="match_parent"
        android:layout_height="200dp"
        android:layout_marginTop="5dp"
        android:layout_marginLeft="2dp"
        android:layout_marginRight="2dp"
        android:background="@drawable/back2"/>
    <TextView
        android:layout_width="match_parent"
        android:layout_height="30dp"
        android:textSize="20dp"
        android:text="学生信息详情如下"
        android:gravity="center"
        android:textColor="#00B8D4"/>
    <TextView
        android:id="@+id/no33"
        android:layout_marginTop="5dp"
        android:layout_width="match_parent"
        android:gravity="center"
        android:layout_height="25dp"
        android:inputType="text"
        android:textColor="#D50000"
        android:text="学号不能修改"/>
    <EditText
        android:id="@+id/name33"
        android:layout_marginTop="5dp"
        android:layout_width="match_parent"
        android:layout_height="wrap_content"
        android:inputType="text"
        android:hint="@string/name" />
    <EditText
        android:id="@+id/age33"
        android:layout_marginTop="2dp"
        android:layout_width="match_parent"
        android:layout_height="wrap_content"
        android:inputType="numberSigned"
        android:maxLength="3"
        android:hint="@string/age"/>
    <AutoCompleteTextView
        android:id="@+id/major33"
        android:layout_width="match_parent"
        android:layout_height="wrap_content"
        android:layout_marginTop="2dp"
        android:inputType="text"
        android:hint="@string/major"/>
    <TextView
        android:layout_width="match_parent"
        android:layout_marginTop="2dp"
        android:layout_height="wrap_content"
        android:textColor="#00B8D4"
        android:text="性别"/>
    <RadioGroup
        android:layout_width="match_parent"
        android:layout_height="wrap_content"
        android:id="@+id/sex33"
        android:orientation="horizontal">
        <RadioButton
            android:layout_width="600dp"
            android:layout_height="wrap_content"
            android:layout_weight="1"
            android:textColor="#00B0FF"
            android:clickable="false"
            android:text="男"/>
        <RadioButton
            android:layout_width="match_parent"
            android:layout_height="wrap_content"
            android:layout_weight="1"
            android:clickable="false"
            android:textColor="#D81B60"
            android:text="女"/>
    </RadioGroup>
    <LinearLayout
        android:layout_width="match_parent"
        android:layout_height="wrap_content"
        android:layout_marginTop="15dp"
        android:orientation="horizontal">
        <Button
            android:id="@+id/exit1"
            android:layout_width="match_parent"
            android:layout_height="wrap_content"
            android:layout_weight="1"
            android:background="@drawable/button_shape1"
            android:text="退出" />
    </LinearLayout>
</LinearLayout>
界面设计的效果图如下所示:
8-2、该界面的实现类java代码如下所示:
package com.cqjtu.studentsystemweb;
import androidx.appcompat.app.AppCompatActivity;
import android.os.Bundle;
import android.view.View;
import android.widget.Button;
import android.widget.CheckBox;
import android.widget.EditText;
import android.widget.LinearLayout;
import android.widget.RadioButton;
import android.widget.RadioGroup;
import android.widget.TextView;
import java.util.ArrayList;
import java.util.List;
public class delite extends AppCompatActivity implements View.OnClickListener {
    private TextView id33;
    private EditText major33;
    private EditText age33;
    private RadioGroup sex33;
    private EditText name33;
    private Button exit1;
    @Override
    protected void onCreate(Bundle savedInstanceState) {
        super.onCreate(savedInstanceState);
        setContentView(R.layout.activity_delite);
        id33=(TextView)findViewById(R.id.no33);
        name33=(EditText) findViewById(R.id.name33);
        sex33=(RadioGroup) findViewById(R.id.sex33);
        age33=(EditText) findViewById(R.id.age33);
        major33=(EditText)findViewById(R.id.major33);
        exit1=(Button)findViewById(R.id.exit1);
        exit1.setOnClickListener(this);
        name33.setKeyListener(null);
        age33.setKeyListener(null);
        major33.setKeyListener(null);
        View v = findViewById(R.id.back4);
        v.getBackground().setAlpha(230);
        Bundle bundle = getIntent().getExtras();
        List<Student> show=(ArrayList<Student>)bundle.get("show");
        String id=(String) show.get(0).getId();
        String name=(String) show.get(0).getName();
        String sex=(String) show.get(0).getSex();
        String age=(String) show.get(0).getAge();
        String major=(String)show.get(0).getMajor();
        id33.setText("学生学号:"+id);
        name33.setText("姓名:"+name);
        showRadio(sex33,sex);
        age33.setText("年龄:"+age);
        major33.setText("专业:"+major);
    }
    public void showRadio(RadioGroup radioGroup, String v){
        int num=radioGroup.getChildCount();
        for(int i=0;i<num;i++){
            RadioButton radioButton=(RadioButton)radioGroup.getChildAt(i);
            String info=radioButton.getText().toString();
            if(info.equals(v)){
                radioButton.setChecked(true);
                break;
            }
        }
    }
    public void showBox(LinearLayout linearLayout , List<String>v){
        int num=linearLayout.getChildCount();
        for(int i=0;i<num;i++){
            CheckBox checkBox=(CheckBox)linearLayout.getChildAt(i);
            checkBox.setChecked(false);
            for(String c:v){
                if(checkBox.getText().toString().equals(c)){
                    checkBox.setChecked(true);
                    break;
                }
            }
        }
    }
    @Override
    public void onClick(View view) {
        if(view.getId()==R.id.exit1){
            finish();
        }
    }
}
到这里,我们的AndroidStudent端的项目设计就完成了,接下来,我们就该进行服务器端的讲解了
二、eclisp-Tomcat端的步骤如下所示:
对于eclisp中的Tomcat的布置,大家可以参照一下网上的博客进行服务器端的Tomcat端进行相应的配置
Tomcat在eclisp上面的配置参考教程
(一)、创建我们需要的数据库
1、用户名和密码的保存:
| 列名 | 数据类型 |
|---|---|
| no | int |
| username | varchar(30) |
| password | varchar(30) |
2、学生信息列表的创建:
| 列名 | 数据类型 |
|---|---|
| no | int |
| name | varchar(30) |
| age | int |
| sex | varchar(5) |
| major | varchar(30) |
(二)、创建学生信息类和用户名类对应android端的学生信息
1、学生类的java代码如下:
package cqjtu.edu.studentadmin.entity;
public class Student {
	private int no;
	private String name;
	private String sex;
	private int age;
	private String major;
	public Student(){}
	public Student(int no,String name,String sex,int age,String major){
		this.no=no;
		this.name=name;
		this.sex=sex;
		this.age=age;
		this.major=major;
	}
	public int getNo() {
		return no;
	}
	public void setNo(int no) {
		this.no = no;
	}
	public String getName() {
		return name;
	}
	public void setName(String name) {
		this.name = name;
	}
	public String getSex() {
		return sex;
	}
	public void setSex(String sex) {
		this.sex = sex;
	}
	public int getAge() {
		return age;
	}
	public void setAge(int age) {
		this.age = age;
	}
	public String getMajor() {
		return major;
	}
	public void setMajor(String major) {
		this.major = major;
	}
}
2、用户名类的java代码如下:
package cqjtu.edu.studentadmin.entity;
public class User {
	private int no;
	private String userName;
	private String password;
	public int getNo() {
		return no;
	}
	public void setNo(int no) {
		this.no = no;
	}
	public String getUserName() {
		return userName;
	}
	public void setUserName(String userName) {
		this.userName = userName;
	}
	public String getPassword() {
		return password;
	}
	public void setPassword(String password) {
		this.password = password;
	}
}
(三)、让服务器端与SqlServer数据库进行连接匹配
1、创建一个java类DatabaseOperation进行对数据库的连接,代码如下所示:
package cqjtu.edu.studentadmin.dao;
import java.sql.Connection;
import java.sql.DriverManager;
import java.sql.PreparedStatement;
import java.sql.ResultSet;
import java.sql.SQLException;
import java.util.ArrayList;
import java.util.List;
import cqjtu.edu.studentadmin.entity.Course;
import cqjtu.edu.studentadmin.entity.Grade;
import cqjtu.edu.studentadmin.entity.Student;
public class DatabaseOperation {
	public static Connection getConn() {
		String driverName="com.microsoft.sqlserver.jdbc.SQLServerDriver";
		String dbURL="jdbc:sqlserver://localhost:1433;DatabaseName=javaWeb;";
		String userName="sa";
		String userPwd="*******";//这里填写自己的数据库连接的密码
		try
		{
		    Class.forName(driverName);
		    Connection dbConn=DriverManager.getConnection(dbURL,userName,userPwd);
		    return dbConn;
		 }
		 catch(ClassNotFoundException e)
		 {
			  e.printStackTrace();
		 }
		 catch(SQLException e) {
			  e.printStackTrace();
		 }
		 return null;
	}
    /*
     * 用户登录验证
     */
    public boolean findUser(String name,String password){
    	Connection conn=getConn();
		String sql="select * from user1 where username=? and password=?";
		PreparedStatement pst=null;
		try {
			pst=conn.prepareStatement(sql);
			pst.setString(1, name);
			pst.setString(2, password);
			ResultSet results=pst.executeQuery();
			while(results.next()) {
				return true;
			}
		} catch (SQLException e) {
			// TODO Auto-generated catch block
			e.printStackTrace();
		}finally {
			try {
				pst.close();
				conn.close();
			} catch (SQLException e) {
				// TODO Auto-generated catch block
				e.printStackTrace();
			}

		}
    	return false;
    }
    /*
     * 学生信息查询
     */
    public List<Student> findStuInfo(String key){
		List<Student> students=new ArrayList<Student>();
		Connection conn=getConn();
		String sql = "select * from student where name like '%"+key+"%' or no like '%"+key+"%'";
		try {
			PreparedStatement pst=conn.prepareStatement(sql);
			ResultSet results=pst.executeQuery();
			while(results.next()){
				int no=results.getInt("no");
				String name=results.getString("name");
				String sex=results.getString("sex");
				int age=results.getInt("age");
				String major=results.getString("major");
				Student s=new Student(no,name,sex,age,major);
				students.add(s);
			}
		} catch (SQLException e) {
			// TODO Auto-generated catch block
			e.printStackTrace();
		}
		return students;
	}
    /*
     * 删除学生信息
     */
    public int deleteGradeInfo(int no,int no1){
    	int i=0;
    	Connection con=getConn();
    	String sql="delete from grade where sno=? and cno=?";
    	try {
			PreparedStatement pst=con.prepareStatement(sql);
			pst.setInt(1,no);
			pst.setInt(2,no1);
			i=pst.executeUpdate();
			pst.close();
			con.close();
		} catch (SQLException e) {
			// TODO Auto-generated catch block
			e.printStackTrace();
		}
    	return i;
    }
    /*
     * 插入学生信息
     */
    public int insertStuInfo(Student s){
		if(s==null) return 0;
		Connection con=getConn();
		String sql="insert into student(name,sex,age,major) values(?,?,?,?)";
		try {
			PreparedStatement pst=con.prepareStatement(sql);
			pst.setString(1, s.getName());
			pst.setString(2, s.getSex());
			pst.setInt(3, s.getAge());
			pst.setString(4, s.getMajor());
			int i=pst.executeUpdate();
			pst.close();
			con.close();
			return i;
		} catch (SQLException e) {
			// TODO Auto-generated catch block
			e.printStackTrace();
			return 0;

		}
	}
    /*
     * 编辑学生信息
     */
    public int updateStudent(Student s){
		int i=0;
		Connection con=getConn();
		String sql="update student set name='"+s.getName()+"',sex='"+s.getSex()+"',age="+s.getAge()+",major='"+s.getMajor()+"'where"
				+ " no="+s.getNo();
		try {
			PreparedStatement pst=con.prepareStatement(sql);
			i=pst.executeUpdate();
			pst.close();
			con.close();
		} catch (SQLException e) {
			// TODO Auto-generated catch block
			e.printStackTrace();
		}
		return i;
	}
}
(四)、对服务器学生信息实现和数据库学生信息同步的增、删、改、查!
1、首先创建一个学生信息的接口类,StudentOperation,实现学生信息的一系列操作的函数接口,代码如下所示:
package cqjtu.edu.studentadmin.service;
import java.util.List;
import cqjtu.edu.studentadmin.entity.Student;
public interface StudentOperation {
	public abstract List<Student> searchStudent(String key);
	public abstract int  deleteStudent(int no);
	public abstract int  insertStudent(Student s);
	public abstract int  updateStudent(Student s);
}
增加学生信息public abstract int insertStudent(Student s);
删除学生信息public abstract int deleteStudent(int no);
修改学生信息public abstract int updateStudent(Student s);
查找学生信息public abstract List<Student> searchStudent(String key);
2、创建有一个学生信息接口函数的实现类StudentOperationImp,为接口StudentOperation完成函数的实现,java代码如下:
package cqjtu.edu.studentadmin.service;
import java.util.List;
import cqjtu.edu.studentadmin.dao.DatabaseOperation;
import cqjtu.edu.studentadmin.entity.Student;
public class StudentOperationImp implements StudentOperation {
	DatabaseOperation dbOp = new DatabaseOperation();
	@Override
	public List<Student> searchStudent(String key) {
		// TODO Auto-generated method stub
		return dbOp.findStuInfo(key);
	}
	@Override
	public int deleteStudent(int no) {
		int i = dbOp.deleteStuInfo(no);
		return i;
	}
	@Override
	public int insertStudent(Student s) {
		int i = dbOp.insertStuInfo(s);
		return i;
	}
	@Override
	public int updateStudent(Student s) {
		int i=dbOp.updateStudent(s);
		return i;
	}
}
以上中返回(return)的函数在数据库连接的函数中可以找到。
(五)、创建学生信息的servlet服务和用户信息的servlet服务,用来实现前端和后端的相互访问
1、新建一个servlet名为LoginServlet,进行用户的登录数据获取代码如下:
package cqjtu.edu.jsp.servlet;
import java.io.IOException;
import java.io.PrintWriter;
import javax.servlet.ServletException;
import javax.servlet.http.HttpServlet;
import javax.servlet.http.HttpServletRequest;
import javax.servlet.http.HttpServletResponse;
import com.alibaba.fastjson.JSONObject;
import cqjtu.edu.studentadmin.service.LoginService;
public class LoginServlet extends HttpServlet {
	private static final long serialVersionUID = 1L;
    LoginService loginService=new LoginService();
	@Override
	protected void doGet(HttpServletRequest request, HttpServletResponse response) throws ServletException, IOException {
		// TODO Auto-generated method stub
		response.setContentType("text/html;charset=utf-8");
		//
		response.setCharacterEncoding("UTF-8");
		request.setCharacterEncoding("UTF-8");
		String username=request.getParameter("userName");
		String password=request.getParameter("password");
		JSONObject json = new JSONObject();
		if(loginService.loginCheck(username, password)) {
			json.put("code", 1);
		}else {
			json.put("code", 0);
		}
		PrintWriter pw=response.getWriter();
		pw.print(json);
		pw.close();
	}
	@Override
	protected void doPost(HttpServletRequest request, HttpServletResponse resp) throws ServletException, IOException {
		doGet(request,resp);
	}
}
这里response.setCharacterEncoding("UTF-8")和request.setCharacterEncoding("UTF-8")这两句代码很重要,一个是保证传过去的数据不会发生乱码、另一个是保证从前端传回来的数据不会发生乱码、任何一个发生都会导致学生信息查找失败或者用户登录失败。
2、新建一个servlet名为StudentInsertServlet,进行学生信息插入,java代码如下:
package cqjtu.edu.jsp.servlet;
import java.io.IOException;
import java.io.PrintWriter;
import javax.servlet.ServletException;
import javax.servlet.annotation.WebServlet;
import javax.servlet.http.HttpServlet;
import javax.servlet.http.HttpServletRequest;
import javax.servlet.http.HttpServletResponse;
import com.alibaba.fastjson.JSONObject;
import com.mysql.jdbc.StringUtils;
import cqjtu.edu.studentadmin.entity.Student;
import cqjtu.edu.studentadmin.service.StudentOperationImp;
/**
 * 学生信息保存
 */
@WebServlet("/StudentInsertServlet")
public class StudentInsertServlet extends HttpServlet {
	private static final long serialVersionUID = 1L;
	StudentOperationImp stuOper = new StudentOperationImp();
	/**
	 * @see HttpServlet#doPost(HttpServletRequest request, HttpServletResponse response)
	 */
	protected void doGet(HttpServletRequest request, HttpServletResponse response) throws ServletException, IOException {
		response.setContentType("text/html;charset=utf-8");
		response.setCharacterEncoding("UTF-8");
		request.setCharacterEncoding("UTF-8");
		String name=request.getParameter("name");
		String age=request.getParameter("age");
		String no=request.getParameter("no");
		String sex=request.getParameter("sex");
		String major=request.getParameter("major");
		int i=0 ;
		if(StringUtils.isNullOrEmpty(no)) {//如果有No说明是编辑,没有说明是新增
			Student s=new Student(0,name,sex,Integer.parseInt(age),major);
			i=stuOper.insertStudent(s);
		}else {
			Student s=new Student(Integer.parseInt(no),name,sex,Integer.parseInt(age),major);
			i=stuOper.updateStudent(s);
		}
		JSONObject json = new JSONObject();
		json.put("code", i);
		PrintWriter pw=response.getWriter();
		pw.print(json);
		pw.close();
	}
	@Override
	protected void doPost(HttpServletRequest request, HttpServletResponse resp) throws ServletException, IOException {
		doGet(request,resp);
	}
}
3、新建一个servlet名为StudentQuery,进行学生信息的查询,java代码如下:
package cqjtu.edu.jsp.servlet;
import java.io.IOException;
import java.io.PrintWriter;
import java.util.List;
import javax.servlet.ServletException;
import javax.servlet.annotation.WebServlet;
import javax.servlet.http.HttpServlet;
import javax.servlet.http.HttpServletRequest;
import javax.servlet.http.HttpServletResponse;
import com.alibaba.fastjson.JSONObject;
import cqjtu.edu.studentadmin.entity.Student;
import cqjtu.edu.studentadmin.service.StudentOperationImp;

/**
 * Servlet implementation class StudentQuery
 */
@WebServlet("/StudentQuery")
public class StudentQuery extends HttpServlet {
	private static final long serialVersionUID = 1L;
	StudentOperationImp stuOper = new StudentOperationImp();
	/**
	 * 学生信息查询
	 */
	protected void doGet(HttpServletRequest request, HttpServletResponse response)
			throws ServletException, IOException {
		// TODO Auto-generated method stub
		response.setContentType("text/html;charset=utf-8");//防止页面出现中文乱码,要放在PrintWriter前面
		response.setCharacterEncoding("UTF-8");
		request.setCharacterEncoding("UTF-8");
		String key = request.getParameter("key");
		JSONObject json = new JSONObject();
		List<Student> students=stuOper.searchStudent(key);
		json.put("students", students);
		PrintWriter pw = response.getWriter();
		pw.print(json);
		pw.close();
	}
	@Override
	protected void doPost(HttpServletRequest request, HttpServletResponse resp) throws ServletException, IOException {
		doGet(request,resp);
	}
}
4、新建一个servlet名为StudentDelServlet,进行学生信息的删除,java代码如下:
package cqjtu.edu.jsp.servlet;
import java.io.IOException;
import java.io.PrintWriter;
import javax.servlet.ServletException;
import javax.servlet.annotation.WebServlet;
import javax.servlet.http.HttpServlet;
import javax.servlet.http.HttpServletRequest;
import javax.servlet.http.HttpServletResponse;
import com.alibaba.fastjson.JSONObject;
import cqjtu.edu.studentadmin.service.StudentOperationImp;

/**
 * Servlet implementation class StudentDelServlet
 */
@WebServlet("/StudentDelServlet")
public class StudentDelServlet extends HttpServlet {
	private static final long serialVersionUID = 1L;
	StudentOperationImp stuOper = new StudentOperationImp();
	/**
	 * @see HttpServlet#doGet(HttpServletRequest request, HttpServletResponse response)
	 */
	protected void doGet(HttpServletRequest request, HttpServletResponse response) throws ServletException, IOException {
		// TODO Auto-generated method stub
		response.setContentType("text/html;charset=utf-8");
		//
		response.setCharacterEncoding("UTF-8");
		request.setCharacterEncoding("UTF-8");
		String no = request.getParameter("no");
		int i=stuOper.deleteStudent(Integer.parseInt(no));
		JSONObject json = new JSONObject();
		json.put("code", i);
		PrintWriter pw = response.getWriter();
		pw.print(json);
		pw.close();
	}
	@Override
	protected void doPost(HttpServletRequest request, HttpServletResponse resp) throws ServletException, IOException {
		doGet(request,resp);
	}
}
(六)、在创建的web项目中找到web.xml文件,将里面添加代码为我们上面创建的一系列servlet
1、web.xml中的代码如下所示:
<?xml version="1.0" encoding="UTF-8"?>
<web-app xmlns:xsi="http://www.w3.org/2001/XMLSchema-instance" xmlns="http://xmlns.jcp.org/xml/ns/javaee" xsi:schemaLocation="http://xmlns.jcp.org/xml/ns/javaee http://xmlns.jcp.org/xml/ns/javaee/web-app_3_1.xsd" version="3.1">
  <display-name>JSPStudy</display-name>
  <servlet>
    <servlet-name>loginServlet</servlet-name>
    <servlet-class>cqjtu.edu.jsp.servlet.LoginServlet</servlet-class>
  </servlet>
  <servlet-mapping>
    <servlet-name>loginServlet</servlet-name>
    <url-pattern>/login</url-pattern>
  </servlet-mapping>
  <servlet>
    <servlet-name>studentQuery</servlet-name>
    <servlet-class>cqjtu.edu.jsp.servlet.StudentQuery</servlet-class>
  </servlet>
  <servlet-mapping>
    <servlet-name>studentQuery</servlet-name>
    <url-pattern>/studentQuery</url-pattern>
  </servlet-mapping>
  <servlet>
    <servlet-name>studentDelServlet</servlet-name>
    <servlet-class>cqjtu.edu.jsp.servlet.StudentDelServlet</servlet-class>
  </servlet>
  <servlet-mapping>
    <servlet-name>studentDelServlet</servlet-name>
    <url-pattern>/studentDelServlet</url-pattern>
  </servlet-mapping>
  <servlet>
    <servlet-name>studentInsertServlet</servlet-name>
    <servlet-class>cqjtu.edu.jsp.servlet.StudentInsertServlet</servlet-class>
  </servlet>
  <servlet-mapping>
    <servlet-name>studentInsertServlet</servlet-name>
    <url-pattern>/studentInsertServlet</url-pattern>
  </servlet-mapping>
  <servlet>
    <servlet-name>MyServlet</servlet-name>
    <servlet-class>cqjtu.edu.jsp.servlet.MyServlet</servlet-class>
  </servlet>
  <servlet-mapping>
    <servlet-name>MyServlet</servlet-name>
    <url-pattern>/MyServlet</url-pattern>
  </servlet-mapping>
  <welcome-file-list>
    <welcome-file>index.html</welcome-file>
    <welcome-file>index.htm</welcome-file>
    <welcome-file>index.jsp</welcome-file>
    <welcome-file>default.html</welcome-file>
    <welcome-file>default.htm</welcome-file>
    <welcome-file>default.jsp</welcome-file>
  </welcome-file-list>
</web-app>
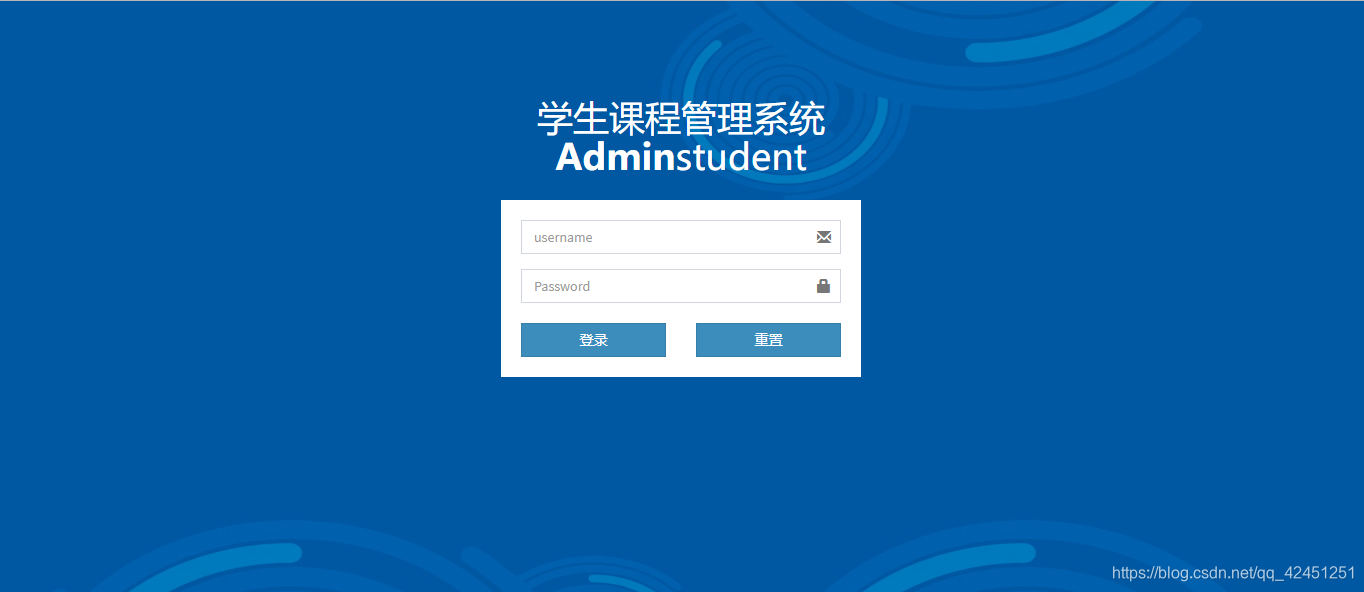
2、创建我们的登录界面login.jsp,html文件代码如下:
<%@ page language="java" contentType="text/html; charset=UTF-8"
	pageEncoding="UTF-8"%>
<!DOCTYPE html PUBLIC "-//W3C//DTD HTML 4.01 Transitional//EN" "http://www.w3.org/TR/html4/loose.dtd">
<html>
<head>
<meta http-equiv="Content-Type" content="text/html; charset=UTF-8">
<link rel="stylesheet"
	href="<%=request.getContextPath()%>/resource/bootstrap/css/bootstrap.min.css">
<link rel="stylesheet"
	href="<%=request.getContextPath()%>/resource/dist/css/AdminLTE.min.css">
<link rel="stylesheet"
	href="<%=request.getContextPath()%>/temp/login/logincss/myLogin.css">
<title>登录</title>
</head>
<body class="hold-transition login-page">
	<div class="login-box">
		<div class="login-logo">
			<h1>
				学生课程管理系统<b>Admin</b>student
			</h1>
		</div>
		<!-- /.login-logo -->
		<div class="login-box-body">
			<div class="form-group has-feedback">
				<input type="text" class="form-control" placeholder="username"
					id="userName"> <span
					class="glyphicon glyphicon-envelope form-control-feedback"></span>
			</div>
			<div class="form-group has-feedback">
				<input type="password" class="form-control" placeholder="Password"
					id="password"> <span
					class="glyphicon glyphicon-lock form-control-feedback"></span>
			</div>
			<div class="col-xs-12">
				<label id="error" style="color: red"></label>
			</div>
			<div class="row">
				<div class="col-xs-6">
					<button type="button" id="loginBtn"
						class="btn btn-primary btn-block btn-flat">登录</button>
				</div>
				<!-- /.col -->
				<div class="col-xs-6">
					<button type="reset" class="btn btn-primary btn-block btn-flat">重置</button>
				</div>
				<!-- /.col -->
			</div>
		</div>
		<!-- /.login-box-body -->
	</div>
	<!-- /.login-box -->
	<!-- jQuery 2.1.4 -->
	<script
		src="<%=request.getContextPath()%>/resource/jQuery/jQuery-2.1.4.min.js"></script>
	<!-- Bootstrap 3.3.5 -->
	<script
		src="<%=request.getContextPath()%>/resource/bootstrap/js/bootstrap.min.js"></script>
	<script type="text/javascript">
		$('#loginBtn').on('click',function(){
			var userName=$('#userName').val();
			var password=$('#password').val();
			var url="<%=request.getContextPath()%>/login"
			var data = {
				"userName" : userName,
				"password" : password
			}
			$.ajax({
				type : "post",
				url : url,
				dataType : "json",
				data:data,
				success : function(data) {
                    if(data.code==1){
                    	window.location ='<%=request.getContextPath()%>/temp/student/student.jsp';
					} else {
						$('#error').html('用户名或密码错误');
					}
                }
		   })
	})
	</script>
</body>
</html>
登录界面的效果如下所示:
3、创建我们的学生信息界面student.jsp,html文件代码如下:
<%@ page language="java" contentType="text/html; charset=UTF-8"
pageEncoding="UTF-8"%>
<!DOCTYPE html PUBLIC "-//W3C//DTD HTML 4.01 Transitional//EN" "http://www.w3.org/TR/html4/loose.dtd">
<html>
<head>
<meta http-equiv="Content-Type" content="text/html; charset=UTF-8">
<link rel="stylesheet"
href="<%=request.getContextPath()%>/resource/bootstrap/css/bootstrap.min.css">
<link rel="stylesheet"
href="<%=request.getContextPath()%>/resource/dist/css/AdminLTE.min.css">
<link rel="stylesheet"
href="<%=request.getContextPath()%>/resource/dist/css/skins/_all-skins.min.css">
<link rel="stylesheet"
href="<%=request.getContextPath()%>/resource/font-awesome-4.4.0/css/font-awesome.min.css">
<link rel="stylesheet"
href="<%=request.getContextPath()%>/resource/datatables/dataTables.bootstrap.css">
<link rel="stylesheet"
href="<%=request.getContextPath()%>/resource/mycss/mystlye.css">
<style type="text/css">
table {
text-align:center; /*设置水平居中*/
vertical-align:middle;/*设置垂直居中*/
font-size: 12px;
}
th {
text-align:center; /*设置水平居中*/
vertical-align:middle;/*设置垂直居中*/
font-size: 14px;
}
</style>
<title>学生信息管理</title>
</head>
<body class="hold-transition skin-yellow layout-top-nav">
<div class="wrapper">
<div class="main-header">
<div class="navbar navbar-static-top">
<div class="navbar-header">
<a href="#" class="navbar-brand"><b>Admin</b>课程管理</a>
</div>
<!--顶部导航栏菜单按钮-->
<div class="collapse navbar-collapse pull-left" id="navbar-collapse">
<ul class="nav navbar-nav">
<li class="active"><a href="#" id="studenshow">学生信息 <span
class="sr-only">(current)</span></a></li>
<li class="dropdown"><a href="course.jsp">课程信息 <span
class="sr-only">(current)</span></a></li>
<li class="dropdown"><a href="grade.jsp">成绩管理 <span
class="sr-only">(current)</span></a></li>
</ul>
</div>
<!-- /.navbar-collapse -->
<!--顶部导航栏右侧的-->
</div>
</div>
<div class="content-wrapper">
<div class="content" style="min-height: 560px">
<div class="box-header with-border">
<i class="fa fa-th-list"></i>
<h4 class="box-title">学生管理</h4>
</div>
<div class="box-body">
<div class="box-header with-border">
<button type="button" name="add"
class="btn btn-info pull-left addBtn">
<i class="fa fa-plus-circle"></i>添加
</button>
<button type="button" name="cancel" id="cancel-btn"
class="btn btn-info pull-left resetBtn" title="刷新">
<i class="fa fa-refresh"></i>刷新
</button>
<div class="form-inline pull-right">
<button type="button" name="search" id="search-btn"
class="btn btn-default pull-right searchBtn" title="查询">
<i class="fa fa-search"></i>
</button>
<input type="text"
class="form-control pull-right name-search position-search"
id="keyword" placeholder="姓名" />
</div>
</div>
<table width="100%" id="dataTable" class="table" >
<thead>
<tr>
<th width="10%">序号</th>
<th width="10%">学号</th>
<th width="15%">姓名</th>
<th width="15%">年龄</th>
<th width="15%">性别</th>
<th width="15%">专业</th>
<th width="20%">操作</th>
</tr>
</thead>
<tbody id="stuInfoList">
</tbody>
</table>
</div>
</div>
</div>
<div class="main-footer">
<div class="pull-right hidden-xs">
<strong>Copyright © 2016-2017 <a href="#">重庆交通大学</a></strong>
</div>
<b>Version</b> 1.0.0
</div>
<!-- 学生信息弹窗 -->
<div class="modal" id="studentModal">
<div class="modal-dialog" role="dialog">
<div class="modal-content">
<form id="userEditForm">
<div class="modal-header">
<button type="button" class="close" data-dismiss="modal"
aria-label="Close">
<span aria-hidden="true">×</span>
</button>
<h4 class="modal-title">
<strong>学生信息</strong>
</h4>
</div>
<div class="modal-body">
<input type="hidden" name="no" id="no" />
<div class="form-horizontal">
<div class="row">
<div class="form-group">
<label class="col-sm-2 control-label">姓名</label>
<div class="col-sm-4">
<div class="col-md-10">
<input class="form-control" type="text" name="name"
id="name" />
</div>
<div class="col-md-2">
<span style="color: #F00; fontsize: 30px">*</span>
</div>
</div>
<label class="col-sm-2 control-label">年龄</label>
<div class="col-sm-4">
<div class="col-md-10">
<input class="form-control" type="text" name="age" id="age" />
</div>
</div>
</div>
<div class="form-group">
<label class="col-sm-2 control-label">专业</label>
<div class="col-sm-4">
<div class="col-md-10">
<select style="width: 100%" class="form-control"
name="major" id="major">
<option>物联网工程</option>
<option>计算机技术</option>
<option>电子信息工程</option>
</select>
</div>
<div class="col-md-2">
<span style="color: #F00; fontsize: 30px">*</span>
</div>
</div>
<label class="col-sm-2 control-label">性别</label>
<div class="col-sm-4">
<div class="col-md-6">
<input class="radioIterm" type="radio" name="sex" id="sex1"
value="male" checked="checked" />男
</div>
<div class="col-md-6">
<input class="radioIterm" type="radio" name="sex" id="sex2"
value="female" />女
</div>
</div>
</div>
</div>
</div>
</div>
<div class="modal-footer">
<button type="button" class="btn btn-primary saveBtn">保存</button>
<button type="button" class="btn btn-default"
data-dismiss="modal">返回</button>
</div>
</form>
</div>
</div>
</div>
<!-- 学生信息弹窗 -->
</div>
<!-- jQuery 2.1.4 -->
<script
src="<%=request.getContextPath()%>/resource/jQuery/jQuery-2.1.4.min.js"></script>
<!-- Bootstrap 3.3.5 -->
<script
src="<%=request.getContextPath()%>/resource/bootstrap/js/bootstrap.min.js"></script>
<script type="text/javascript">
//加载页面自动获得所有学生信息
jQuery(document).ready(function() {
findStudent("");
})
//打开增加学生信息的弹窗
$('.addBtn').on('click',function(){
jQuery("#no").val('');
jQuery("#name").val('');
jQuery("#age").val('');
jQuery('#sex').prop("checked", true);//默认选中文
jQuery("#major").val('');
jQuery("#studentModal").modal('show');
});
//保存学生信息
$('.saveBtn').on('click',function(){
saveStudent();
});
//查询学生信息
$('.searchBtn').on('click',function(){
var key=$('#keyword').val();
findStudent(key);
})
//刷新表格
$('.resetBtn').on('click',function(){
findStudent("");
})
///保存学生信息
function saveStudent(){
var url='<%=request.getContextPath()%>/StudentInsertServlet';
var no = $('#no').val();
var name = $('#name').val();
var age = $('#age').val();
////确定选择的性别
var sex;
var option = jQuery('input:radio[name="sex"]:checked').val();
if (option == "male") {
sex = '男';
}
if (option == "female") {
sex = '女';
}
///获得专业
var major = $('#major').val();
///传到后台保存的JSON数据
var data = {
'no' : no,
'name' : name,
'age' : age,
'sex' : sex,
'major' : major
}
$.ajax({
type : "post",
url : url,
dataType : "json",
data:data,
success : function(data) {
if (data.code == 1) {
findStudent('');
jQuery("#studentModal").modal('hide');
} else {
alert('保存失败')
}
}
})
}
//查找学生信息
function findStudent(key){
var url='<%=request.getContextPath()%>/StudentQuery?key='+key;
var t1=document.getElementById("dataTable");
$.ajax({
type : "get",
url : url,
dataType : "json",
contentType: "application/x-www-form-urlencoded; charset=utf-8",
success : function(data) {//根据返回的数据画出表格
if(data!=null){
/*加载表格前先删除除第一行的所有行 */
var rows=t1.rows;
for(var i=rows.length-1;i>0;i--){
rows[i].remove();
}
for(var i=0;i<data.students.length;i++){
var row=document.createElement('tr');
row.innerHTML="<td>"+(i+1)+"</td>"+"<td>"
+ data.students[i].no
+ "</td>"
+ "<td>"
+ data.students[i].name
+ "</td>"
+ "<td>"
+ data.students[i].age
+ "</td>"
+ "<td>"
+ data.students[i].sex
+ "</td>"
+ "<td>"
+ data.students[i].major
+ "</td>"
+"<td><button class='btn btn-sm btn-default delBtn' οnclick='deleteStudent(this)' value='"+data.students[i].no+"'>删除</button>"
+"<button class='btn btn-sm btn-default editBtn' οnclick='editStudent(this)' value='"+(i+1)+"'>修改</button></td>";
t1.appendChild(row);
}
}
}
})
}
//编辑学生信息
function editStudent(d) {
jQuery("#studentModal").modal('show');
var i = d.value;
var table = document.getElementById("dataTable");
var rows = table.rows;
var no = rows[i].cells[1].innerHTML;
var name = rows[i].cells[2].innerHTML;
var age = rows[i].cells[3].innerHTML;
var sex=rows[i].cells[4].innerHTML;
var major=rows[i].cells[5].innerHTML;
$('#no').val(no);
$('#name').val(name);
$('#age').val(age);
////单选按钮显示性别
var sex = rows[i].cells[4].innerHTML;
if (sex == "男") {
jQuery("#sex1").prop('checked', true);
}
if (sex == "女") {
jQuery("#sex2").prop('checked', true);
}
///下拉框显示学生的专业
showSelectOption('#major', selectValue);
}
//删除学生信息
function deleteStudent(d){
if(!confirm("是否删除该学生信息")) return;
var no=d.value
var url='<%=request.getContextPath()%>/StudentDelServlet?no='+ no;
$.ajax({
type : "get",
url : url,
dataType : "json",
success : function(data) {
if (data.code == 1) {
var row = d.parentNode.parentNode;//得到当前元素父节点的父节点(tr)
row.parentNode.removeChild(row);//删除当前行
} else {
alert("学生有选课信息不能删除!")
}
}
})
}
</script>
</body>
</html>
学习信息界面的效果如下所示:
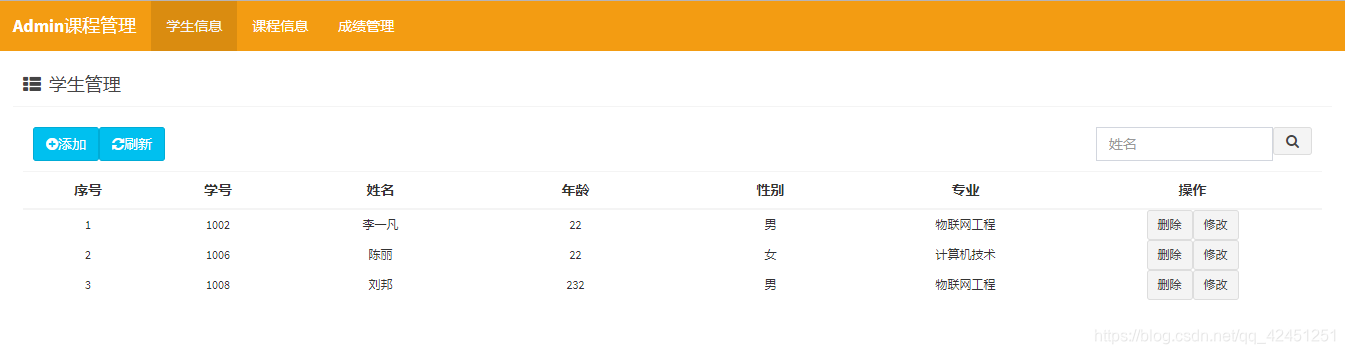
到这里,我们的服务器端的学生信息的相关操作我们也全部介绍完成。这个项目我们值得注意的是,大家一定要保证手机端的网络和电脑的网络处在同一局域网中,所以大家最好用手机开热点吧,然后电脑连接手机的热点进行此项目的操作。感谢大家收看林君的博客,往后我会持续发布相关的博客,包括我们如何处理某java中的某些错误,谢谢大家!
