文章目录
1. 概述
1.1 前言
要学会看控制台打印出来的
错误信息,带着问题来百度会事半功倍哦。
- 环境部署并不需要很大的难度,但是很考验动手能力和经验。
- 刚开始学的时候,踩了不少坑,花了很多时间,于是总结了这篇文档,与大家一起共同学习。
- 主要分为两部分
- 1 环境部署的思路、流程
- 2 项目源码案例(能自己跑起来,可以增大信心哦
^_^)
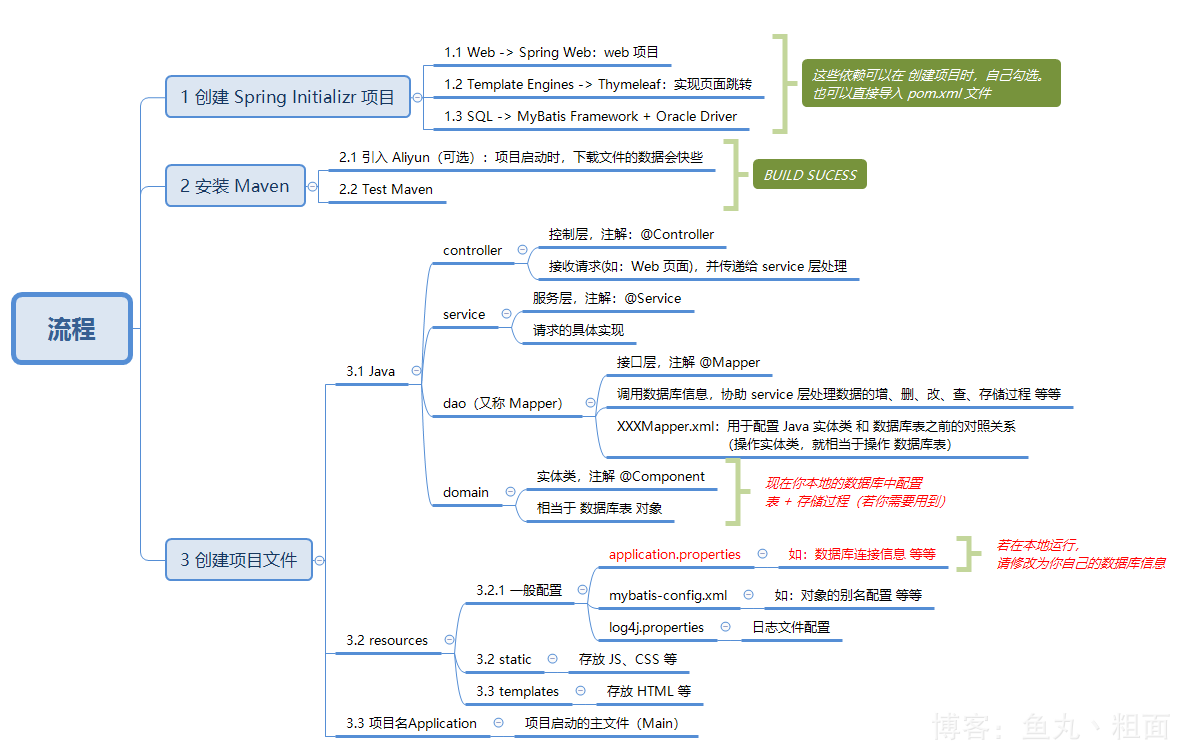
1.2 环境部署导图

1.3 源码福利
- GitHub:
https://github.com/YoYo-simida/SpringBootDemo - Maven 特别说明

2 目录结构

3. 步骤
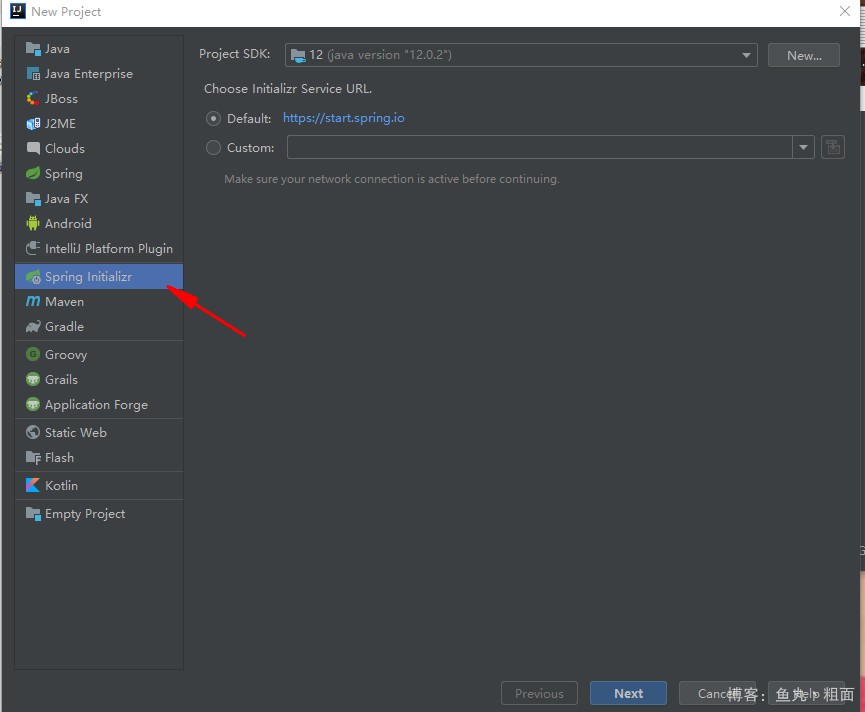
3.1 创建 SprintBoot 项目

(1) 录入 Group 和 Artifact

(2) Web 项目
- 可在此处自己勾选依赖,也可手动在
pom.xml文件中手动添加依赖 - 以下同理

(3) Thymeleaf:将数据显示到页面

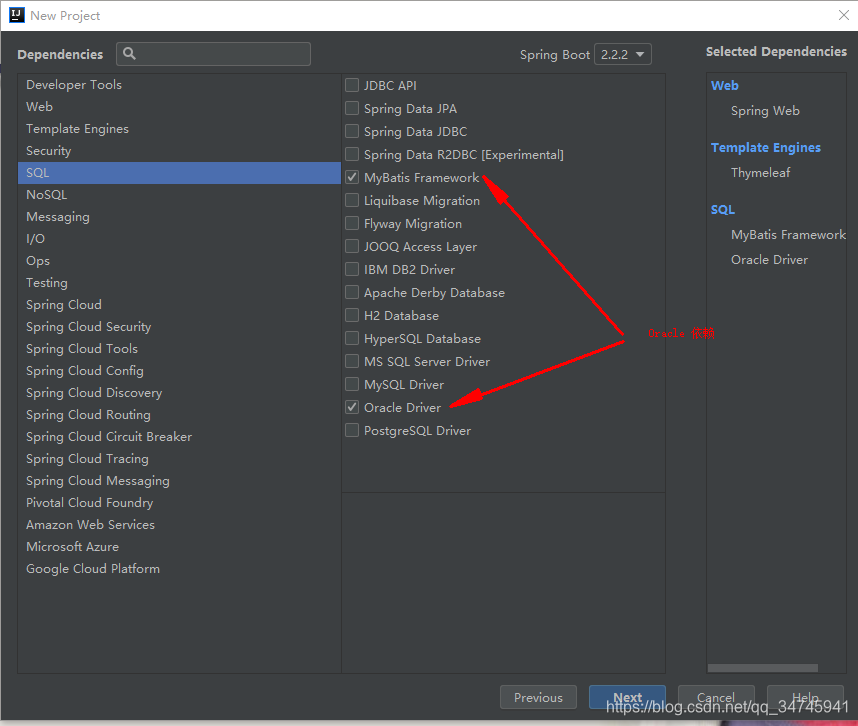
(4) Mybatis + Oracle 依赖
- 注意勾选后,在
pom.xml中看看 Oracle 依赖包是不是ojdbc6

(5) 项目名称

(5) 等待

pom.xml 文件
- 若不想那么麻烦,直接用以下文件覆盖你自己的
pom.xml即可
<?xml version="1.0" encoding="UTF-8"?>
<project xmlns="http://maven.apache.org/POM/4.0.0" xmlns:xsi="http://www.w3.org/2001/XMLSchema-instance"
         xsi:schemaLocation="http://maven.apache.org/POM/4.0.0 https://maven.apache.org/xsd/maven-4.0.0.xsd">
    <modelVersion>4.0.0</modelVersion>
    <parent>
        <groupId>org.springframework.boot</groupId>
        <artifactId>spring-boot-starter-parent</artifactId>
        <version>2.2.2.RELEASE</version>
        <relativePath/> <!-- lookup parent from repository -->
    </parent>
    <groupId>com.example</groupId>
    <artifactId>springbootdemo</artifactId>
    <version>0.0.1-SNAPSHOT</version>
    <name>springbootdemo</name>
    <description>Demo project for Spring Boot</description>

    <properties>
        <java.version>1.8</java.version>
    </properties>

    <dependencies>
        <dependency>
            <groupId>org.springframework.boot</groupId>
            <artifactId>spring-boot-starter-web</artifactId>
        </dependency>
        <dependency>
            <groupId>org.mybatis.spring.boot</groupId>
            <artifactId>mybatis-spring-boot-starter</artifactId>
            <version>2.1.1</version>
        </dependency>

        <dependency>
            <groupId>org.springframework.boot</groupId>
            <artifactId>spring-boot-starter-test</artifactId>
            <scope>test</scope>
            <exclusions>
                <exclusion>
                    <groupId>org.junit.vintage</groupId>
                    <artifactId>junit-vintage-engine</artifactId>
                </exclusion>
            </exclusions>
        </dependency>

        <!--Oracle 依赖 start-->
        <dependency>
            <groupId>org.mybatis</groupId>
            <artifactId>mybatis</artifactId>
            <version>3.5.2</version>
        </dependency>

        <dependency>
            <groupId>com.oracle</groupId>
            <artifactId>ojdbc6</artifactId>
            <version>11.2.0.1.0</version>
        </dependency>
        <!--Oracle 依赖 end-->

        <!--log4j 日志 start-->
        <dependency>
            <groupId>org.springframework.boot</groupId>
            <artifactId>spring-boot-starter-log4j</artifactId>
            <version>1.3.8.RELEASE</version>
        </dependency>
        <!--log4j 日志 end-->

        <!--将数据显示到 web 页面 start-->
        <dependency>
            <groupId>org.springframework.boot</groupId>
            <artifactId>spring-boot-starter-thymeleaf</artifactId>
        </dependency>
        <!--将数据显示到 web 页面 end-->
    </dependencies>

    <build>
        <plugins>
            <plugin>
                <groupId>org.springframework.boot</groupId>
                <artifactId>spring-boot-maven-plugin</artifactId>
            </plugin>
        </plugins>

        <!--找不到map.xml 可以在此处配置,也可以在 application.properties 中配置-->
        <resources>
            <resource>
                <directory>src/main/java</directory>
                <includes>
                    <include>**/*.properties</include>
                    <include>**/*.xml</include>
                </includes>
                <filtering>false</filtering>
            </resource>
            <resource>
                <directory>src/main/resources</directory>
                <includes>
                    <include>**/*.properties</include>
                    <include>**/*.xml</include>
                    <!--坑!!!-->
                    <include>**/*.html</include>
                </includes>
                <filtering>false</filtering>
            </resource>
        </resources>
    </build>

</project>
3.2 配置 Maven
- 第一次启动项目时,加载的时间会很长,因为要从远程下载 依赖 包
- 推荐自己下载一个 Maven,不用 Idea 自带的,方便管理。
- 引入
aliyun的配置,加快启动速度 - 配置路径:
File -> Setting -> 搜索 Maven
	  <mirror>
        <id>alimaven</id>
        <mirrorOf>*</mirrorOf>
        <name>aliyun maven</name>
        <url>http://maven.aliyun.com/nexus/content/repositories/central/</url>
    </mirror>
3.2.1 Test Maven

