UIKit与swiftUI 交互
运用swiftUI写界面非常迅速且酷炫。大大减少了曾经在UIKit中的代码量。
不过有时候可能你还会需要用到UIKit,但是你又想用swiftUI做界面,此时就考虑到二者交互的问题了。
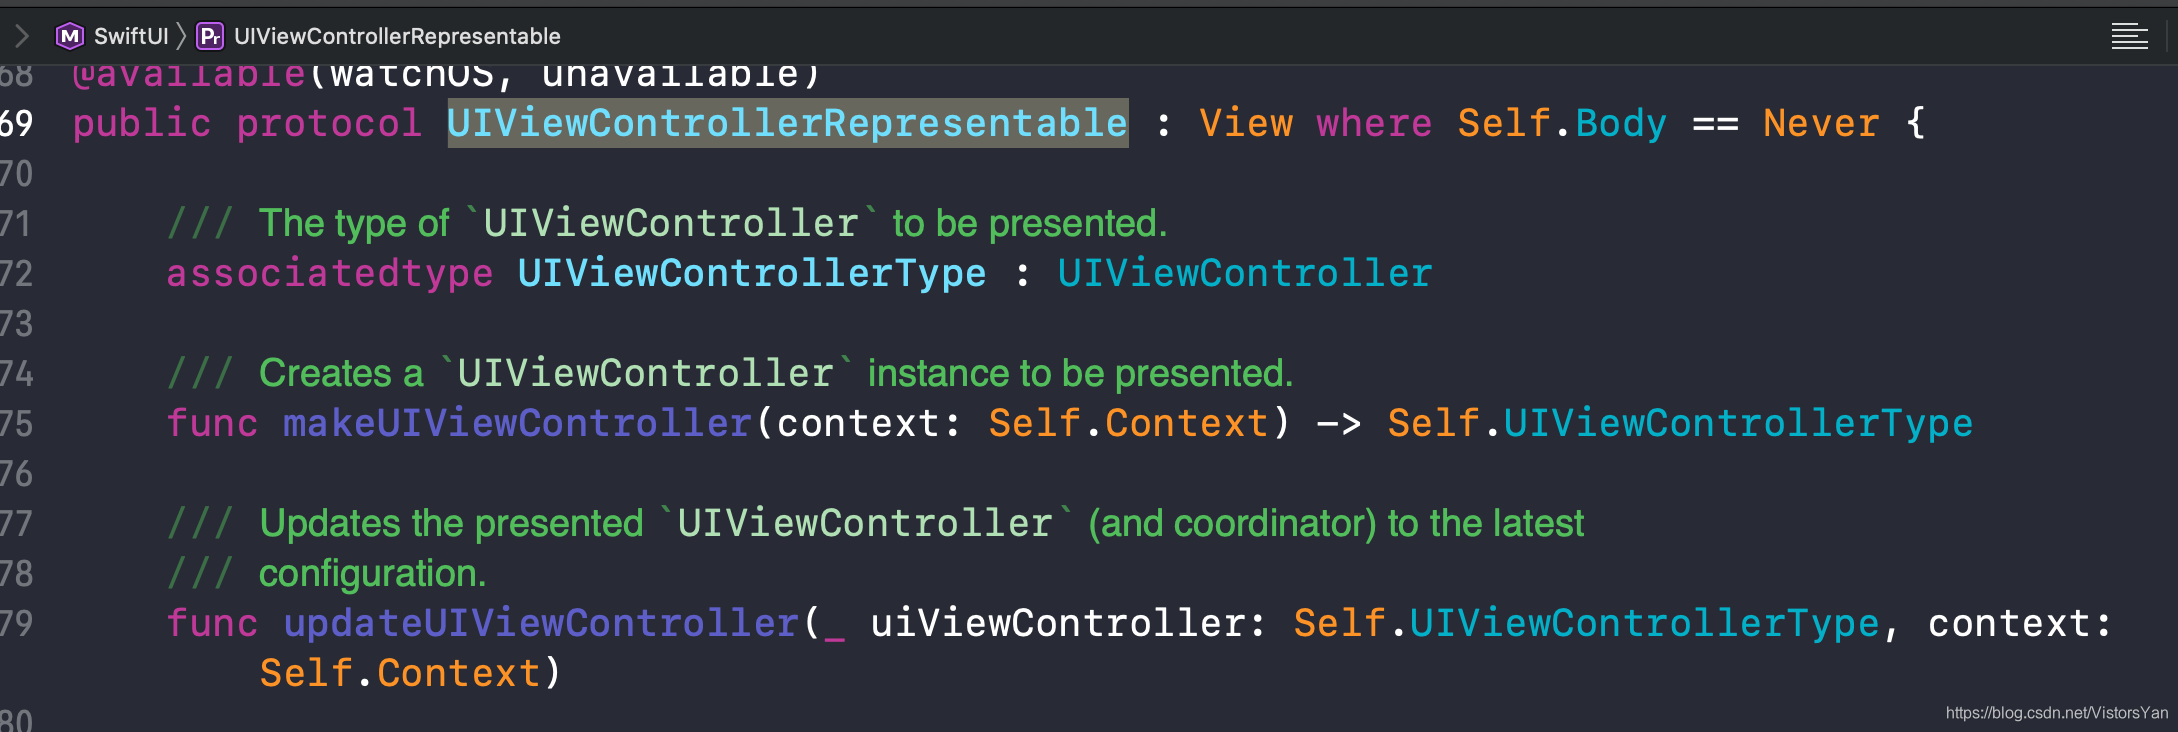
UIViewControllerRepresentable
在swiftUI中提供了一个UIViewControllerRepresentable协议
我们可以用它作为UIKit 与swiftUI的桥接
第一步:
你依然可以像往常一样,新建一个swift文件,把他命名为viewController 然后导入UiKit ,然后再让它继承UIViewController 重写父类的viewDidLoad()方法,你也可以往里面随便添点东西,为后面验证做准备,just like this…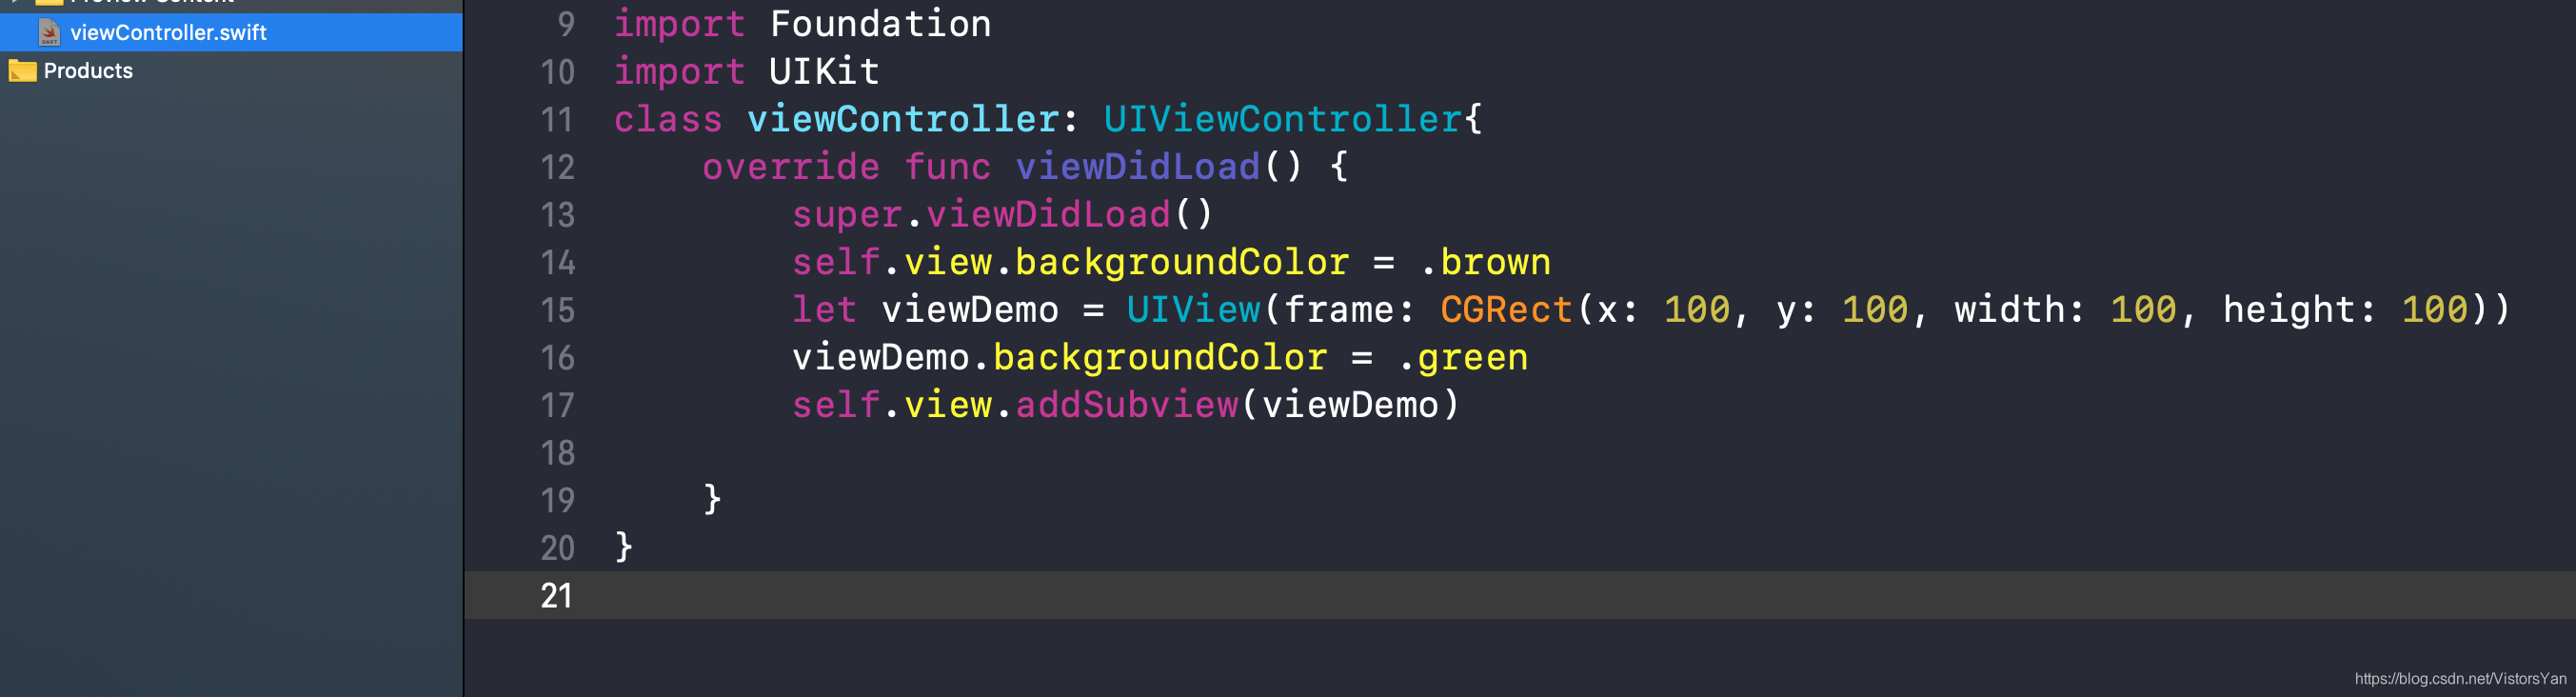
第二步 桥接
第二步就是在你的swiftUI文件中写一个结构体连接你刚创建的viewController 他需要遵循并实现UIViewControllerRepresentable这个协议
第三步 应用
接下来直接在你swiftUI中结构体中调用第二步的结构体就OK了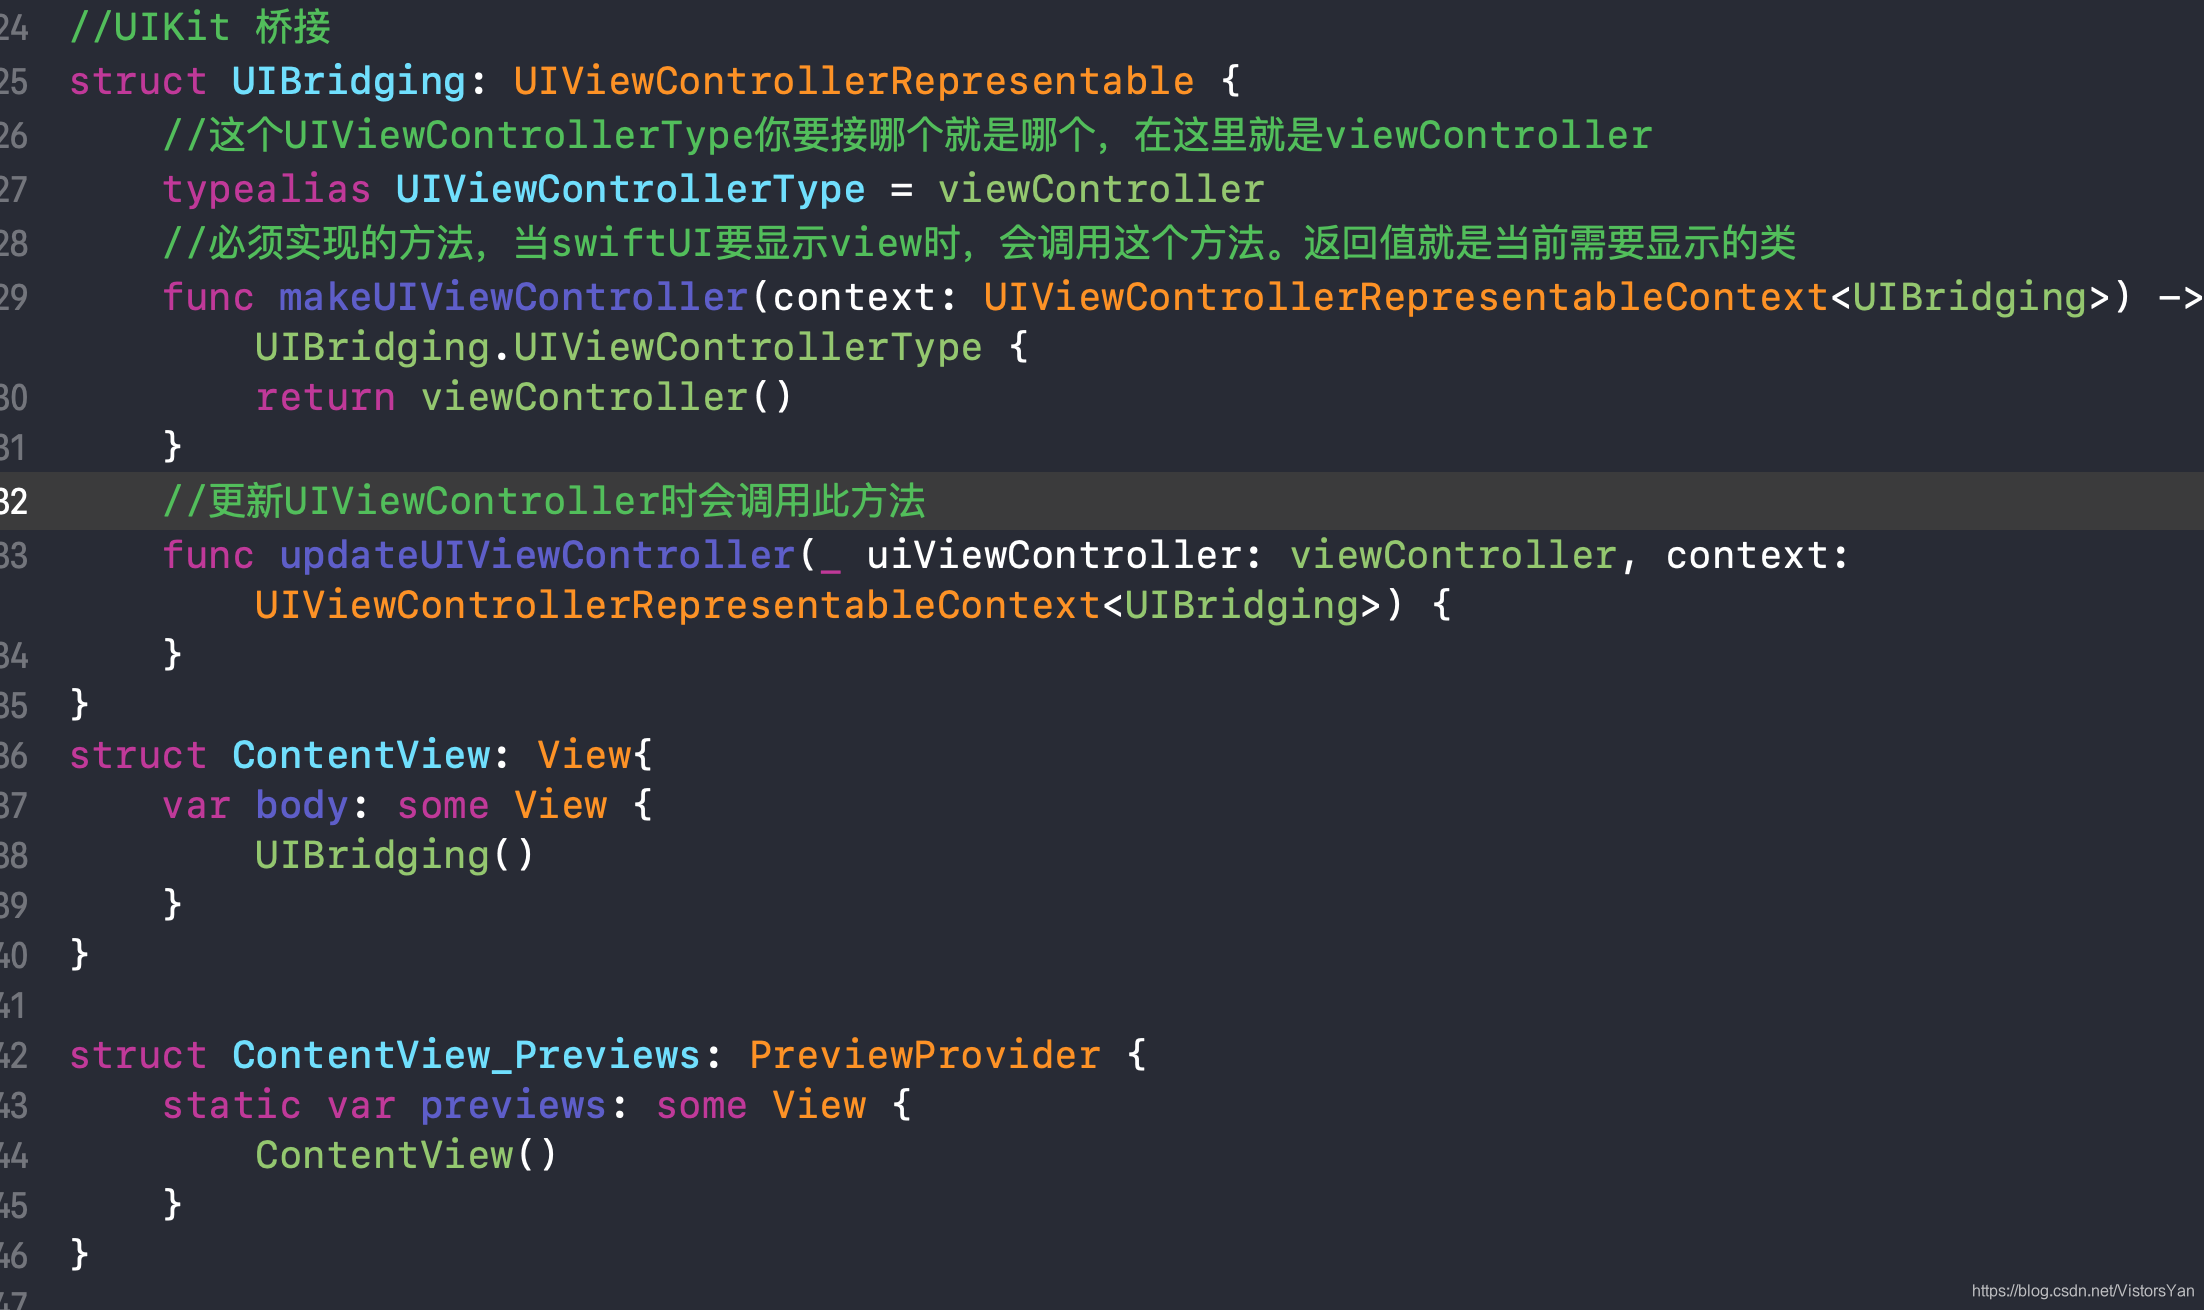
显示效果如图

代码如下:
viewController.swift 文件中:
import Foundation
import UIKit
class viewController: UIViewController{
    override func viewDidLoad() {
        super.viewDidLoad()
        self.view.backgroundColor = .brown
        let viewDemo = UIView(frame: CGRect(x: 100, y: 100, width: 100, height: 100))
        viewDemo.backgroundColor = .green
        self.view.addSubview(viewDemo)

    }
}
ConventView.swift 文件中
//UIKit 桥接
struct UIBridging: UIViewControllerRepresentable {
    //这个UIViewControllerType你要接哪个就是哪个,在这里就是viewController
    typealias UIViewControllerType = viewController
    //必须实现的方法,当swiftUI要显示view时,会调用这个方法。返回值就是当前需要显示的类
    func makeUIViewController(context: UIViewControllerRepresentableContext<UIBridging>) -> UIBridging.UIViewControllerType {
        return viewController()
    }
    //更新UIViewController时会调用此方法
    func updateUIViewController(_ uiViewController: viewController, context: UIViewControllerRepresentableContext<UIBridging>) {
    }
}
struct ContentView: View{
    var body: some View {
        UIBridging()
    }
}

struct ContentView_Previews: PreviewProvider {
    static var previews: some View {
        ContentView()
    }
}
