通过上一篇文章,我们理解了 Path Data 的命令,这样就可以绘制一些简单的矢量图,也可以看懂一些简单的矢量图。
但是,我们经常所看到的别人的矢量图,都并不简单,那么问题来了,这些复杂的矢量图我们怎么绘制呢? 当然是用一些 svg 编辑器 啦。 这个时候,你是不是感觉很兴奋呢,感觉可以开始画一些高逼格的矢量图。呃…,等等,你好像还是画不出来吧。 没错,其实,我也不会,这是 UI 设计师的工作呀。
矢量图资源
既然自己没这个能力,那就伸手去拿现成的(但是不要养成习惯!)。例如,Android Studio 就可以生成很多矢量图。
“File->New->Vector Asset”


然后点击小机器人图标
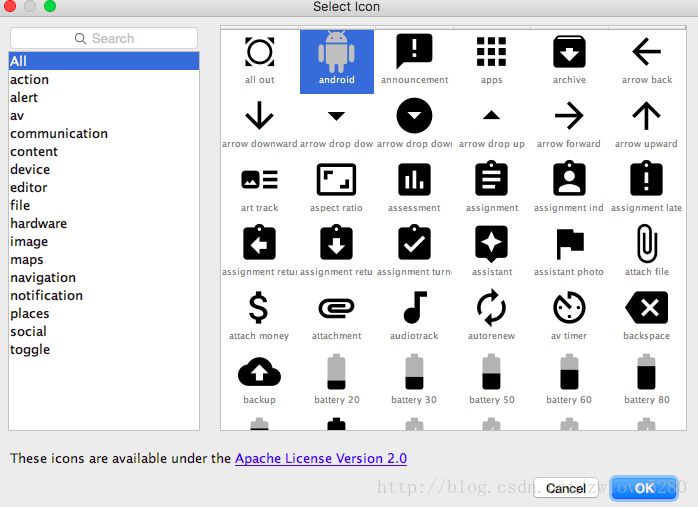
可以看到,这里的矢量图其实还是很多的。
不过问题又随之而来了,这些矢量图都是黑白色的,能不能改下颜色呢?当然能,可以设置 tint 属性,例如
    <ImageView
        android:tint="@color/colorPrimary"
        android:src="@drawable/ic_archive_black_24dp"
        android:layout_width="100dp"
        android:layout_height="100dp"/>
我们给 ImageView 设置了 android:tint 属性,这个时候,图片就不再是黑白色了。

喜欢搞事的你肯定不满足这点图标数量,肯定还想拥有更多的选择,那我就推荐 阿里巴巴矢量图库,这下就问你满不满足。
对PathData做转换
既然已经可以绘制PathData了,那么也应该可以对PathData做转换(缩放,旋转,位移),这个在Android中是用< group >标签包裹 < path >,然后对 < group > 做转换来实现的。 一个 < group > 可以包含多个 < path >,那么在做转换的时候,可以同时对多个 < Path > 应用转换。
< group > 转换属性如下
1. android:pivotX, andoid:pivotY: 缩放,旋转的 x 轴和 y 轴的中心点,默认为原点(0,0)。
2. android:rotation:旋转角度,默认为0
3. android:scaleX,android:scaleY:x 轴和 y 轴的缩放的比例,默认为1
4. android:translateX,android:translateY:x 轴和 y 轴的位移距离,默认为0
例如,我现在画一个播放按钮
<?xml version="1.0" encoding="utf-8"?>
<vector
    xmlns:android="http://schemas.android.com/apk/res/android"
    android:width="24dp"
    android:height="24dp"
    android:viewportHeight="24"
    android:viewportWidth="24">

    <path
        android:fillColor="@color/colorPrimary"
        android:pathData="M 6,6 L 18,12 6,18Z"/>
</vector>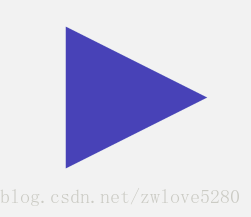
那么,我要让这个图形旋转90°
<?xml version="1.0" encoding="utf-8"?>
<vector
    xmlns:android="http://schemas.android.com/apk/res/android"
    android:width="24dp"
    android:height="24dp"
    android:viewportHeight="24"
    android:viewportWidth="24">

    <group
        android:pivotX="12"
        android:pivotY="12"
        android:rotation="90">

        <path
            android:fillColor="@color/colorPrimary"
            android:pathData="M 6,6 L 18,12 6,18Z"/>

    </group>
</vector>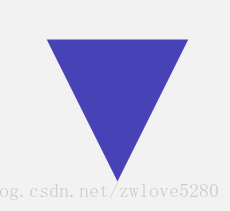
如上面所说,我们需要一个 < group > 包裹 < path >,然后设置旋转中心点,然后设置旋转角度。
AnimatedVectorDrawable
AnimatedVectorDrawable 给矢量图添加属性动画,属性动画操作的是属性,也就是说 AnimatedVectorDrawbale 操作的是矢量图的属性。你可以用三个文件定义一个动画,或者只用一个文件定义一个动画。
多文件定义动画
三个文件包括
1. 一个 VectorDrawable 的 XML 文件
2. 一个 AnimatedVectorDrawable 的 XML 文件
3. 属性动画的 XML 文件 (ObjectAnimator 或者 AnimatorSet)
说起来比较抽象,举个例子
首先,我从 Android Studio 的 Vector Asset 导出一个笑脸图片,然后稍微整理了下,用重新命名为 satisfied.xml,这个作为动画的起始图片。
<vector xmlns:android="http://schemas.android.com/apk/res/android"
        android:width="24dp"
        android:height="24dp"
        android:viewportHeight="24.0"
        android:viewportWidth="24.0">

    <group
        android:name="group_satisfied"
        android:pivotX="12.0"
        android:pivotY="12.0">
        <path
            android:fillColor="#FF000000"
            android:pathData="M11.99,2 C 6.47,2 2,6.48 2,12 s 4.47,10 9.99,10C17.52,22 22,17.52 22,12S17.52,2 11.99,2z
                              M12,20c-4.42,0 -8,-3.58 -8,-8s3.58,-8 8,-8 8,3.58 8,8 -3.58,8 -8,8z
                              M15.5,9.5m-1.5,0a1.5,1.5 0,1 1,3 0a1.5,1.5 0,1 1,-3 0
                              M8.5,9.5m-1.5,0a1.5,1.5 0,1 1,3 0a1.5,1.5 0,1 1,-3 0z"/>

        <path
            android:name="satisfied"
            android:fillColor="#FF000000"
            android:pathData="M12,16c-1.48,0 -2.75,-0.81 -3.45,-2 L6.88,14c0.8,2.05 2.79,3.5 5.12,3.5s4.32,-1.45 5.12,-3.5h-1.67c-0.7,1.19 -1.97,2 -3.45,2"/>
    </group>
</vector>

整个 Path 我没看懂,但是我找到了嘴型的 Path(后面一个 name 为 satisfied 的 path),我把这2个 Path 用一个 < group > 包含,是因为我想让这个2个 Path 做一个旋转转换。
然后,我还导出一个哭脸图片,也整理下了,命名为 dissatisfied.xml,这个作为动画的最终图片。其实这个是没必要导出的,我这里把这个矢量图放出来,是因为我想让大家看明白动画的最终矢量图是什么样的。
<vector xmlns:android="http://schemas.android.com/apk/res/android"
        android:width="24dp"
        android:height="24dp"
        android:viewportHeight="24.0"
        android:viewportWidth="24.0">

    <group
        android:name="group_satisfied"
        android:pivotX="12.0"
        android:pivotY="12.0">
        <path
            android:fillColor="#FF000000"
            android:pathData="M11.99,2 C 6.47,2 2,6.48 2,12 s 4.47,10 9.99,10C17.52,22 22,17.52 22,12S17.52,2 11.99,2z
                              M12,20c-4.42,0 -8,-3.58 -8,-8s3.58,-8 8,-8 8,3.58 8,8 -3.58,8 -8,8z
                              M15.5,9.5m-1.5,0a1.5,1.5 0,1 1,3 0a1.5,1.5 0,1 1,-3 0
                              M8.5,9.5m-1.5,0a1.5,1.5 0,1 1,3 0a1.5,1.5 0,1 1,-3 0z"/>

        <path
            android:name="satisfied"
            android:fillColor="#FF000000"
            android:pathData="M12,16c-1.48,0 -2.75,-0.81 -3.45,-2 L6.88,14c0.8,2.05 2.79,3.5 5.12,3.5s4.32,-1.45 5.12,-3.5h-1.67c-0.7,1.19 -1.97,2 -3.45,2"/>
    </group>
</vector>
既然已经知道起始的和最终的 VectorDrawable 是什么,那么现在就需要定义一个 AnimatedVectorDrawable,命名为
avd_smile.xml
<?xml version="1.0" encoding="utf-8"?>
<animated-vector xmlns:android="http://schemas.android.com/apk/res/android"
                 android:drawable="@drawable/satisfied">

    <target
        android:animation="@animator/smile_rotation"
        android:name="group_satisfied"/>
    <target
        android:name="satisfied"
        android:animation="@animator/smile_morph"/>

</animated-vector>
< animated-vector > 的 android:drawable 定义了动画的 VectorDrawable。
< target > 的 android:name 的值为 VectorDrawable 中的 < group > 和 < path > 的 android:name,也就是说,指定了动画的具体目标
< target > 的 android:animation 定了属性动画,这个属性动画由 ObjectAnimator 或者 AnimatorSet 定义。
看下第一个对 < group >动画,animator/smile_rotation.xml
<?xml version="1.0" encoding="utf-8"?>
<objectAnimator
    xmlns:android="http://schemas.android.com/apk/res/android"
    android:duration="1000"
    android:propertyName="rotation"
    android:valueFrom="0"
    android:valueTo="360"/>
很简单,就是一个旋转的动画
再看下第二个对 < path >的动画,animator/smile_morph.xml
<?xml version="1.0" encoding="utf-8"?>
<set xmlns:android="http://schemas.android.com/apk/res/android" android:ordering="sequentially">
    <objectAnimator xmlns:android="http://schemas.android.com/apk/res/android"
                    android:duration="1000"
                    android:propertyName="pathData"
                    android:valueFrom="M12,16c-1.48,0 -2.75,-0.81 -3.45,-2 L6.88,14c0.8,2.05 2.79,3.5 5.12,3.5s4.32,-1.45 5.12,-3.5h-1.67c-0.7,1.19 -1.97,2 -3.45,2"
                    android:valueTo="M12,14 c-2.33,0 -4.32,1.45 -5.12,3.5 L 8.55,17.5 c0.69,-1.19 1.97,-2 3.45,-2s2.75,0.81 3.45,2h1.67c-0.8,-2.05 -2.79,-3.5 -5.12,-3.5"
                    android:valueType="pathType"/>

    <objectAnimator xmlns:android="http://schemas.android.com/apk/res/android"
                    android:duration="1000"
                    android:propertyName="pathData"
                    android:valueFrom="M12,14 c-2.33,0 -4.32,1.45 -5.12,3.5 L 8.55,17.5 c0.69,-1.19 1.97,-2 3.45,-2s2.75,0.81 3.45,2h1.67c-0.8,-2.05 -2.79,-3.5 -5.12,-3.5"
                    android:valueTo="M12,16c-1.48,0 -2.75,-0.81 -3.45,-2 L6.88,14c0.8,2.05 2.79,3.5 5.12,3.5s4.32,-1.45 5.12,-3.5h-1.67c-0.7,1.19 -1.97,2 -3.45,2"
                    android:valueType="pathType"/>

</set>
这个就有点复杂了,是一个动画集,并且定义了动画的执行顺序为 android:ordering="sequentially ,即顺序执行两个动画。
由于这是对 < path > 执行的动画,因此特别要注意 < objectAnimator > 的 android:valueType 的值为 pathType。
最后,就是 android:valueFrom 和 android:valueTo,分别对应笑脸或者哭脸的嘴型,因为我只想对嘴型做动画。
从 Android Studio 到处的笑脸和哭脸的嘴型 Path 是不能做矢量图动画的,那么要制作成矢量图动画,A 和 B 绘制命令需要满足如下条件
1. A 和 B 要同样数量的命令,并且在每个对应位置,命令类型要一样。
2. 命令后面的参数要完全一样
然后给 ImageView 设置 android:src=@drawable/avd_smile
    <ImageView
        android:id="@+id/smile_avd"
        android:layout_width="200dp"
        android:layout_height="200dp"
        android:layout_centerInParent="true"
        android:src="@drawable/avd_smile_generator"
        android:tint="@color/colorPrimary"/>
然后设置点击 ImageView 启动动画
        findViewById(R.id.smile_avd).setOnClickListener(new View.OnClickListener() {
            @Override
            public void onClick(View v) {
                ImageView imageView = (ImageView) v;
                AnimatedVectorDrawable smileDrawable = (AnimatedVectorDrawable) imageView.getDrawable();
                smileDrawable.start();
            }
        });
现在看下效果
单XML文件定义动画
官网上,给出了一个例子,然后给出了如何用单个 XML 文件生成动画例子,虽然不明觉厉,但是大体上还是看得懂的。不过没有用多文件生成动画来的清晰,但是官网为何要给这个例子呢,因为这个是用工具生成的,但是特么的官网也没告诉我到底可以用什么工具生成。不过我还是找到这个在线工具。接下来,我一步一步告诉大家怎么制作矢量图动画。
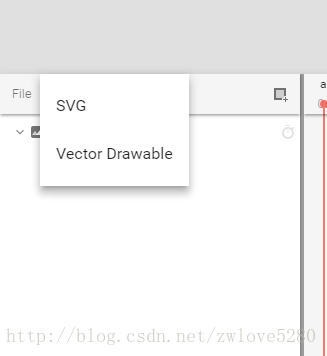
首先从Android Studio 的 Vector Drawable 下载一个哭脸矢量图(这个我就不演示了),然后打开https://shapeshifter.design/ 这个网站,选择左下角的 import -> Vector Drawable,导入哭脸的图形。
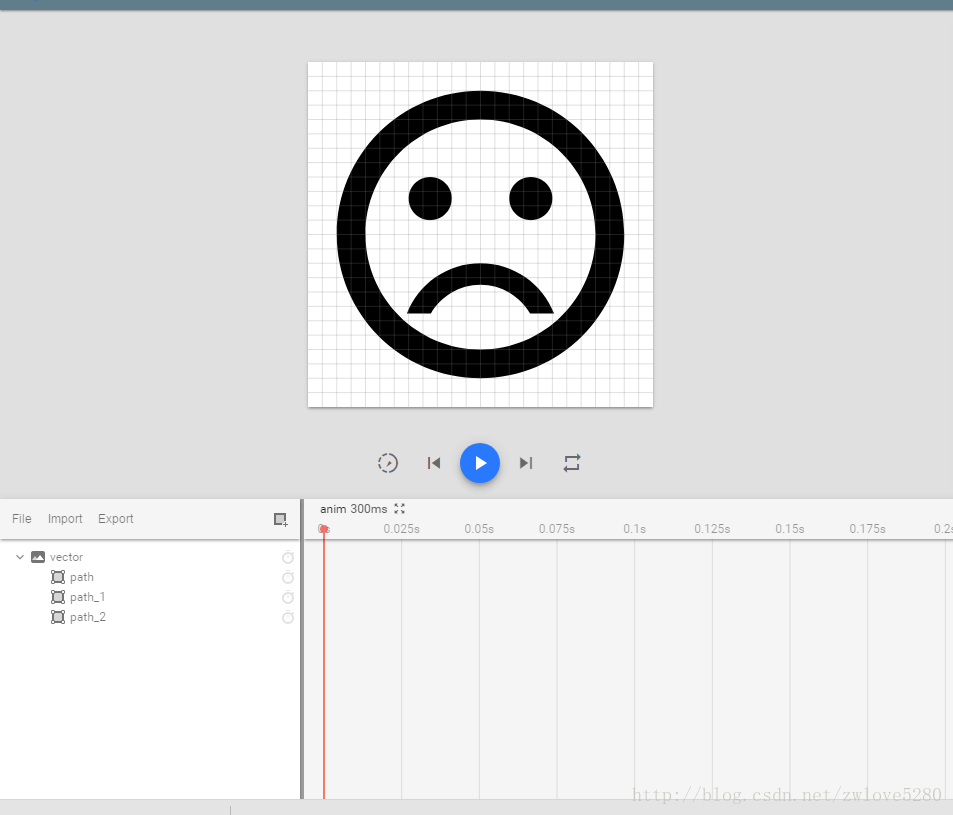
导入完后,看到效果如下
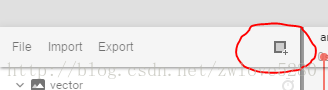
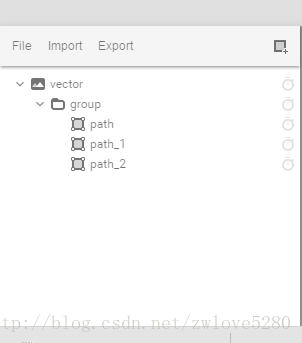
然后,点击左下角的那个加号按钮,并选择“New group layer”
这个时候,效果是这样的
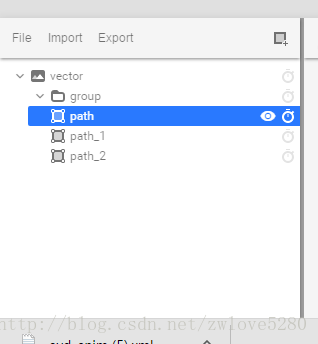
但是不要被这个层级所迷惑,图中所示的 path,path_1,path_2,grop 是平级的,因此这几个 path 并不在 group 中,不信的话自己双击 group 那一层,看是否这几个 path 会消失。 那么有人会问了,为何在 import vector drawable 之前就先 New group layer,那么我只能说,你试试看。 这点我就要吐槽下,太僵硬了。
那么现在,我们要把 path, path_1, path_2 拖动到 group 中,这个大家应该会操作吧,验证是否拖进去就是,你双击 group ,看那几个 path 是否消失。拖进去后效果如下
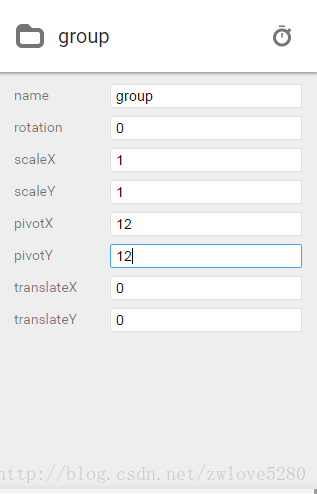
一切准备就绪后,首先要明白,我们需要对 group 做旋转动画,对嘴型的 path(也就是 path_2)做动画。
那么首先设置 group 的旋转中心,点击 group 层,然后在右上角设置旋转的中心,设置后效果如下
然后,点击 group 层最右边的类似小闹钟按钮,选择 rotation,然后在右上角设置选择参数,效果如下

从截图中的右下方可以看到动画的时间轴,总时间是 300 ms,所以我在右上角中设置 endtime 为 300,并设置 tovalue 为360。到这里,< group > 的旋转效果就设置好,当你点击那个播放按钮的时候,就会看到旋转动画
然后为嘴型那个 path(也就是 path_2 层)设置矢量图动画,点击 path_2 层的右边的类似小闹钟按钮,然后选择 pathData,然后同上在右上角看到设置pathData数据
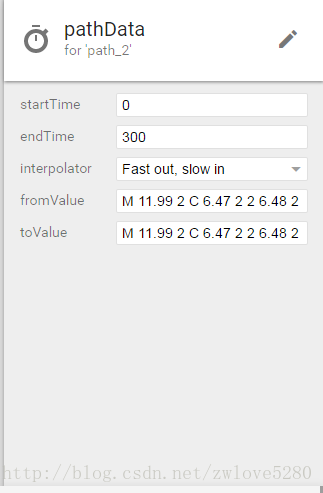
endTime 同样设置为了 300,那么这个 toValue 是关键,决定最终效果,刚刚我们不是从 Android Studio 下载了个笑脸矢量图嘛,那么这个就设置笑脸图形中的那个嘴型 Path。
到这了,你可以再点击播放按钮,不过首先,你得把事件坐标轴调整到 0ms 的地方。
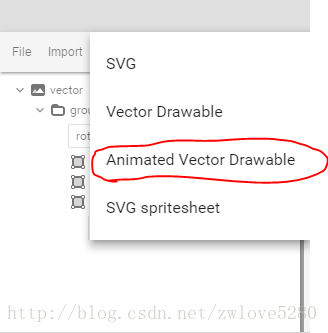
到这了,你是不是有点兴奋了,接下来要导出来,点击左下角的 “export” ,然后选择 “Animated Vector Drawable”
你以为这就完了吗?你把这个导出文件放到 res/drawable 目录下,然后给上面例子中的 ImageView 设置 android:src 试试? Boom ! App Crash! 那我就来告诉你,有哪几处错误,打开导出的文件,如果截图中就是错误点
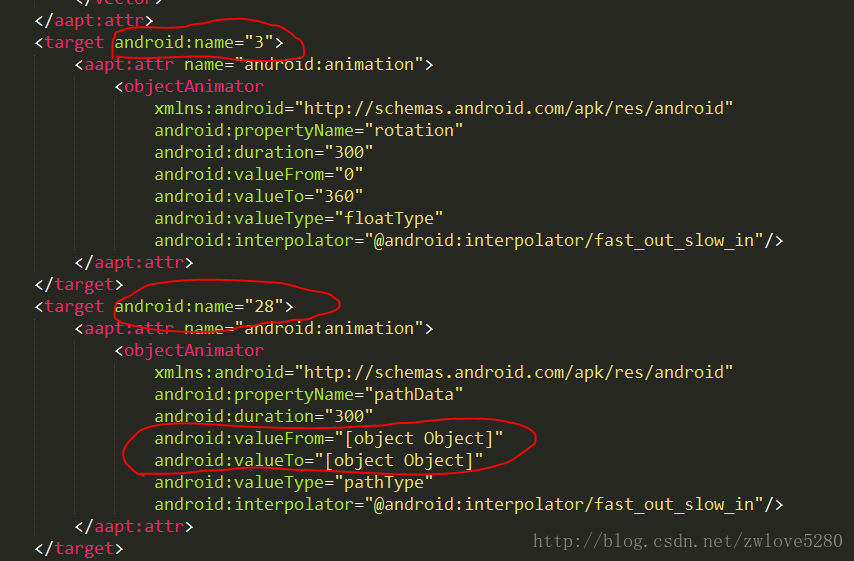
刚才说过,要对 group 旋转,要对 path_2 做动画,因此第一个红色圈,应为 group 名字,第一个红色圈应为 path_2 的名字,也就是如下截图中所示
改完名字后,然后就是那个 valueFrom 和 valueTo 的错误,有的兄弟会认为,这不就是笑脸和哭脸的嘴型的 Path 吗? 那你赋值粘贴进去试试,保证又是一声 Boom~ 。我当时看到 app crash 的心情就是想把这个网站的作者找出来到有关部门喝喝茶,因为我差点损失了一个键盘。
好了,回归正题,这2个值如何设置呢?我们再回到那个网站的界面,点击时间轴上关于 path_2 动画的那一条线
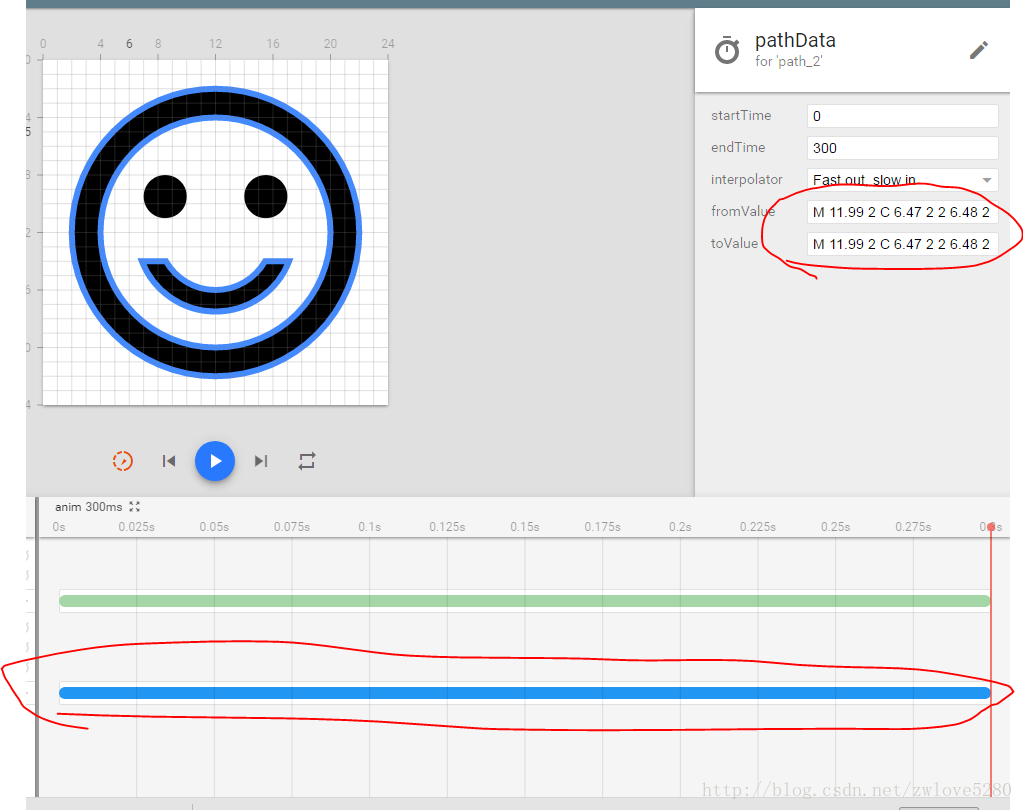
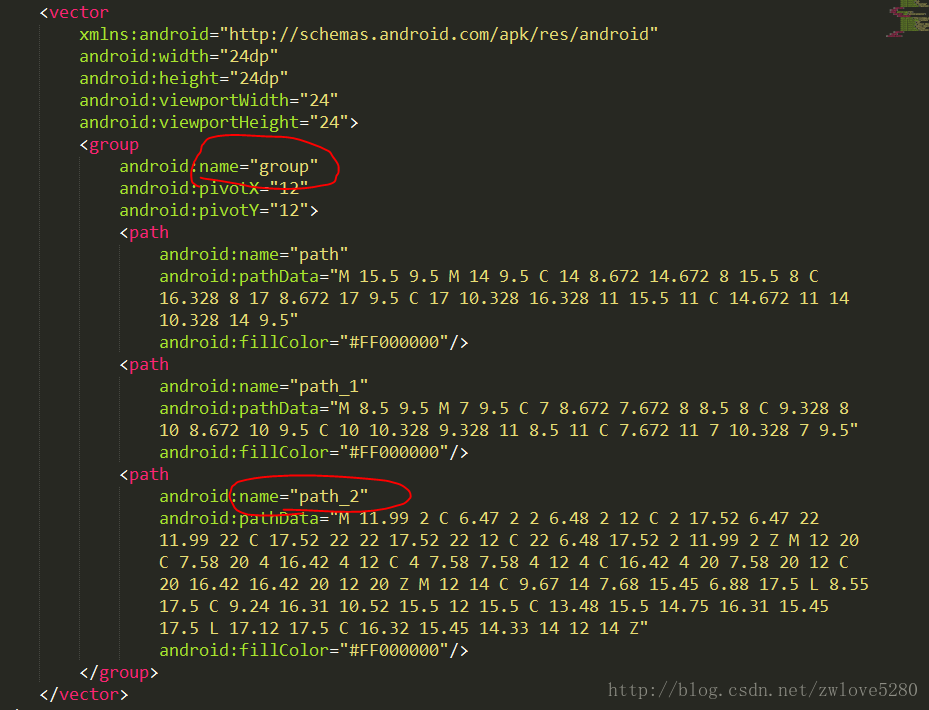
按图中所示,把右上角那个 valueFrom 和 valueTo 复制粘贴到我们到处的文件中,这样才叫真正的完成。修改后的到处文件代码如下
<animated-vector
    xmlns:android="http://schemas.android.com/apk/res/android"
    xmlns:aapt="http://schemas.android.com/aapt">
    <aapt:attr name="android:drawable">
        <vector
            xmlns:android="http://schemas.android.com/apk/res/android"
            android:width="24dp"
            android:height="24dp"
            android:viewportWidth="24"
            android:viewportHeight="24">
            <group
                android:name="group"
                android:pivotX="12"
                android:pivotY="12">
                <path
                    android:name="path"
                    android:pathData="M 15.5 9.5 M 14 9.5 C 14 8.672 14.672 8 15.5 8 C 16.328 8 17 8.672 17 9.5 C 17 10.328 16.328 11 15.5 11 C 14.672 11 14 10.328 14 9.5"
                    android:fillColor="#FF000000"/>
                <path
                    android:name="path_1"
                    android:pathData="M 8.5 9.5 M 7 9.5 C 7 8.672 7.672 8 8.5 8 C 9.328 8 10 8.672 10 9.5 C 10 10.328 9.328 11 8.5 11 C 7.672 11 7 10.328 7 9.5"
                    android:fillColor="#FF000000"/>
                <path
                    android:name="path_2"
                    android:pathData="M 11.99 2 C 6.47 2 2 6.48 2 12 C 2 17.52 6.47 22 11.99 22 C 17.52 22 22 17.52 22 12 C 22 6.48 17.52 2 11.99 2 Z M 12 20 C 7.58 20 4 16.42 4 12 C 4 7.58 7.58 4 12 4 C 16.42 4 20 7.58 20 12 C 20 16.42 16.42 20 12 20 Z M 12 14 C 9.67 14 7.68 15.45 6.88 17.5 L 8.55 17.5 C 9.24 16.31 10.52 15.5 12 15.5 C 13.48 15.5 14.75 16.31 15.45 17.5 L 17.12 17.5 C 16.32 15.45 14.33 14 12 14 Z"
                    android:fillColor="#FF000000"/>
            </group>
        </vector>
    </aapt:attr>
    <target android:name="group">
        <aapt:attr name="android:animation">
            <objectAnimator
                xmlns:android="http://schemas.android.com/apk/res/android"
                android:propertyName="rotation"
                android:duration="300"
                android:valueFrom="0"
                android:valueTo="360"
                android:valueType="floatType"
                android:interpolator="@android:interpolator/fast_out_slow_in"/>
        </aapt:attr>
    </target>
    <target android:name="path_2">
        <aapt:attr name="android:animation">
            <objectAnimator
                xmlns:android="http://schemas.android.com/apk/res/android"
                android:propertyName="pathData"
                android:duration="300"
                android:valueFrom="M 11.99 2 C 6.47 2 2 6.48 2 12 C 2 17.52 6.47 22 11.99 22 C 17.52 22 22 17.52 22 12 C 22 6.48 17.52 2 11.99 2 Z M 12 20 C 7.58 20 4 16.42 4 12 C 4 7.58 7.58 4 12 4 C 16.42 4 20 7.58 20 12 C 20 16.42 16.42 20 12 20 Z M 12 14 C 9.67 14 7.68 15.45 6.88 17.5 L 8.55 17.5 C 9.24 16.31 10.52 15.5 12 15.5 C 13.48 15.5 14.75 16.31 15.45 17.5 L 17.12 17.5 C 16.32 15.45 14.33 14 12 14 Z"
                android:valueTo="M 11.99 2 C 6.47 2 2 6.48 2 12 C 2 17.52 6.47 22 11.99 22 C 17.52 22 22 17.52 22 12 C 22 6.48 17.52 2 11.99 2 Z M 12 20 C 7.58 20 4 16.42 4 12 C 4 7.58 7.58 4 12 4 C 16.42 4 20 7.58 20 12 C 20 16.42 16.42 20 12 20 Z M 12 16 C 10.52 16 9.25 15.19 8.55 14 L 6.88 14 C 7.68 16.05 9.67 17.5 12 17.5 C 14.33 17.5 16.32 16.05 17.12 14 L 15.45 14 C 14.75 15.19 13.48 16 12 16 Z"
                android:valueType="pathType"
                android:interpolator="@android:interpolator/fast_out_slow_in"/>
        </aapt:attr>
    </target>
</animated-vector>
这个时候,你再把这个到处文件设置为 ImageView 的 android:src 属性,你就可以看到效果了
结束
我相信大家在刚接触矢量图的时候是懵逼的,更别提如何去制作矢量图动画,当然这也也是我的疑惑。 通过本篇文章,我们对如何生成矢量图,以及如何制作矢量图动画,心里就有个底了。
本篇文章,并没有把 VectorDrawable 和 AnimatedVectorDrawable 讲完全,由于篇幅限制,留在下一篇讲。
参考
https://developer.android.com/guide/topics/graphics/vector-drawable-resources.html
http://www.androiddesignpatterns.com/2016/11/introduction-to-icon-animation-techniques.html
https://shapeshifter.design/
