一、创建项目并导入相关依赖
<dependency>
<groupId>org.springframework.boot</groupId>
<artifactId>spring-boot-starter-security</artifactId>
</dependency>
<dependency>
<groupId>org.springframework.boot</groupId>
<artifactId>spring-boot-starter-web</artifactId>
</dependency>
<dependency>
<groupId>org.mybatis.spring.boot</groupId>
<artifactId>mybatis-spring-boot-starter</artifactId>
<version>2.1.1</version>
</dependency>
<dependency>
<groupId>com.alibaba</groupId>
<artifactId>druid-spring-boot-starter</artifactId>
<version>1.1.10</version>
</dependency>
<dependency>
<groupId>mysql</groupId>
<artifactId>mysql-connector-java</artifactId>
<scope>runtime</scope>
<version>5.1.27</version>
</dependency>
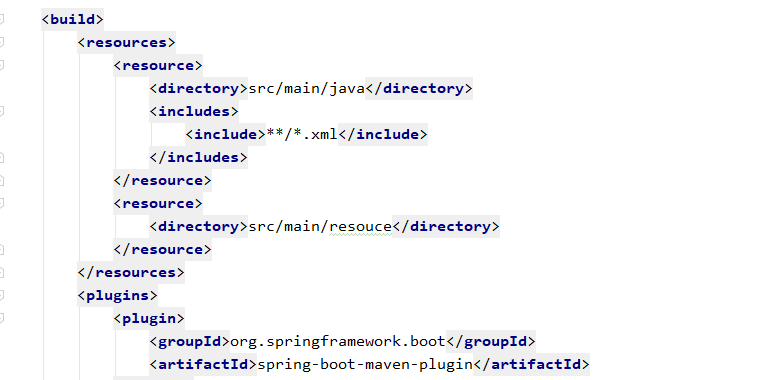
注:maven默认不编译src/main/java下的xml文件,需要我们手动导入
二、相关配置和代码
1)application.properties
spring.datasource.type=com.alibaba.druid.pool.DruidDataSource
spring.datasource.url=jdbc:mysql://127.0.0.1:3306/security
spring.datasource.username=root
spring.datasource.password=123
2)数据库脚本
| /* |
|
|
|
Navicat MySQL Data Transfer |
|
|
Source Server : localhost |
|
|
Source Server Version : 50717 |
|
|
Source Host : localhost:3306 |
|
|
Source Database : security |
|
|
Target Server Type : MYSQL |
|
|
Target Server Version : 50717 |
|
|
File Encoding : 65001 |
|
|
Date: 2018-07-28 15:26:51 |
|
|
*/ |
|
|
SET FOREIGN_KEY_CHECKS=0; |
|
|
-- ---------------------------- |
|
|
-- Table structure for role |
|
|
-- ---------------------------- |
|
|
DROP TABLE IF EXISTS `role`; |
|
|
CREATE TABLE `role` ( |
|
|
`id` int(11) NOT NULL AUTO_INCREMENT, |
|
|
`name` varchar(32) DEFAULT NULL, |
|
|
`nameZh` varchar(32) DEFAULT NULL, |
|
|
PRIMARY KEY (`id`) |
|
|
) ENGINE=InnoDB AUTO_INCREMENT=4 DEFAULT CHARSET=utf8; |
|
|
-- ---------------------------- |
|
|
-- Records of role |
|
|
-- ---------------------------- |
|
|
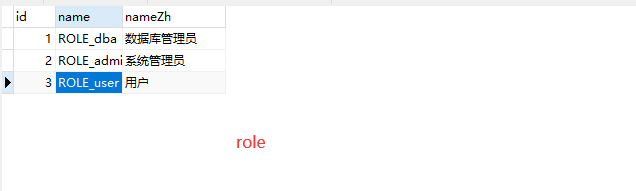
INSERT INTO `role` VALUES ('1', 'ROLE_dba', '数据库管理员'); |
|
|
INSERT INTO `role` VALUES ('2', 'ROLE_admin', '系统管理员'); |
|
|
INSERT INTO `role` VALUES ('3', 'ROLE_user', '用户'); |
|
|
-- ---------------------------- |
|
|
-- Table structure for user |
|
|
-- ---------------------------- |
|
|
DROP TABLE IF EXISTS `user`; |
|
|
CREATE TABLE `user` ( |
|
|
`id` int(11) NOT NULL AUTO_INCREMENT, |
|
|
`username` varchar(32) DEFAULT NULL, |
|
|
`password` varchar(255) DEFAULT NULL, |
|
|
`enabled` tinyint(1) DEFAULT NULL, |
|
|
`locked` tinyint(1) DEFAULT NULL, |
|
|
PRIMARY KEY (`id`) |
|
|
) ENGINE=InnoDB AUTO_INCREMENT=4 DEFAULT CHARSET=utf8; |
|
|
-- ---------------------------- |
|
|
-- Records of user |
|
|
-- ---------------------------- |
|
|
INSERT INTO `user` VALUES ('1', 'root', '$2a$10$RMuFXGQ5AtH4wOvkUqyvuecpqUSeoxZYqilXzbz50dceRsga.WYiq', '1', '0'); |
|
|
INSERT INTO `user` VALUES ('2', 'admin', '$2a$10$RMuFXGQ5AtH4wOvkUqyvuecpqUSeoxZYqilXzbz50dceRsga.WYiq', '1', '0'); |
|
|
INSERT INTO `user` VALUES ('3', 'sang', '$2a$10$RMuFXGQ5AtH4wOvkUqyvuecpqUSeoxZYqilXzbz50dceRsga.WYiq', '1', '0'); |
|
|
-- ---------------------------- |
|
|
-- Table structure for user_role |
|
|
-- ---------------------------- |
|
|
DROP TABLE IF EXISTS `user_role`; |
|
|
CREATE TABLE `user_role` ( |
|
|
`id` int(11) NOT NULL AUTO_INCREMENT, |
|
|
`uid` int(11) DEFAULT NULL, |
|
|
`rid` int(11) DEFAULT NULL, |
|
|
PRIMARY KEY (`id`) |
|
|
) ENGINE=InnoDB AUTO_INCREMENT=5 DEFAULT CHARSET=utf8; |
|
|
-- ---------------------------- |
|
|
-- Records of user_role |
|
|
-- ---------------------------- |
|
|
INSERT INTO `user_role` VALUES ('1', '1', '1'); |
|
|
INSERT INTO `user_role` VALUES ('2', '1', '2'); |
|
|
INSERT INTO `user_role` VALUES ('3', '2', '2'); |
|
|
INSERT INTO `user_role` VALUES ('4', '3', '3'); |
|
|
SET FOREIGN_KEY_CHECKS=1; |
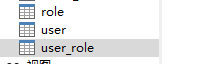
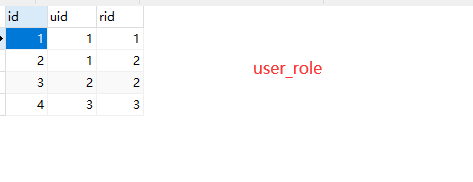
3)数据库结构
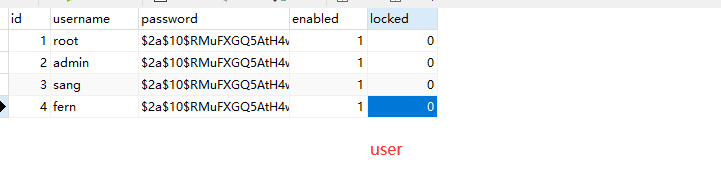
密码是123 springsecurity加密算法后的密文,可以让同样的密码每次生成的密文都不一样,从而不会重复,我们案列中的密文是我偷懒复制粘贴的所以一样
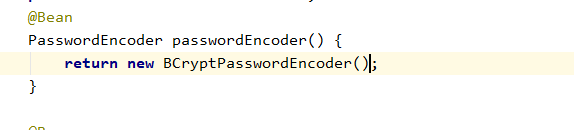
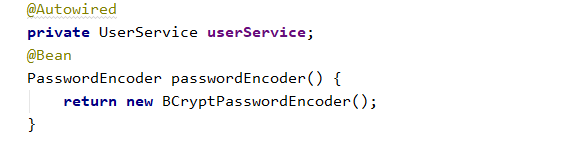
也就是该类完成加密的
4)创建实体类User,Role
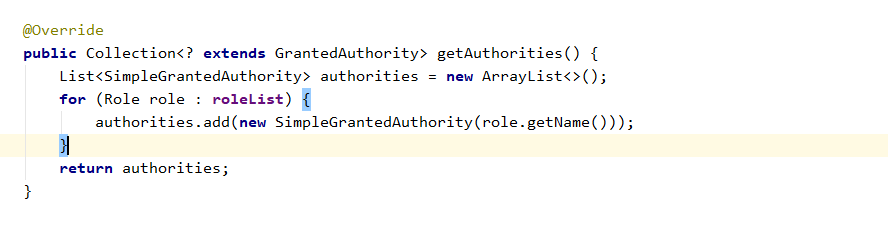
4.1)创建User实现UserDetails
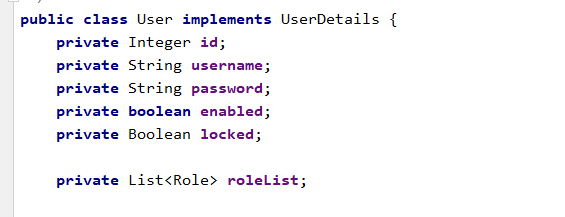
这里要实现UserDetails接口,这个接口好比一个规范。防止开发者定义的密码变量名各不相同,从而导致springSecurity不知道哪个方法是你的密码
我给的数据库中user表没有UserDetails的几个方法,可以直接手动给它true
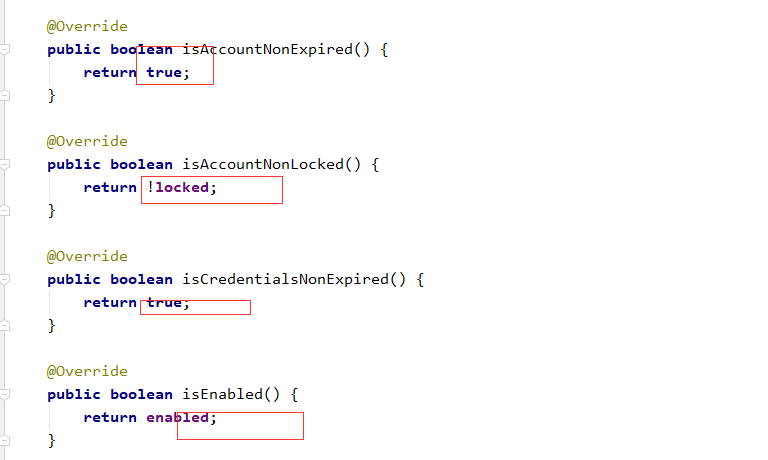
有的就是用数据库查出来的属性
4.2)创建Role类

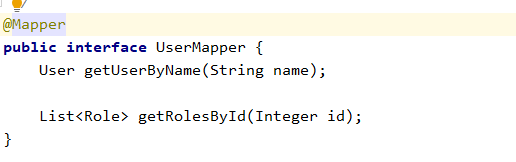
5)创建UserMapper和UserMapper.xml
5.1)UserMapper.class
注:以前在SSM框架之所以不用加类似@Service和@controller的注解时因为我们在xml文件已经配置了,如今使用SpringBoot所以我们也要改变写法
一共两种写法
5.1.1)在类上直接加@Mapper
5.1.2)在SpringBoot启动类上配置全局的扫描

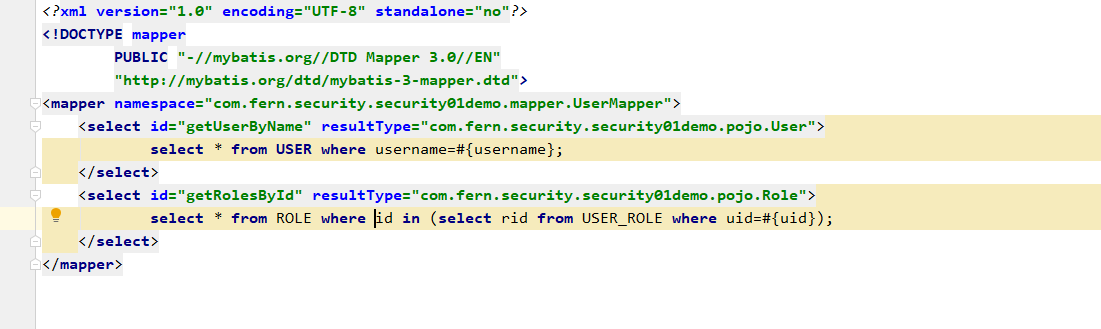
5.2)UserMapper.xml
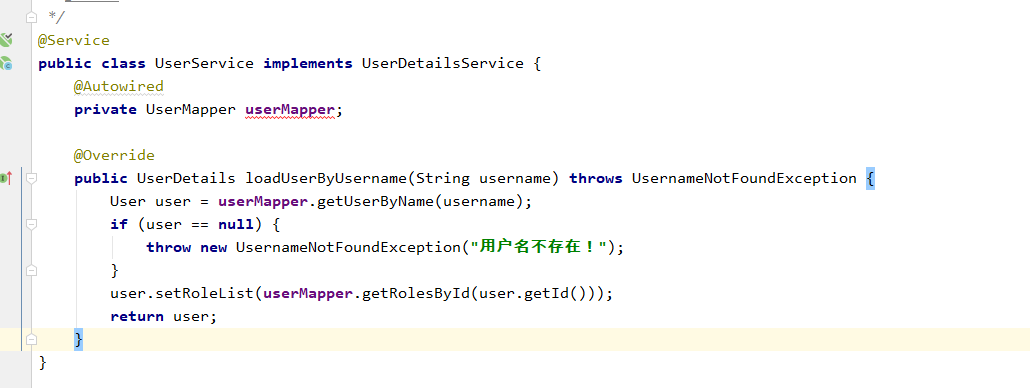
6)创建UserService类
6.1)UserService同样也要继承UserServiceDetails接口
7)创建SercurityConfig配置类
7.1)SercurityConfig需要继承WebSecurityConfigurerAdapter类,并在类上加@configuration

7.2)SpringSecurity5.0之后密码必须加密
7.3)把数据库查出的用户信息交给SpringSecurity处理

这样就算完成了一半了,为什么说完成一半因为这些并不是全部代码下半部分我下篇博客写,这样比较容易接受,所以url的权限还是写死的
下篇博客https://www.cnblogs.com/fernfei/p/12194847.html
7.4)配置httpSercurity
下图的代码可以参考我另一个博客介绍里面有这段全部代码,并有解释
https://www.cnblogs.com/fernfei/p/12185186.html
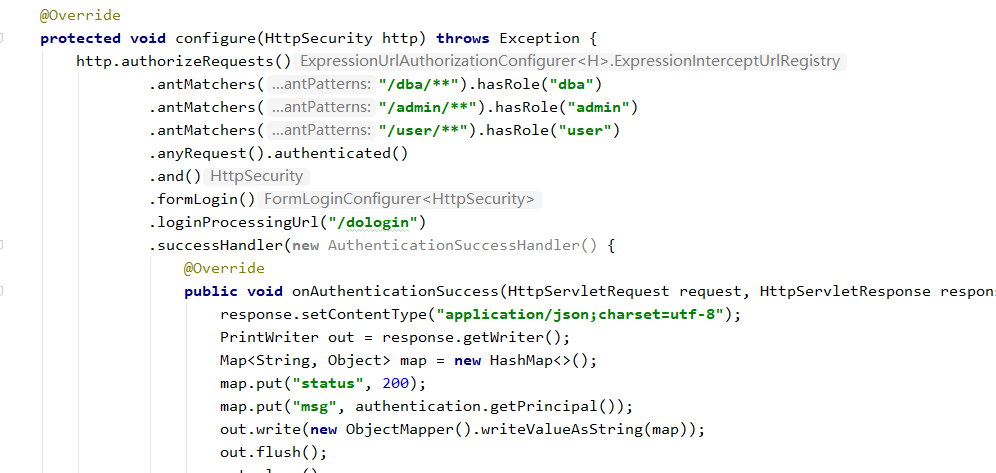
这里解释一下为什么数据库中的user表需要加ROLE_这样前缀,可以看一下源码

①处告诉我们如果在.antMatchers("/dba/**").hasRole("dba")的时候加前缀会抛异常
②处告诉我们为什么在.antMatchers("/dba/**").hasRole("dba")的时候不需要加ROLE_前缀
8)角色继承
8.1)在Spring Boot2.0.8(含)版本的时候是以下写法
用空格把ROLE_dba>ROLE_admin 和ROLE_admin>ROLE_user分开
@Bean
RoleHierarchyroleHierarchy(){
RoleHierarchyImplroleHierarchy=newRoleHierarchyImpl();
Stringhierarchy="ROLE_dba>ROLE_adminROLE_admin>ROLE_user";
roleHierarchy.setHierarchy(hierarchy);
returnroleHierarchy;
}
8.2)Spring Boot2.0.8(不含)之后得版本用 \n 来区分
@Bean
RoleHierarchyroleHierarchy(){
RoleHierarchyImplroleHierarchy=newRoleHierarchyImpl();
Stringhierarchy="ROLE_dba>ROLE_admin\nROLE_admin>ROLE_user";
roleHierarchy.setHierarchy(hierarchy);
returnroleHierarchy;
}
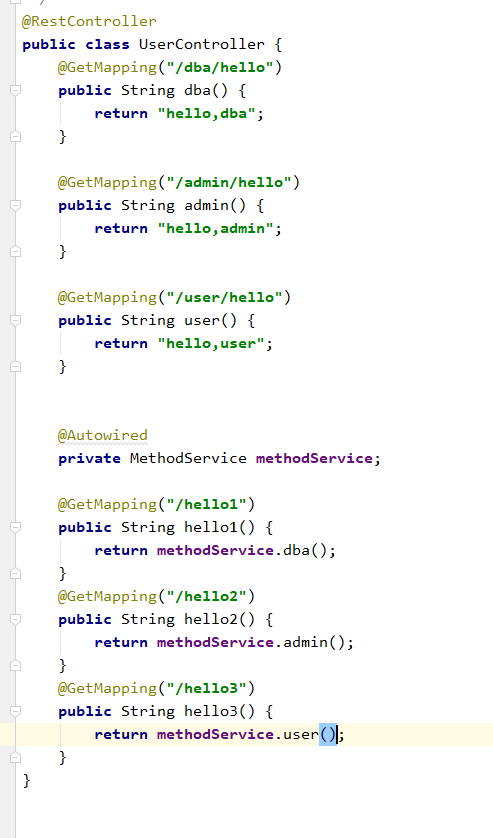
9)方法安全
9.1)在SecurityConfig配置上类加上
@EnableGlobalMethodSecurity(prePostEnabled=true,securedEnabled=true)
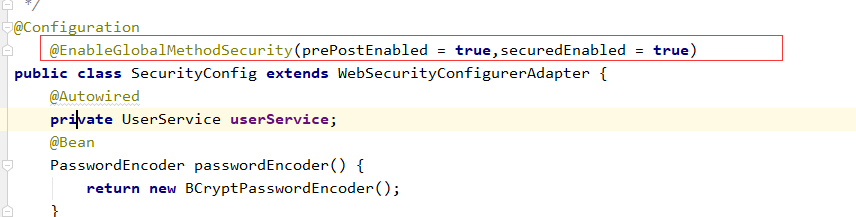
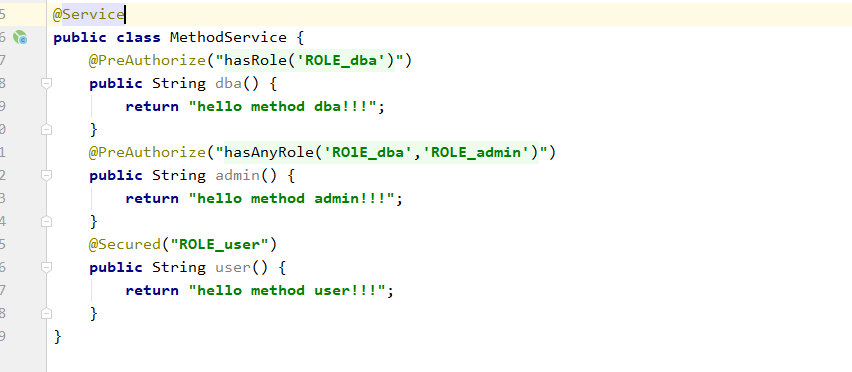
9.2)在Service层创建一个MethodService,当然并一定非要叫这个类名 可以根据你的具体业务考虑加在哪里
10)controller层