写在前面
本文主要描述了如何使用IntelliJ,从零开始搭建一个springboot+mybatis+mysql项目。文章可能还有很多不足,请大家谅解,欢迎大佬提意见。
本文使用的东西
- IntelliJ 2019
- springboot
- mybatis
- mysql
1.新建项目
1.打开IntelliJ,选择“Spring Initializr”,点击下一步。

2.项目的type固定为“Maven Project”,其他的包名等可以根据现实情况改动。

3.添加依赖,点击“web”选中“spring web”添加该依赖,这个是我们web项目的基础。实际上还要添加MyBatis和mysql的依赖,我们稍后添加。点击下一步之后,直接点击“完成”,完成项目创建。创建项目要等待一小段时间,等待依赖下载添加完成。

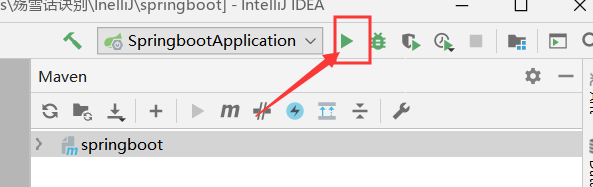
4.项目创建好之后直接点击右上角的三角形运行。

5.打来浏览器,输入“http://localhost:8080”,出现如下图,表示项目搭建成功了,但是我们的项目还没有页面。

2.添加页面
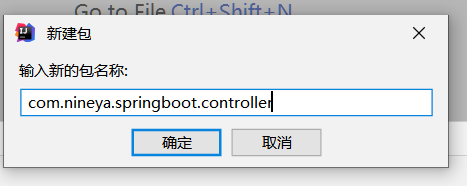
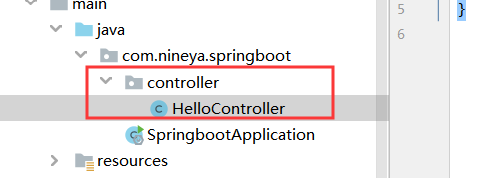
2.添加一个“controller”包,该包用于存放控制器。
2.在“controller”包中新建一个“HelloController”的类。
3.使用“@Controller”将新建的“HelloController”类注释为控制器。

4.添加“hello”方法,使用“@RequestMapping("/hello")”注释使其监听到“hello”的请求,使用“@ResponseBody”注释返回字符串内容,不会用字符串查找jsp页面或者html页面。

5.点击右上角红色正方形停止运行,再点击三角形从新启动,打来浏览器输入“http://localhost:8080/hello”,可以看到我们return的字符串。

3.搭建mvc框架
3.1添加依赖
1.在pom.xml的project标签中加入以下内容,配置阿里云代理仓库
    <repositories>
        <repository>
            <id>maven-ali</id>
            <url>http://maven.aliyun.com/nexus/content/repositories/central</url>
            <releases>
                <enabled>true</enabled>
            </releases>
            <snapshots>
                <enabled>true</enabled>
                <updatePolicy>always</updatePolicy>
                <checksumPolicy>fail</checksumPolicy>
            </snapshots>
        </repository>
    </repositories>

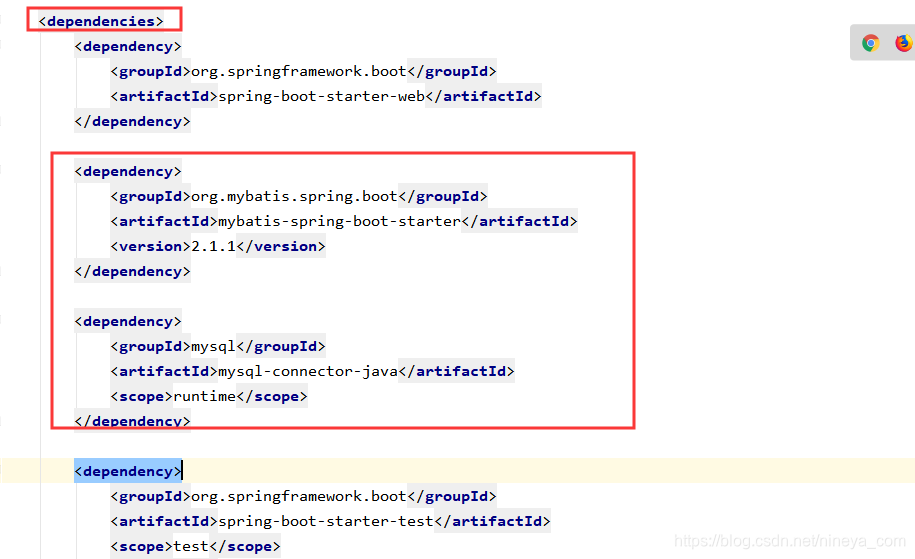
2.添加依赖,在pom.xml文件的“dependencies”标签下加入下面两个依赖。
        <dependency>
            <groupId>org.mybatis.spring.boot</groupId>
            <artifactId>mybatis-spring-boot-starter</artifactId>
            <version>2.1.1</version>
        </dependency>

        <dependency>
            <groupId>mysql</groupId>
            <artifactId>mysql-connector-java</artifactId>
            <scope>runtime</scope>
        </dependency>
3.2 新建数据库
在mysql中新建一个“springboot””数据库“user”表,表中包含“uid”和“name”两个字段,随便插入几条数据,等一下用于测试。


3.3 搭建MVC框架
1.在项目中新建以下包和文件

2.文件内容为
“controller”包的“HelloController”接口:
package com.nineya.springboot.controller;

import com.nineya.springboot.entity.User;
import com.nineya.springboot.service.HelloService;
import org.springframework.beans.factory.annotation.Autowired;
import org.springframework.beans.factory.annotation.Qualifier;
import org.springframework.stereotype.Controller;
import org.springframework.web.bind.annotation.RequestMapping;
import org.springframework.web.bind.annotation.ResponseBody;

@Controller
public class HelloController {
    @Autowired
    @Qualifier("impl1") //取得bean,指定bean名称为impl1
    private HelloService helloService;

    @ResponseBody
    @RequestMapping("/hello")   //监听hello请求
    public String hello(){
        User user=helloService.getUser(1);  //从Service取得uid为1的数据
        return "hello "+user.getName()+", uid="+user.getUid()+".";
    }
}
“entity”包的“User”类:
package com.nineya.springboot.entity;

//用户的实体类
public class User {
    private long uid;
    private String name;

    public User() {
    }

    public User(long uid, String name) {
        this.uid = uid;
        this.name = name;
    }

    public long getUid() {
        return uid;
    }

    public void setUid(long uid) {
        this.uid = uid;
    }

    public String getName() {
        return name;
    }

    public void setName(String name) {
        this.name = name;
    }

    @Override
    public String toString() {
        return "User{" +
                "uid=" + uid +
                ", name='" + name + '\'' +
                '}';
    }
}
“service”包的“HelloService”接口:
package com.nineya.springboot.service;

import com.nineya.springboot.entity.User;

//服务接口
public interface HelloService {
    User getUser(long uid);  //通过uid取得用户名称
}
“service.impl”包的“HelloServiceImpl”类,继承“HelloService”接口:
package com.nineya.springboot.service.impl;

import com.nineya.springboot.mapper.UserMapper;
import com.nineya.springboot.entity.User;
import com.nineya.springboot.service.HelloService;
import org.springframework.beans.factory.annotation.Autowired;
import org.springframework.stereotype.Service;

@Service("impl1")    //注释为服务,指定bean名称为impl1
public class HelloServiceImpl implements HelloService {
    @Autowired
    private UserMapper userMapper;
    @Override
    public User getUser(long uid) {
        return userMapper.getUser(uid);
    }
}
“mapper”包的“UserMapper”接口:
package com.nineya.springboot.mapper;

import com.nineya.springboot.entity.User;
import org.apache.ibatis.annotations.Mapper;

@Mapper //注释为Mapper
public interface UserMapper {
    User getUser(long uid);
}
“SpringbootApplication”类添加扫描Mapper接口
package com.nineya.springboot;

import org.mybatis.spring.annotation.MapperScan;
import org.springframework.boot.SpringApplication;
import org.springframework.boot.autoconfigure.SpringBootApplication;

@MapperScan("com.nineya.springboot.mapper")//使用MapperScan批量扫描所有的Mapper接口
@SpringBootApplication
public class SpringbootApplication {

    public static void main(String[] args) {
        SpringApplication.run(SpringbootApplication.class, args);
    }

}
“resources”的“mapper”下的“UserMapper.xml”文件:
<?xml version="1.0" encoding="UTF-8" ?>
<!DOCTYPE mapper PUBLIC "-//mybatis.org//DTD Mapper 3.0//EN" "http://mybatis.org/dtd/mybatis-3-mapper.dtd" >
<mapper namespace="com.nineya.springboot.mapper.UserMapper">
    <!-- application.yml中type-aliases-package:未配置则需要用全名-->
    <select id="getUser" resultType="User">
        SELECT * FROM user where uid=#{0}
    </select>
</mapper>
“resources”目录下的“application.yml”文件:
server:
  port: 8080   #配置本服务器的端口为8080
spring:
  #数据库连接配置
  datasource:
    driver-class-name: com.mysql.cj.jdbc.Driver
    url: jdbc:mysql://192.168.138.39:3306/springboot?useSSL=false&serverTimezone=CST&allowMultiQueries=true
    username: root
    password: 361654768

#mybatis的相关配置
mybatis:
  #mapper配置文件
  mapper-locations: classpath:mapper/*.xml
  type-aliases-package: com.nineya.springboot.entity
  #开启驼峰命名
  configuration:
    map-underscore-to-camel-case: true
3.4运行结果
成功取得数据库数据。

3.5项目源代码
我把项目源代码打包放在了百度网盘,需要的话点击链接前往下载》》Demo项目下载地址
提取码:kzaa
4.总结
本文只是简单描述了springboot+mybatis+mysql项目搭建,有不清楚的地方欢迎评论留言,看到的我都会回复的。本文到此结束,有什么不足的地方请大家不吝指正。
