写在前面:
本文章旨在总结备份、方便以后查询,由于是个人总结,如有不对,欢迎指正;另外,内容大部分来自网络、书籍、和各类手册,如若侵权请告知,马上删帖致歉。
这篇来分析一下 Uart的实现方法以及添加自己的用户代码
首先我们来看看官方已经写好的串口程序,在 uart.c文件里面,而初始化 Uart是在 uart_init_new(void)函数里面,然后我们进入里面分析一下
void uart_init_new(void)
{
    UART_WaitTxFifoEmpty(UART0);
    UART_WaitTxFifoEmpty(UART1);

    UART_ConfigTypeDef uart0_config, uart1_config;

//    uart0_config.baud_rate    = 100000;					// 波特率
    uart0_config.baud_rate    = BIT_RATE_115200;

    uart0_config.data_bits     = UART_WordLength_8b;	// 数据位 8位
    uart0_config.parity          = USART_Parity_None;	// 奇偶校验,无
    uart0_config.stop_bits     = USART_StopBits_1;		// 一个停止位
    uart0_config.flow_ctrl      = USART_HardwareFlowControl_None;	// 硬件流控制,就是两个串口芯片的CTS_RTS引脚相连接控制收发
    uart0_config.UART_RxFlowThresh = 120;
    uart0_config.UART_InverseMask = UART_None_Inverse;
    UART_ParamConfig(UART0, &uart0_config);

//    uart1_config.baud_rate    = 100000;
    uart1_config.baud_rate    = BIT_RATE_115200;

    uart1_config.data_bits     = UART_WordLength_8b;
    uart1_config.parity          = USART_Parity_None;
    uart1_config.stop_bits     = USART_StopBits_1;
    uart1_config.flow_ctrl      = USART_HardwareFlowControl_None;
    uart1_config.UART_RxFlowThresh = 120;
    uart1_config.UART_InverseMask = UART_None_Inverse;
    UART_ParamConfig(UART1, &uart1_config);

    UART_IntrConfTypeDef uart_intr;
//    uart_intr.UART_IntrEnMask = UART_RXFIFO_TOUT_INT_ENA | UART_FRM_ERR_INT_ENA | UART_RXFIFO_FULL_INT_ENA | UART_TXFIFO_EMPTY_INT_ENA;
    uart_intr.UART_IntrEnMask = UART_RXFIFO_TOUT_INT_ENA | UART_FRM_ERR_INT_ENA | UART_TXFIFO_EMPTY_INT_ENA;
    uart_intr.UART_RX_FifoFullIntrThresh = 10;		// 设置接收 FIFO数据满时的中断阈值
    uart_intr.UART_RX_TimeOutIntrThresh = 2;		// 配置进入空闲中断的传输时间,此处表示停止传输的时间超过两个字符则触发该中断
    uart_intr.UART_TX_FifoEmptyIntrThresh = 20;		// 表示发送 FIFO里面的数据个数少于 20个进入中断
    UART_IntrConfig(UART0, &uart_intr);

    UART_SetPrintPort(UART0);	// 选择串口打印端口
    UART_intr_handler_register(uart0_rx_intr_handler,NULL);		// uart0接收中断
    ETS_UART_INTR_ENABLE();		// 使能 uart中断

    /*
    UART_SetWordLength(UART0,UART_WordLength_8b);
    UART_SetStopBits(UART0,USART_StopBits_1);
    UART_SetParity(UART0,USART_Parity_None);
    UART_SetBaudrate(UART0,74880);
    UART_SetFlowCtrl(UART0,USART_HardwareFlowControl_None,0);
    */
}
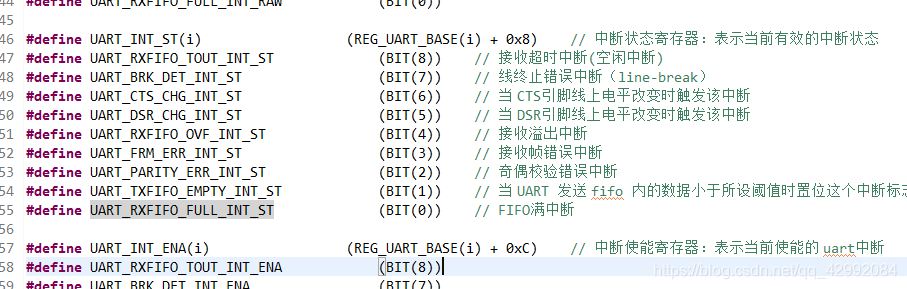
这里我稍微改了下,把 uart_config这个结构体拆分成两个,这样比较好区分,还有就是对应中断使能的宏解释如下
到这里,串口的初始化大致就这样,然后再看看中断函数处理部分
/* 串口接收数据中断函数 */
LOCAL void uart0_rx_intr_handler(void *para)
{
    /* uart0 and uart1 intr combine togther, when interrupt occur, see reg 0x3ff20020, bit2, bit0 represents
    * uart1 and uart0 respectively
    */
    uint8 RcvChar;
    uint8 uart_no = UART0;//UartDev.buff_uart_no;
    uint8 fifo_len = 0;
    uint8 buf_idx = 0;
    uint8 temp = 0;
   // uint8 fifo_tmp[128] = {0};	// 只是告诉我们这个单片机的内部 FIFO是 128字节大小

    uint32 uart_intr_status = READ_PERI_REG(UART_INT_ST(uart_no)) ;		//读取中断状态

    portBASE_TYPE xHigherPriorityTaskWoken;
    UART_Buf_Type uart_receive_data;
    memset((char*)&uart_receive_data, 0, sizeof(UART_Buf_Type));

    while (uart_intr_status != 0x0) {
    	/* 接收帧错误中断,,,可能是数据位数不对,或者接收到的数据不满8bit...等等 */
        if (UART_FRM_ERR_INT_ST == (uart_intr_status & UART_FRM_ERR_INT_ST)) {
            //printf("FRM_ERR\r\n");
        	WRITE_PERI_REG(UART_INT_CLR(uart_no), UART_FRM_ERR_INT_CLR);	// 清除中断寄存器的 帧错误位
        }
        /* 进入 FIFO满中断 */
        else if (UART_RXFIFO_FULL_INT_ST == (uart_intr_status & UART_RXFIFO_FULL_INT_ST)) {
            //printf("full\r\n");
            fifo_len = (READ_PERI_REG(UART_STATUS(UART0)) >> UART_RXFIFO_CNT_S)&UART_RXFIFO_CNT;	// 读出来内部 FIFO缓存的数据个数
            buf_idx = 0;

            while (buf_idx < fifo_len) {
                uart_tx_one_char(UART0, READ_PERI_REG(UART_FIFO(UART0)) & 0xFF);	// 把数据通过串口 0输出
                buf_idx++;
            }

            WRITE_PERI_REG(UART_INT_CLR(UART0), UART_RXFIFO_FULL_INT_CLR);	// 清除满中断
        }
        /* 空闲中断,证明接受到了一条完整的数据 */
        else if (UART_RXFIFO_TOUT_INT_ST == (uart_intr_status & UART_RXFIFO_TOUT_INT_ST)) {
            //printf("tout\r\n");
            fifo_len = (READ_PERI_REG(UART_STATUS(UART0)) >> UART_RXFIFO_CNT_S)&UART_RXFIFO_CNT;	// 读出来接收的数据个数
            buf_idx = 0;

            while (buf_idx < fifo_len) {
            	temp = READ_PERI_REG(UART_FIFO(UART0)) & 0xFF;		// 读取数据

            	if(uart_receive_data.len + buf_idx < USER_UART_MAX)
            	{
            		uart_receive_data.buf[uart_receive_data.len + buf_idx] = temp;
            	}
                uart_tx_one_char(UART1, temp);	// 把数据通过串口 1输出
                buf_idx++;
            }
            uart_receive_data.len += fifo_len;

            WRITE_PERI_REG(UART_INT_CLR(UART0), UART_RXFIFO_TOUT_INT_CLR);	// 清除空闲标志位

            /* 发送队列 */
            xQueueSendFromISR(xQueueCusUart, (void *)&uart_receive_data, &xHigherPriorityTaskWoken);
            portEND_SWITCHING_ISR(xHigherPriorityTaskWoken);
        }
        /* 发送 FIFO里面的数据个数少于 20个,进入中断 */
        else if (UART_TXFIFO_EMPTY_INT_ST == (uart_intr_status & UART_TXFIFO_EMPTY_INT_ST)) {
            //printf("empty\n\r");
            WRITE_PERI_REG(UART_INT_CLR(uart_no), UART_TXFIFO_EMPTY_INT_CLR);	// 清除中断
            CLEAR_PERI_REG_MASK(UART_INT_ENA(UART0), UART_TXFIFO_EMPTY_INT_ENA);	// 清除中断标志
        } else {
            //skip
        }

        uart_intr_status = READ_PERI_REG(UART_INT_ST(uart_no)) ;
    }
}
接下来,再分析一下一些有用到的程序
/* 这个用于单字节打印,你可以加个循环用来做成字符串打印 */
LOCAL STATUS uart_tx_one_char(uint8 uart, uint8 TxChar)
{
    while (true) {
    	// 首先要明确,只要发送FIFO里面有数据,串口就会不断的从 FIFO里面取数据然后发出去
        uint32 fifo_cnt = READ_PERI_REG(UART_STATUS(uart)) & (UART_TXFIFO_CNT << UART_TXFIFO_CNT_S);

        // 如果 FIFO里面 >= 126,就会一直在 while循环,实际上内部串口也在不停的从 FIFO取出来数据,然后发出去
        if ((fifo_cnt >> UART_TXFIFO_CNT_S & UART_TXFIFO_CNT) < 126) {
            break;
        }
    }

    WRITE_PERI_REG(UART_FIFO(uart) , TxChar);		// 写一个字节到串口的FIFO
    return OK;
}

/* 这个就不用多说了,用来转换打印串口 */
void UART_SetPrintPort(UART_Port uart_no)
{
    if (uart_no == 1) {
        os_install_putc1(uart1_write_char);		// 选用 USART1打印
    } else {
        os_install_putc1(uart0_write_char);		// 选用 USART0打印
    }
}
好了,分析完官方内嵌的程序后,我们自己去定义,封装一些需要用到函数,因为是 RTOS开发,自然要引用操作系统啦,不多说,代码如下,说明看注释
/*
 * bsp_uart.c
 *
 *  Created on: 2019年9月7日
 *      Author: liziyuan
 */

#include "esp_common.h"

#include "bsp_uart.h"


xQueueHandle xQueueCusUart;
xQueueHandle xQueueXmodem;

/******************************************************************************
 * FunctionName : uart0_send_data
 * Description  : uart 0数据发送
 * Parameters   : Buf ---- 数据
 * 				  Len ---- 长度
 * Returns      : none
*******************************************************************************/
void ICACHE_FLASH_ATTR uart0_send_data(uint8 *Buf, uint32 Len)
{
	uint32 i;

	for(i = 0;i < Len;i++)
	{
		WRITE_PERI_REG(UART_FIFO(UART0) , *(Buf + i));		// 写一个字节到串口 0的FIFO
	}
}

/******************************************************************************
 * FunctionName : uart_receive
 * Description  : uart数据接收处理
 * Parameters   : Buf ---- 数据
 * 				  Len ---- 长度
 * Returns      : none
*******************************************************************************/
LOCAL void ICACHE_FLASH_ATTR uart_receive(uint8 *Buf, uint32 Len)
{
	uart0_send_data(Buf, Len);    // 自收发测试,你可以在这里添加你需要执行的程序
}

/******************************************************************************
 * FunctionName : uart_task
 * Description  : uart处理任务
 * Parameters   : pvParameters
 * Returns      : none
*******************************************************************************/
LOCAL void ICACHE_FLASH_ATTR uart_task(void *pvParameters)
{
	UART_Buf_Type Uart0_data;

	while(1)
	{
		if(xQueueReceive(xQueueCusUart, (void *)&Uart0_data, (portTickType)500/*portMAX_DELAY*/))	// wait about 5sec
		{
			if(Uart0_data.len > 0)
			{
				uart_receive(Uart0_data.buf, Uart0_data.len);
			}
		}
//		vTaskDelay(50 / portTICK_RATE_MS);	 // 50 ms
	}

	vTaskDelete(NULL);
}

/******************************************************************************
 * FunctionName : user_Uart_Init
 * Description  : 串口初始化
 * Parameters   : none
 * Returns      : none
*******************************************************************************/
void ICACHE_FLASH_ATTR user_Uart_Init(void)
{
	xQueueCusUart = xQueueCreate((unsigned portBASE_TYPE)UART0_QUEUE_LENGTH, sizeof(UART_Buf_Type));	// 目标队列的句柄
//	xQueueXmodem = xQueueCreate((unsigned portBASE_TYPE)(1), sizeof(UART_Buf_Type));

	uart_init_new();	// config uart0 connection device MCU, config uart1 TX debug output

	xTaskCreate(uart_task, "uart_task", 256, NULL, tskIDLE_PRIORITY + 4, NULL);	// 串口处理任务
}


/*------------------------------- END OF FILE -------------------------------*/
/*
 * bsp_uart.h
 *
 *  Created on: 2019年9月7日
 *      Author: liziyuan
 */

#ifndef __BSP_UART_H
#define __BSP_UART_H


#include "freertos/FreeRTOS.h"
#include "freertos/task.h"
#include "freertos/queue.h"

#include "../../../include/uart.h"

#define UART0_QUEUE_LENGTH		3
#define USER_UART_MAX			50

typedef struct
{
	uint16 len;
	uint8 buf[USER_UART_MAX];
}UART_Buf_Type;

extern xQueueHandle xQueueCusUart;
extern xQueueHandle xQueueXmodem;

void ICACHE_FLASH_ATTR user_Uart_Init(void);


#endif /* __BSP_UART_H */


/*------------------------------- END OF FILE -------------------------------*/
最后,当时在学习串口时参考的链接:https://www.cnblogs.com/yangfengwu/p/11080567.html
