一、创建项目并导入依赖
<dependency>
<groupId>org.springframework.boot</groupId>
<artifactId>spring-boot-starter-security</artifactId>
</dependency>
<dependency>
<groupId>org.springframework.boot</groupId>
<artifactId>spring-boot-starter-web</artifactId>
</dependency>

二、相关配置和代码
在创建完项目时,我们得springboot项目所有接口都被保护起来了,如果要想访问必须登陆,用户名默认是user,密码在项目启动时生成在控制台。
1)我们可以设置自己得账户和密码,有两种方法配置
1.1)在application.properties中配置
spring.security.user.name=fernfei
spring.security.user.password=fernfei
spring.security.user.roles=admin
1.2)在配置类中配置
步骤1.2.1)
创建SecurityConfig继承WebSecurityConfigurerAdpater
步骤1.2.2)
实现WebSecurityConfigurerAdpater中的configure(AuthenticationManagerBuilder auth)方法
步骤1.2.3)
从 Spring5 开始,强制要求密码要加密,如果非不想加密,可 以使用一个过期的 PasswordEncoder 的实例 NoOpPasswordEncoder,但是不建议这么做,毕竟不安全。

这样就算完成自己定义账户密码了。
2)HttpSecurity配置
2.1)实现config(HttpSecurity http)方法
2.2)相关代码
@Override
    protected void configure(HttpSecurity http) throws Exception {
        http.authorizeRequests()
                .antMatchers("/admin/**").hasRole("admin")
                .antMatchers("/db/**").hasAnyRole("admin","user")
                .antMatchers("/user/**").access("hasAnyRole('admin','user')")
                //剩下的其他路径请求验证之后就可以访问
                .anyRequest().authenticated()
                .and()
                .formLogin()
                .loginProcessingUrl("/dologin")
                .loginPage("/login")
                .usernameParameter("uname")
                .passwordParameter("pwd")
                .successHandler(new AuthenticationSuccessHandler() {
                    @Override
                    public void onAuthenticationSuccess(HttpServletRequest request, HttpServletResponse response, Authentication authentication) throws IOException, ServletException {
                        response.setContentType("application/json;charset=utf-8");
                        PrintWriter pw = response.getWriter();
                        Map<String, Object> map = new HashMap<String, Object>();
                        map.put("status", 200);
                        map.put("msg", authentication.getPrincipal());
                        pw.write(new ObjectMapper().writeValueAsString(map));
                        pw.flush();
                        pw.close();
                    }
                })
                .failureHandler(new AuthenticationFailureHandler() {
                    @Override
                    public void onAuthenticationFailure(HttpServletRequest request, HttpServletResponse response, AuthenticationException exception) throws IOException, ServletException {
                        response.setContentType("application/json;charset=utf-8");
                        PrintWriter pw = response.getWriter();
                        Map<String, Object> map = new HashMap<String, Object>();
                        map.put("status", 401);
                        if (exception instanceof LockedException) {
                            map.put("msg", "账户被锁定,登陆失败!");
                        } else if (exception instanceof BadCredentialsException) {
                            map.put("msg", "账户或者密码错误,登陆失败!");
                        } else if (exception instanceof DisabledException) {
                            map.put("msg", "账户被禁用,登陆失败!");
                        } else if (exception instanceof AccountExpiredException) {
                            map.put("msg", "账户已过期,登陆失败!");
                        } else if (exception instanceof CredentialsExpiredException) {
                            map.put("msg", "密码已过期,登陆失败!");
                        } else {
                            map.put("msg", "登陆失败!");
                        }
                        pw.write(new ObjectMapper().writeValueAsString(map));
                        pw.flush();
                        pw.close();
                    }
                })
                .permitAll()
                .and()
                .csrf().disable();
    }
2.3)代码解释
2.3.1)/admin/**路径下的必须有admin角色才能访问
.antMatchers("/admin/**").hasRole("admin")
2.3.2)/db/**和/user/**下的路径,admin和user角色都可以访问
.antMatchers("/db/**").hasAnyRole("admin","user")
.antMatchers("/user/**").access("hasAnyRole('admin','user')")
2.3.3)表示剩下的任何请求只要验证之后都可以访问
.anyRequest().authenticated()
2.3.4)开启表单登陆
.formLogin()
2.3.5)登陆处理的路径
.loginProcessingUrl("/dologin")
2.3.6)登陆的页面,如果不写会使用默认的登陆页面
.loginPage("/login")
2.3.7)定义登录时,用户名的 key,默认为 username
.usernameParameter("uname")
2.3.7)定义登录时,用户名的 key,默认为 password
.passwordParameter("pwd")
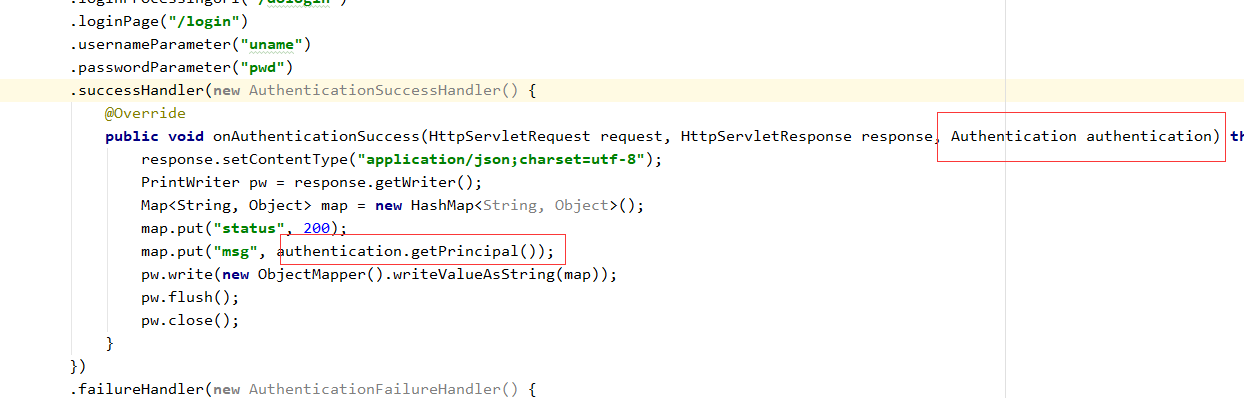
2.3.8)登陆成功的处理(用于前后端分离时,直接返回json
.successHandler()
红框里面的类是存放登陆成功后的用户信息
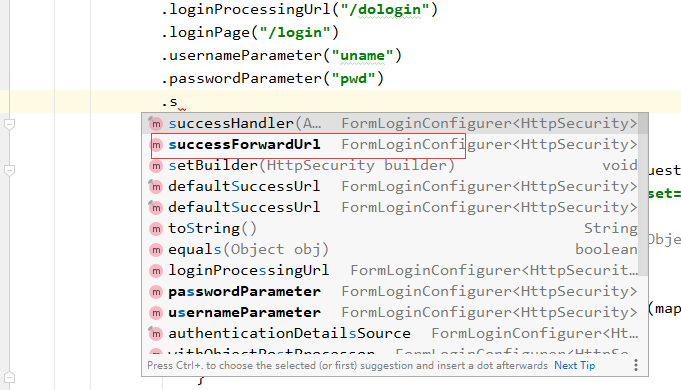
2.3.9)下图就是登陆成功后直接返回url的方法
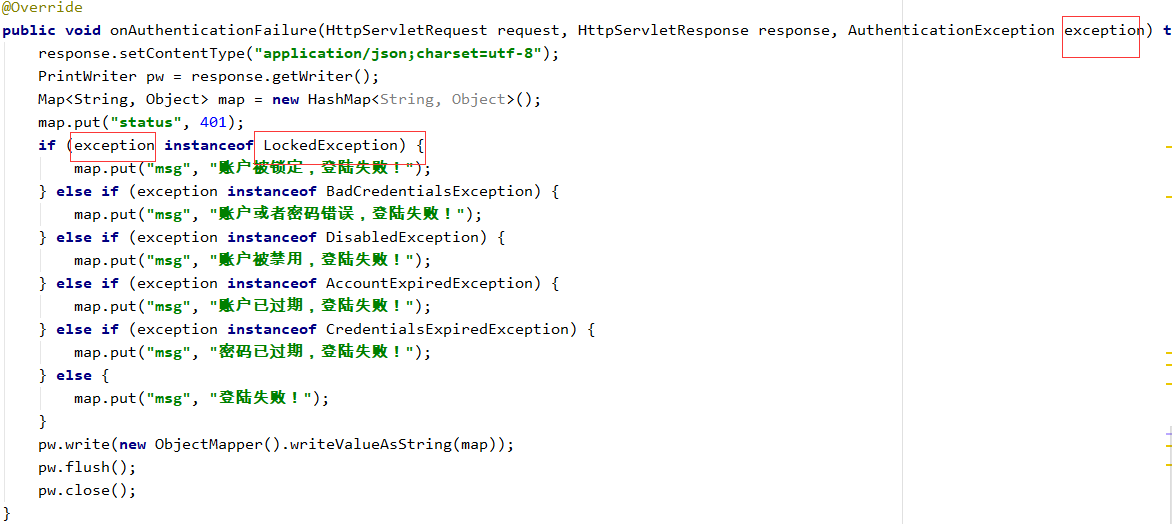
2.3.10)同上,登陆失败的处理
.failureHandler()
判断属于哪个异常可以更友好给用户作出提示
可以进入这个类按Ctrl+H查看类的继承关系,方便更好使用

2.3.11)permitALL()表示放开和登陆有关的接口,csrf是关闭csrf,以便我们在 postman类似的软件测试被系统给拦截了
.permitAll()
.and()
.csrf().disable();
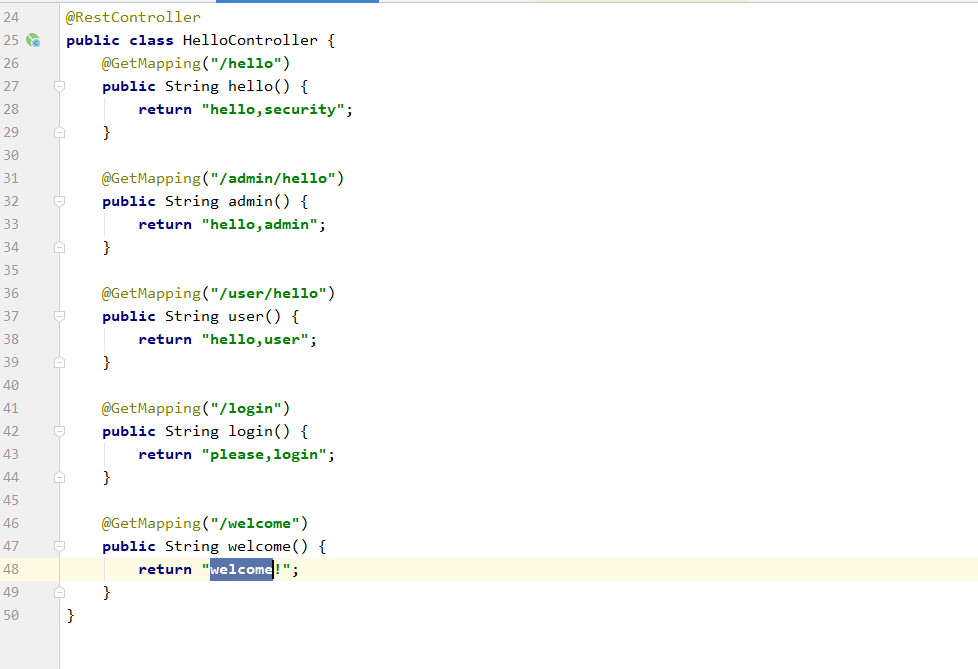
3)controller层设置一些接口以便我们测试