前面,我们学习里模拟量的输入输出,这里我们进一步熟悉它们。这里我们精准实现亮度的调节与控制,做一个可以调节亮度的小台灯。
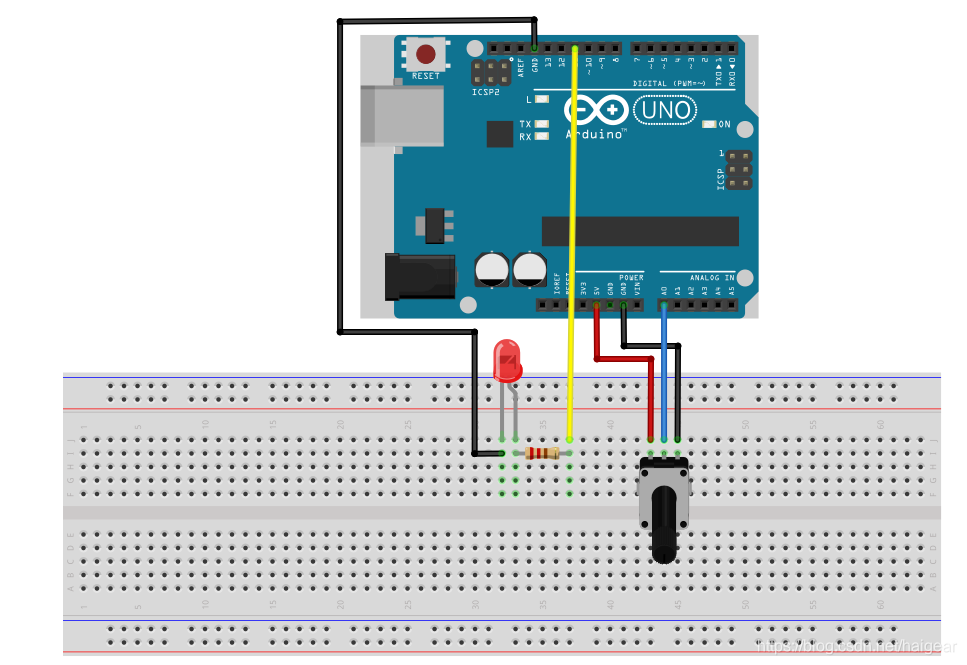
实物图如下(我们用LED灯来替代台灯):
大致代码如下:
int potpin=A0;//定义模拟输入口接口A1
int ledpin=11;//定义数字接口11

int val=0;

void setup()

{
pinMode(ledpin,OUTPUT);//定义数字接口11 为输出

}

void loop(){

val=map(analogRead(potpin),0,1024,0,255);// 读取传感器的模拟值并赋值给val
analogWrite(ledpin,val);// 打开LED 并设置亮度
delay(30);

}
可能我们会好奇,为什么val获得的值这里我们会用一个map函数来处理呢?这个map函数是如何使用的?
首先我们应该记得上一篇博文中提到,analogWrite的输出值是0~255,而我们直接从analogRead读取到的值很多时候都是会超过255的。所以我们必须想办法让我们读取到的值在0到255范围内,那么map函数就是起到这个作用的。
map函数的用法如下:
map(value, fromLow, fromHigh, toLow, toHigh)
参数说明如下
value: the number to map
fromLow: the lower bound of the value’s current range
fromHigh: the upper bound of the value’s current range
toLow: the lower bound of the value’s target range
toHigh: the upper bound of the value’s target range
返回值
The mapped value.
analogWrite这里的输出,我们也还有另外一种叫法,叫做PWM。后面我们接续介绍PWM。
